The Ultimate “Cake Happy Birthday” Recipe (That’s Actually Easy!)
You’ve been chosen. The sacred, time-honored, and slightly terrifying duty of producing the birthday cake has fallen to you. No pressure, right? You just have to bake a confection that is not only delicious but also visually stunning, emotionally resonant, and capable of making the recipient feel like the most cherished human on the planet.
Before you succumb to a full-blown panic and make a beeline for the nearest grocery store bakery, take a deep breath. What if I told you that the perfect cake happy birthday is not only within your grasp but is actually fun to make? We’re talking from scratch, people.
Forget the box mix, put down the car keys. We’re about to bake a cake so good, so festive, and so full of joy, it practically sings “Happy Birthday” on its own. Let’s get this party started.
Why This Recipe is Awesome (And Will Make You a Hero)
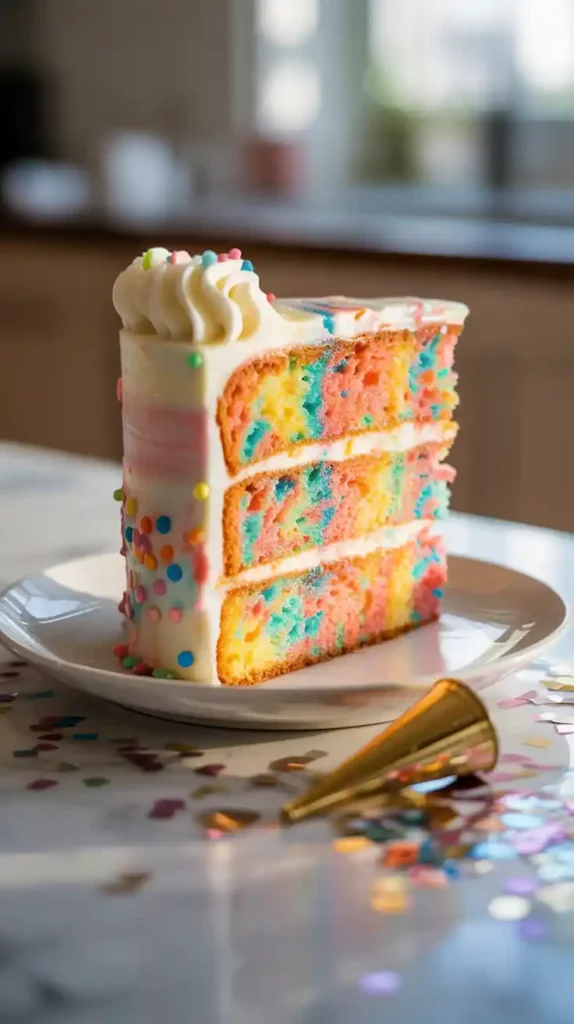
First off, this isn’t just any cake. This is the quintessential birthday cake. It’s a ridiculously moist, tender vanilla cake, packed to the gills with a riot of colorful sprinkles. It’s slathered in a dreamy, sweet-but-not-too-sweet vanilla buttercream that’s a dream to work with. It is, in short, joy in cake form.
Secondly, it’s surprisingly straightforward. I’ve broken down every step to be as clear and painless as possible. There are no weird techniques or impossible-to-find ingredients. This is a from-scratch recipe designed for real people who just want to make a spectacular cake without needing a culinary degree.
Finally, the sheer, unadulterated delight on someone’s face when you present them with a beautiful, homemade birthday cake is a reward like no other. It tastes a million times better than store-bought, and it’s made with the most important ingredient of all: love (and a whole lot of butter).
Ingredients You’ll Need
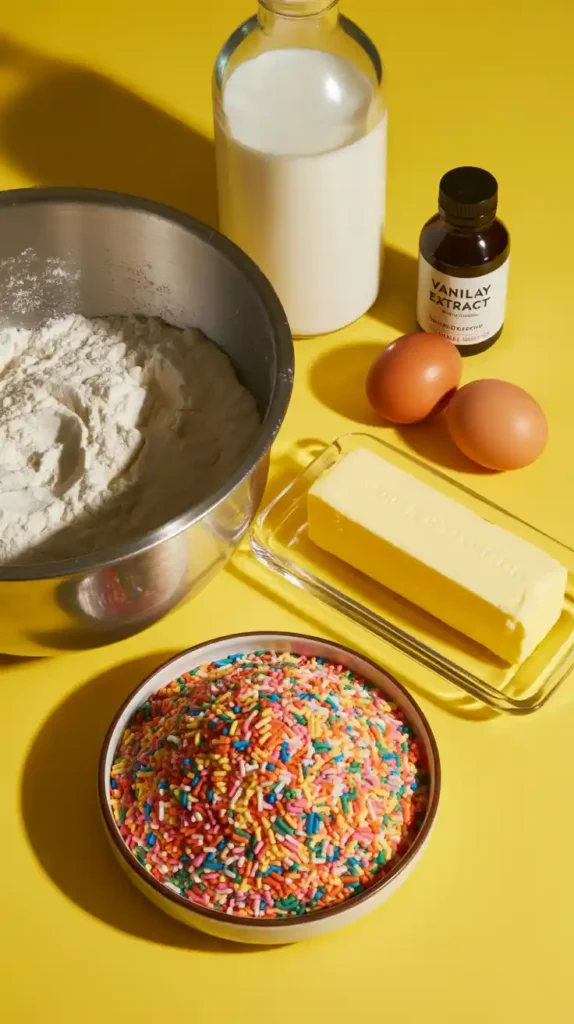

The best cakes start with simple, good-quality ingredients. No funny business here.
For the Ultimate Funfetti Birthday Cake:
- 2 ½ cups (300g) all-purpose flour
- 2 ½ teaspoons baking powder
- ½ teaspoon salt
- 1 cup (226g) unsalted butter, softened to room temperature (this is not a suggestion!)
- 1 ¾ cups (350g) granulated sugar
- 4 large eggs, at room temperature
- 2 teaspoons pure vanilla extract
- 1 cup (240ml) whole milk, at room temperature
- ¾ cup rainbow sprinkles (use jimmies, the little rod-shaped ones, not the tiny balls or nonpareils, to prevent color bleeding!)
For the Dreamiest Vanilla Buttercream:
- 1 ½ cups (340g) unsalted butter, softened
- 4-5 cups (480-600g) powdered sugar, sifted
- ¼ cup (60ml) whole milk or heavy cream
- 2 teaspoons pure vanilla extract
- A pinch of fine sea salt
Tools & Kitchen Gadgets Used
Having the right gear makes you feel like a pro and ensures a flawless result. Here’s what you’ll need in your corner:
- Stand Mixer or a trusty Hand Mixer: Absolutely essential for getting that light and fluffy texture in both the cake and frosting.
- Two 9-inch Round Cake Pans: The classic choice for a stunning layer cake.
- Parchment Paper: Your best friend for ensuring the cakes release from the pans perfectly.
- Wire Cooling Racks: Because nobody likes a soggy cake bottom.
- Offset Spatula: The secret weapon for spreading frosting smoothly and creating beautiful swirls.
- Rubber Spatula: For scraping down the bowl. Leave no batter behind!
- Cake Turntable (Optional but amazing): If you want to get serious about smooth frosting, this makes life a thousand times easier.
- Piping Bag and Tips (Optional): For writing “Happy Birthday” or creating decorative borders.
Step-by-Step Instructions: Your Guide to Birthday Glory
Alright, deep breaths. We’re going to tackle this in three easy-to-manage parts. You can do this!
H3: Part 1: Building the Perfect Cake
- Prep Your Station: Preheat your oven to 350°F (175°C). Grease your two 9-inch cake pans, line the bottoms with circles of parchment paper, and then grease the parchment paper too. It seems like a lot, but you’ll thank me later.
- The Dry Team: In a medium bowl, whisk together the flour, baking powder, and salt. Set it aside.
- The Creaming Method: This is the most important step! In the bowl of your stand mixer, beat the softened butter and granulated sugar on medium-high speed for a full 5 minutes. Scrape down the bowl a couple of times. You want it to look pale, light, and incredibly fluffy. This process whips air into the batter, which is the key to a light cake.
- Egg Time: Add the room temperature eggs one at a time, beating well for about 30 seconds after each addition until it’s fully incorporated. Then, beat in the vanilla extract.
- Alternate Universe: With the mixer on low speed, add the dry ingredients in three additions, alternating with the milk in two additions (Dry, Milk, Dry, Milk, Dry). Mix only until the last streaks of flour disappear. Seriously, do not overmix, or you’ll get a tough cake.
- It’s Sprinkle O’Clock: Gently, oh-so-gently, fold in the rainbow sprinkles with your rubber spatula. If you mix too aggressively, their color will bleed and you’ll have a sad, greyish batter.
- Bake It Off: Divide the batter evenly between your two prepared pans. Bake for 30-35 minutes, or until a toothpick inserted into the center comes out clean.
- The Cool Down: Let the cakes cool in the pans for about 15 minutes before inverting them onto wire racks. Peel off the parchment paper and let them cool completely. I mean it. Not even a little bit warm.
H3: Part 2: Whipping Up a Cloud of Frosting
- Beat the Butter: In your clean mixer bowl, beat the softened butter on medium-high speed for about 3-4 minutes until it’s very pale and creamy.
- Sugar, Sugar: With the mixer on low, gradually add the sifted powdered sugar. Once it’s mostly incorporated, add the vanilla extract and salt.
- Whip It Good: Pour in the milk or cream and turn the mixer up to medium-high. Let it whip for another 3-5 minutes until the buttercream is ridiculously light, fluffy, and spreadable.
H3: Part 3: The Grand Assembly
- Level Up (Optional): If your cakes have a slight dome, use a long serrated knife to carefully slice off the top for a perfectly flat surface. The baker gets to eat the scraps. It’s the law.
- The Crumb Coat: Place one cake layer on your cake stand. Top it with a big scoop of frosting. Spread it out evenly. Place the second layer on top. Now, apply a very thin layer of frosting over the entire cake. This is your crumb coat, and it traps all the loose crumbs. Pop the whole thing in the fridge for 20-30 minutes to firm up.
- The Final Masterpiece: Once the crumb coat is chilled, apply the rest of your frosting, making it as smooth or as swirly as you like. Go absolutely wild with more sprinkles on top and around the sides. You’ve earned it.
Calories & Nutritional Info
Listen. This is a birthday cake. Its primary nutritional components are sugar, butter, and pure, unadulterated happiness. But if you must know:
- Calories per slice (assuming 1/12th of cake): Approximately 600-700 kcal
- Fat: A glorious amount, probably around 35g.
- Carbohydrates: Roughly 75g.
- Main Benefit: Proven to increase joy, create memories, and make someone feel deeply loved.
Common Mistakes to Avoid (Don’t Be That Person)

I’ve made these errors so you don’t have to. Read this section twice.
- Using Cold Ingredients: If your butter and eggs feel like they just came from the North Pole, your batter will not emulsify properly and your cake will be dense. Room temperature ingredients are not a polite suggestion, they are a commandment.
- Abusing the Sprinkles: If you beat the sprinkles into the batter with the mixer, their colors will bleed together into a murky, sad-looking grey. Gently fold them in at the very end with a spatula.
- Frosting a Warm Cake: Do you enjoy watching your hard work slide off the cake in a greasy, heartbreaking puddle? No? Then you must wait until your cake layers are 100% completely cool to the touch. Be patient.
- Skipping the Crumb Coat: You can, but then you’ll be fighting little cake crumbs that get dragged through your final, beautiful layer of frosting. The 20 minutes it takes to chill a crumb coat will save you a world of frustration. Trust me.
Variations & Customizations
Once you’ve mastered this funfetti classic, you can play!
- Ultimate Chocolate Birthday Cake: Use your favorite chocolate cake recipe. For the frosting, add ½ cup of unsweetened cocoa powder along with the powdered sugar. Fold mini chocolate chips into the batter instead of sprinkles.
- Lemon-Blueberry Dream Cake: Add the zest of two lemons to the cake batter. Gently fold in 1 cup of fresh blueberries instead of sprinkles. Make a lemon buttercream by adding lemon zest and a tablespoon of lemon juice to the frosting.
- Cookies and Cream Cake: Omit the sprinkles. Instead, crush about 15 Oreo cookies and fold them into the cake batter. Add more crushed Oreos to the vanilla buttercream.
FAQ Section: Your Birthday Cake Burning Questions
- How far in advance can I make a birthday cake? You can bake the cake layers up to a month ahead and freeze them (wrap them well!). The fully assembled and frosted cake is best made a day or two before the party.
- How do I write “Happy Birthday” on a cake? Use a piping bag with a small round writing tip (like a Wilton #3). The key is to have your frosting at a good consistency—not too stiff, not too soft. Pro tip: practice on a piece of parchment paper first!
- What’s the best frosting for a beginner to use? American buttercream, like the one in this recipe, is the most forgiving and easiest to make. It requires no cooking or special techniques.
- How do I store a frosted cake? In a cake carrier at room temperature for up to 3 days is perfect. If your kitchen is very hot or if the cake has a perishable filling (like cream cheese frosting or fruit), it’s safer in the fridge.
- Why did my cake come out dry? The most common culprits are overbaking (even by a few minutes) or measuring your flour incorrectly (packing it into the measuring cup). Using a kitchen scale is the best way to ensure accuracy.
- Can I use different kinds of sprinkles? For mixing into the batter, jimmies (the little rods) are best because their coating prevents the color from bleeding too much. The little balls (nonpareils) will turn your batter a murky color almost instantly. For decorating the outside, use whatever makes your heart happy!
- How do I get my cake layers to bake evenly? For truly perfect, even layers, the best trick is to weigh your batter. Place each empty cake pan on a kitchen scale, tare it to zero, and then pour in the batter until they weigh the same.
Final Thoughts
And there you have it. You are no longer just a person; you are a cake-bringer, a celebration-starter, a creator of edible joy. You have built the centerpiece of someone’s special day from flour, sugar, and sheer force of will.
Now, go on. Light those candles, lead a spirited (and probably off-key) rendition of “Happy Birthday,” and take a massive bite. You’ve more than earned it. And good luck ever wanting to buy a birthday cake again.