The Ultimate Brownie Para Vender Recipe (Your Guide to Selling Brownies!)
So, you’ve got a passion for baking, a love for chocolate, and you’re thinking of turning that delicious hobby into a little bit of cash. You’re searching for the perfect brownie para vender—a brownie so good, so consistent, and so ridiculously crave-able that people will be sliding into your DMs begging for a batch.
You have come to the right place. This isn’t just a recipe; it’s a business plan. A delicious, chocolate-fueled, step-by-step guide to creating a brownie that’s not only the best your customers will ever taste, but is also reliable, scalable, and profitable.
We’re moving you from “talented home baker” to “local brownie legend.” Ready to get that bread (and bake those brownies)? Let’s get down to business.
Why This Recipe is Awesome (for Selling!)
Not all brownie recipes are created equal, especially when you’re trying to build a business. Here’s why this specific recipe is your new secret weapon.
- It’s Incredibly Consistent: When customers buy from you, they expect the same amazing brownie every single time. This recipe is a workhorse. It’s reliable, it’s foolproof, and it produces that perfect fudgy texture and shiny, crackly top that people go crazy for, batch after batch after batch.
- It’s Cost-Effective: We’re using simple, high-impact ingredients that deliver a premium, “gourmet” taste without requiring you to spend a fortune on fancy, imported chocolate. This recipe is designed from the ground up to be profitable, which is pretty important when you’re, you know, trying to run a business.
- It’s Sturdy and Travels Like a Dream: These brownies are intensely fudgy, but they are not a gooey, fall-apart mess. They hold their shape beautifully, which makes them perfect for cutting into clean, professional squares, packaging attractively, and transporting to markets or customers without disintegrating.
Ingredients
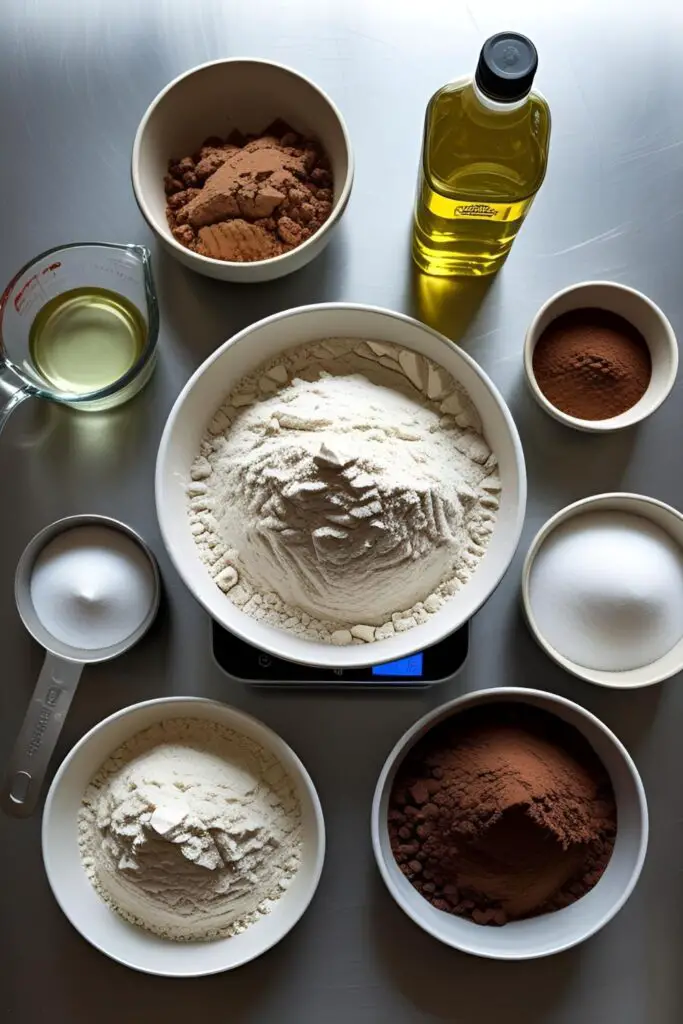
This recipe is designed for a 9×13 inch pan, which is a great, scalable size for selling. It yields about 12-16 sellable-sized brownies.
- 1 cup (8 ounces) vegetable oil (or other neutral oil)
- 2 cups granulated sugar
- ½ cup packed light brown sugar
- 4 large eggs, at room temperature
- 1 tablespoon pure vanilla extract
- 1 ¼ cups all-purpose flour
- 1 cup unsweetened cocoa powder, sifted
- 1 teaspoon salt
- 1 ½ cups semi-sweet or dark chocolate chips
Tools & kitchen gadgets used

When you’re baking to sell, consistency and efficiency are key. These tools will help you produce a professional product every time.
- A 9×13 inch METAL Baking Pan: Metal pans conduct heat more evenly than glass, which is crucial for getting perfectly cooked edges and a consistently baked center.
- Parchment Paper
- A Stand Mixer with the paddle attachment, or a powerful Hand Mixer
- A Kitchen Scale: This is the #1 tool for consistency. Weighing your ingredients, especially flour and cocoa, is non-negotiable for a professional product.
- Large Mixing Bowls
- A Whisk and a Silicone Spatula
- A Long, Sharp Chef’s Knife or a Bench Scraper (for cutting clean, professional squares)
- A Wire Cooling Rack
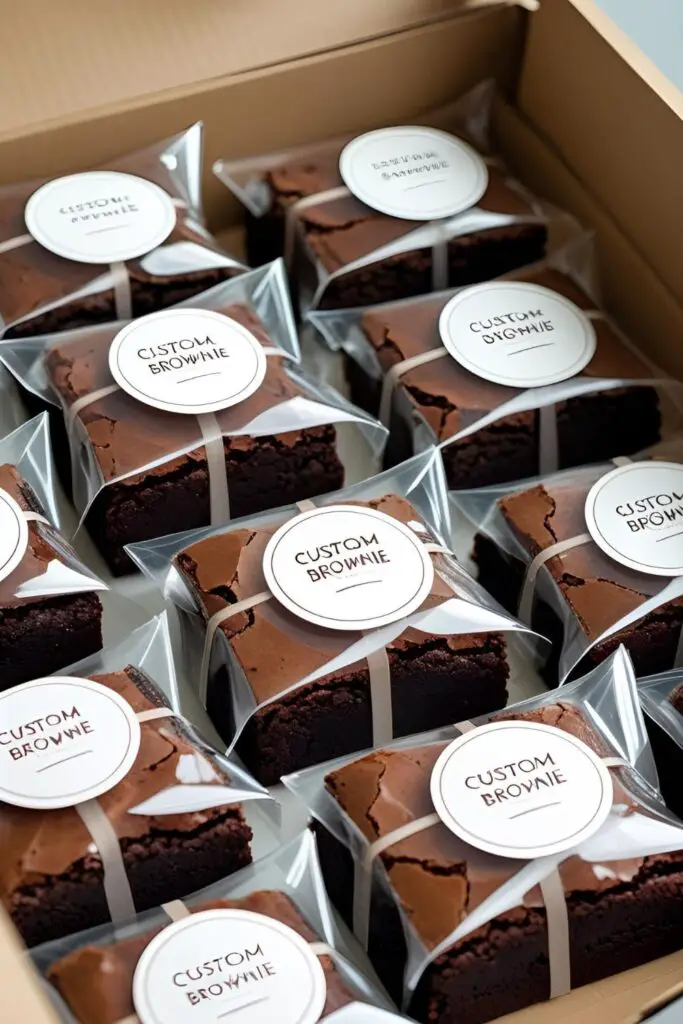
- Packaging Supplies: Think clear cellophane bags, cute bakery boxes, custom stickers with your logo, and ingredient labels.
Step-by-step instructions
This is your new production line. Let’s make some money, honey.
Step 1: The Professional Prep Preheat your oven to 350°F (175°C). Line your 9×13 inch metal pan with parchment paper, leaving a 2-inch overhang on the two long sides. This will create “slings” that allow you to lift the entire slab of brownies out of the pan for perfect cutting. This is a non-negotiable step for a professional look.
Step 2: The Sugar and Oil Foundation In the large bowl of your stand mixer or using a hand mixer, combine the oil, granulated sugar, and brown sugar. Mix on medium speed for about a minute.
Step 3: The Egg Emulsion (Secret to the Shiny Top!) Add the 4 room temperature eggs and the vanilla extract. Now, turn the mixer up to medium-high and beat for a full 2 to 3 minutes. The mixture will become thick, pale, and ribbony. This step is absolutely crucial for creating that beautiful, paper-thin, shiny, crackly top that screams “gourmet brownie.”
Step 4: The Dry Ingredients In a separate medium bowl, whisk together your flour, sifted cocoa powder, and salt. Add this dry mixture to the wet mixture all at once. Mix on the lowest possible speed just until the first few streaks of flour disappear.

Step 5: Fold, Don’t Mix! Remove the bowl from the mixer. Add your chocolate chips. Use your silicone spatula to gently fold everything together until the last of the dry ingredients are just incorporated. Do not overmix! Overmixing will give you a tough, cakey brownie, and your customers will not be coming back for more.
Step 6: Bake It Off Pour the thick, glossy batter into your prepared pan and use an offset spatula to spread it into an even layer, making sure it gets into all the corners. Bake for 28 to 32 minutes.
Step 7: The Doneness Test (It’s Critical!) The brownies are done when a wooden toothpick inserted into the center comes out with moist, fudgy crumbs attached, not wet batter and not completely clean. A clean toothpick means you’ve over-baked them and murdered the fudgy texture. Err on the side of under-baking.
Step 8: The Cool Down (Patience is Profitable!) This is the hardest, most important step for a sellable product. Let the brownies cool completely in the pan on a wire rack. I’m talking several hours, or even overnight. For ultra-clean cuts, you can even chill the cooled slab in the refrigerator for an hour.
Step 9: The Perfect Cut and Package Use your parchment slings to lift the entire slab of brownies out of the pan. Place it on a large cutting board. Use your long, sharp knife or bench scraper to cut the brownies into clean, uniform squares. Wipe the knife clean with a damp cloth between each cut. Package your beautiful brownies in cellophane bags or boxes, add your sticker, and get ready to sell!
Calories & Nutritional Info
Providing this information can be a great selling point for health-conscious customers.
- Serving Size: 1 brownie (assuming you cut the pan into 16 squares)
- Estimated Calories: Around 300-350 kcal.
- Contains: A profitable amount of deliciousness.
- Allergen Info: Contains wheat, eggs, dairy (in chocolate chips), soy. Be sure to list allergens clearly on your packaging.
Common Mistakes to Avoid (When Selling)

These are the mistakes that can cost you customers and money. Avoid them at all costs.
- Inconsistent Batch Quality: Your customers will come back expecting the same amazing brownie they had last time. You must use a kitchen scale to weigh your ingredients, especially your flour and cocoa powder. It is the only way to guarantee a consistent product every single time.
- Messy, Uneven, Amateurish Cuts: People eat with their eyes first, and they will not pay premium prices for a messy-looking product. Cool the brownies completely (and even chill them) before you attempt to cut them. Use a long, sharp knife and wipe it clean between each and every cut.
- Over-baking Your Brownies into Dry Bricks: The #1 sin of brownie making. For a sellable, fudgy brownie that people will rave about, you must pull it from the oven when a toothpick still has moist, sticky crumbs attached.
- Skimping on Quality Ingredients: You don’t need to use the most expensive chocolate imported from a remote Swiss village, but using a good quality cocoa powder (like Dutch-processed) and real vanilla extract makes a massive difference in flavor. Your customers will notice.
Variations & Customizations (Your “Gourmet” Product Line!)
Once you’ve perfected the classic, you can expand your menu and charge a premium for these variations.
- The “Gourmet” Salted Caramel Brownie: After pouring the batter into the pan, drop spoonfuls of a thick, high-quality salted caramel sauce on top. Use a knife to gently swirl it into the batter before baking. When they’re out of the oven, sprinkle the top with flaky sea salt.
- The “Doce de Leite” Swirl Brownie: A perfect nod to the “brownie para vender” audience! Instead of caramel, use the same technique to swirl in a thick, delicious doce de leite before baking.
- The “Loaded” Rocky Road Brownie: Before baking, top the batter with a generous layer of mini marshmallows, more chocolate chips, and chopped toasted walnuts or pecans.
FAQ Section
All your burning business and brownie questions, answered.
1. What is the best brownie recipe for selling? A recipe that is consistent, cost-effective, sturdy, and, above all, delicious. This recipe hits all those marks! The use of oil instead of butter keeps it incredibly moist for days, which is great for shelf life.
2. How do you price homemade brownies for sale? A common formula is: (Cost of Ingredients + Cost of Your Time + Overhead Costs) x 2 or 3 = Your Final Price. Calculate the exact cost of all your ingredients for one batch, decide on an hourly wage for yourself, and then mark it up to ensure you’re making a profit.
3. How do you package brownies to sell and keep them fresh? Individually wrapping each brownie square tightly in plastic wrap first is a great way to lock in moisture. Then, you can place them in clear cellophane bags tied with a ribbon, or in small, attractive bakery boxes. Always include a sticker with your brand name and a list of ingredients/allergens.
4. How long do these brownies stay fresh? Because this recipe uses oil, these brownies stay incredibly moist and fresh. In an airtight container, they are perfect for up to 5 days, making them ideal for selling at markets.
5. Can I scale this recipe up to make a bigger batch? Yes, this recipe can be easily doubled and baked in a half-sheet pan. You will need to adjust the baking time accordingly. Always check with a toothpick to ensure doneness.
6. What makes a brownie look professional and sellable? Three things: a shiny, crackly top, incredibly clean, sharp edges from proper cutting, and attractive, consistent packaging.
7. Do I need a special license to sell baked goods from my home? This is a very important question! The laws vary dramatically by country, state, and even city. These are often called “cottage food laws.” You must research and comply with your own local health department’s regulations regarding selling food made in a home kitchen.
Final Thoughts
And there you have it—not just a recipe, but the cornerstone of your new baking empire. You have the secret to a perfect, consistent, crowd-pleasing, and profitable “brownie para vender.” You’ve learned the techniques that separate the hobbyist from the pro.
Now go on, start baking, perfect your packaging, and get that bread (and those brownies!). Your delicious new side hustle awaits.