How candles are being integrated into smart home technology and automation systems.
In recent years, the concept of smart home technology has transitioned from a futuristic dream to a tangible reality, reshaping the way we interact with our living spaces. The proliferation of Internet of Things (IoT) devices has enabled homeowners to automate various aspects of their homes, from lighting and heating to security and entertainment systems. This technological evolution is driven by the desire for convenience, energy efficiency, and enhanced security.
As consumers increasingly seek to simplify their lives, smart home technology has emerged as a solution that offers both functionality and comfort. The rise of smart home technology is also closely linked to advancements in wireless communication and artificial intelligence. With the advent of Wi-Fi, Bluetooth, and other connectivity options, devices can now communicate seamlessly with one another, allowing for centralized control through smartphones or voice-activated assistants.
This interconnectedness has paved the way for innovative solutions that cater to diverse needs, such as smart thermostats that learn user preferences or security cameras that provide real-time alerts. As a result, the smart home market has witnessed exponential growth, with projections indicating that it will continue to expand as more consumers embrace the benefits of automation.
The Evolution of Candles in Home Automation
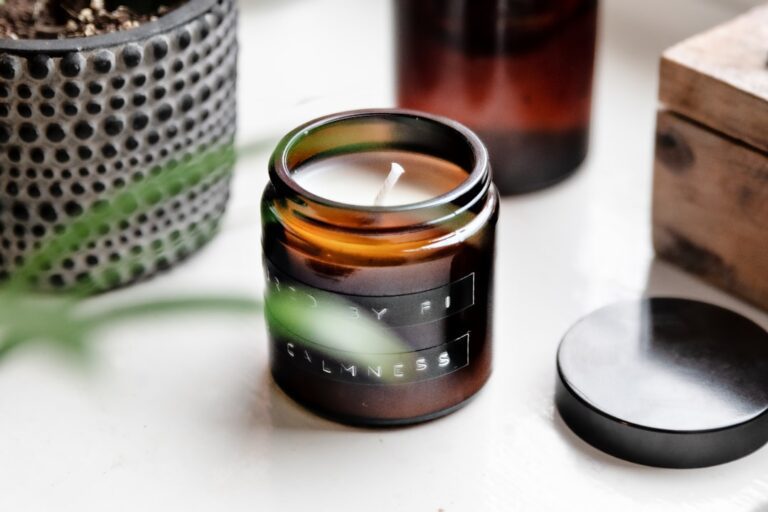
Candles have long been cherished for their ability to create ambiance and warmth within a home. Historically, they served as a primary source of light before the advent of electricity, and their flickering flames have been associated with relaxation and tranquility. However, as technology has advanced, so too has the role of candles in home environments.
The evolution of candles in home automation reflects a broader trend toward integrating traditional elements with modern technology, resulting in products that enhance both aesthetic appeal and functionality. The introduction of smart candles marks a significant shift in how we perceive and utilize this age-old item. Unlike traditional candles that rely solely on wax and wick, smart candles incorporate LED technology and connectivity features that allow them to be controlled remotely.
This transformation not only preserves the soothing qualities of candlelight but also introduces new possibilities for customization and automation. For instance, users can adjust brightness levels, change colors, or set schedules for when their candles should illuminate, all through a smartphone app or voice command. This blend of tradition and innovation exemplifies how even the simplest objects can be reimagined in the context of modern living.
Benefits of Integrating Candles into Smart Home Systems


Integrating smart candles into a smart home system offers numerous advantages that extend beyond mere aesthetics. One of the most significant benefits is the ability to create personalized lighting experiences tailored to individual preferences and moods. Smart candles can be programmed to emit different colors or intensities based on the time of day or specific activities, such as hosting a dinner party or winding down after a long day.
This level of customization allows homeowners to curate their environments in ways that enhance their overall well-being. Moreover, smart candles contribute to energy efficiency and safety within the home. Traditional candles pose fire hazards if left unattended or placed near flammable materials; however, smart candles eliminate this risk by utilizing LED technology that remains cool to the touch.
Additionally, many smart candle products come equipped with timers and scheduling features that ensure they are only active when needed, reducing unnecessary energy consumption. This combination of safety and efficiency makes smart candles an appealing option for those looking to enhance their living spaces without compromising on security.
How Smart Candles Work
Smart candles operate through a combination of LED technology and wireless connectivity, allowing them to be controlled via smartphones or smart home hubs. At their core, these devices utilize energy-efficient LED lights that mimic the flickering effect of traditional candle flames while providing a range of customizable features. Most smart candles are equipped with rechargeable batteries, ensuring they can operate without being tethered to an electrical outlet.
The connectivity aspect is what truly sets smart candles apart from their traditional counterparts. Many models utilize Wi-Fi or Bluetooth technology to connect to a home network or directly to a smartphone app. This connection enables users to control their candles remotely, adjusting brightness levels, changing colors, or setting timers from anywhere within range.
Some advanced models even incorporate voice control capabilities through integration with virtual assistants like Amazon Alexa or Google Assistant, allowing users to command their candles with simple voice prompts. This seamless interaction between technology and design exemplifies how smart candles are redefining the concept of home lighting.
Popular Smart Candle Brands and Products
As the market for smart candles continues to grow, several brands have emerged as leaders in this niche segment. One notable player is Philips Hue, renowned for its innovative lighting solutions. Their line of smart candles offers a variety of features, including customizable colors and integration with other Philips Hue products for a cohesive lighting experience throughout the home.
Users can easily control these candles through the Philips Hue app or via voice commands when paired with compatible smart assistants. Another prominent brand is Luminara, which specializes in realistic flameless candles that replicate the appearance of traditional wax candles while incorporating smart technology. Luminara’s products often feature remote control capabilities and timers, allowing users to set their desired ambiance effortlessly.

Additionally, brands like Candle Impressions and Enbrighten have introduced their own lines of smart candles, each offering unique features such as color-changing options and compatibility with various smart home ecosystems. The diversity among these brands ensures that consumers have access to a wide range of choices tailored to their specific needs and preferences.
Integrating Smart Candles with Other Smart Home Devices

The true potential of smart candles is realized when they are integrated into broader smart home ecosystems. By connecting these devices with other smart home products—such as smart speakers, thermostats, and security systems—homeowners can create a cohesive environment that enhances convenience and efficiency. For instance, integrating smart candles with motion sensors can trigger them to illuminate automatically when someone enters a room, providing instant ambiance without requiring manual control.
Moreover, smart candles can be synchronized with other lighting systems within the home for a unified lighting experience. For example, when hosting a gathering, users can program their smart candles to change colors in sync with other Philips Hue lights throughout the space, creating an immersive atmosphere that enhances social interactions. Additionally, integrating smart candles with security systems can provide added peace of mind; for instance, users can set their candles to turn on at specific times when they are away from home, simulating occupancy and deterring potential intruders.
Safety and Security Considerations for Smart Candles
While smart candles offer numerous benefits over traditional options, it is essential to consider safety and security aspects associated with their use. One of the primary advantages of smart candles is their flameless design; however, users must still be mindful of potential hazards related to electrical components and battery usage. It is crucial to follow manufacturer guidelines regarding charging and maintenance to prevent overheating or battery malfunctions.
Additionally, as with any connected device, there are cybersecurity concerns associated with smart candles. Users should ensure that their home networks are secure by utilizing strong passwords and regularly updating firmware on all connected devices. Some brands offer additional security features such as two-factor authentication or encrypted connections to enhance user safety further.
By taking these precautions, homeowners can enjoy the benefits of smart candles while minimizing risks associated with their use.
The Future of Smart Candles in Home Automation
Looking ahead, the future of smart candles within the realm of home automation appears promising as technology continues to evolve. Innovations in artificial intelligence may lead to even more sophisticated features that allow smart candles to learn user preferences over time and adapt accordingly. For instance, future models could analyze patterns in usage data to automatically adjust brightness levels based on ambient light conditions or user behavior.
Furthermore, as sustainability becomes an increasingly important consideration for consumers, manufacturers may focus on developing eco-friendly materials for smart candle production while enhancing energy efficiency in their designs. The integration of renewable energy sources—such as solar charging capabilities—could also become a reality for smart candle products in the future. As consumer interest in creating personalized living environments grows, it is likely that we will see an expansion in the variety of available designs and functionalities for smart candles.
From customizable shapes and sizes to enhanced connectivity options with other smart devices, the possibilities are vast. Ultimately, as technology continues to advance and consumer preferences evolve, smart candles will undoubtedly play an integral role in shaping the future landscape of home automation.
Candles have long been a staple in creating a cozy and inviting atmosphere in homes, but now they are being integrated into smart home technology and automation systems. This innovative approach allows for the control of candle lighting through voice commands or smartphone apps, adding convenience and customization to the traditional candle experience. For more information on the safety aspects of using candles in smart home setups, check out this article on the significance of safety labels on candle compliance. Visit the Crafters Buzz blog for more insights on the latest trends in home decor and technology, or reach out to them directly through their contact page.
FAQs
What is smart home technology and automation systems?
Smart home technology and automation systems refer to the integration of various devices and systems within a home to provide centralized control and automation. This can include lighting, heating, security, entertainment, and more.
How are candles being integrated into smart home technology and automation systems?
Candles are being integrated into smart home technology and automation systems through the use of smart candle holders and connected devices. These devices can be controlled remotely through a smartphone app or integrated into existing smart home systems.
What are the benefits of integrating candles into smart home technology and automation systems?

Integrating candles into smart home technology and automation systems allows for greater control and customization of the ambiance within a home. This can include setting schedules for when candles are lit, adjusting their brightness, and even integrating them with other smart home devices for coordinated effects.
What are some examples of how candles can be integrated into smart home technology and automation systems?
Examples of integrating candles into smart home technology and automation systems include using smart candle holders that can be controlled remotely, integrating candles with voice-activated smart home assistants, and coordinating candle lighting with other smart home devices such as music systems or lighting.
Are there any safety considerations when integrating candles into smart home technology and automation systems?
When integrating candles into smart home technology and automation systems, it is important to consider safety measures such as ensuring that the smart candle holders are designed to prevent fire hazards and that they are used in accordance with manufacturer guidelines. It is also important to consider the placement of candles in relation to other smart home devices to prevent any potential hazards.