Ever tried toasting a slice of gluten-free bread and realized it tastes like cardboard? Yeah, me too. That’s why I decided to create my foolproof gluten free bread recipe—moist, fluffy, and no weird aftertaste. One bite and you’ll forget it’s even gluten-free. Ready to ditch store-bought despair?
Why This Gluten Free Bread Recipe Actually Rocks
Listen, I’ve had enough of dry, dense loaves masquerading as “bread.” This gluten free bread recipe delivers:
- Soft, pillowy texture that rivals classic wheat bread.
- Neutral flavor so you can top it with butter, avocado, or whatever you fancy.
- One-bowl magic—no complex steps or mysterious ingredients.
- Impresses guests who have no clue it’s GF. Let them guess and bask in your baking glory.
Ingredients
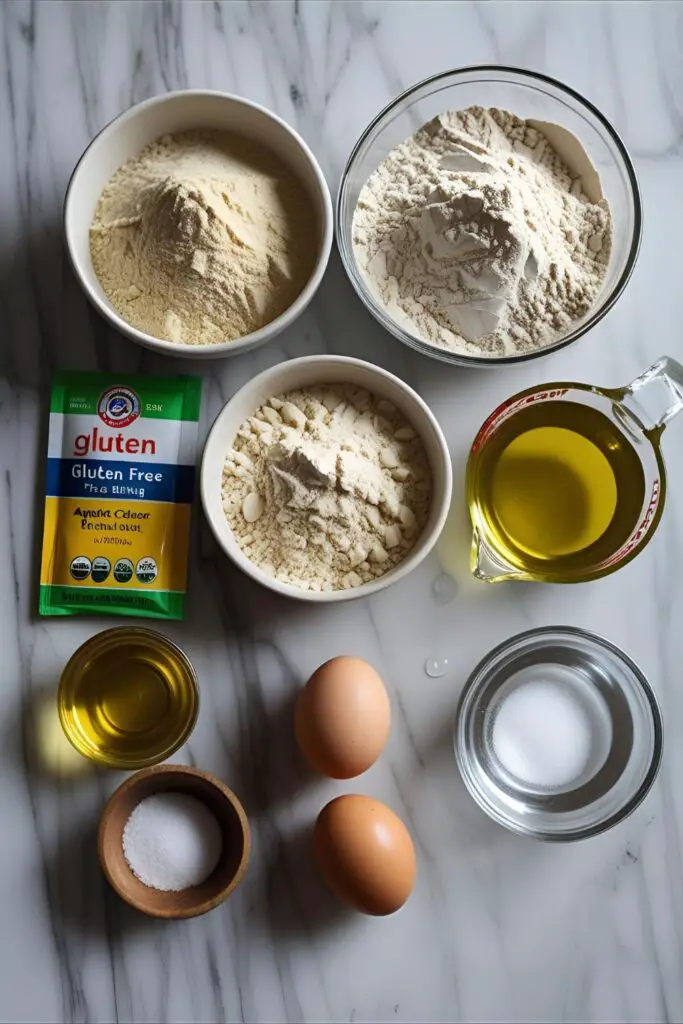
- 2 cups gluten-free all-purpose flour blend (must have xanthan gum included)
- 2 tablespoons sugar (boosts yeast activity)
- 1 teaspoon salt
- 2¼ teaspoons active dry yeast (one packet)
- 1¼ cups warm water (about 110°F)
- 1 large egg (room temperature)
- 2 tablespoons olive oil (or avocado oil)
- 1 teaspoon apple cider vinegar (helps rise)
- Optional: 1 tablespoon honey (for sweetness)
Substitutions:
- No gluten-free blend? Combine 1:1 rice flour + tapioca, but add ½ tsp xanthan gum.
- Egg-free? Use flax egg (1 tbsp ground flax + 3 tbsp water).
- Dairy-free? Already is—celebrate that freedom.
Tools & Kitchen Gadgets Used
- Mixing bowl – For combining everything.
- Whisk or silicone spatula – Stir effectively.
- Loaf pan (9×5 inch) – Essential for shape.
- Clean kitchen towel – For proofing cover.
- Instant-read thermometer – Check water temp for yeast.
- Cooling rack – Prevents soggy crust.
Step-by-Step Instructions
Step 1:
Preheat oven to 375°F (190°C). Grease your loaf pan.
Step 2:
In a bowl, whisk yeast, warm water, and sugar. Wait 5 minutes—should froth like it’s ready to party.

Step 3:
Add flour blend, salt, egg, oil, vinegar, honey (if using). Stir until thick and sticky. No kneading needed.
Step 4:
Transfer dough to pan. Smooth the top with wet spatula.
Step 5:
Cover with towel and let proof in a warm spot for 30–45 minutes—it should rise about 1 inch above pan rim.
Step 6:
Bake 35–40 minutes, until golden and internal temp hits 200°F.
Step 7:
Cool in pan for 10 minutes, then move to rack. Slice once slightly cooled—resist temptation!
Calories & Nutritional Info (Per Slice, 12 Slices per Loaf)
- Calories: ~130
- Carbs: 20g
- Protein: 3g
- Fat: 5g
- Fiber: 1g
- Sugar: 2g
- Gluten-Free: ✓
- Dairy-Free: ✓
Common Mistakes to Avoid
Water too hot or cold. Water hotter than 115°F kills yeast. Too cold? No rise. Use that thermometer!

Skipping proofing. Yeast loaf needs time. Don’t rush it, okay?
Wrong flour blend. Wheat-free doesn’t always mean gluten-free. Check labels.
Overbaking. It’ll dry out. Check color and temperature at 35 minutes.
Not enough moisture. GF flour drains water. Batter should be sticky but not dry.
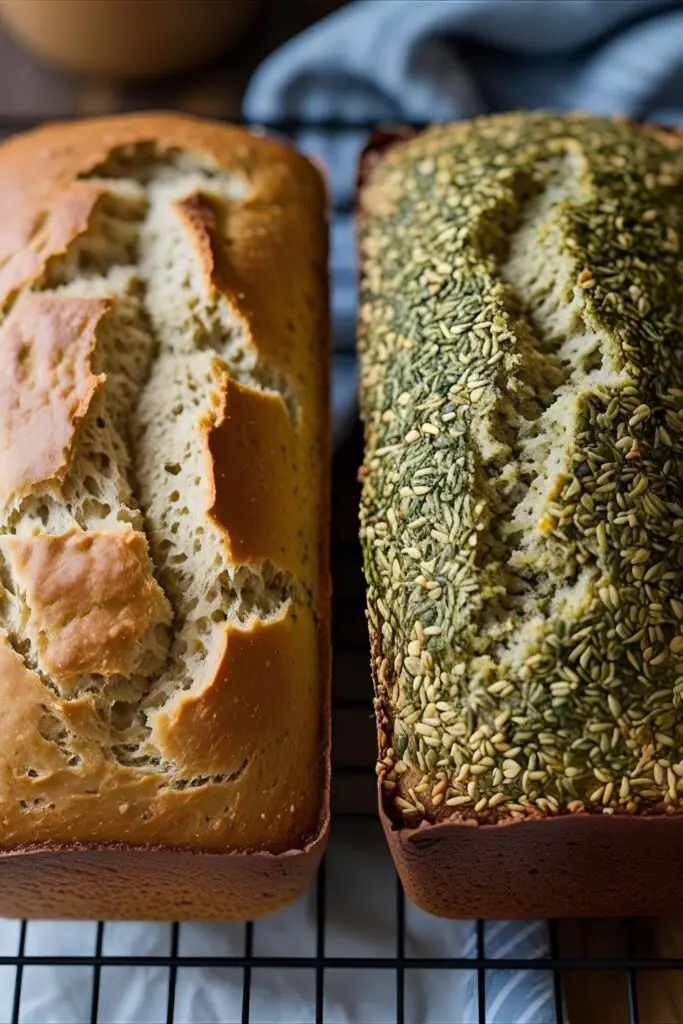
Variations & Customizations
Keto-ish Twist: Swap sugar for stevia, use almond flour blend, and add chia seeds. Low carb FTW.
Herbed Delight: Mix in 1 tsp each Italian seasoning and garlic powder for savory vibes.
Seeded Loaf: Top with sesame or sunflower seeds. Adds crunch, looks bougie.
Sweet Cinnamon Swirl: Spread softened butter, sprinkle cinnamon+brown sugar in dough before baking for guilt-free indulgence.
FAQ About Gluten Free Bread Recipe
1. Is this recipe completely gluten-free?
Yes, if you use a certified gluten-free flour blend. Read labels!
2. Can I use quick-rise yeast?
Yep, but reduce proof time slightly—check rise at 20 minutes.
3. Can I freeze this bread?
Absolutely. Slice and freeze. Toast when needed.
4. Why didn’t my bread rise enough?
Check yeast freshness and proofing environment—needs warmth.
5. Can I make vegan?
Replace egg with flax egg; loaf still rises beautifully.
6. How long does it stay fresh?
3 days tightly wrapped. Keep leftover slices in fridge to avoid crumbly texture.
7. Can I bake this in a bread machine?
Totally. Use dough cycle, then bake separately for best crust.
Final Thoughts
There you go—a gluten free bread recipe that’s legit bread, not weird crumb-“cake.” It’s easy, tasty, and versatile. Once you make this, you’ll never go back to dry store-bought GF bricks. Share your version, show off your slice, and let’s laugh together at how gluten-free baking doesn’t have to suck.