The Ultimate Fried Chicken Sandwich (That’ll Ruin Fast Food For You)
Let’s be honest, we’ve all been casualties in the great Chicken Sandwich Wars. We’ve waited in ludicrous lines, we’ve fiercely defended our favorite fast-food joint, and we’ve eaten our weight in crispy, brined poultry. But what if I told you the undisputed champion wasn’t on a drive-thru menu? What if the most epic, most shatteringly crispy, most mind-blowingly juicy fried chicken sandwich was waiting to be made in your very own kitchen? That’s right. It’s time to hang up your car keys, put on an apron, and prepare to create a sandwich so good, it will make you look at fast food with a single, disappointed tear in your eye.
Forget the hype and the corporate rivalries. We’re about to embark on a culinary journey to create the undisputed G.O.A.T. of fried chicken sandwiches. It’s a little bit of a project, I won’t lie to you, but the payoff is a sandwich so transcendent, you’ll wonder why you ever settled for anything less.
Why This Sandwich Is a Life-Changing Experience
Still thinking that drive-thru version is “good enough”? Allow me to respectfully disagree and present the evidence for why this homemade masterpiece reigns supreme.
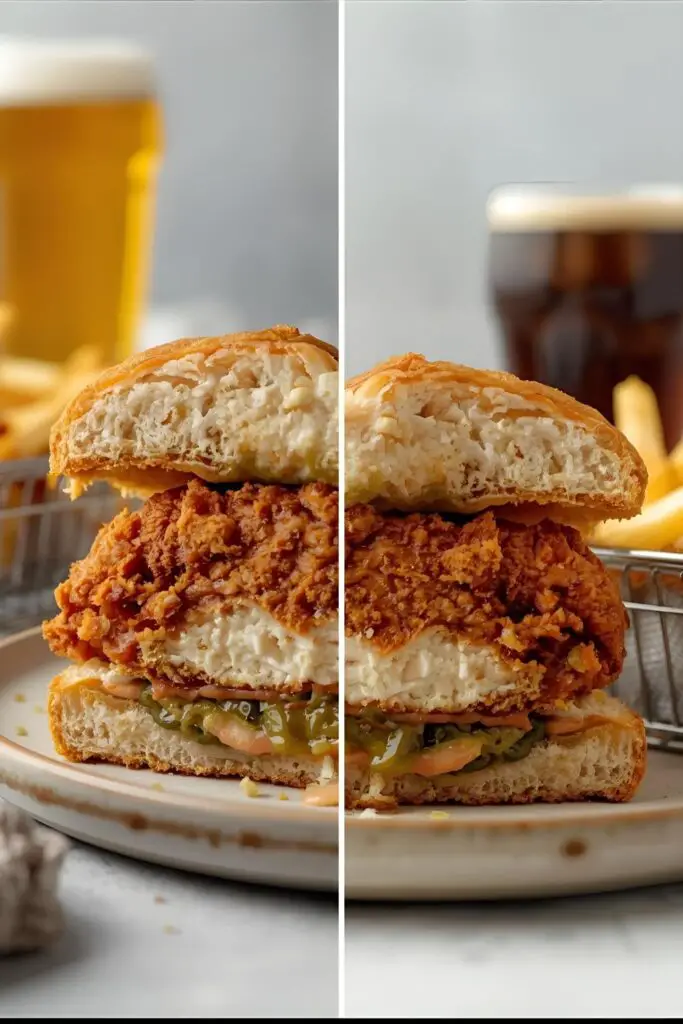
First and foremost, the CRUNCH is legendary. We’re talking a craggy, seasoned, shatteringly crisp coating that provides the kind of audible crunch that should be an ASMR category. This isn’t just breading; it’s an experience.
Second, the chicken is JUICY beyond belief. Our secret weapon? A buttermilk brine. This simple but essential step ensures that the chicken inside that crispy armor is ridiculously tender, flavorful, and moist. Dry chicken? We don’t know her.
Finally, you are the master of your sandwich destiny. You control everything. The quality of the chicken, the exact spice level of the coating, the toastiness of the bun, and, most importantly, the pickle-to-chicken ratio. It’s your sandwich, your rules.
The All-Star Ingredient Lineup
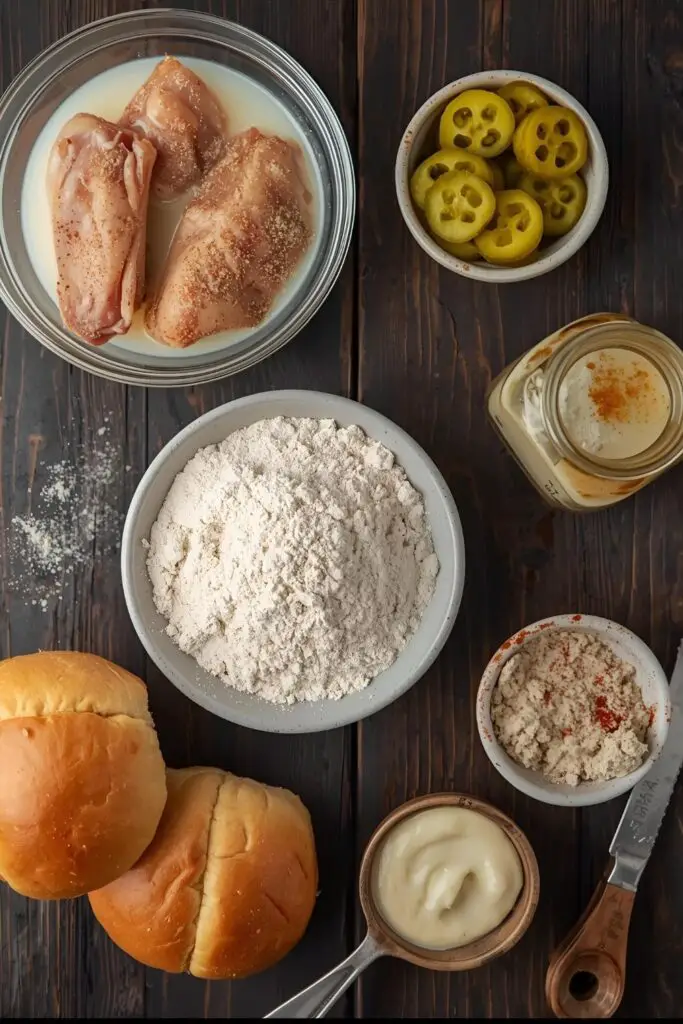
To build a legendary sandwich, you need a legendary team of ingredients. This is no time for shortcuts.
For the Chicken & Buttermilk Brine:
- Boneless, Skinless Chicken Thighs: 4 (about 1.5 lbs). Thighs are the MVP for juiciness and flavor. You can use breasts, but you’ll need to pound them to an even thickness and be extra careful not to overcook them.
- Buttermilk: 2 cups. This is the magic tenderizer.
- Hot Sauce: 2 tablespoons (like Frank’s RedHot or Cholula). For a little background heat.
- Salt: 1 tablespoon. For a proper brine.
For the Crispy Dredge:
- All-Purpose Flour: 2 cups.
- Cornstarch: ¼ cup. The secret to an extra-crispy, light coating.
- Smoked Paprika: 1 tablespoon. For color and smoky depth.
- Garlic Powder: 2 teaspoons.
- Onion Powder: 2 teaspoons.
- Salt: 2 teaspoons.
- Freshly Ground Black Pepper: 1 tablespoon.
- Cayenne Pepper: ½ teaspoon (or more, if you like to live dangerously).
For Frying & Assembly:
- Neutral, High-Smoke-Point Oil: 48 oz (about 6 cups), like peanut, canola, or vegetable oil.
- Brioche Buns: 4, the superior sandwich bun. It’s soft, buttery, and sturdy.
- Dill Pickle Slices: A generous amount. This is not optional. This is the acidic crunch that cuts through the richness and makes the sandwich sing.
- Spicy Mayo:
- ½ cup mayonnaise
- 1-2 tablespoons hot sauce
- ½ teaspoon smoked paprika
Your Fried Chicken Command Center (Tools & Gadgets)
Frying can seem intimidating, but with the right gear, you’re in complete control.
- A Large, Heavy-Bottomed Pot or Dutch Oven: This is crucial for maintaining a stable oil temperature. A 5-quart Dutch oven is perfect.
- A Deep-Fry or Candy Thermometer: This is the most important tool on the list. Guessing the oil temperature is a recipe for greasy or burnt chicken. Don’t do it.
- Long Metal Tongs: For safely adding, flipping, and removing the chicken from the hot oil.
- A Wire Rack Set Over a Baking Sheet: Absolutely essential for letting the chicken rest and stay crispy after frying. Never, ever rest fried food on paper towels!
- Two Shallow Dishes or Pie Plates: For your dredging station.
- A Meat Mallet or Heavy Pan: If you’re using chicken breasts, you’ll need this to pound them to an even thickness.
Step-by-Step: The Path to Sandwich Glory
Ready to create a masterpiece? Let’s get to it. This is a journey, not a sprint.
Step 1: The Buttermilk Brine (The Most Important Step)
In a large bowl, whisk together the buttermilk, hot sauce, and salt. Add your chicken thighs. Make sure they are fully submerged. Cover the bowl and refrigerate for at least 4 hours, or preferably overnight. Do not skip this step! This is where the magic of tender, flavorful chicken begins.
Step 2: Prep Your Stations
When you’re ready to cook, set up your command center.
- Make the Spicy Mayo: In a small bowl, whisk together the mayonnaise, hot sauce, and smoked paprika. Cover and pop it in the fridge.
- Make the Dredge: In a shallow dish, whisk together the flour, cornstarch, smoked paprika, garlic powder, onion powder, salt, black pepper, and cayenne pepper.
Step 3: Dredge Like a Champion
Take one piece of chicken out of the buttermilk brine, letting the excess drip off but leaving it damp. Place it in the flour mixture and toss to coat completely. Press the flour mixture firmly onto the chicken with your hands to ensure a thick, shaggy coating. This is what creates those glorious crunchy bits.
For an extra-craggy, ultra-crisp coating (the pro move), dip the floured chicken back into the buttermilk for a second, then back into the flour dredge again. Place the coated chicken on a clean plate or wire rack while you heat the oil.
Step 4: Heat the Oil
Pour your oil into the heavy-bottomed pot until it’s about 2-3 inches deep. Attach your deep-fry thermometer to the side of the pot, making sure the tip is submerged in the oil but not touching the bottom. Heat the oil over medium-high heat until it reaches a steady 350°F (175°C).
Step 5: The Frying Game
Once the oil is at temperature, carefully lower 2 pieces of chicken into the pot using your tongs. Do not overcrowd the pan! This will cause the oil temperature to drop, resulting in greasy, sad chicken.
Fry for 4-6 minutes per side, flipping once, until the chicken is a deep golden brown, ridiculously crispy, and the internal temperature reaches 165°F (74°C). The oil temperature will fluctuate; adjust your stove’s heat as needed to keep it around 325-350°F.
Step 6: The Crucial Rest
Using your tongs, remove the perfectly fried chicken from the oil and place it on your wire rack set over a baking sheet. Let it rest for at least 5-10 minutes. This allows the juices to redistribute and the crust to stay crispy. Repeat the frying process with the remaining chicken.
Step 7: Assemble the Masterpiece
While the chicken is resting, lightly toast your brioche buns. Slather a generous amount of your spicy mayo on both the top and bottom bun. Place a piece of glorious, crispy fried chicken on the bottom bun. Top it with a liberal amount of dill pickle slices. Crown your creation with the top bun.
Take a moment to admire your work. You’ve earned it. Now, devour it immediately.
Calories & Nutritional Info (Let’s Not Kid Ourselves)
This is not a health food. This is a happiness food. This is a “I’m celebrating the fact that it’s Saturday” food.
- Serving Size: 1 sandwich
- Estimated Calories: 800-1,100 (It’s worth it)
- Main Components: Glorious fried chicken, buttery carbs, spicy fat, and pure, unadulterated joy.
- Nutritional Note: Best enjoyed on a day when you’re not counting calories. Maybe pair it with a light, leafy green salad to appease your conscience.
Common Mistakes to Avoid (Save Your Sandwich!)
- The Soggy Crust Saga: Your oil was not hot enough, or you crowded the pan. You must use a thermometer and you must fry in batches.
- The Burnt-Outside, Raw-Inside Nightmare: Your oil was too hot. A thermometer prevents this tragedy. Aim for that 350°F (175°C) sweet spot.
- Flavorless, Tough Chicken: You skipped the buttermilk brine. The brine is the soul of the sandwich. DO NOT SKIP THE BRINE.
- A Bald, Sad Crust: Your dredge didn’t stick. Be sure to press the flour mixture firmly onto the damp, brined chicken.
Variations & Customizations (Your Sandwich, Your Rules)
Once you’ve mastered the classic, why not play around?
1. The Nashville Hot Chicken Sandwich
This one’s a legend. After frying, brush the chicken with a spicy oil made by whisking about ½ cup of the hot frying oil with 3 tablespoons of cayenne pepper, 1 tablespoon of brown sugar, and some garlic powder and paprika. Serve on white bread with extra pickles. Prepare for a flavor inferno.
2. The “Healthier” Air Fryer Version
Brine and dredge the chicken as directed. Spray the chicken generously with cooking oil spray. Air fry at 375°F (190°C) for about 20-25 minutes, flipping halfway through, until golden, crispy, and cooked through. It won’t be quite as decadent as the deep-fried version, but it’s still darn good.
3. The Vegetarian Imposter
Use a thick slab of extra-firm tofu (pressed well!), a large portobello mushroom cap, or a seitan cutlet. Brine it, dredge it, and fry it just like the chicken for an incredible vegetarian sandwich.
FAQ: Your Fried Chicken Conundrums, Answered
Let’s clear up some common questions.
1. Can I use chicken breasts instead of thighs? You can, but thighs are superior for this recipe. If you must use breasts, slice them in half horizontally to create thinner cutlets, pound them to an even ½-inch thickness, and watch them like a hawk while frying as they’ll cook faster and can dry out.
2. What’s the best and safest oil for frying? A neutral oil with a high smoke point is key. Peanut oil is the classic choice for its flavor and high smoke point. Canola, vegetable, or grapeseed oil also work well.
3. How do I know when the chicken is perfectly cooked? The only 100% reliable way is to use an instant-read digital thermometer. The internal temperature in the thickest part of the chicken should read 165°F (74°C).
4. How do I properly dispose of all that frying oil? NEVER pour it down the drain! Let the oil cool completely in the pot. Then, pour it back into its original container (or another sealable container like a milk jug) and throw it in the trash.
5. Is the buttermilk brine really that important? YES. I will shout it from the rooftops. It adds flavor, moisture, and tenderizes the chicken in a way that just seasoning the outside cannot. It is the difference between a good sandwich and a great one.
6. My breading is falling off in the fryer! What did I do wrong? A few things could be the culprit. Make sure you press the dredge on firmly. Also, once you place the chicken in the hot oil, let it be for the first couple of minutes to allow the crust to set before you try to move it.
7. Can I make these ahead of time? Fried chicken is at its peak deliciousness when it’s fresh and hot. You can brine the chicken the day before, but the frying and assembly should be done right before serving for maximum crunch and enjoyment.
Final Thoughts
You’ve done it. You have stared into the face of the Chicken Sandwich Wars and emerged not just as a survivor, but as a conqueror. You are now the proud creator of a fried chicken sandwich that would make fast-food chains weep salty, greasy tears of envy.
So go forth, heat up that oil, and build the sandwich of your dreams. And when you take that first, earth-shatteringly crunchy bite, you’ll know it was all worth it. Welcome to the major leagues.