The Ultimate DIY Christening Cake for a Girl (That Won’t Make You Cry)
So, you’ve been nominated. The great honor (and terrifying responsibility) of creating the christening cake girl centerpiece has fallen to you. No pressure, right? You just have to produce a confection that’s equal parts heavenly, beautiful, and sturdy enough to withstand the critical gaze of Great Aunt Mildred. Are you panicking yet? Don’t.
Deep breaths. What if I told you that you can create a jaw-dropping, patisserie-level cake without having a complete meltdown? A cake so good, people will assume you secretly outsourced it to a pro.
This recipe is your new best friend. It’s your secret weapon. It’s the key to unlocking your inner cake-baking deity. Let’s do this.
Why This Recipe is Awesome (AKA Your Ticket to Glory)
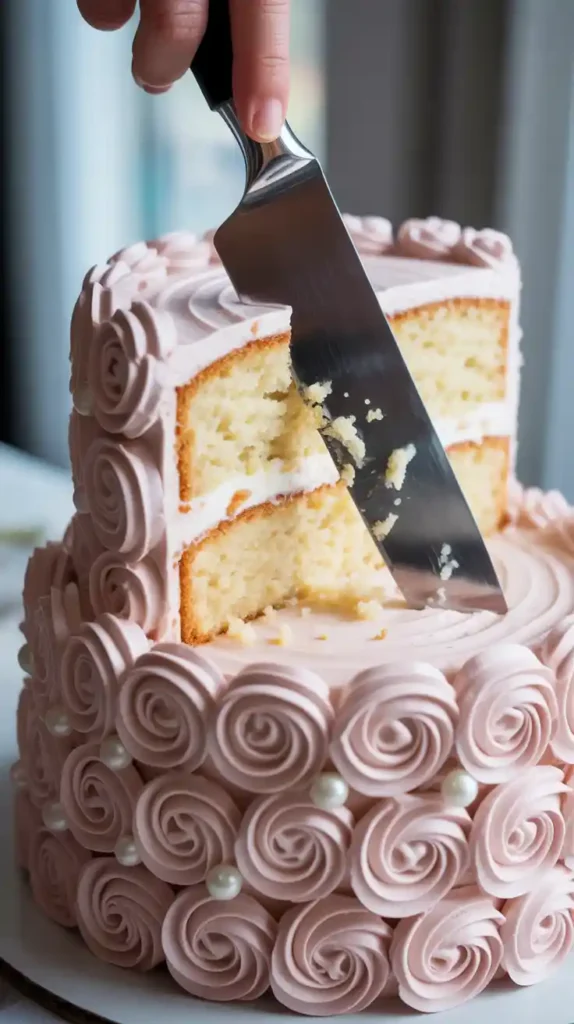
First off, let’s talk flavor. We’re not messing around with a dry, forgettable sponge here. This is a moist, tender vanilla bean cake that actually tastes as good as it looks. It’s paired with a Swiss meringue buttercream, which sounds fancy but is basically the silk sheets of the frosting world. It’s unbelievably smooth, not sickly sweet, and pipes like a dream.
Secondly, it’s deceptively simple. I’ve broken down every single step so there’s no room for error. We’re taking the guesswork out of baking. You just follow the map, and X will mark the spot of a delicious, stunning cake.
Finally, the bragging rights. Imagine the quiet satisfaction when someone asks, “Which bakery did you get this from?” and you get to casually reply, “Oh, this little thing? I just whipped it up myself.” The power. The glory. It’s all yours for the taking.
Ingredients You’ll Need

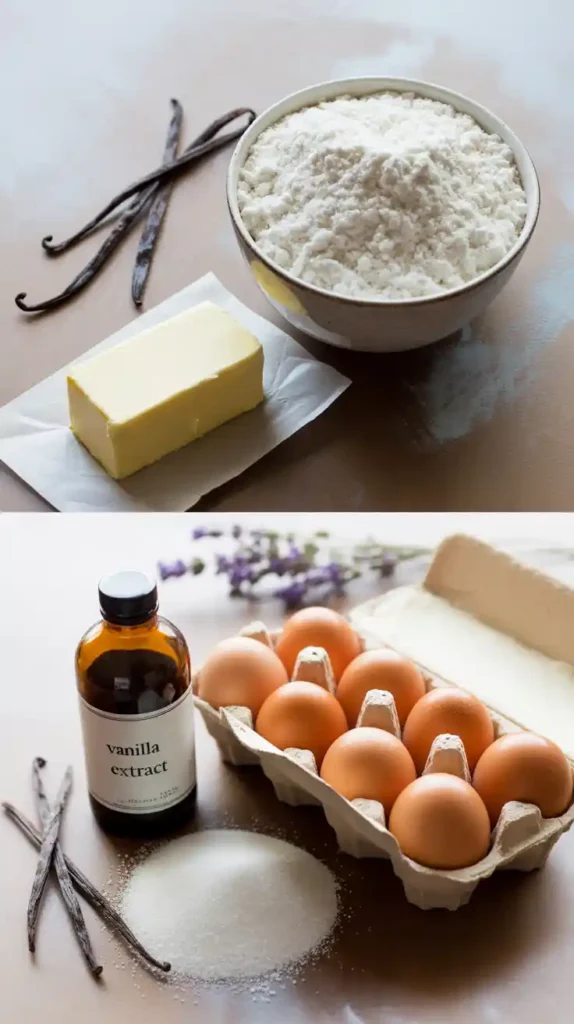
Let’s get our mise en place in order. No weird, impossible-to-find ingredients here. Just good old-fashioned baking staples.
For the Vanilla Bean Cake (makes two 8-inch layers):
- 2 ½ cups (300g) cake flour (or all-purpose flour, but cake flour gives a finer crumb)
- 1 ½ cups (300g) granulated sugar
- 1 cup (226g) unsalted butter, softened to room temperature
- 4 large eggs, room temperature
- 1 cup (240ml) whole milk, room temperature
- 2 ½ tsp baking powder
- ½ tsp salt
- 2 tsp pure vanilla extract (or the seeds from one vanilla bean for extra fancy points)
For the Swiss Meringue Buttercream:
- 5 large egg whites
- 1 ¾ cups (350g) granulated sugar
- 2 cups (454g) unsalted butter, cut into cubes and softened
- 2 tsp pure vanilla extract
- Pinch of salt
- Pink gel food coloring (a tiny drop goes a long way!)
For Decoration (Optional but Recommended):
- White and pink sprinkles or sugar pearls
- A simple, elegant cake topper (like a cross or script of the baby’s name)
Tools & Kitchen Gadgets Used
Having the right tools is half the battle. Seriously, it makes life so much easier. Here’s what I used to pull this off without a hitch:
- Stand Mixer with paddle and whisk attachments: Your absolute best friend for this recipe. A powerful hand mixer will also work, but prepare for an arm workout.
- Two 8-inch round cake pans: Essential for getting those even layers.
- Parchment Paper: For lining your pans. Don’t you dare skip this.
- Digital Kitchen Scale: For precise measurements, which is non-negotiable in baking.
- Wire Cooling Racks: Because nobody likes a soggy cake bottom.
- Offset Spatula: The key to getting those smooth, professional-looking sides.
- Bench Scraper: Your secret weapon for perfectly straight edges.
- Cake Turntable: Makes frosting the cake about a thousand times easier.
- Piping Bags & Tips: I love a Wilton 1M or 2D tip for beautiful rosettes.
- Double Boiler (or a saucepan and a heatproof bowl): Crucial for the Swiss meringue buttercream.
Step-by-Step Instructions: Let’s Bake!
Alright, apron on? Let’s make some magic. We’ll tackle this in three parts: the cake, the buttercream, and the grand assembly.
H3: Part 1: The Perfect Vanilla Cake
- Prep Time: Preheat your oven to 350°F (175°C). Grease your two 8-inch cake pans, line the bottoms with parchment paper, and then grease the parchment paper too. Yes, really. Trust me.
- Dry Ingredients: In a medium bowl, whisk together the cake flour, baking powder, and salt. Set it aside. This is your dry team.
- Creaming: In the bowl of your stand mixer with the paddle attachment, beat the softened butter and sugar on medium-high speed for about 3-5 minutes. You want it to look light, pale, and fluffy. This step whips air into the butter, which is key for a light cake.
- Add the Eggs: Add the eggs one at a time, beating well after each addition and scraping down the sides of the bowl. Once they’re all in, mix in the vanilla extract.
- Alternate Wet & Dry: Now for the main event. With the mixer on low speed, add about a third of your dry ingredients, followed by half of the milk. Repeat this, ending with the last third of the dry ingredients. Mix only until the flour streaks disappear. Overmixing develops gluten and makes the cake tough. We want tender, not chewy.
- Bake: Divide the batter evenly between your two prepared pans. Bake for 30-35 minutes, or until a wooden skewer inserted into the center comes out clean.
- Cool Down: Let the cakes cool in their pans on a wire rack for about 15 minutes. Then, carefully invert them onto the rack, peel off the parchment paper, and let them cool completely. And I mean completely. Don’t even think about frosting a warm cake.
H3: Part 2: The Silkiest Swiss Meringue Buttercream

This sounds intimidating, but it’s not! Just follow the steps.
- The Double Boiler: Fill a saucepan with an inch or two of water and bring it to a simmer. In a large, heatproof bowl (the bowl of your stand mixer is perfect), whisk together the egg whites and sugar.
- Heat It Up: Place the bowl over the simmering water, making sure the bottom of the bowl doesn’t touch the water. Whisk constantly until the sugar has completely dissolved and the mixture is hot to the touch (around 160°F or 71°C on a thermometer). It should feel smooth, not grainy, when you rub a little between your fingers.
- Whip It Good: Transfer the bowl to your stand mixer fitted with the whisk attachment. Whisk on high speed for 10-15 minutes, until the meringue is stiff, glossy, and the outside of the bowl is completely cool to the touch. This is critical!
- The Butter Stage: Switch to the paddle attachment. With the mixer on low-medium speed, start adding your softened butter, one cube at a time.
- THE PANIC MOMENT: At some point, your frosting will look curdled, soupy, and absolutely ruined. DO NOT PANIC. This is totally normal. It’s just the butter and meringue getting to know each other. Just keep mixing. Walk away for a few minutes if you have to. It will come together.
- Magic Time: After a few more minutes of mixing, it will magically transform into a thick, smooth, and silky buttercream. Once it’s smooth, add the vanilla and salt.
- Add Some Color: Add a tiny drop of pink gel food coloring and mix on low until you get a delicate, pale pink. You can always add more, but you can’t take it away!
H3: Part 3: The Assembly & Decoration
- Level Up: If your cake layers have a dome, use a long serrated knife to carefully level them. A flat surface is a happy surface.
- The Crumb Coat: Place one cake layer on your turntable or cake stand. Add a generous dollop of buttercream (about 1 cup) and spread it evenly. Place the second layer on top. Now, cover the entire cake in a thin layer of buttercream. This is the crumb coat—it traps all the loose crumbs.
- Chill Out: Place the crumb-coated cake in the fridge for at least 30 minutes to firm up. This step is the secret to a clean final coat.
- Final Frosting: Apply a thicker, final layer of buttercream. Use your offset spatula and bench scraper to get the sides as smooth as you like. It doesn’t have to be perfect! Rustic is chic, remember?
- Decorate: Transfer the remaining buttercream to a piping bag fitted with your favorite tip. Pipe rosettes, swirls, or simple dollops on top. Finish with a sprinkle of pearls or your chosen decorations. Voila!
Calories & Nutritional Info
Let’s be real, this is a celebration cake, not a kale smoothie. But for those who are curious, here’s an estimate per slice (assuming the cake is cut into 12 generous slices):
- Calories: Approximately 550-650 kcal
- Protein: Around 6g
- Fat: Approximately 35g
- Carbohydrates: Roughly 55g
- Note: This is an indulgent treat made with real butter, sugar, and flour. It’s designed for a special occasion, so enjoy every single bite without a shred of guilt. FYI, life is too short for bad cake.
Common Mistakes to Avoid (So You Don’t Cry)
We’ve all been there. Here’s how to sidestep the most common cake-tastrophes.
- Decorating a Warm Cake: I mentioned it before, and I’ll say it again. If you frost a warm cake, you will have a puddle of melted buttercream and sadness. Let it cool completely.
- Panicking When the Buttercream Curdles: Welcome to the club! Every baker has experienced this. The solution is always to just keep mixing. It feels wrong, but it’s so right. Trust the process.
- Eyeballing Ingredients: Baking is a science. Use a kitchen scale for your flour and sugar if you can. It guarantees consistency and is actually faster than using cups once you get the hang of it.
- Opening the Oven Door: Are you baking or just peeking? Opening the oven door too early can cause your beautiful cake to sink in the middle. Wait until the last 5-10 minutes of baking time to check for doneness.
Variations & Customizations
Feeling adventurous? Here are a few ways to switch things up.
- Lemon & Raspberry Delight: Add the zest of two lemons to the cake batter. When assembling, spread a thin layer of raspberry jam on top of the first cake layer before adding the buttercream. A truly elegant flavor combo.
- Almond Amore: Swap the vanilla extract for almond extract in both the cake and the buttercream for a sophisticated, nutty flavor. Garnish with toasted sliced almonds.
- White Chocolate Wonder: Fold 1 cup of white chocolate chips into the cake batter before baking. For the buttercream, you can tint it with a touch of ivory food coloring for a classic, creamy look.
FAQ: Your Burning Cake Questions Answered
- What is a good flavor for a christening cake? Vanilla, lemon, and strawberry are timeless classics that please almost everyone. This vanilla recipe is a perfect, crowd-pleasing base.
- How far in advance can I make this christening cake? You can bake the cake layers up to a month in advance! Let them cool completely, wrap them tightly in two layers of plastic wrap and one layer of foil, and freeze. The buttercream can be made up to a week ahead and stored in an airtight container in the fridge. Just bring it to room temperature and re-whip it until smooth before using. Assemble and decorate the cake the day before the event.
- What do you write on a christening cake for a girl? Keep it simple and sweet. “On Your Christening Day,” “God Bless [Baby’s Name],” or just the baby’s name and the date are all lovely options.
- Can I use fondant instead of buttercream? Absolutely! If you’re a fondant fan, you can cover the buttercream-crumb-coated cake with a layer of light pink or white fondant for a super smooth finish.
- How do I transport the finished cake safely? This is the most stressful part, TBH. Use a sturdy cake box. The safest place for it in the car is the floor of the passenger seat, where it’s flat. Drive like you have a precious, edible baby on board… because you do.
- Is this christening cake recipe truly beginner-friendly? Yes! While it has multiple steps, none of them are overly complex. If you read the instructions carefully before you start and avoid the common mistakes I listed, you can totally do this.
- What are some other appropriate decorations for a girl’s christening cake? Think delicate and elegant. Besides simple piping, you could use edible sugar pearls, small handmade fondant flowers, a delicate sugar cross, or even fresh (non-toxic and pesticide-free) flowers like baby’s breath or small roses.
Final Thoughts
There you have it—a guide to creating a gorgeous, delicious, and totally achievable christening cake girl masterpiece. You’ve conquered the batter, tamed the buttercream, and assembled a thing of beauty.
Now go forth, present your creation, and graciously accept the flood of compliments that are about to come your way. You’ve earned it. And I bet you’ll never look at a store-bought celebration cake the same way again. 😉