The Ultimate Dark Cacao Cookie for True Chocolate Lovers
Alright, let’s have a little chat. Do you really love chocolate? Or do you just love sugar that happens to be brown? Because if you’re tired of cloyingly sweet desserts that barely whisper the word “chocolate,” then you, my friend, are in the right place. It’s time to walk on the dark side and bake the most intense, profound, and unapologetically chocolatey dark cacao cookie you will ever experience. This isn’t your average after-school treat; this is a cookie for grown-ups.
Why This Recipe Is Awesome (And Not for the Faint of Heart)
So, what makes this cookie so special it deserves its own dramatic monologue? It’s all about the pure, unadulterated flavor of cacao. We’re not hiding behind a mountain of sugar here. This recipe uses high-quality cacao powder to deliver a deep, complex, and slightly bitter chocolate flavor that is absolutely intoxicating. It’s the cookie equivalent of a shot of straight espresso.
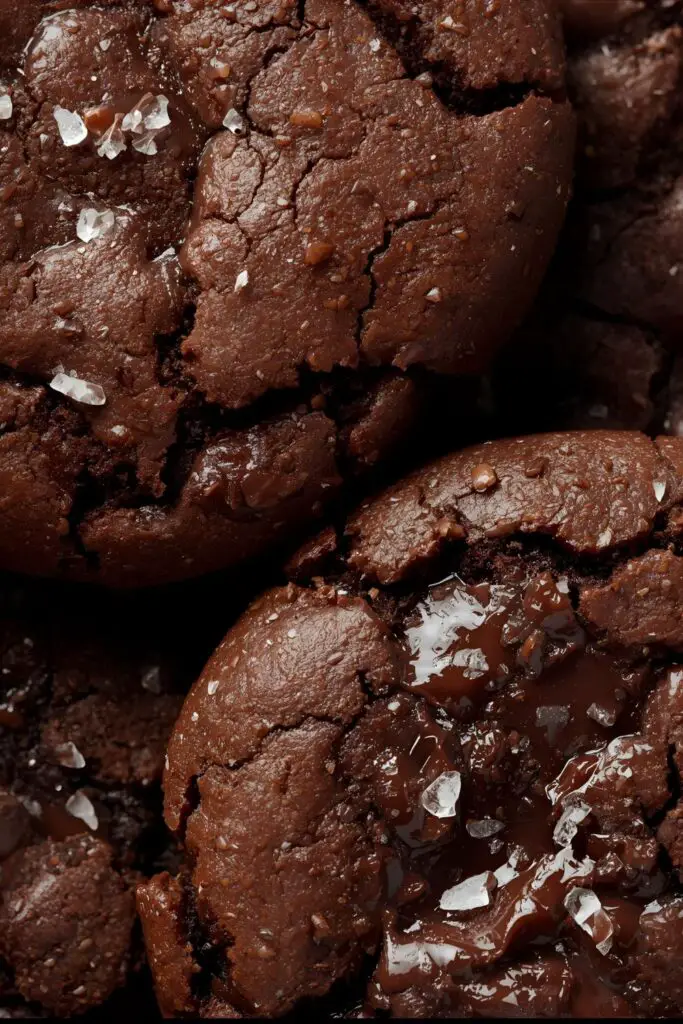
The texture is another story altogether. Forget light and crispy; we’re diving headfirst into a dense, fudgy, brownie-like consistency that is so satisfyingly chewy. They bake up with a gorgeous, crackly, glossy top that looks like it came from a fancy French patisserie. They’re naturally gluten-free, shockingly easy to make, and guaranteed to make you look like a culinary genius. Are you ready for this?
Ingredients: Your Arsenal for the Dark Side
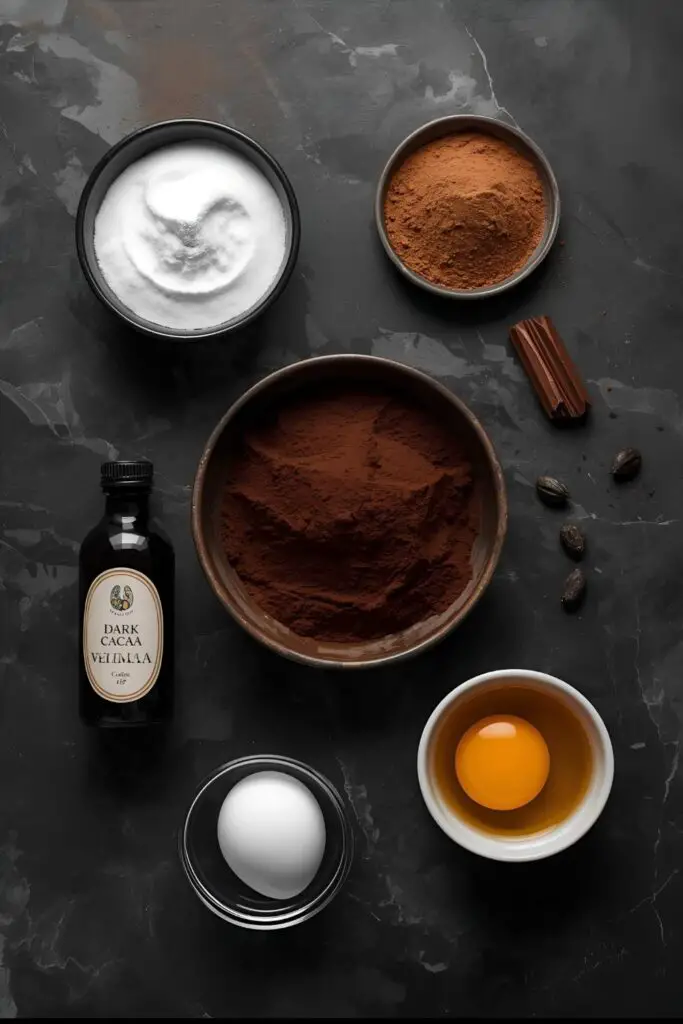
The ingredient list is deceptively simple, which means quality is non-negotiable. Especially the cacao.
- 3 cups powdered sugar
- ¾ cup high-quality, unsweetened cacao powder (Raw cacao is amazing here, or a very good dark Dutch-processed cocoa powder)
- ½ teaspoon salt
- 1 tablespoon instant espresso powder (Optional, but it makes the chocolate taste more like itself)
- 3 large egg whites, at room temperature
- 1 tablespoon pure vanilla extract
- Optional Add-ins: 1 ½ cups dark chocolate chunks, toasted walnuts, or dried cherries
- Flaky sea salt, for that perfect finish
A Critical Note on Cacao vs. Cocoa:
- Cacao powder is typically raw and less processed, retaining more of the bean’s bitter, complex flavor notes and nutrients. Cocoa powder, especially Dutch-processed, has been treated to neutralize its acidity, resulting in a smoother, darker, and less bitter flavor. For the most intense experience, use cacao. For a slightly tamer but still incredibly rich cookie, a high-quality dark cocoa powder works beautifully.
Tools & Kitchen Gadgets Used: Your Baking Command Center

You’ll be shocked at how little you need to create something so magnificent.
- Stand Mixer with a Whisk Attachment or a Hand Mixer
- Large Mixing Bowl
- Sifter or Fine-Mesh Sieve (Absolutely essential for this recipe!)
- Rubber Spatula
- Measuring Cups and Spoons
- Baking Sheets
- Parchment Paper or Silicone Baking Mats
- Cookie Scoop (A 1.5-tablespoon scoop is ideal.)
- Wire Cooling Rack
Step-by-Step Instructions: Embrace the Darkness
This isn’t your typical creaming-butter-and-sugar situation. Pay attention; the results are worth it.
- Prep Your Oven and Pans: Preheat your oven to 350°F (175°C). Line two baking sheets with parchment paper. This is a sticky dough, so don’t even think about skipping this.
- Sift, Sift, Sift! This is the most important step. In your large mixing bowl, you absolutely must sift together the powdered sugar, cacao powder, salt, and espresso powder (if using). This breaks up all the lumps and aerates the mixture, which is the key to that crackly top.
- Whisk the Dry Ingredients: After sifting, use a whisk to mix the dry ingredients thoroughly for about 30 seconds.
- Add the Wet Ingredients: Pour in the egg whites and vanilla extract.
- Mix It Up: Using your mixer on medium speed, beat the mixture for about 2-3 minutes. It will look like a thick, glossy, tar-like batter. It should be smooth and shiny. This is when the magic happens.
- Fold in the Goodies (Optional): If you’re adding dark chocolate chunks or nuts, switch to a rubber spatula and gently fold them in now.
- Scoop and Space: The dough will be sticky, like a thick frosting. Use a cookie scoop to drop mounds of dough onto your prepared baking sheets, leaving about 2 inches of space between each one. They will spread.
- Let Them Rest: This is a crucial, often-skipped step. Let the scooped cookies sit at room temperature for 10-15 minutes. This allows them to form a slight skin, which helps create that signature crinkly, meringue-like top.
- Bake to Perfection: Bake for 12-14 minutes. The cookies will puff up and the tops will crack. They are done when the edges are set and the center is still soft. Do not overbake them!
- The Salty Finish: As soon as they come out of the oven, sprinkle the tops with a pinch of flaky sea salt. The contrast is divine.
- Cool Completely on the Pan: These cookies are very delicate when hot. You must let them cool completely on the baking sheet before attempting to move them. They will deflate a bit and become fudgy as they cool.
Calories & Nutritional Info: The Dark Details
Here’s a rough idea of what you’re looking at, per cookie. But let’s be honest, the antioxidant power of cacao probably cancels it all out, right? 😉
- Estimated Calories per cookie: ~100-120 calories (without add-ins)
- Fat: ~2g
- Carbohydrates: ~22g
- Protein: ~2g
- Sugar: ~19g
Nutritional Notes:
- Cacao is packed with antioxidants and flavonoids. So, technically, this is a health food. (Don’t quote me on that).
- Naturally gluten-free and dairy-free!
Common Mistakes to Avoid: Don’t Fear the Dark
These cookies are unique, so avoid these common pitfalls.
- Not Sifting: If you skip the sifting, you will have a lumpy, grainy cookie. The texture will be all wrong. Sift your powdered sugar and cacao powder. There are no shortcuts here.
- Overbaking: I will shout this from the rooftops. If you overbake these cookies, they will become dry, hard, and overly bitter. Pull them from the oven when the center is still soft to the touch.
- Expecting a Sweet Cookie: This is a dark cacao cookie. It is for people who enjoy the complex, bitter notes of high-quality dark chocolate. If you have a major sweet tooth, this might not be the cookie for you (or you might want to add milk chocolate chunks).
- Moving Them Too Soon: They will be fragile and gooey when they first come out of the oven. You must let them cool completely on the baking sheet to firm up. Be patient.
Variations & Customizations: Paint It Black (With Flavor)
This intense cookie is a fantastic base for other flavors.
- The Spicy Maya: Add ½ teaspoon of cinnamon and a ¼ teaspoon of cayenne pepper to the dry ingredients for a cookie with a slow, warming heat.
- Mint Chocolate Majesty: Add ½ teaspoon of pure peppermint extract along with the vanilla. After they cool, you can even drizzle them with a simple mint glaze.
- Nut Butter Swirl: After scooping the cookies, drop a small dollop of creamy peanut butter or almond butter on top of each one and use a toothpick to create a gentle swirl before baking.
FAQ Section: Your Darkest Cookie Questions Answered

Venturing into the world of cacao can be intimidating. I’ve got you covered.
- Q: What is the real difference between cacao and cocoa powder? A: Cacao powder is made from cold-pressing unroasted cacao beans, which keeps more of the enzymes and nutrients. Cocoa powder is made from beans that have been roasted at a high temperature, which can change the flavor profile and nutritional content. In short, cacao is generally more bitter and intense.
- Q: Can I use regular unsweetened cocoa powder? A: Yes, you can. The cookies will still be delicious and intensely chocolatey. However, they may be slightly less complex and a bit sweeter than if you used raw cacao. A high-quality dark or black cocoa would also be amazing here.
- Q: Are these cookies supposed to be bitter? A: They have a pronounced bitterness, like a very dark chocolate bar (75% cacao or higher). The powdered sugar provides enough sweetness to make them balanced and enjoyable, not harsh.
- Q: Why do my cookies have a cracked top? Is that right? A: Yes! That beautiful, glossy, cracked top is the signature of this type of meringue-based cookie. It’s a sign you did everything right, especially the sifting and resting steps.
- Q: Can I make these vegan? A: Since this recipe relies on egg whites for its entire structure, it’s a perfect candidate for using aquafaba (the liquid from a can of chickpeas)! Replace the 3 egg whites with about 6 tablespoons of aquafaba and proceed with the recipe.
- Q: How do I store these cookies? A: Store them in an airtight container at room temperature. They are actually best on day two, as their fudgy texture becomes even more pronounced. They’ll last for about 5 days.
- Q: Can I add regular chocolate chips? A: You can, but I highly recommend using high-quality dark chocolate chunks. Regular semi-sweet chips can taste overly sweet against the dark cacao base.
Final Thoughts: Welcome, Fellow Chocoholic
You’ve done it. You’ve graduated from the world of sweet, simple chocolate and emerged as a true connoisseur. You now hold the recipe for a cookie that is as complex, sophisticated, and intensely wonderful as you are. Go forth and share them with your most discerning friends, or hoard them all for yourself in a dark corner. You’ve earned it.