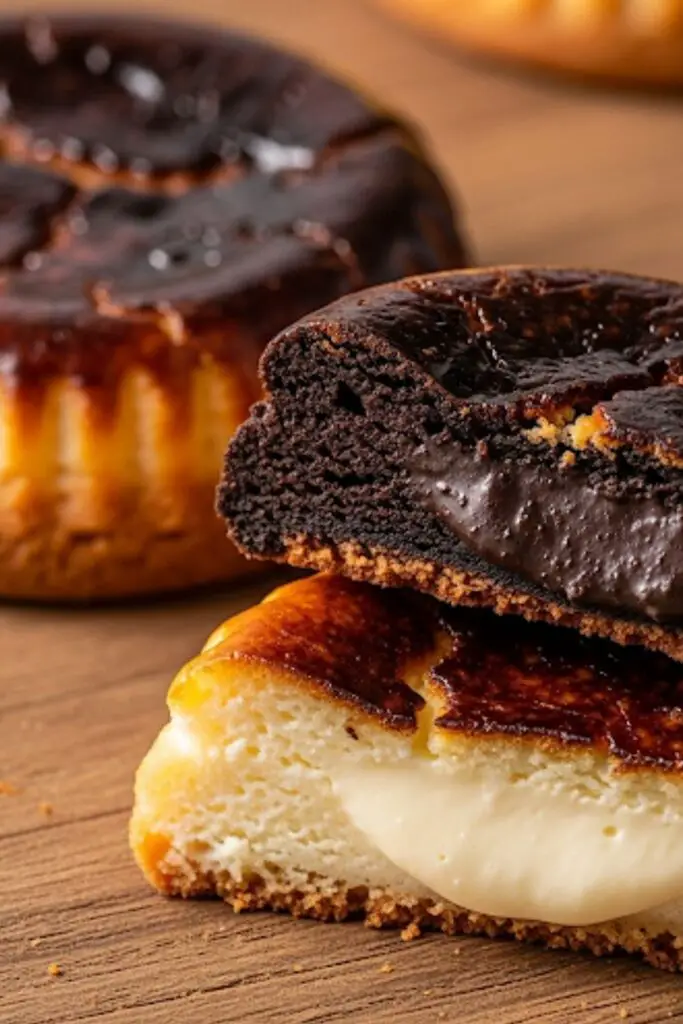
The Burnt Cheese Cookie: A Delicious Act of Culinary Rebellion
For our entire lives, we’ve been told to avoid burning our food. A blackened toast is a tragedy, a charred cookie a reason for mourning. But what if I told you that in the world of baking, “burnt” is the new “perfect”? We’re not talking about a sad, acrid, smoke-alarm-inducing mistake. We’re talking about a deliberate, deeply caramelized, gloriously dark top that hides a creamy, luscious center. Welcome, my friends, to the age of the burnt cheese cookie. This is the dessert for those who walk on the wild side, a sophisticated, savory-sweet treat inspired by the legendary Basque cheesecake, and it’s about to become your new obsession.
Why This Recipe Is Awesome (It’s Imperfection Perfected)
So, why are we intentionally “burning” a perfectly good cookie? Because this isn’t just a cookie; it’s a masterclass in flavor and texture contrast. You get a buttery, tender shortbread base that cradles a pool of rich, tangy, lightly sweetened cheesecake filling. And the star of the show? That deeply caramelized, almost-black top that offers a nutty, slightly bitter counterpoint to the creamy sweetness beneath it. It’s complex, it’s addictive, and it’s a world away from your average sugar cookie.
These cookies look incredibly chic and impressive, like something you’d find in a trendy bakery in a big city, but they are shockingly simple to make right in your kitchen in Khulna. There’s no fussy decorating, no water baths, no worrying about a tiny crack. In fact, the more rustic and dark it looks, the better! It’s the perfect, low-stress, high-reward bake.
Ingredients: Your Toolkit for Controlled Chaos
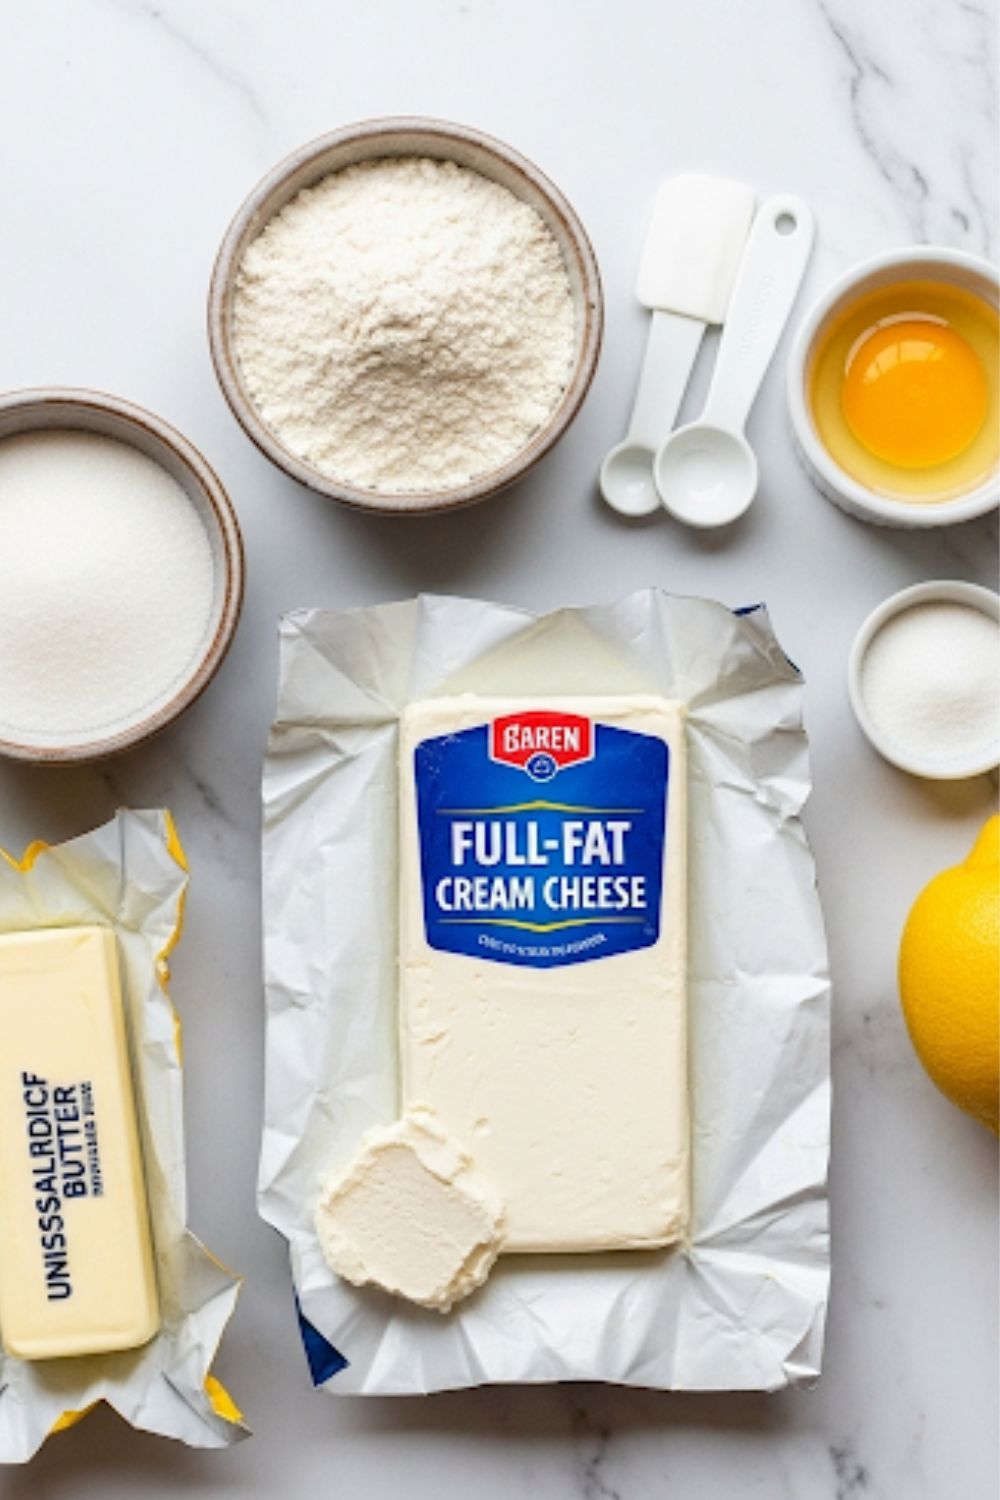
This recipe is a tale of two perfect partners: the simple, sturdy base and the rich, creamy filling.
For the Buttery Shortbread Base:
- 1 cup (2 sticks) unsalted butter, softened
- ½ cup granulated sugar
- 1 teaspoon vanilla extract
- 2 cups all-purpose flour
- ¼ teaspoon salt
For the “Burnt” Cheesecake Filling:
- 8 ounces (1 block) full-fat cream cheese, at room temperature
- ⅓ cup granulated sugar
- 1 large egg yolk
- 1 teaspoon lemon juice
- ½ teaspoon vanilla extract
The Golden Rules of Ingredients:
- Full-Fat, Block Cream Cheese: This is a non-negotiable. Do not use whipped cream cheese or low-fat varieties. You need the full-fat block style (the one in the foil wrapper) to get that rich, creamy texture that caramelizes beautifully.
- Room Temperature Filling Ingredients: Your cream cheese and egg yolk must be at room temperature to ensure a smooth, lump-free cheesecake filling.
Tools & Kitchen Gadgets Used: Your Arsonist’s… I Mean, Baker’s Kit
No need for a blowtorch, just some standard kitchen gear.
- Stand Mixer or a Hand Mixer
- Mixing Bowls
- Baking Sheets lined with Parchment Paper
- Cookie Scoop (A 1.5-tablespoon scoop works well.)
- A round-bottomed object for making indents (like the back of a ½-tablespoon measure)
- Rubber Spatula
- Measuring Cups and Spoons
Step-by-Step Instructions: Let’s Play with Fire
Ready to break the rules? This is where the fun begins.
Act 1: The Shortbread Vessel
- Prep Your Oven (The First Time): Preheat your oven to 350°F (175°C). Line two baking sheets with parchment paper.
- Make the Dough: In your mixer, beat the softened butter and sugar until light and fluffy. Beat in the vanilla extract. On low speed, gradually add the flour and salt, mixing until just combined.
- Shape the Cookies: Use a cookie scoop to portion the dough into 1.5-tablespoon-sized balls. Roll them in your hands until smooth and place them about 2 inches apart on the baking sheets.
- Make an Indent: Use the back of a round measuring spoon (or your thumb) to press a deep well into the center of each dough ball. You’re creating a little cup to hold the glorious filling.
- Par-Bake the Base: Bake the cookie bases for 10-12 minutes, just until the edges are set but still pale. Remove them from the oven. If the wells have puffed up, gently press them down again with your spoon.
Act 2: The Fiery Filling and Final Bake
- Crank Up the Heat: Increase your oven temperature to a blazing 425°F (220°C). This high heat is the secret to the “burn.”
- Make the Filling: While the bases are baking, make the filling. In a medium bowl, beat the room temperature cream cheese with an electric mixer until completely smooth. Beat in the sugar, egg yolk, lemon juice, and vanilla until just combined and silky. Don’t over-whip it; we don’t want a lot of air.
- Fill ‘Em Up: Carefully spoon about a teaspoon of the cheesecake filling into the well of each warm cookie base. Fill them just to the top.
- The Final Burn: Place the filled cookies back into the hot 425°F oven. Bake for 8-12 minutes. You need to watch them closely now! You’re looking for the cheesecake filling to puff up and get deeply browned, with dark, almost-black spots on top.
- Cool Down: Let the cookies cool on the baking sheet for 10-15 minutes before transferring them to a wire rack to cool completely. The filling will set as it cools.
Calories & Nutritional Info (Per Cookie, Estimated)
A sophisticated treat for a sophisticated palate. The numbers are just details.
- Estimated Calories per cookie: ~180-220 calories
- Fat: ~12g
- Carbohydrates: ~16g
- Protein: ~3g
Common Mistakes to Avoid: Don’t Get Actually Burned!
There’s a fine line between “perfectly burnt” and “sad, smoky hockey puck.”
- Using Low-Fat Cream Cheese: It has too much water, won’t set properly, and won’t caramelize into that beautiful dark crust. Full-fat block style is the only way.
- Forgetting to Pre-Bake the Base: If you don’t pre-bake the shortbread, it will be raw and doughy underneath the cheesecake filling by the time the top is perfectly burnt.
- Not Using High Enough Heat: That final blast of high heat is what creates the signature “burnt” top. A lower temperature will just cook the cheesecake filling normally without the deep caramelization.
- Overfilling the Wells: If you put too much filling in, it will puff up and spill over the sides of the cookie, creating a delicious, but messy, cheesecake puddle.
Variations & Customizations: Different Kinds of Delicious Fire
The base is a masterpiece, but feel free to experiment.
- The Savory Burnt Cheese Cookie: Drastically reduce the sugar in the cheesecake filling (to just 1 tablespoon) and add 1 tablespoon of chopped fresh chives and a good crack of black pepper. It becomes a phenomenal appetizer cookie.
- The Chocolate Inferno: Use a chocolate shortbread base for your cookie. You can even add a little cocoa powder to the cheesecake filling for a double-chocolate version.
- The Fruity Underbelly: Before adding the cheesecake filling, place a single fresh raspberry or blueberry in the bottom of the shortbread well for a burst of fruity surprise.
FAQ Section: All Your Burning Questions, Answered
You have questions about this delightful paradox of a cookie. Let’s clear the smoke.
- Q: Is it really burnt? What does the top taste like? A: It’s not burnt in an acrid, bitter way. It’s deeply caramelized. The flavor is nutty, complex, and has a slight, pleasant bitterness that perfectly cuts through the rich, sweet, and tangy cheesecake filling underneath.
- Q: My cheesecake filling cracked! What did I do wrong? A: Don’t worry! A few cracks are totally normal and part of the rustic charm of a “burnt” cheesecake style. It’s often caused by a sudden temperature change or slightly over-beating the filling. Embrace the imperfection!
- Q: Can I make these ahead of time? A: Yes! They are fantastic the next day. The flavors meld and the cheesecake filling sets up even more. Store them in the fridge.
- Q: Why did my shortbread base spread so much? A: Your butter was likely too soft, or your flour was under-measured. Make sure your butter is at a cool room temperature, not melty.
- Q: Can I use a different cheese? A: This recipe is really designed for the tangy, creamy texture of cream cheese. You could experiment with mixing in a little mascarpone for extra richness, but stick with cream cheese as the primary base.
- Q: How should I store these cookies? A: Because of the cheesecake filling, they should be stored in an airtight container in the refrigerator. They will last for up to 5 days. They are delicious served chilled or you can let them sit out for 15 minutes to take the chill off.
- Q: My cheesecake filling is grainy. Why? A: Your cream cheese was probably too cold when you mixed it. It’s crucial that the cream cheese is at room temperature to get that silky-smooth texture.
Final Thoughts: Embrace the Beautiful Burn
You’ve done it. You’ve broken the rules of baking and created something intentionally, beautifully burnt. You’ve harnessed the power of high heat to create a cookie that is complex, sophisticated, and utterly delicious. So go on, share these unique treats, and watch as your friends are amazed by your culinary bravery. Welcome to the dark side… it’s delicious here.