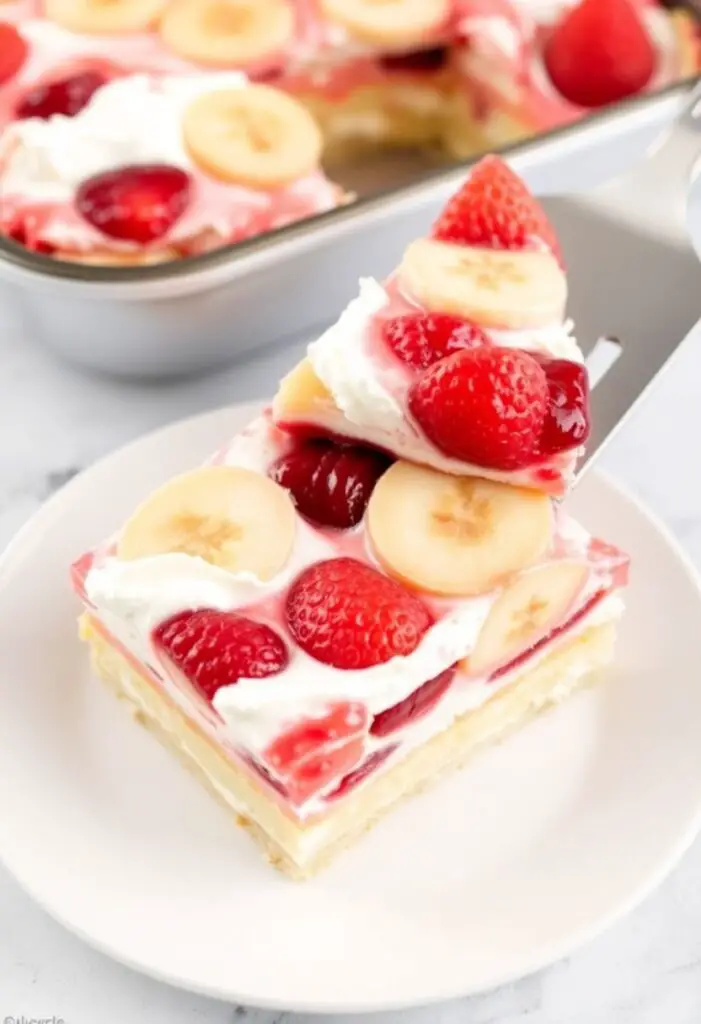
The Ultimate Banana Split Dessert (That’s a No-Bake Masterpiece!)
Remember the pure, unadulterated joy of a classic banana split? The long boat dish, the perfect scoops of vanilla, chocolate, and strawberry ice cream, the rivers of sauce, the cloud of whipped cream, and that triumphant cherry on top. It was the pinnacle of childhood indulgence. But what if you could capture that glorious, chaotic magic in an easy, no-bake, feed-a-crowd dessert? Well, hold onto your spoons, because we’re about to make a banana split dessert that transforms that nostalgic memory into a legendary layered creation. This isn’t just a dessert; it’s a party in a pan.
Why This Recipe Is Awesome (It’s a No-Bake Nostalgia Trip)
So, why are you about to fall head-over-heels for this layered marvel? Because this recipe is the definition of a showstopper that requires almost zero actual skill. It’s awesome because:
- It’s 100% NO-BAKE: That’s right. Your oven can stay off. This is a lifesaver on a hot day in Khulna, or when your oven is already working overtime for a holiday feast.
- A Symphony of Flavors & Textures: You get a buttery, crunchy crust, a cool and tangy cream cheese layer, sweet bananas and pineapple, and a fluffy whipped topping, all finished with the classic chocolate, nuts, and cherries. Every bite is an adventure.
- The Ultimate Potluck Hero: This dessert is designed to be made ahead and serves a crowd. You will be the undisputed champion of any gathering you bring this to. Prepare for recipe requests.
- It’s Pure Fun: It’s colorful, it’s nostalgic, and it’s incredibly fun to assemble. You can’t be in a bad mood when you’re making something this joyful.
This is the dessert you make when you want to bring pure, unadulterated happiness to the table.
Ingredients: Your Layers of Deliciousness
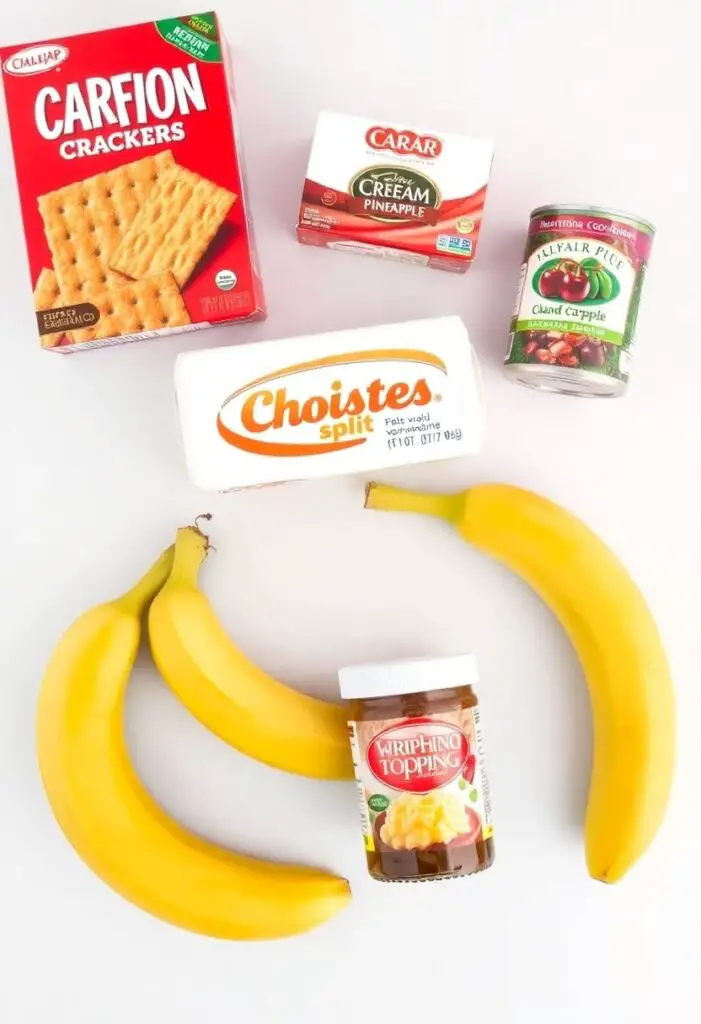
This masterpiece is built in layers, like a delicious archaeological dig.
For the Buttery Graham Cracker Crust:
- 2 cups graham cracker crumbs (about 18-20 full sheets)
- ½ cup (1 stick) unsalted butter, melted
- ¼ cup granulated sugar
For the Creamy Cheesecake Layer:
- 1 (8-ounce) block full-fat cream cheese, softened to room temperature
- 1 cup powdered sugar, sifted
- 1 (8-ounce) container whipped topping (like Cool Whip), thawed
For the Fruity Center & Grand Finale Topping:
- 3-4 medium ripe bananas, sliced
- 1 (20-ounce) can crushed pineapple, very well drained
- Another (8-ounce) container whipped topping, thawed
- For Garnish:
- Chocolate syrup
- Chopped pecans or walnuts
- Maraschino cherries, stems removed
A Very Important Note on Draining:
- When I say very well drained for the pineapple, I mean it. Press it against the sides of a sieve to get as much liquid out as possible. A watery pineapple is the enemy of a crisp crust!
Tools & Kitchen Gadgets Used: Your No-Bake Assembly Line
No oven mitts required for this mission!
- 9×13 inch Baking Dish
- Mixing Bowls (A couple of medium and one large.)
- An Electric Hand Mixer or a Stand Mixer
- Food Processor or a Ziploc bag and a rolling pin (for the crumbs)
- Offset Spatula (For those smooth, beautiful layers.)
- Fine-mesh sieve (For draining the pineapple.)
- Measuring Cups and Spoons
Step-by-Step Instructions: Building Your Banana Split Palace

This is all about the art of the layer. Let’s construct a masterpiece.
Act 1: The Foundation (The Crust)
- Prep Your Pan: Have your 9×13 inch dish ready. No need to grease it.
- Make the Crust: In a medium bowl, stir together the graham cracker crumbs, melted butter, and granulated sugar until the mixture is uniformly sandy and moist.
- Press It Down: Dump the crumb mixture into the bottom of your baking dish. Use the back of a spoon or the bottom of a measuring cup to press it firmly and evenly into a compact layer. Pop the dish in the refrigerator to chill for at least 15 minutes while you make the next layer.
Act 2: The Creamy Dream (The Cheesecake Layer)
- Whip It Good: In a large bowl, use your electric mixer to beat the softened cream cheese and sifted powdered sugar together on medium-high speed until it’s completely smooth and free of lumps.
- Fold in the Fluff: Gently fold in one 8-ounce container of thawed whipped topping with a rubber spatula until the mixture is uniform and light.
- Spread It Out: Carefully spread the cream cheese mixture evenly over your chilled crust. An offset spatula is your best friend here for a smooth, perfect layer.
Act 3: The Fruity Fiesta & The Grand Finale
- The Pineapple Layer: Spoon your very well-drained crushed pineapple over the cream cheese layer, spreading it out as evenly as you can.
- The Banana Layer: Arrange the sliced bananas in a single, even layer over the pineapple.
- The Final Cloud: Top the bananas with your second 8-ounce container of whipped topping. Spread it gently to cover the entire dessert, sealing in the fruit.
- The Classic Garnish: Now for the fun part! Drizzle the top with chocolate syrup. Sprinkle generously with chopped nuts. And finally, dot the top with maraschino cherries.
- The All-Important Chill: Cover the dish with plastic wrap and chill in the refrigerator for at least 4-6 hours, but overnight is even better. This is a non-negotiable step! It allows all the layers to set and firm up, so you can get clean, beautiful slices.
Calories & Nutritional Info (Per Square of Bliss)
Let’s just agree that this is a “special occasion” treat and not look too closely at the numbers, okay?
- Estimated Calories per square: ~400-500 calories
- Nostalgia: 1000%
Common Mistakes to Avoid: Don’t Let Your Dessert Be a Disaster!
Even no-bake desserts can go wrong. Sidestep these common issues.
- A Soggy, Weeping Crust: This is almost always caused by not draining the crushed pineapple enough. Press out that liquid like you mean it!
- Lumpy Cheesecake Layer: Your cream cheese was too cold. It must be fully softened to room temperature to beat into a smooth, creamy consistency.
- Brown, Sad Bananas: Arrange the banana layer, then immediately cover it with the whipped topping. The topping seals the bananas from the air, which helps prevent them from browning too quickly.
- Cutting It Too Soon: If you don’t let this dessert chill for at least 4 hours, you will have a soupy, sloppy mess instead of neat layers. Patience is the final ingredient.
Variations & Customizations: Your Split, Your Way
The classic is a classic for a reason, but who doesn’t love a good remix?
- The Chocolate Lover’s Split: Use a crushed Oreo cookie crust instead of graham crackers. You can also add a layer of chocolate pudding on top of the cream cheese layer for extra decadence.
- The Strawberry Shortcake Split: Use a crushed shortbread or vanilla wafer crust. Replace the pineapple with 1 pound of fresh, sliced strawberries (macerated with a little sugar, just like in our parfait recipe!).
- The Tropical Split: Use a crust made with crushed vanilla wafers and toasted coconut. Add toasted coconut and macadamia nuts to the top.
FAQ Section: All Your Banana Split Bewilderments
You have questions about this layered legend. Let’s get them answered.
- Q: Can I make this dessert ahead of time? A: Yes! It’s the perfect make-ahead dessert. It needs to be made at least 4-6 hours in advance, but it’s even better when made the day before.
- Q: How do I keep the bananas from turning brown? A: The best way is to assemble it quickly. The layer of whipped topping on top of the bananas acts as a barrier to the air, which is what causes browning. A very light toss of the banana slices in a tiny bit of lemon juice can also help, but it can affect the flavor.
- Q: Can I use fresh pineapple instead of canned? A: You can, but you need to cook it first! Fresh pineapple contains an enzyme (bromelain) that will prevent the dairy-based layers from setting properly. Sauté the chopped fresh pineapple with a little sugar for a few minutes to deactivate the enzyme, then cool it completely before using.
- Q: How long does this dessert last in the fridge? A: It’s best eaten within 2-3 days. After that, the bananas can get a bit mushy and the crust can start to soften.
- Q: Can I freeze this dessert? A: Yes, it freezes quite well! Cover it tightly and freeze for up to a month. Let it thaw in the refrigerator for a few hours before serving. The texture will be similar to an ice cream cake.
- Q: My dessert seems runny and didn’t set up properly. What went wrong? A: The most likely culprits are not draining the pineapple enough, or not chilling the dessert for the full recommended time.
- Q: Can I use homemade whipped cream instead of Cool Whip? A: You can, but you should stabilize it first. To do this, beat a teaspoon of cornstarch or unflavored gelatin into your powdered sugar before adding it to the whipping cream. This will help it hold its shape for a couple of days without weeping.
Final Thoughts: Grab a Fork and Dive In!
You’ve done it. You have successfully captured the pure joy of a banana split and transformed it into an easy, crowd-pleasing, no-bake masterpiece. You are now the official hero of the potluck, the champion of the dessert table. So go on, grab a fork, scoop a giant square onto your plate, and get ready for a delicious trip down memory lane. No long, boat-shaped dish required.