The Ultimate 19th Birthday Cake That’s Cooler Than You Are
So, you’re turning 19. Welcome to the final boss battle of your teenage years. You’re on the cusp of real adulthood, but you still get asked if you’re a student at the movie theater (and you definitely still use that discount). This age demands a cake that gets it. You need a birthday cake 19-year-olds will actually post on their story, not some boring floral thing your aunt would pick out.
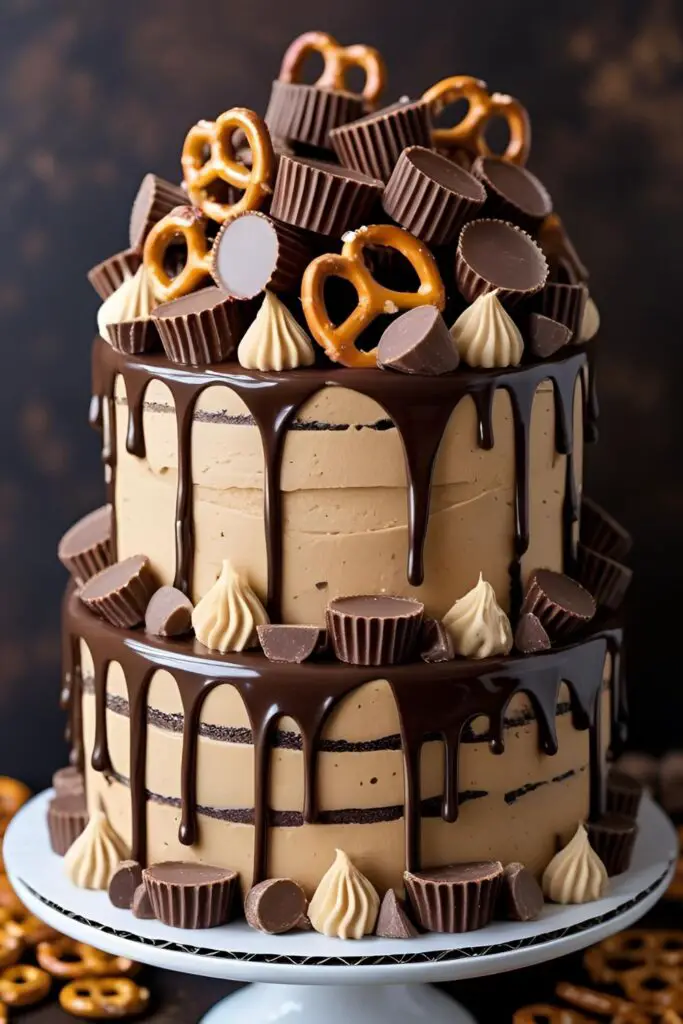
Forget basic vanilla. Forget anything that could be described as “quaint.” We’re making a towering, ridiculously indulgent Chocolate Peanut Butter Drip Cake. It’s loud, it’s a little extra, and it’s the most delicious thing you’ll eat all year. This is the cake that says, “I’m legally an adult, but I’m still here for a good time.”
Why This Cake is an Absolute Vibe
Let’s be real, at 19, the party is all about the aesthetic. This cake is your centerpiece. It’s a showstopper. The rich chocolate cake, the creamy peanut butter frosting, the glossy chocolate drip, and the mountain of candy on top? It’s an Instagram dream come true. Your friends will lose their minds.
But it’s not just a pretty face. This cake is shockingly easy to make (we’ve got a secret shortcut), and the flavor combination is legendary. It’s the perfect balance of sweet, salty, rich, and creamy. It’s the kind of cake people talk about for weeks. TBH, it might just be the best thing about turning 19.
The Shopping List for Your Epic Cake
We’re breaking this down so you don’t get overwhelmed. This isn’t just a recipe; it’s a construction project for deliciousness.
For the (Secretly Easy) Chocolate Cake:
- A Box of Devil’s Food Cake Mix: Yes, you read that right. We’re elevating a box mix. It’s the ultimate life hack.
- Eggs: Whatever the box says (usually 3).
- Vegetable Oil: Whatever the box says (usually 1/2 cup).
- Buttermilk: 1 cup. Replace the water on the box directions with this. It makes the cake incredibly moist and rich.
- Instant Espresso Powder: 1 teaspoon. You won’t taste coffee, it just makes the chocolate taste more chocolatey. It’s magic.
For the Dreamy Peanut Butter Buttercream:
- Unsalted Butter: 121 cups (340g), softened to room temperature. This is crucial.
- Creamy Peanut Butter: 1 cup (260g). Use the standard stuff like Jif or Skippy, not the natural, oily kind.
- Powdered Sugar: 4 cups (500g), sifted.
- Heavy Cream: 1/4 cup (60ml), plus more if needed.
- Vanilla Extract: 1 tablespoon.
- Pinch of Salt.
For the Perfect Chocolate Drip:
- Semi-Sweet Chocolate Chips: 1 cup (180g).
- Heavy Cream: 1/2 cup (120ml).
For the Over-the-Top Decorations:
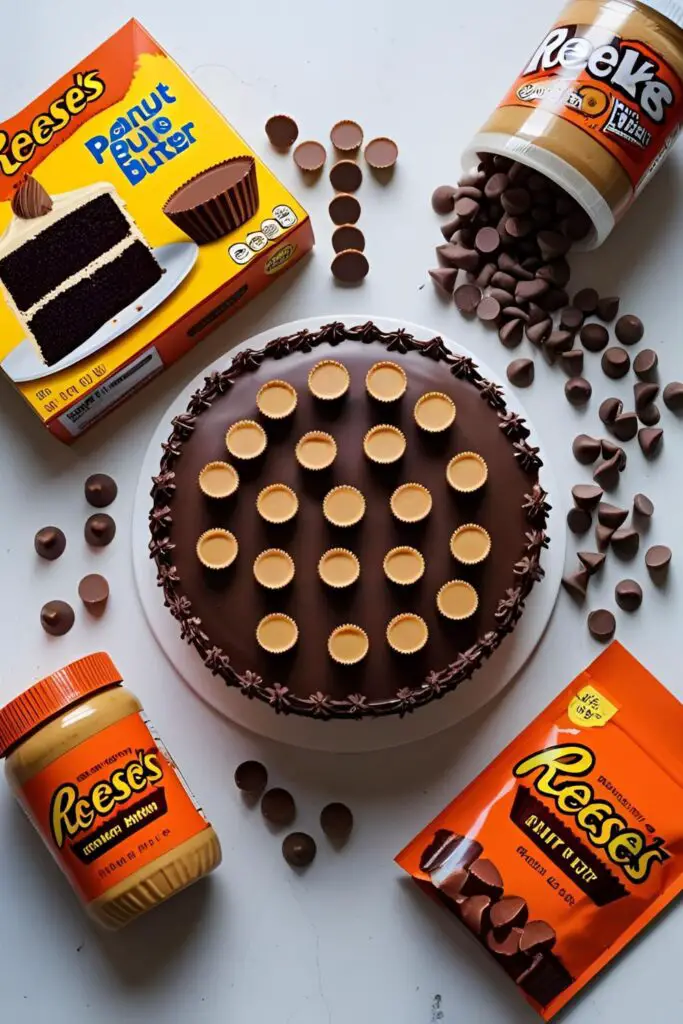
- Reese’s Peanut Butter Cups: A mix of full-size and minis.
- Reese’s Pieces, Pretzels, Popcorn, Chocolate Bars…whatever your heart desires. This is your moment.
Your Baker’s Toolkit
To build this masterpiece, you’ll need a few key pieces of equipment. Having the right tools is half the battle.
- Electric Mixer (Stand or Handheld): You are not creaming butter and sugar by hand. We’re not living in the 1800s.
- Three 8-inch Round Cake Pans: Three layers gives you that impressive height.
- Parchment Paper: For lining the pans. Trust me, you do not want your cake to stick.
- Offset Spatula & Bench Scraper: The secret weapons for getting that smooth, professional frosting finish.
- Cake Turntable: Seriously, this makes frosting the cake about a million times easier. It’s a game-changer.
- Piping Bag & a Large Star Tip (like a 1M): For those perfect swirls on top.
- Squeeze Bottle: Optional, but it makes applying the drip so much cleaner and more controlled.
Let’s Build This Thing: Step-by-Step

Alright, put on your favorite playlist and let’s get messy. This is going to be fun.
Step 1: Bake the “Box-Hack” Cake
Preheat your oven to 350°F(175°C). Grease and flour your three 8-inch cake pans and line the bottoms with parchment paper.
In a large bowl, combine the cake mix, eggs, oil, buttermilk, and espresso powder. Mix according to the package directions, but use the buttermilk instead of water. Don’t overmix! Just combine until the lumps are gone.
Pour the batter evenly into your three prepared pans. Bake for the time specified on the box, or until a toothpick inserted into the center comes out clean. Let the cakes cool in the pans for 10 minutes, then turn them out onto a wire rack to cool completely. And I mean completely.
Step 2: Whip Up the Peanut Butter Frosting
In a large bowl with your electric mixer, beat the softened butter on medium-high speed for about 3-4 minutes until it’s light and fluffy. Add the creamy peanut butter and beat for another 2 minutes until fully combined and airy.
Turn the mixer to low and slowly add the sifted powdered sugar. Once it’s mostly mixed in, add the vanilla, salt, and heavy cream. Crank the speed up to medium-high and beat for a full 5 minutes. The frosting should be incredibly light, fluffy, and smooth.
Step 3: Stack It Up & Crumb Coat

Place your first cake layer on the turntable or your serving platter. Top it with a heaping cup of peanut butter frosting and spread it into an even layer. Repeat with the second cake layer. Place the third layer on top.
Now, cover the entire cake—top and sides—with a thin layer of frosting. This is the crumb coat. It will look messy and full of crumbs. That’s its job! It traps the crumbs so your final layer is perfect. Use your bench scraper to get it relatively smooth.
Chill the cake in the fridge for at least 30 minutes. Do not skip this. This firms everything up.
Step 4: The Final Coat
Once your crumb coat is chilled and firm, apply a thick, generous layer of frosting all over the cake. Use your offset spatula and bench scraper to smooth the sides and top until you have a finish you’re happy with. It doesn’t have to be perfect! A rustic look is cool too. Pop the cake back in the fridge to chill while you make the drip.
Step 5: Make it Drip
Place your chocolate chips in a heatproof bowl. Heat the heavy cream in the microwave or on the stovetop until it’s steaming but not boiling. Pour the hot cream over the chocolate chips and let it sit, untouched, for 5 minutes.
After 5 minutes, whisk the mixture slowly until it’s a completely smooth, glossy ganache. Now, let it cool at room temperature for 15-20 minutes. It should be slightly warm, but not hot. If it’s too hot, it will melt your frosting. Test a drip on the side of a cold glass to check the consistency.

Carefully pour or spoon the ganache onto the top edge of your chilled cake, using the back of a spoon or a squeeze bottle to gently push it over the edge to create drips. Once the drips are done, pour the rest on top and spread it out.
Step 6: Go Absolutely Wild
This is your moment. Before the drip fully sets, start piling on your decorations. Create a mountain of Reese’s cups, stick pretzels in at jaunty angles, sprinkle on some Reese’s Pieces. There are no rules. More is more.
The Nutritional Reality Check
Look, it’s a birthday cake. We’re not here for a salad.
- Serving Size: 1 “responsible” slice (or 1 “it’s my birthday” chunk)
- Estimated Calories: ~700 kcal
- Peanut Butter & Chocolate Content: A soul-satisfying amount.
- Vitamins: The vitamin of pure, unadulterated joy.
- Note: Calories don’t count on your birthday. This is a known scientific fact.
Common 19th Birthday Mistakes (In Cake Form)
- Frosting a Warm Cake: You will create a chocolate-peanut-butter landslide. It will be tragic. The Fix: Patience, my friend. Your cake layers must be 100% cool.
- Skipping the Crumb Coat & Chill: You’ll have a lumpy, crumb-filled final coat of frosting that will make you sad. The Fix: Just do the crumb coat and chill the cake. It’s the boring but essential foundation of a great cake.
- A Disastrous Drip: Your ganache was too hot and melted everything, or too cold and seized into a blob. The Fix: Let the ganache cool to lukewarm. The “test drip” on a cold glass is your best friend.
- Forgetting to Use Buttermilk: Your cake will be fine, but it won’t be amazing. The Fix: Don’t skip the buttermilk! It’s the easiest way to make a box mix taste like it came from a fancy bakery.
Level Up: Fun Variations
If peanut butter isn’t your jam, try one of these equally epic variations.
- The Cookies & Cream Overload: Use a white or vanilla cake mix. Make a vanilla buttercream and crush a whole sleeve of Oreos into it. Drip with white chocolate ganache and top with a mountain of Oreos.
- The Nutella & Pretzel Explosion: Use a chocolate cake base. Make a Nutella buttercream by swapping the peanut butter for Nutella. Drip with chocolate ganache and top with pretzels, Ferrero Rocher, and a drizzle of Nutella.
- The Salted Caramel Biscoff Dream: Use a vanilla or butter-flavored cake mix. Make a salted caramel buttercream. Fill the layers with Biscoff cookie butter. Drip with salted caramel and top with Biscoff cookies and caramel popcorn.
Your Burning Questions, Answered
Do I have to make it a drip cake?
Nope! If the drip scares you, just frost the cake and use a piping bag with a star tip to make pretty swirls around the top edge. Then pile your candy in the middle. It will still look awesome.
Can I make this cake without peanut butter due to an allergy?
Absolutely. Make the chocolate cake as directed. For the frosting, you can make a simple chocolate buttercream or a vanilla one. For toppings, use your favorite peanut-free chocolates and candies.
How far in advance can I make this 19th birthday cake?
You can bake the cake layers up to two days ahead. Cool, wrap tightly in plastic, and store at room temp. You can fully assemble and decorate the cake the day before the party. Just keep it in the fridge.
Help! My drip is too thick/thin!
Easy fix! If it’s too thick, whisk in a tiny bit more warm cream (a teaspoon at a time) until it’s the right consistency. If it’s too thin, let it cool for longer, or add a few more chocolate chips and whisk until smooth.
What’s the best way to store leftovers?
Assuming there are leftovers (unlikely), store the cake in an airtight container in the fridge for up to 4 days. Let a slice sit out for 20 minutes before eating to let the frosting soften up.
Can I use two 9-inch pans instead of three 8-inch pans?
You can, but you’ll have two thicker layers instead of three thinner ones. You’ll also need to adjust the baking time—start checking for doneness after about 30 minutes.
Why do I need to use buttermilk?
Buttermilk is acidic, which helps to break down the gluten in the flour, resulting in a more tender, moist cake. It also adds a very subtle, pleasant tang that balances the sweetness. It’s a simple upgrade that makes a huge difference.
Final Thoughts
There you have it—a cake that’s worthy of your last year as a teenager. It’s fun, it’s decadent, and it’s guaranteed to be the star of the show (besides you, of course).
So go on, bake your heart out. Make a glorious mess. Celebrate the awesome, chaotic, wonderful person you are at 19. Happy Birthday!