The Last Chocolate Chip Cookie Recipe You’ll Ever Need
Let’s be real, the world doesn’t need another recipe for chocolate chip cookies. A quick search will give you approximately 47 million results, each claiming to be “the best.” It’s exhausting. What the world needs is the right one. The one that ends the eternal quest. The one that delivers on the promise of a perfect cookie: crispy, golden edges that give way to a soft, chewy, buttery center, studded with glorious pools of melty chocolate.
Forget the cookies that spread into sad, greasy wafers. Banish the ones that are dry and cakey. Today, we’re making THE cookie. The one that will make your friends and family look at you with a newfound respect, wondering if you secretly attended a pastry school in Paris while they were sleeping. This isn’t just a recipe; it’s the end of your search. Even if it’s a sweltering August night in Khulna, turning on the oven for these is 100% worth it.
Why This Recipe Ends the Great Cookie Debate
So what makes this specific combination of flour, butter, and sugar so darn special? What makes it “The One”?
First, the texture is absolute perfection. We are talking about the holy grail of cookie textures. The edges have a delicate, buttery crispness, but the center is profoundly soft and chewy. It’s a textural masterpiece that will have you contemplating the very meaning of life with each bite.
Second, the flavor is deep and complex. Thanks to a higher ratio of brown sugar and a little secret ingredient (an extra egg yolk!), these cookies have a rich, caramel-like, toffee-esque flavor that standard recipes just can’t touch. This isn’t just sweet; it’s deeply flavorful.
Finally, we’re creating epic chocolate pools, not just chips. By using a chopped chocolate bar instead of standard chips, you get those incredible, Instagram-worthy puddles of gooey, melted chocolate throughout the cookie. It’s a small change that makes a world of difference.
The A-List Ingredient Lineup
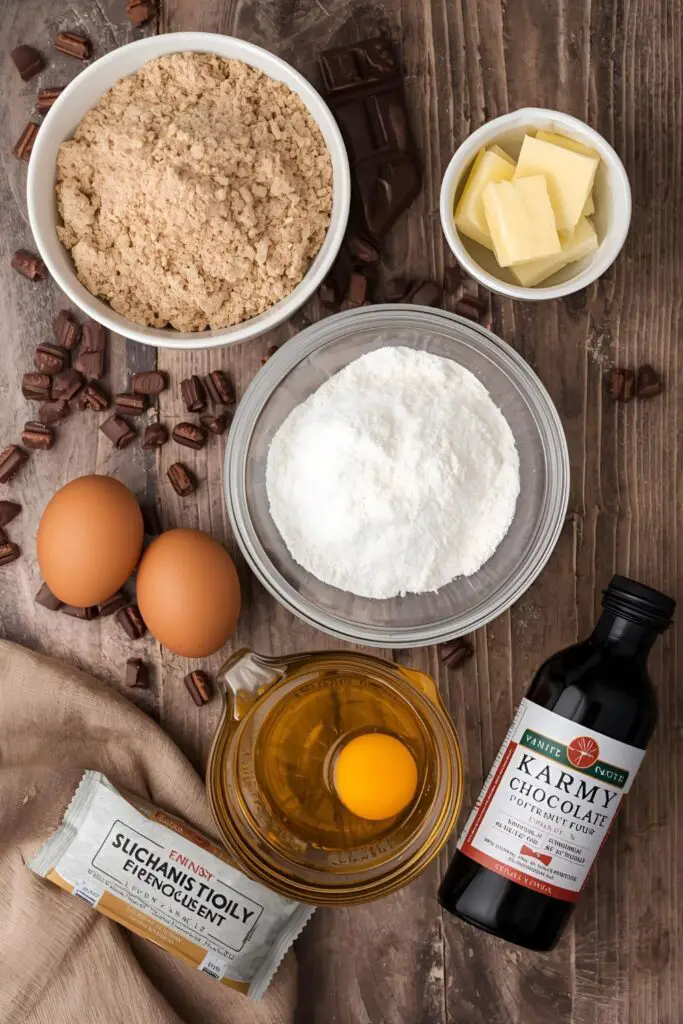

To achieve cookie nirvana, you need the right players on your team. Quality matters! This recipe makes about 2 dozen cookies.
- 1 cup (2 sticks) Unsalted Butter, melted: Yes, melted. This is a key secret to a chewier cookie.
- 1 cup Packed Light Brown Sugar: The MVP for moisture and chew.
- ½ cup Granulated Sugar: For sweetness and those crispy edges.
- 1 Large Egg + 1 Large Egg Yolk: The extra yolk is our secret weapon for richness and an ultra-chewy texture.
- 2 teaspoons Vanilla Extract: Use the good stuff. Seriously.
- 2 ¼ cups All-Purpose Flour:
- 1 teaspoon Baking Soda: For the right amount of lift.
- ½ teaspoon Salt: To balance the sweetness and make the flavors pop.
- 1 ½ cups Semi-Sweet Chocolate, chopped: Use a good quality chocolate bar or chocolate chunks/discs. This is the secret to getting those melty pools!
- Flaky Sea Salt, for sprinkling (optional, but not really):
Your Cookie-Making Arsenal
You don’t need a professional bakery, but these tools will make your quest for the perfect cookie much, much easier.
- Electric Mixer (Stand Mixer or Hand Mixer): While you can mix by hand, an electric mixer helps ensure everything is well combined.
- Mixing Bowls: At least one large one for the dough and a smaller one for the dry ingredients.
- Whisk & Rubber Spatula: Essential for combining ingredients and scraping the bowl.
- Measuring Cups and Spoons: Baking is a science! Be precise.
- Baking Sheets: Two is ideal so you can rotate them.
- Parchment Paper or Silicone Baking Mats: For a non-stick surface and easy cleanup. This is a must.
- A Cookie Scoop (about 1.5 – 2 tablespoons): The key to getting perfectly uniform, evenly baked cookies.
The Path to Cookie Perfection: Step-by-Step
Ready to change your life? Let’s bake the best cookies ever.
Step 1: Combine the Wet Stuff
In a large bowl, whisk together the melted butter, brown sugar, and granulated sugar until well combined. The mixture will look like wet sand. Add the egg, egg yolk, and vanilla extract and whisk vigorously for about a minute until the mixture is smooth and glossy.
Step 2: Combine the Dry Stuff
In a separate, medium bowl, whisk together the flour, baking soda, and salt. This ensures that the leavening and salt are evenly distributed, which is key for a consistent cookie.
Step 3: Mix It All Together
Pour the dry ingredients into the wet ingredients. Using your mixer on low speed or a rubber spatula, mix until just combined. Do not overmix! The moment you no longer see streaks of flour, stop mixing. Overmixing will make your cookies tough.
Step 4: Fold in the Chocolate

Gently fold in your glorious chopped chocolate chunks.
Step 5: THE MOST IMPORTANT STEP – CHILL YOUR DOUGH!
I know, I know. You want cookies now. But this step is the difference between perfect cookies and sad, flat, greasy discs. Cover the bowl with plastic wrap and chill the dough in the refrigerator for at least 30 minutes. For truly superior flavor and texture, chill it for 24 to 72 hours. Chilling solidifies the fat (preventing spreading) and allows the flavors to deepen. This is not a suggestion; it is a command.
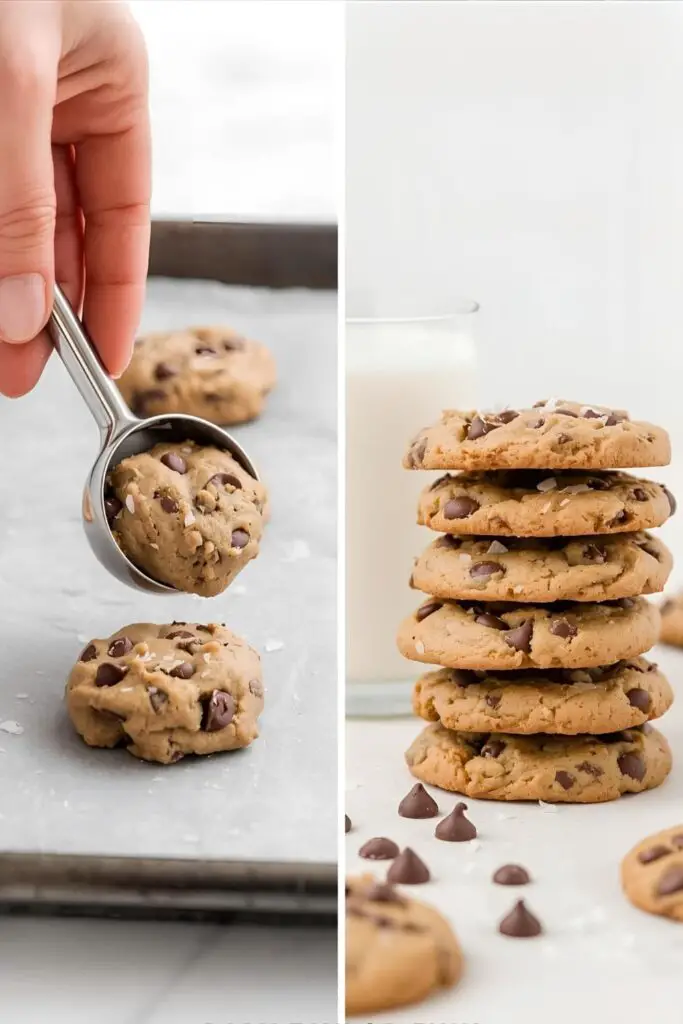
Step 6: Scoop and Bake
When you’re ready to bake, preheat your oven to 375°F (190°C). Line your baking sheets with parchment paper.
Use your cookie scoop to form balls of the chilled dough and place them about 2-3 inches apart on the prepared baking sheets. Sprinkle the tops with a little bit of flaky sea salt.
Step 7: The Bake
Bake for 10-12 minutes. The edges should be golden brown, but the centers should still look slightly soft and underdone. This is the secret to a chewy center.
Step 8: The Pro-Move (Optional but Awesome)
As soon as you pull the cookies from the oven, take a round cookie cutter that’s slightly larger than the cookie and “scoot” it around the edges of the hot cookie. This will nudge it into a perfectly round shape. It’s a simple trick that makes them look super professional.
Step 9: Cool Down
Let the cookies cool on the baking sheet for 5-10 minutes. This allows them to set up before you try to move them. After they’ve firmed up a bit, transfer them to a wire rack to cool completely. Or, you know, eat one while it’s still warm and gooey. You deserve it.
Calories & Nutritional Info
This is a buttery, sugary, chocolate-filled cookie. It is a treat. Let’s not pretend it’s a health food. Here is a rough estimate for one cookie, assuming the recipe makes about 24.
- Calories: Approximately 200-240 kcal
- Fat: Around 10-14g
- Carbohydrates: Roughly 25-30g
- Protein: About 2-3g
- Note: The joy derived from eating a perfect, warm chocolate chip cookie has been scientifically proven to have zero calories. (This is not true, but it should be.)
Common Mistakes to Avoid (Cookie Crimes)
- Skipping the Chill Time: I will die on this hill. If you don’t chill your dough, the melted butter will cause your cookies to spread into thin, sad pancakes. Chill your dough.
- Overmixing After Adding Flour: As soon as the flour goes in, your goal is to mix as little as possible. Overmixing develops gluten, which leads to tough, bready cookies.
- Using Softened Butter Instead of Melted: This recipe is specifically formulated for the chewiness that melted butter provides. Using softened butter will change the texture, making it cakier.
- Overbaking: The key to a chewy cookie is to pull it from the oven when it still looks a little gooey in the center. It will continue to bake on the hot pan.
- Using Standard Chocolate Chips: They’re fine. But if you want those amazing, melty pools of chocolate, use a chopped chocolate bar or chocolate discs. It’s a small upgrade with a massive payoff.
Variations & Customizations
Once you’ve mastered the perfect base, you can get creative!
- Brown Butter Chocolate Chip Cookies: Before you begin, brown the butter in a saucepan until it smells nutty and has little brown bits. Let it cool slightly before using. This one simple step will add an incredible depth of toffee and caramel flavor.
- The “Kitchen Sink” Cookie: Go wild! Fold in a ½ cup each of chopped pecans or walnuts, old-fashioned oats, and toffee bits along with your chocolate chunks.
- Espresso Chocolate Chunk Cookies: Dissolve 2 teaspoons of instant espresso powder in the melted butter before you mix it with the sugars. This will intensify the chocolate flavor without making the cookies taste like coffee.
Frequently Asked Questions (Your Cookie Curiosities)
1. Why did my cookies spread so much and get flat? The number one reason is that your dough wasn’t cold enough. Other culprits can be using too much butter or not enough flour. Chilling the dough is your best defense!
2. What makes a cookie chewy versus crispy? Chewy cookies typically have a higher moisture content, which is achieved by using more brown sugar, melted butter, and an extra egg yolk, and slightly underbaking them. Crispy cookies often use more white sugar and are baked a bit longer.
3. Can I make the cookie dough ahead of time? Yes, and you should! The flavor actually gets better the longer it chills. You can keep the dough in the refrigerator for up to 72 hours before baking.
4. What’s the best kind of chocolate to use? A good quality semi-sweet chocolate bar (around 60-70% cacao) that you chop yourself will give you the best mix of small shards and big melty puddles.
5. Why do you add flaky sea salt on top? That little sprinkle of salt on top provides a fantastic contrast to the sweetness of the cookie and makes the chocolate flavor pop. It’s a simple touch that makes the cookie taste more complex and “gourmet.”
6. Do I really need an extra egg yolk? You don’t have to, but the extra fat and emulsifiers in the yolk are a secret weapon for creating a richer, chewier cookie. Try it once, and you’ll be a convert.
7. Can I freeze the cookie dough? Absolutely! Scoop the chilled dough into balls, place them on a baking sheet, and freeze until solid. Then transfer them to a freezer bag. You can bake them straight from frozen; just add 1-2 minutes to the baking time.
Final Thoughts
Congratulations! You are now the keeper of The Recipe. The one that ends the endless search. The one that will make you a legend among your friends and family. You have the power to create cookie perfection on demand. Wield it wisely.
Now go forth and bake. Fill your home with that incredible, soul-warming smell. And when you take that first bite of a warm, gooey, perfectly chewy and crispy chocolate chip cookie, you’ll know. You’ll never need another recipe again.