The Best Sugar Cookie Frosting Recipe (That’s Not a Sad, Crusty Glaze)
Let’s talk about a culinary tragedy that unfolds in kitchens across the world: the naked sugar cookie. It’s a perfectly good, buttery cookie, but it’s missing its soulmate, its better half, its gloriously sweet and fluffy crown. Even worse is the sad, thin glaze that cracks and flakes off, or that stuff from a can that tastes vaguely of plastic. Your cookies deserve better. You deserve better. Today, we’re whipping up the ultimate sugar cookie frosting recipe—a creamy, dreamy buttercream so good, you’ll want to eat it with a spoon (and you absolutely should).
Why This Recipe Is Awesome (It’s Basically Edible Clouds)
So, why is this the only frosting recipe you’ll ever need for your soft sugar cookies and bars? Because it’s perfectly balanced. We’re talking rich, buttery, and sweet without being one-note or tooth-achingly sugary. It’s incredibly light and fluffy, with a creamy, melt-in-your-mouth texture that complements a soft cookie instead of competing with it.
This recipe is also ridiculously easy and fast. If you have five minutes and an electric mixer, you can make this frosting. It’s a blank canvas, ready to be transformed with any color or flavor you can imagine. This isn’t the hard, crackly royal icing for fancy, detailed piping. This is the good stuff—the generous, swoopy, sprinkle-covered frosting that signals pure, unadulterated joy.
Ingredients: Your 5-Ingredient Path to Perfection
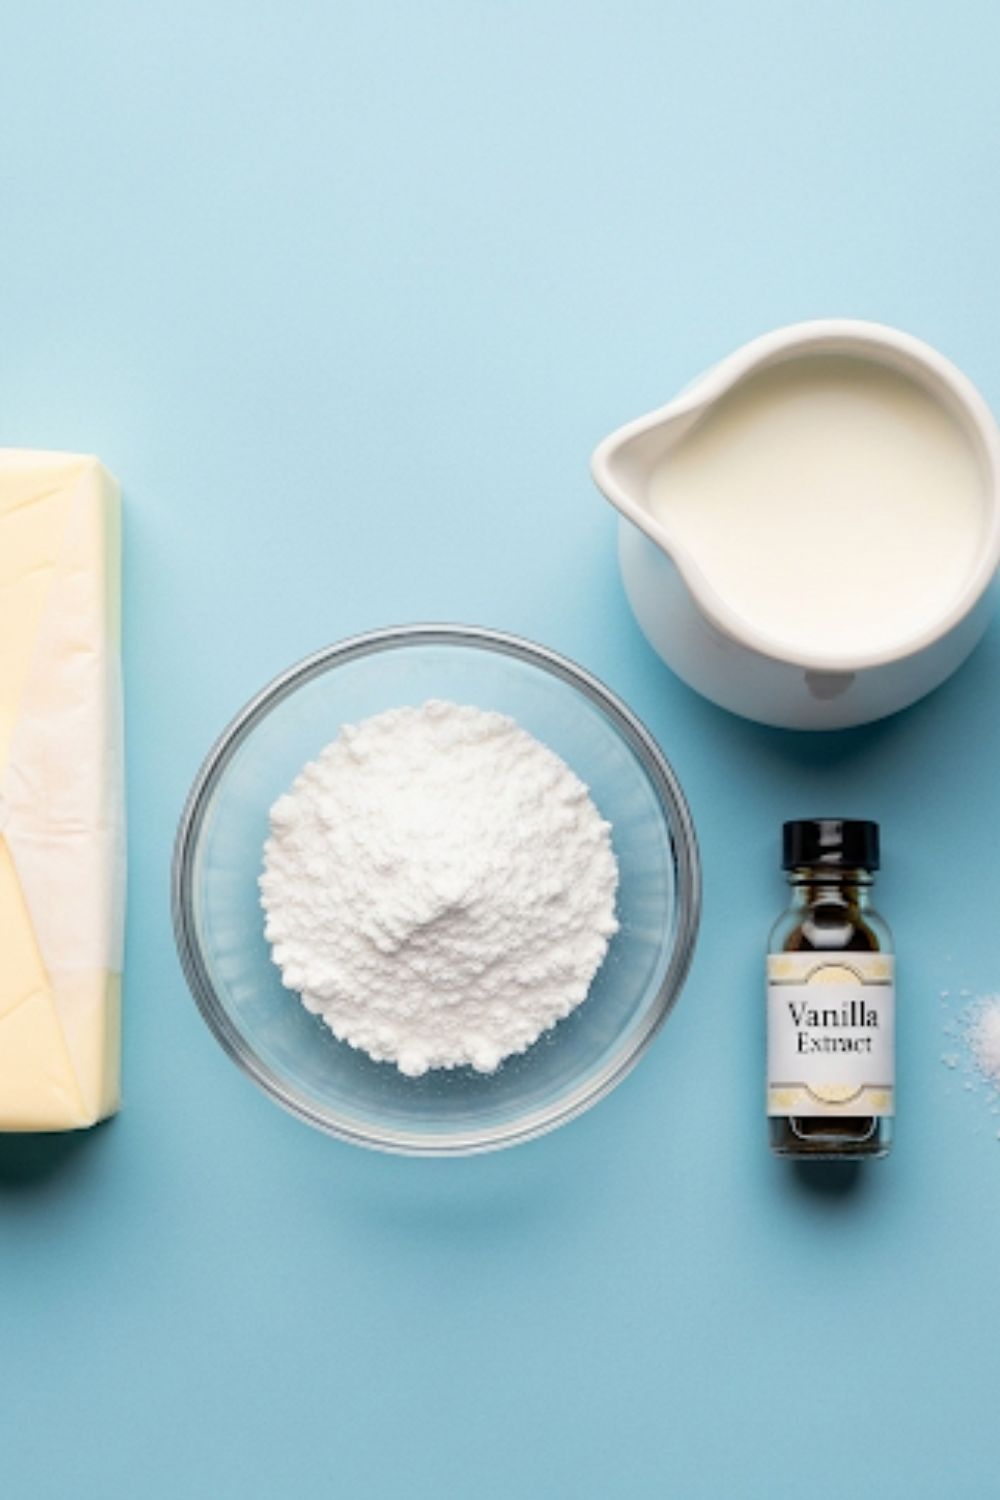
Simplicity is the soul of this recipe. You just need a few key players.
- 1 cup (2 sticks) unsalted butter, softened to room temperature
- 3-4 cups powdered sugar, sifted
- ¼ cup milk or heavy cream, at room temperature
- 1 teaspoon vanilla extract
- ½ teaspoon almond extract (Optional, but this is the secret to that “bakery” flavor!)
- A pinch of salt (Crucial for balancing the sweetness!)
A Very Important Note on Your Ingredients:
- Softened Butter: Your butter must be softened to room temperature, not cold and not melted. It should give slightly when you press it. This is the key to a creamy, non-greasy frosting.
- Sifted Powdered Sugar: Yes, you really should sift it. It’s an annoying extra step, I know, but it’s the only way to guarantee a silky-smooth, non-gritty frosting.
Tools & Kitchen Gadgets Used: Your Frosting Arsenal
To achieve maximum fluffiness, a little bit of power is required.
- An Electric Hand Mixer or a Stand Mixer with the Paddle Attachment (This is non-negotiable for a light, whipped texture.)
- Large Mixing Bowl
- Sifter or Fine-Mesh Sieve (For the powdered sugar.)
- Rubber Spatula
- Measuring Cups and Spoons
- Offset Spatula (For beautifully swooping the frosting onto your cookies.)
Step-by-Step Instructions: Whipping Up Some Magic

This is so easy, you’ll laugh at the thought of ever buying canned frosting again.
- Whip the Butter: In your large mixing bowl, beat the softened butter with your electric mixer on medium-high speed for a full 2-3 minutes. It should become very pale, light, and fluffy. Don’t skimp on this step; this is where you build the foundation for a light frosting.
- Add the Sugar (Gradually!): Turn the mixer down to low. Add the sifted powdered sugar, one cup at a time, mixing until just incorporated before adding the next. Start with 3 cups.
- Get It Creamy: Once the sugar is mostly mixed in, turn the mixer up to medium-high. Add the vanilla extract, almond extract (if using), and the pinch of salt. Pour in 3 tablespoons of the milk or cream.
- The Final Whip: Beat the frosting on high speed for another 2-3 minutes until it is incredibly light, fluffy, and smooth. Scrape down the sides of the bowl as needed.
- Check Your Consistency: At this point, check the texture. If it’s too stiff, add the remaining tablespoon of milk and beat again. If it’s too thin (unlikely, but possible), add another ½ cup of powdered sugar.
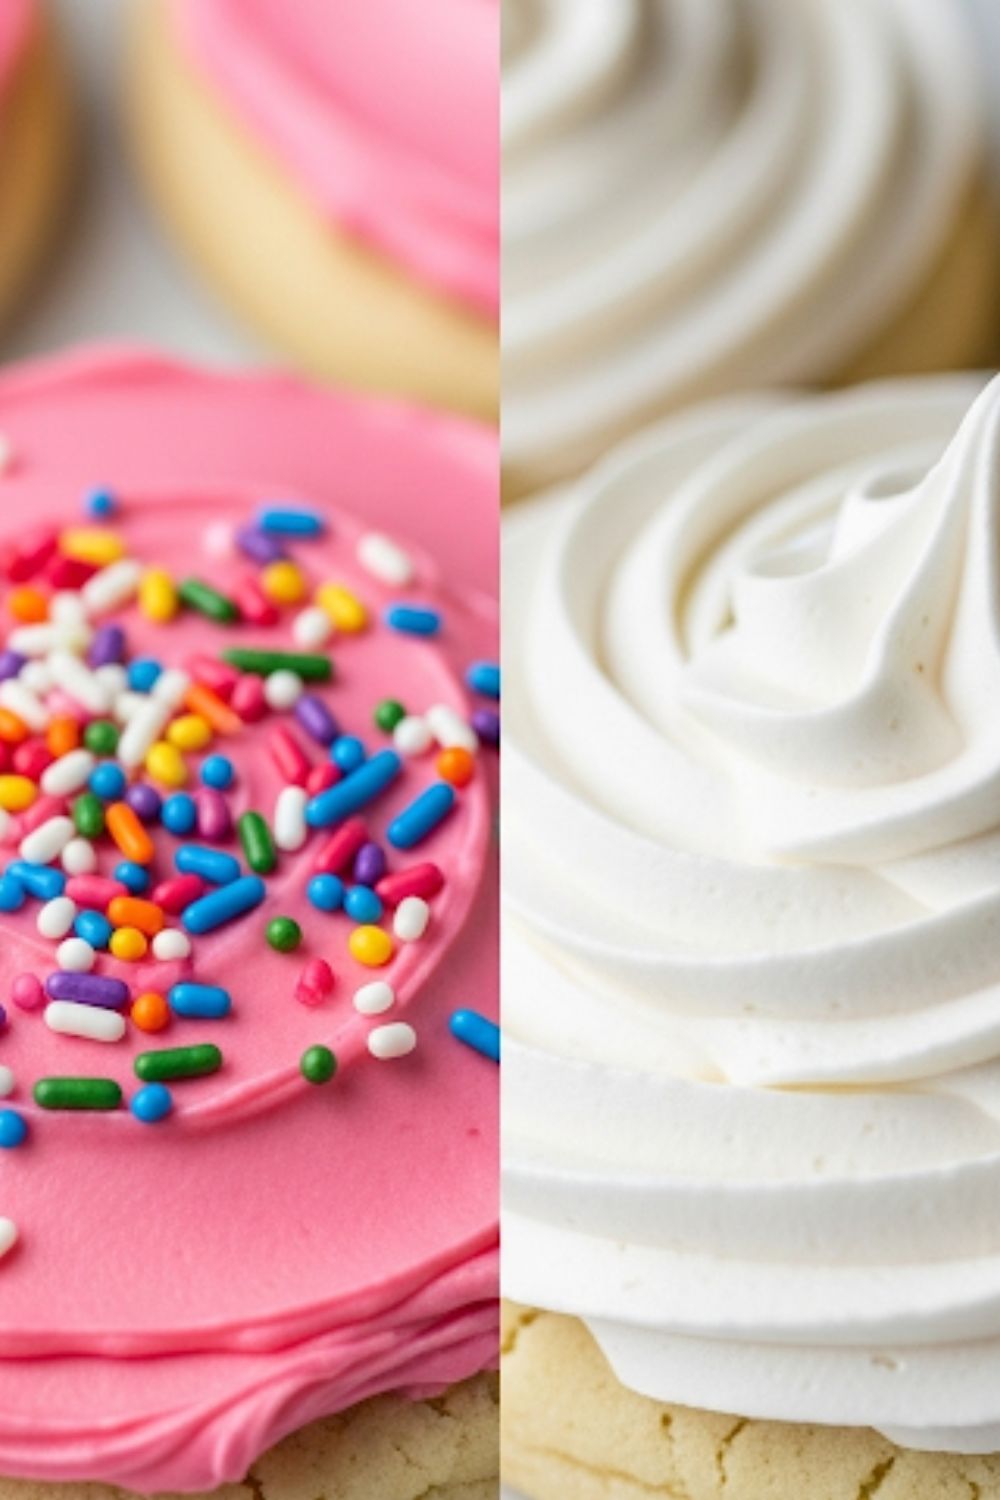
- Color and Conquer: If you’re coloring your frosting, use gel food coloring for the most vibrant results without thinning it out. Add a tiny drop at a time and mix until you reach your desired shade. Now go forth and frost with abandon!
Calories & Nutritional Info (Per 2-Tablespoon Serving)
Let’s be real. It’s butter and sugar. The nutritional value is pure happiness.
- Estimated Calories per serving: ~150-180 calories
- Fat: ~9g
- Carbohydrates: ~18g
- Sugar: Most of it.
- Recommended Daily Joy: 100%
Common Mistakes to Avoid: Don’t Let Your Frosting Flop!
Avoid these simple slip-ups for foolproof frosting every time.
- Using Cold or Melted Butter: Cold butter won’t whip up properly and will leave you with lumps. Melted butter will result in a greasy, soupy mess that will never get fluffy. Softened, room temperature butter is the only way.
- Not Sifting the Powdered Sugar: If you skip this, you’re almost guaranteed to have a gritty, lumpy frosting. Take the extra 30 seconds and sift it. You’ll be glad you did.
- Adding Too Much Liquid at Once: If you dump all the milk in at the beginning, you risk making your frosting too thin. Add it gradually until you reach the perfect, spreadable consistency.
- Under-Whipping: The magic of this frosting is in the whipping. Whipping the butter first and then whipping the final frosting for a few minutes incorporates air and makes it incredibly light and fluffy.
Variations & Customizations: Your Frosting, Your Universe
This recipe is your playground. Let your imagination run wild!
- Classic Cream Cheese Frosting: For a tangier vibe, replace half of the butter (1 stick) with 8 ounces of softened, full-fat, block-style cream cheese. Beat the butter and cream cheese together until smooth before adding the sugar.
- The Flavor Emporium: The world is your oyster!
- Lemon: Replace the almond extract with 1 teaspoon of lemon zest and use lemon juice instead of milk.
- Chocolate: Sift in ½ cup of unsweetened cocoa powder with the powdered sugar.
- Strawberry: Add 2-3 tablespoons of finely crushed freeze-dried strawberries for intense flavor and natural color.
- Peppermint: Replace the almond extract with ½ teaspoon of peppermint extract for a perfect holiday treat.
- Coloring Like a Pro: For the best results, always use gel food coloring. It’s super concentrated, so you only need a tiny drop. For beautiful pastel shades, dip a toothpick in the gel, swirl it into your frosting, and then mix.
FAQ Section: All Your Frosting Frustrations, Answered
You have questions about this bowl of fluffy goodness. Let’s get them answered.
- Q: My frosting is way too sweet! How can I fix it? A: The pinch of salt is your first line of defense! You can also add a tiny splash of lemon juice to cut the sweetness without adding a strong lemon flavor. Using high-quality unsalted butter also helps.
- Q: Why is my frosting gritty? A: You didn’t sift your powdered sugar, or you didn’t beat it long enough for the sugar to fully dissolve into the butter. Sift, then whip it good!
- Q: Can I make this frosting ahead of time? A: Yes! You can store it in an airtight container in the refrigerator for up to a week, or in the freezer for up to 3 months.
- Q: How do I store and re-whip leftover frosting? A: Let chilled frosting come back to room temperature on the counter for an hour or so. Then, give it a quick whip with your electric mixer to bring it back to its original fluffy glory.
- Q: Why did my frosting break or look curdled? A: This usually happens if your butter was too warm or if you added liquid that was a very different temperature. Make sure all your ingredients are at a similar room temperature.
- Q: Can I use this frosting for piping decorations? A: Yes! This recipe is great for simple piping like stars, rosettes, and borders. If you need it to be stiffer for more detailed work, just add a little more powdered sugar until you reach the desired consistency.
- Q: Is this the same as royal icing? A: No, and it’s an important distinction! This is a soft, fluffy, butter-based frosting. Royal icing is made with meringue powder or egg whites and dries hard, which is ideal for intricate, detailed cookie art. This frosting stays soft.
Final Thoughts: Go On, Your Cookies Are Begging for It
You are now the master of a frosting recipe so simple and so delicious, you’ll never be tempted by that sad can in the baking aisle again. You have the power to transform any cookie, cupcake, or even a humble graham cracker into a work of art. So go forth, get your mixer, and whip up a batch of this edible magic. Your naked cookies will thank you.