Get Ready to Rumble: This Strawberry Earthquake Cake Is a Delicious Disaster
Alright, let’s talk about cakes that refuse to follow the rules. You know, the ones that aren’t perfectly smooth or flawlessly frosted? The ones that are a little… chaotic? Well, prepare to meet the king of beautiful disasters: the strawberry earthquake cake. It’s a glorious, gooey, and utterly decadent mess of a dessert, and I promise, it’s the most delicious seismic event you’ll ever experience. Forget neat layers and perfect piping. This cake is all about the cracks, crevices, and craters of creamy, fruity goodness.
Why This Cake Is a Delicious Force of Nature
So, what’s the big deal with a cake that looks like it’s been through a natural disaster? For starters, it’s insanely easy to make. We’re talking a box of cake mix and a handful of other ingredients. No fancy techniques, no complicated steps. It’s a “dump, swirl, and bake” kind of situation, which is perfect for when you want a showstopper without the stress.
But the real magic is in the texture and flavor. You have a moist, fluffy strawberry cake base, and then these incredible tunnels and craters of sweetened cream cheese and chocolate chips that erupt through the top as it bakes. Every bite is a surprise – a little cake, a little creamy filling, a pop of chocolate. It’s a party in a pan, and it looks so impressive, people will think you’re some kind of dessert wizard. Little do they know, the cake did all the work itself.
The Epicenter of Flavor (aka The Ingredients)
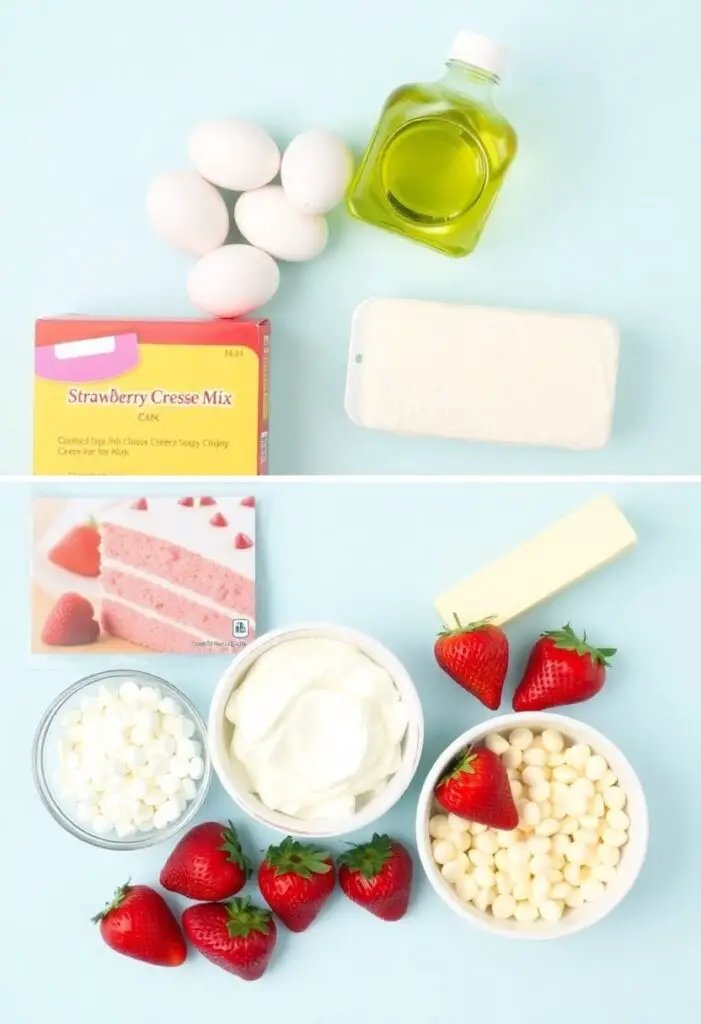
This cake is all about combining simple, pantry-friendly ingredients to create something truly spectacular.
For the Cake Layer:
- White or Strawberry Cake Mix (1 box): A box mix is your best friend here. It’s easy, consistent, and the perfect base for our delicious disaster.
- Vegetable Oil (1 cup): For a super moist cake.
- Large Eggs (3 of them): Binders of our cakey universe.
- Water (¼ cup): Just a splash to get the right consistency.
- Fresh or Frozen Strawberries (1 cup, chopped): For that authentic strawberry flavor.
For the Earthquake Eruption (The Cream Cheese Filling):
- Cream Cheese (8 oz / 1 block): It must be softened to room temperature. This is crucial for a smooth, creamy filling.
- Unsalted Butter (½ cup / 1 stick): Also softened. We’re going for maximum richness here.
- Powdered Sugar (2 cups): To sweeten our creamy explosion.
- White Chocolate Chips or Coconut Flakes (1 cup): These add a lovely texture and flavor to the creamy craters.
Your Seismic Survey Tools (Tools & Kitchen Gadgets)
You don’t need much to create this beautiful mess. Just a few kitchen basics.
- A 9×13 inch Baking Pan: The perfect arena for our earthquake.
- An Electric Mixer (Hand or Stand): Very helpful for whipping up the cream cheese filling until it’s light and fluffy.
- Mixing Bowls: One for the cake batter and one for the cream cheese filling.
- A Whisk and a Silicone Spatula.
- Measuring Cups and Spoons.
How to Create the Delicious Disaster (Step-by-Step Instructions)

Get ready to make a mess, in the most delicious way possible.
Step 1: Prep the Fault Lines
Preheat your oven to 350°F (175°C). Generously grease and flour your 9×13 inch baking pan. This is a very moist, gooey cake, so you don’t want it sticking.
Step 2: Mix the Cake Batter
In a large bowl, combine the cake mix, oil, eggs, and water. Mix with your electric mixer on low speed until just combined, then increase the speed to medium and beat for about 2 minutes, until the batter is smooth. Gently fold in your chopped strawberries. Pour this beautiful pink batter into your prepared pan and spread it out evenly.
Step 3: Create the “Magma” (The Cream Cheese Filling)
In a separate bowl, beat the softened cream cheese and softened butter together until they are completely smooth and creamy. No lumps allowed! Gradually beat in the powdered sugar until the mixture is light and fluffy.
Step 4: The Eruption
Now for the fun part. Dollop spoonfuls of the cream cheese mixture all over the top of the strawberry cake batter. There’s no need to be neat about it! Just plop it on there. Now, sprinkle your white chocolate chips or coconut flakes all over the top.
Step 5: Bake the Earthquake
Place the pan in your preheated oven and bake for 40-50 minutes. You’ll know it’s done when the edges are set and a toothpick inserted into the cakey part (not a gooey cream cheese crater!) comes out with moist crumbs. The center will still look a little jiggly.
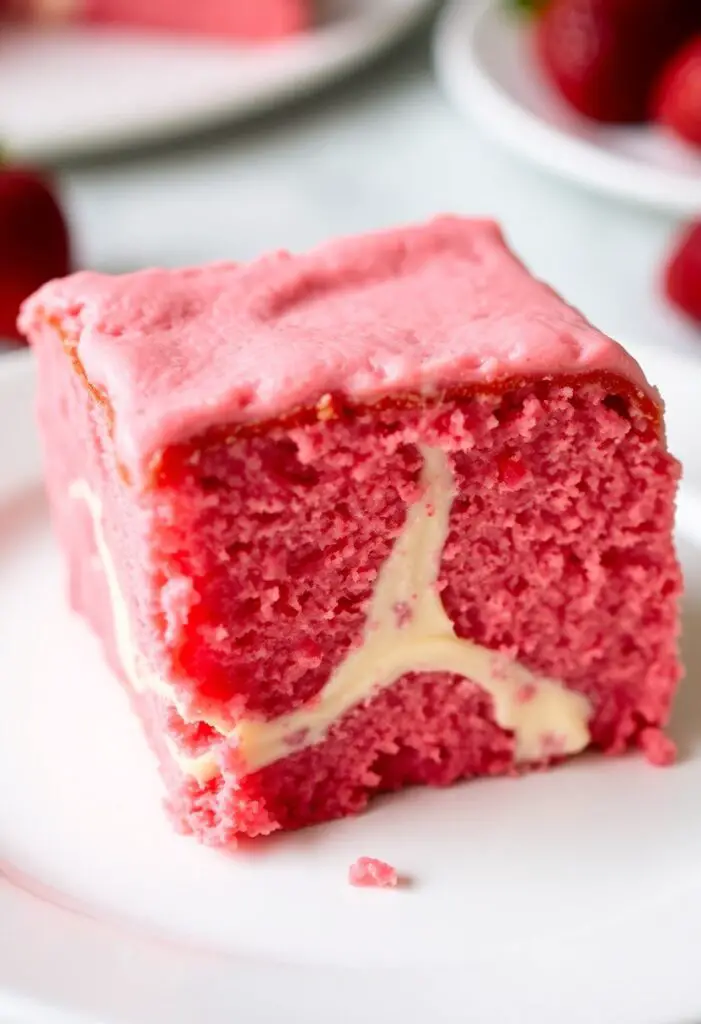
Step 6: The Aftershock (Cooling)

Let the cake cool completely in the pan on a wire rack. As it cools, the top will crack and sink in places, creating that signature “earthquake” look. This is what you want!
Calories & Nutritional Info (A Deliciously Rich Event)
This cake is a rich, decadent, and glorious indulgence. Let’s just own it.
- Serving Size: One square (about 1/15th of the cake).
- Calories: Approximately 400-500 kcal per serving.
- Main Components: Joy, chaos, and a whole lot of deliciousness.
- TBH: It’s a special occasion cake, even if that special occasion is just “it’s Saturday.”
Common Mistakes to Avoid (How to Prevent a Real Disaster)
Even a cake that’s supposed to look like a mess can go wrong. Here’s how to avoid it.
- Using Cold Cream Cheese: If your cream cheese isn’t fully softened, your “creamy craters” will be lumpy craters. Let it sit out on the counter for at least an hour.
- Over-baking the Cake: The magic of this cake is the gooey, slightly underdone cream cheese filling. If you bake it until the center is completely firm, you’ll lose that wonderful texture. A little jiggle is a good thing!
- Not Greasing the Pan Properly: This is a very moist cake. If you don’t grease and flour your pan well, you’ll be serving it with a spatula and a sad look on your face.
- Trying to Make it “Neat”: The whole point of an earthquake cake is its chaotic, cracked appearance. Don’t try to swirl the cream cheese in perfectly. Just dollop it on and let the oven do its magic.
Variations & Customizations (Shake Things Up!)
The earthquake cake formula is ripe for experimentation.
- Chocolate Raspberry Earthquake Cake: Use a chocolate cake mix as the base and swap the strawberries for fresh or frozen raspberries. Use regular semi-sweet chocolate chips instead of white chocolate chips on top.
- Lemon Blueberry Earthquake Cake: Use a lemon cake mix, and fold in 1 cup of fresh blueberries. The cream cheese filling is perfect as is for this zesty, fruity combination.
- German Chocolate Earthquake Cake: Use a German chocolate cake mix. For the topping, mix the cream cheese filling with a can of coconut-pecan frosting before dolloping it over the cake batter.
FAQ: Your Burning Earthquake Cake Questions, Answered
Let’s clear up some of the mysteries of this delicious geological event.
1. Why is it called an earthquake cake?
Because as it bakes, the cream cheese filling sinks and the cake rises, creating a cracked, cratered top that looks like the ground after an earthquake.
2. Can I make this with a from-scratch cake recipe instead of a box mix?

You can, but a box mix is sturdy and reliable, which works well for this kind of cake. If you use a from-scratch recipe, make sure it’s a moist and sturdy one.
3. Does this cake need to be refrigerated?
Yes. Because of the generous amount of cream cheese in the filling, any leftovers should be stored, covered, in the refrigerator.
4. Can I use different fruits?
Absolutely! Cherries, raspberries, blueberries, or even a mix of berries would be delicious. Just make sure they are chopped into small, bite-sized pieces.
5. My cream cheese filling was lumpy. What happened?
Your cream cheese and/or butter were likely too cold when you started mixing them. They need to be at a soft, room temperature to blend into a perfectly smooth and creamy filling.
6. Can I make this cake ahead of time?
Yes, it’s a great make-ahead dessert. You can bake it a day in advance and store it in the refrigerator. In fact, many people think it tastes even better the next day!
7. Can I freeze an earthquake cake?
Yes, it freezes quite well. Let it cool completely, then cover it tightly in a double layer of plastic wrap and a layer of foil. It can be frozen for up to 3 months. Thaw it overnight in the refrigerator.
Final Thoughts
You are now equipped with the knowledge to create a dessert that is not only ridiculously easy but also a guaranteed showstopper. You’ve learned that sometimes, the most beautiful things in the kitchen are the ones that are a little bit messy and chaotic.
So go forth and embrace the delicious disaster. Make this strawberry earthquake cake for your next party, or just for yourself. Enjoy the gooey, creamy, cakey goodness, and take all the credit when everyone begs you for the recipe. It’s our little secret how easy it was.