The Best Black Forest Cake Recipe (A German Chocolate & Cherry Classic!)
Let’s be honest, a Black Forest Cake doesn’t just enter a room; it makes an entrance. With its dramatic layers of dark chocolate cake, billowing clouds of stark white whipped cream, glossy, blood-red cherries, and a chaotic mane of chocolate shavings, it is the moody, sophisticated, slightly dangerous-looking cousin of the cake world. It’s the cake that wears leather jackets and listens to cool, obscure bands.
It looks like something that requires a professional pastry degree, a German passport, and a whole lot of intimidating kitchen equipment to even attempt. But I’m here to tell you that’s not true. Its beauty is a magnificent deception. Today, we’re going to demystify this icon, break it down into simple, manageable steps, and create the best black forest cake recipe you’ll ever need. Prepare to feel like a rock star.
Why This Recipe Is a Certified Showstopper
So, why should you commit to a cake that has, admittedly, a few moving parts? Oh, my friend, the payoff is immense.
First, the flavor is an absolute explosion. This isn’t your one-note, overly sweet birthday cake. You have the deep, rich bitterness of the chocolate sponge, the bright, tart punch of the sour cherries, the light, airy sweetness of the whipped cream, and that crucial, warming kick from the Kirsch (cherry brandy). It’s a perfectly balanced, sophisticated dessert for grown-ups (and adventurous kids).
Second, it is a guaranteed, jaw-dropping showstopper. This is the cake you make when you want to impress someone. The dramatic black, white, and red contrast is visually stunning. Placing this masterpiece on a dessert table instantly elevates the entire event and makes you look like a culinary genius.

Finally, it’s a super fun and satisfying project. Don’t look at it as one complicated recipe; look at it as an assembly of four simple parts. You’ll make a simple chocolate cake, a simple cherry sauce, a simple boozy syrup, and a simple whipped cream. The real fun is in the architecture—putting it all together to create something far greater than the sum of its parts.
The A-List Ingredients
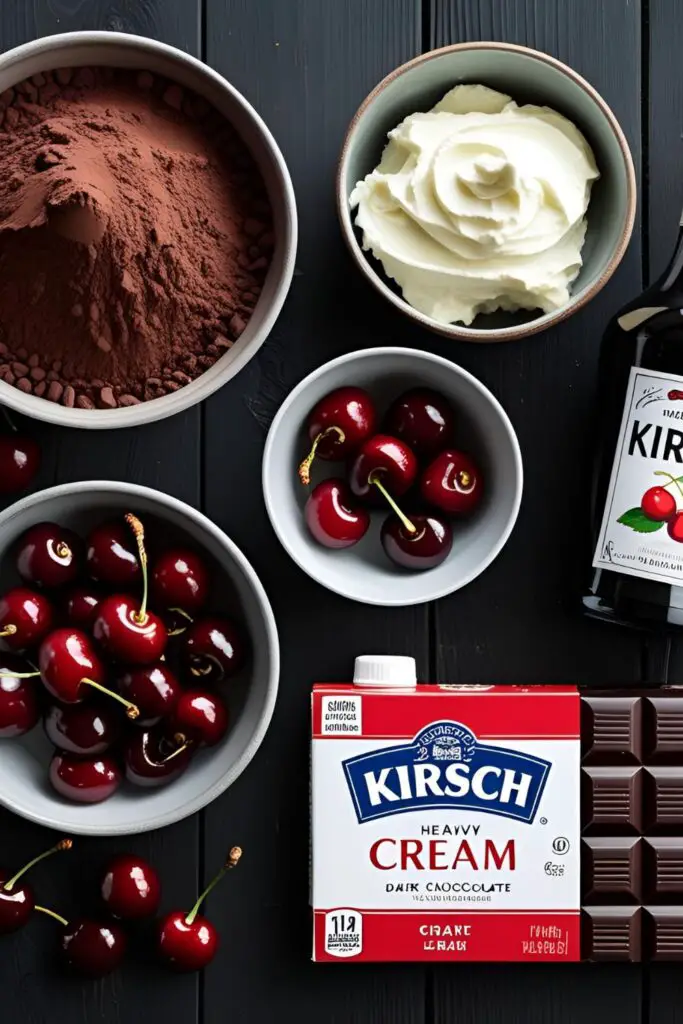
This cake has four main components. Don’t be intimidated! Quality ingredients are key, especially the chocolate, cherries, and Kirsch.
For the Moist Chocolate Sponge Cake:
- All-Purpose Flour: 1 ½ cups.
- Granulated Sugar: 1 cup.
- Unsweetened Cocoa Powder: ½ cup, good quality.
- Baking Soda & Baking Powder: 1 ½ tsp baking soda & ¾ tsp baking powder.
- Salt: ¾ teaspoon.
- Large Egg: 1, at room temperature.
- Buttermilk: ¾ cup, at room temperature.
- Vegetable Oil: ½ cup.
- Vanilla Extract: 2 teaspoons.
- Hot Coffee or Hot Water: ¾ cup. This blooms the cocoa for a richer flavor.
For the Kirsch Syrup (The Soul of the Cake):
- Water: ¼ cup.
- Granulated Sugar: ¼ cup.
- Kirsch (Cherry Brandy): 3-4 tablespoons. This is the traditional, authentic ingredient.
For the Tart Cherry Filling:
- Tart/Sour Cherries: 1 can (about 15 ounces), drained, or 2 cups of frozen, pitted tart cherries.
- Granulated Sugar: ¼ cup.
- Cornstarch: 2 tablespoons.
- Kirsch: 2 tablespoons.
For the Stabilized Whipped Cream Frosting:
- Very Cold Heavy Whipping Cream: 3 cups.
- Powdered Sugar: ¾ cup, sifted.
- Vanilla Extract: 2 teaspoons.
- Unflavored Gelatin: 1 ½ teaspoons, bloomed in 2 tablespoons of cold water (this is the secret to a stable frosting!).
For Decoration:
- Chocolate Shavings or Curls.
- Fresh or Jarred Cherries with Stems.
The Cake Architect’s Toolkit
Having the right gear will make assembling this masterpiece a smooth and enjoyable process.
- Three 8-inch Round Cake Pans: For those classic, distinct layers.
- An Electric Mixer (Hand or Stand): Essential for making the cake batter and, most importantly, the whipped cream.
- A Medium Saucepan: For making the cherry filling and the Kirsch syrup.
- A Pastry Brush: For generously applying that all-important Kirsch syrup to your cake layers.
- An Offset Spatula and a Bench Scraper: Your best friends for achieving a clean, professional finish with the whipped cream.
- A Vegetable Peeler or a Chocolate Shaver: The easiest way to make those beautiful chocolate shavings for the sides.
- A Piping Bag and a Large Star Tip: For creating those iconic, beautiful whipped cream dollops on top.
Step-by-Step: Constructing Your Masterpiece
This is a project, so let’s break it down into manageable phases. None of these are hard!
Phase 1: Bake the Chocolate Cake Layers
- Prep: Preheat your oven to 350°F (175°C). Grease and flour your three 8-inch cake pans and line the bottoms with parchment paper.
- Mix: This is a simple one-bowl cake method. In a large bowl, whisk together the flour, sugar, cocoa powder, baking soda, baking powder, and salt. Add the egg, buttermilk, oil, and vanilla. Mix with an electric mixer on low until just combined.
- Bloom the Cocoa: With the mixer still on low, carefully stream in the hot coffee or water. The batter will be very thin. This is correct!
- Bake: Divide the batter evenly between your three pans. Bake for 25-30 minutes, or until a toothpick inserted into the center comes out clean. Let the cakes cool in the pans for 15 minutes before inverting them onto a wire rack to cool completely.
Phase 2: Make the Fillings (While the Cake Cools)
- The Kirsch Syrup: In a small saucepan, combine the water and sugar. Bring to a simmer, stirring until the sugar dissolves. Remove from the heat and stir in the Kirsch. Set aside to cool.
- The Cherry Filling: In another saucepan, whisk together the sugar and cornstarch. Stir in the drained cherries. Cook over medium heat, stirring constantly, until the mixture thickens and bubbles, about 5-7 minutes. Remove from the heat and stir in the 2 tablespoons of Kirsch. Let it cool completely.

Phase 3: Whip the Cream and Assemble!
- Stabilize the Cream: Sprinkle the gelatin over the 2 tablespoons of cold water in a small, microwave-safe bowl. Let it sit for 5 minutes to “bloom.” Microwave for 5-10 seconds, until just melted.
- Whip It Good: In a cold bowl, whip the very cold heavy cream with your mixer on medium speed until it starts to thicken. Add the sifted powdered sugar and vanilla. While the mixer is running, slowly stream in the melted (but not hot) gelatin mixture. Turn the speed up to high and whip until you have firm, stable peaks.
- The Assembly:
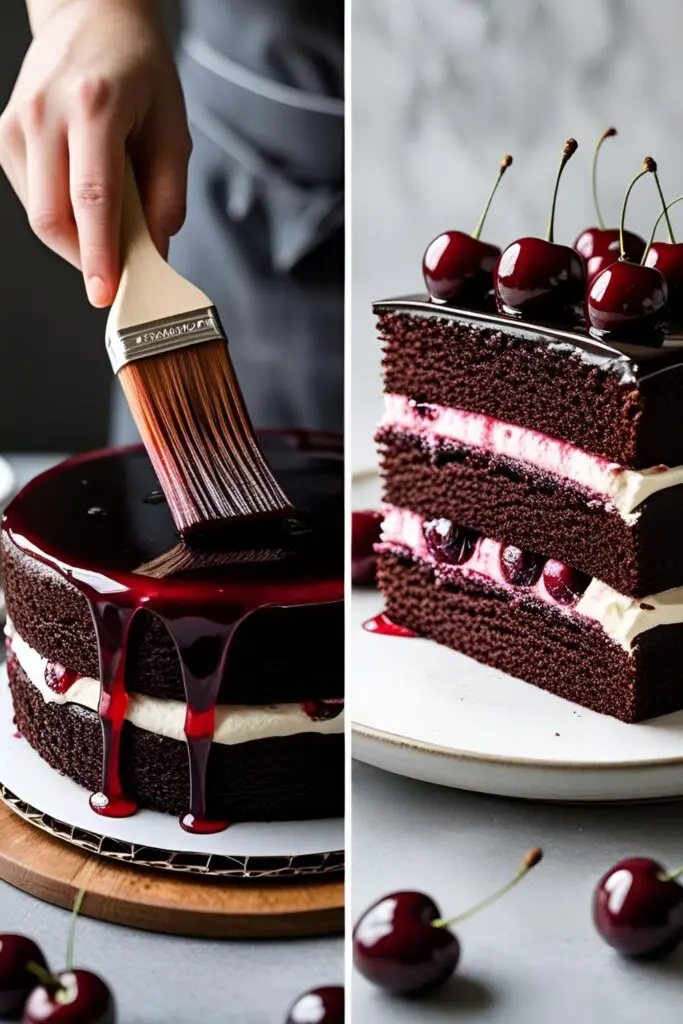
- Place your first cooled cake layer on your serving plate. Brush it generously with the Kirsch syrup.
- Pipe a thick “dam” of whipped cream around the outer edge of the cake layer. Fill the inside of the dam with half of your cooled cherry filling. Spread a thin layer of whipped cream over the cherries.
- Place the second cake layer on top. Repeat: brush with syrup, pipe a dam, add the rest of the cherries, spread with cream.
- Place the third and final cake layer on top and brush it with the remaining syrup.
- Frost and Decorate: Use your offset spatula to cover the top and sides of the entire cake with a smooth layer of the remaining stabilized whipped cream.
- Press the chocolate shavings gently onto the sides of the cake.
- Using your piping bag and star tip, pipe beautiful rosettes or dollops of whipped cream around the top edge. Top each dollop with a single, perfect cherry.
Calories & Nutritional Info (A Decadent Journey)
This is a special occasion cake, a true indulgence.
- Estimated Calories: Around 550-650 kcal per generous slice (assuming 12 slices).
- A Rich Experience: It’s a glorious combination of rich cake, cream, sugar, and a little bit of booze. It’s meant to be savored.
- Antioxidants!: Hey, dark chocolate and cherries are both packed with antioxidants! So, it’s practically a health food, right? 😉
Common Black Forest Blunders to Avoid
Don’t let these simple mistakes turn your masterpiece into a mess.
- Skipping the Kirsch or the Syrup. I know it can be a hassle to find, but the Kirsch-laced syrup is the very soul of this cake. It provides essential moisture and that authentic, boozy, fruity flavor that defines a true Black Forest Cake. Without it, you’ve just made a perfectly nice chocolate cherry cake.
- Using Unstabilized Whipped Cream. You cannot just frost this cake with regular whipped cream. It will weep, wilt, and collapse under the weight of the cake layers within hours. You must stabilize it with gelatin (as in this recipe) or cream cheese. This easy step guarantees your beautiful cake won’t turn into a sad, soupy puddle.
- Assembling with Warm Components. This is a recipe for disaster. If your cake layers are even slightly warm, your cherry filling is warm, or your kitchen is hot, your whipped cream will melt into a tragic mess. Everything must be completely cold before you begin assembly.
- Using Sweet Cherry Pie Filling. A true Black Forest Cake needs the sharp, bright tartness of sour or tart cherries to balance the richness of the chocolate and the sweetness of the cream. Using that goopy, overly sweet canned cherry pie filling will make the whole cake cloying and one-dimensional.
Variations & Customizations
While the classic is a thing of beauty, you can absolutely put your own spin on it.
- The “Easy Mode” Shortcut: In a rush? Use your favorite box of Devil’s Food cake mix for the layers and a can of high-quality tart cherry pie filling (if you must). Focus your energy on making the stabilized whipped cream from scratch. It will still be delicious!
- Black Forest Cupcakes: A perfect party-friendly version. Bake your favorite chocolate cupcakes. Use a cupcake corer to remove the center, fill it with a spoonful of the cherry filling, then top with a generous swirl of the stabilized whipped cream, chocolate shavings, and a single cherry.
- The White Black Forest Cake (“Schwarzwälder Kirschtorte Weiß”): A stunning and less common variation. Use a sturdy white or vanilla cake for the layers instead of chocolate. The combination of white cake, cherries, and Kirsch is incredibly elegant.
Your Burning Cake Questions, Answered
Let’s clear up some of the most common questions about this German icon.
What is Kirsch, and do I really, truly have to use it?
Kirsch (or Kirschwasser) is a clear, colorless brandy traditionally made from double distillation of morello cherries. It has a strong, pungent, bitter almond and cherry flavor. For an authentic Black Forest Cake, it is essential. If you absolutely cannot find it or want a non-alcoholic version, you can substitute the Kirsch in the syrup and filling with the reserved juice from the canned cherries or a bit of cherry juice.
What’s the best and easiest way to make chocolate shavings for decorating?

The easiest way is to take a standard, room-temperature bar of good quality chocolate and a simple vegetable peeler. Just run the peeler down the side of the chocolate bar, and it will create beautiful, delicate shavings and curls.
How do you make stabilized whipped cream?
The gelatin method in this recipe is fantastic. You “bloom” the gelatin in cold water to soften it, then gently melt it and stream it into the cream as it whips. This gives the cream the structure it needs to hold up for days without weeping.
Can I use fresh cherries instead of canned or frozen?
Yes, but it’s more work. You’ll need about 2-3 cups of fresh, pitted tart cherries. You’ll need to cook them down with the sugar and cornstarch as directed, possibly adding a little water, until they release their juices and the sauce thickens.
How do I store Black Forest Cake?
Because of the whipped cream, this cake must be stored in the refrigerator. Keep it in a cake carrier or loosely covered to protect it. It’s best eaten within 2-3 days.
Can I make this cake a day or two ahead of time?
Yes! This is a perfect make-ahead cake. In fact, it’s even better the next day, as it gives the Kirsch syrup time to fully soak into the cake layers.
Help! My whipped cream frosting started to get watery and sad!
This is a sign of unstabilized or over-whipped cream. If it has started to weep, there isn’t much you can do to fix it after the fact. The best defense is a good offense: use the gelatin stabilization method and be careful not to over-whip your cream past the stiff peak stage.
Final Thoughts
You’ve done it. You have stared into the face of a fancy, multi-component, European layer cake and you have emerged victorious. You have constructed one of the world’s most iconic and beautiful desserts. You are now a master of chocolate, a connoisseur of cherries, and a champion of cream.
So go on. Cut a huge, dramatic slice. Admire those perfect layers. Take a bite of your delicious, sophisticated, slightly boozy masterpiece. You didn’t just bake a cake; you created an experience.