The Ultimate Guide to the Vintage Cake Aesthetic (More is More, Darling)
Are you tired of the tyranny of minimalism? Have you had enough of “naked” cakes and “clean girl” aesthetics? If the thought of one more beige, sparsely decorated dessert makes you want to scream, then welcome, my friend, to the glorious, unapologetic world of the vintage cake aesthetic.
Forget everything you know about restraint. We are diving headfirst into a frilly, flamboyant, and fabulous world of over-the-top piping, delicate swags, and intricate shell borders. This isn’t just a cake; it’s an edible art piece, a rococo masterpiece, a rebellion in buttercream. It’s the kind of cake that looks like it was made for Marie Antoinette’s birthday, and I’m going to show you how to create it yourself.
Why This Cake is Your New Personality
So, why should you embrace this level of glorious excess? The reasons are as layered and elaborate as the piping itself.
- It’s a Breathtaking Showstopper: This cake is pure drama. It’s the undisputed main character of any dessert table. When you present this frilly, palatial creation, people will gasp. They will take pictures. They will wonder if you secretly moonlight as a royal pastry chef.
- It’s a Super Fun Art Project: This is your chance to play with piping tips and create something truly unique. The techniques, often associated with the Lambeth method, are a beautiful, old-school skill to learn. It’s incredibly satisfying to see the intricate layers come together.
- The Foundation is Rock Solid (and Delicious): To support this much fabulousness, you need a sturdy base. We’re using a classic, dense, and moist vanilla bean pound cake that not only tastes incredible but also provides the perfect, stable canvas for your buttercream masterpiece.
The Ingredient List: The Anatomy of Opulence
A cake this grand requires a solid structure and a frosting that can defy gravity.
For the Sturdy Vanilla Bean Pound Cake:
- All-Purpose Flour: 3 cups.
- Baking Powder: ½ teaspoon.
- Salt: ½ teaspoon.
- Unsalted Butter: 1 ½ cups (3 sticks), at room temperature.
- Cream Cheese: 4 ounces, at room temperature. This adds incredible moisture and a tender crumb.
- Granulated Sugar: 2 ½ cups.
- Large Eggs: 6, at room temperature.
- Vanilla Bean Paste or 1 whole Vanilla Bean, scraped: 2 teaspoons. This gives you those beautiful, sophisticated flecks.
- Whole Milk: ½ cup, at room temperature.
For the Pipeable, Dreamy Buttercream:
- Unsalted Butter: 2 cups (4 sticks), softened.
- High-Ratio Shortening: 1 cup. This is the secret to a super stable, crusting buttercream that’s perfect for intricate piping.
- Powdered Sugar: 8 cups (a whole 2lb bag), sifted.
- Meringue Powder: 4 tablespoons. This also adds stability.
- Vanilla Extract: 2 teaspoons.
- Milk or Water: 4-6 tablespoons.
- A Pinch of Salt.
- Gel Food Colorings: Soft pastels like pink, mint green, baby blue, and pale yellow are classic choices.
Tools & Kitchen Gadgets: The Royal Decorator’s Kit
This is all about the piping tips. This is where you build your arsenal.
- A Stand Mixer: Essential for making a large batch of smooth, stable buttercream.
- Two 8-inch Round Cake Pans or a Heart-Shaped Pan.
- A Cake Turntable: Non-negotiable for this level of decorating.
- An Offset Spatula and a Bench Scraper: For a flawless base coat.
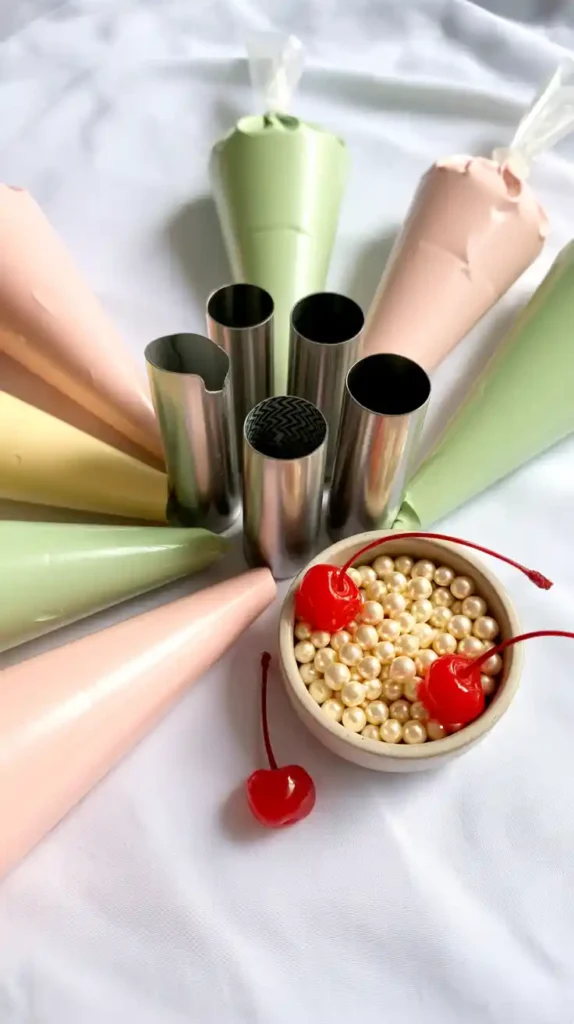
- An Arsenal of Piping Bags and Tips:
- Star Tips: A medium (#21 or #32) for shell borders and a large (#1M) for rosettes.
- Round Tips: A small (#3) and a medium (#5 or #10) for dots, swags, and string work.
- Petal Tip: (#104) for creating ruffles and drapes.
- Leaf Tip: (#352) for adding delicate floral accents.
Step-by-Step Instructions: The Piping Extravaganza
Put on your finest apron. It’s time to create a masterpiece.
Step 1: Build Your Sturdy Canvas
- Prep: Preheat your oven to 325°F (160°C). Grease and flour your cake pans.
- Make the Batter: In your stand mixer, beat the butter, cream cheese, and sugar until very light and fluffy (about 5-7 minutes). Add the eggs one at a time, followed by the vanilla bean paste. In a separate bowl, whisk the flour, baking powder, and salt.
- Combine: On low speed, alternate adding the dry ingredients and the milk, starting and ending with the dry. Mix only until combined.
- Bake: Divide the batter between your pans. Bake for 60-75 minutes. This is a slow-and-low bake for a perfect pound cake texture. A skewer inserted into the center should come out clean. Let cool completely.
Step 2: Make the Perfect Piping Buttercream
In your stand mixer, beat the butter and shortening until smooth. On low speed, gradually add the sifted powdered sugar and meringue powder. Add the vanilla and salt. Once combined, increase the speed to medium-high and beat for 5 minutes until it’s very light and fluffy. Add milk or water, one tablespoon at a time, to reach a stiff-but-pipeable consistency.
Step 3: The Flawless Foundation
Level and stack your cooled cake layers on a cake board with a layer of buttercream in between. Apply a thin crumb coat and chill for 30 minutes. Once firm, apply a final, perfectly smooth coat of your base color frosting. A smooth canvas is key.
Step 4: The Piping Masterclass
This is where the magic happens. We build the design in layers.
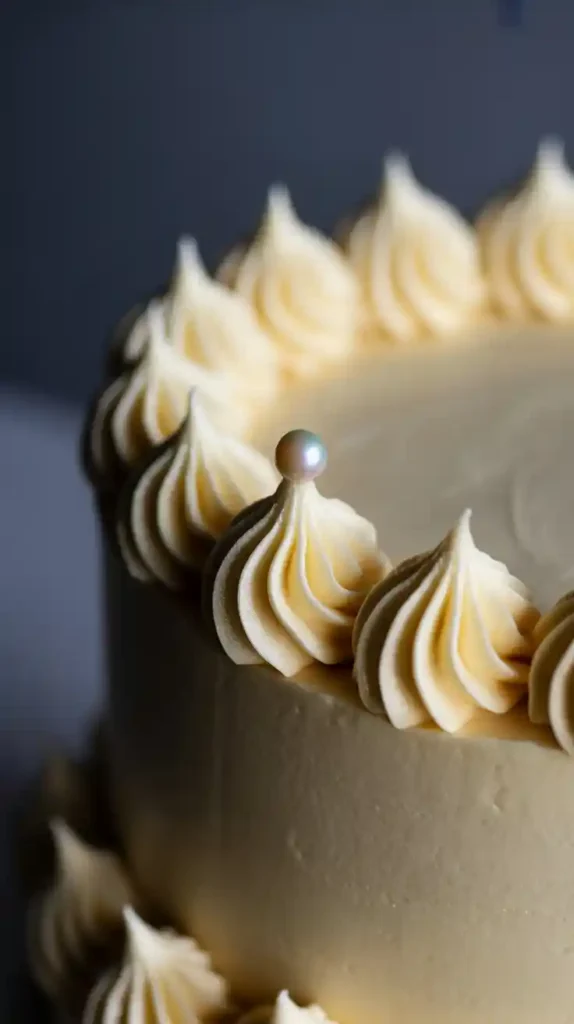
- The Borders: Using a medium star tip, pipe a shell border around the bottom edge and the top edge of the cake.
- The Swags: Using a medium round tip, pipe delicate “drapes” or swags along the sides of the cake. A great trick is to use a toothpick to mark evenly spaced points around the cake to guide you.
- The Over-Piping: This is the key to the Lambeth look. Go back to your shell borders. Using a smaller tip (either star or round), pipe another, more delicate border directly on top of the first one. This creates that amazing 3D, layered effect.
- The Flourishes: Now, fill in the details. Pipe rosettes on top, add little dots at the points where your swags meet, and use a leaf tip to add small accents. More is more!
Step 5: Add the Crowning Jewels
Carefully place your edible pearls or maraschino cherries onto the piped rosettes and dots. A pair of tweezers can be very helpful here. Stand back and admire your opulent creation.
Calories & Nutritional Info (An Opulent Profile)
Let’s be clear. This cake’s nutritional value is measured in grandeur, not grams.
- Primary Ingredient: Unapologetic fabulousness.
- Caloric Content: Enough to fuel a royal ball.
- Recommended Serving Size: Whatever your heart desires, darling.
Common Mistakes to Avoid (Vintage Violations)
- Using Soft, Sad Frosting: This is the cardinal sin. The intricate, gravity-defying piping of the vintage aesthetic requires a stiff, stable, crusting buttercream. A soft cream cheese or meringue frosting will droop into a sad, melty puddle. The shortening is your friend here.
- A Rushed, Messy Canvas: If your base coat of frosting isn’t smooth and chilled, your intricate piping will look sloppy. A perfect foundation is everything.
- Piping on a Warm Cake: Even a slightly warm cake will melt your masterpiece from the inside out. Ensure your cake is completely cool or even chilled before you begin decorating.
- Color Chaos: The vintage look is often about a controlled, harmonious color palette. Stick to 2-3 soft pastel colors and white. Too many bright, clashing colors can make it look messy instead of majestic.
Variations & Customizations (Choose Your Era)
The vintage aesthetic is vast. Here are a few ways to tailor the look.
1. The Rococo Romance (Heart-Shaped)
Use a heart-shaped pan for your cake. Stick to a classic palette of pastel pink and white. Focus on delicate details like piped ruffles (using a petal tip), tiny rosettes, and lots of edible pearls. It’s the ultimate coquette dream cake.
2. The Art Deco Darling (Square-Shaped)
Use a square cake as your canvas. Focus on more geometric and symmetrical piping—think scalloped shells, straight lines, and repeating fan patterns. Use a chic color palette like mint green, black, and gold for a stunning Great Gatsby vibe.
3. The Moody Victorian
For a more dramatic, gothic-romance look, use deeper colors like burgundy, deep purple, or forest green as your base. Focus on intricate, lace-like string work piped with a very small round tip and delicate, trailing ivy leaves.
FAQ: Your Most Fabulous Questions, Answered
What exactly is the “Lambeth method” of cake decorating?
It’s a traditional, English style of over-piping that became popular in the early 20th century. It’s all about creating intricate, 3D layers of scrolls, shells, and swags by piping new details on top of existing ones. It’s the definition of “more is more.”
What is the absolute best frosting for this style of piping?
A crusting American buttercream, especially one made with half butter and half high-ratio shortening, is the industry standard. The shortening makes it incredibly stable, so it holds those delicate, gravity-defying shapes without drooping.
How do I make my piping so symmetrical?
Don’t just eyeball it! Before you start piping your swags, use a ruler and a toothpick to gently mark evenly spaced guidelines on the side of your chilled, frosted cake. Pipe from mark to mark.
This seems like it would take forever. Can I make it in stages?
Yes, and you absolutely should!
- Day 1: Bake the pound cake layers. They are even better the next day.
- Day 2: Make your buttercream, assemble the cake, and do the base coat of frosting. Chill it overnight.
- Day 3: Do all the fun, detailed piping work.
Where can I find all the different piping tips?
Most craft stores with a baking aisle (like Michael’s or Jo-Ann), specialty baking supply stores, and of course, online retailers like Amazon, will have a huge variety of decorating tips.
Is this style too hard for a beginner?
It looks intimidating, but it’s just repeating simple motions. The key is patience, not professional skill. Practice piping a shell border or a swag on a piece of parchment paper until you get the feel for it. You can do this!
My hand is cramping from all this piping! Any advice?
Yes! First, don’t overfill your piping bag. A smaller, more manageable amount gives you better control and is less tiring to hold. Second, take breaks! This is a marathon, not a sprint.
Final Thoughts
You did it. You rejected minimalism. You embraced the frills. You have created a work of flamboyant, edible art that is a testament to the fact that sometimes, more really is more. You didn’t just bake a cake; you baked a piece of history. A delicious, opulent, and utterly fabulous piece of history.
Now, place your masterpiece on your finest cake stand, put on your metaphorical crown, and prepare for the adoration. You’ve earned it.


