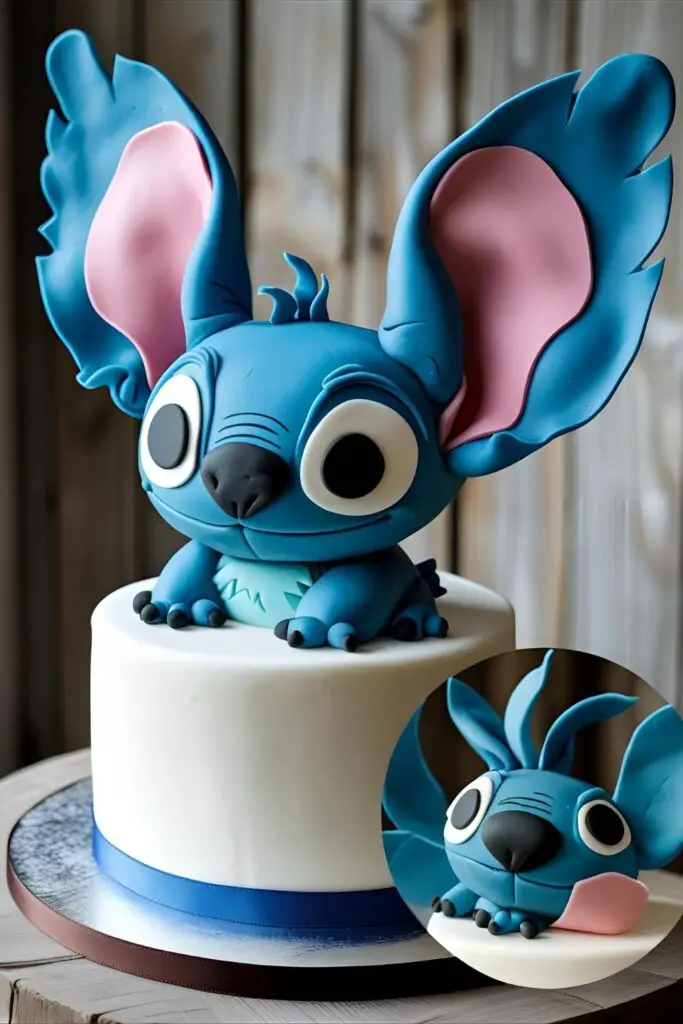
Aloha! Let’s talk about that lovable blue agent of chaos, Stitch. He’s fluffy, he’s destructive, he’s weirdly adorable, and he’s probably the star of a birthday party you’re planning right now. You could go buy a cake with a plastic Stitch figure stuck on top, but where’s the fun in that? You’re here because you want to create a Stitch birthday cake that will make everyone say, “Wow, you made that?!”
Don’t panic. You don’t need to be a mad scientist like Jumba to create this masterpiece. This guide will break down how to make an outrageously cute Stitch birthday cake that looks like it took hours of professional work but is actually totally achievable for a mere mortal like you. Get ready to create a cake so cute, it’s out of this world.
Why This Stitch Cake Recipe is Your New ‘Ohana
So, why should this be your go-to recipe for any Lilo & Stitch themed party? It’s simple, really.
First and foremost, it is ridiculously cute. A cake that looks like Stitch’s adorable, mischievous face is an absolute show-stopper. It’s the centerpiece that will have everyone snapping pictures before you even get a chance to cut into it. This cake isn’t just a dessert; it’s an event.
Second, it’s way easier than it looks. I promise. We’re not sculpting a 3D model of a space alien here. We’re basically just decorating a round cake to look like his face. It’s all about a few simple fondant shapes on a beautifully frosted cake. You can totally do this.
Finally, the flavor is a tropical vacation. To honor Stitch’s home in Hawaii, we’re making a delicious coconut cake. It’s a moist, flavorful surprise that perfectly complements the fun, tropical vibe. It’s a cake that tastes as good as it looks.
Your Experiment’s Ingredient List
To create your cute and fluffy alien, you’ll need these essential supplies.
- For the “Ohana” Coconut Cake:
- 2 ½ cups all-purpose flour
- 2 teaspoons baking powder
- 1 teaspoon salt
- 1 cup (2 sticks) unsalted butter, softened
- 1 ¾ cups granulated sugar
- 4 large eggs, room temperature
- 1 cup canned coconut milk (the full-fat kind!)
- 1 teaspoon vanilla extract
- 1 teaspoon coconut extract
- 1 cup sweetened shredded coconut
- For the Buttercream & Decorations:
- A large batch of your favorite vanilla buttercream (enough to fill and frost a two-layer cake).
- Blue gel food coloring (Royal Blue or a similar vibrant shade).
- Fondant in the following colors: Blue (matching your frosting), Light Blue, Dark Blue/Black, and a small amount of Pink.
- A little cornstarch or powdered sugar for dusting.
Key Substitutions: Not a coconut fan? Use a sturdy vanilla or white cake recipe instead. You can swap the coconut milk for regular buttermilk. If you’re short on time, a doctored white box cake mix with coconut extract and shredded coconut is a great hack.
Tools & Gadgets for Your Lab
You’ll need a few key tools to bring Experiment 626 to life.
- Two 8-inch or 9-inch Round Cake Pans
- Parchment Paper
- Stand Mixer or a reliable Hand Mixer
- Cake Turntable
- Offset Spatula
- Bench Scraper for smooth sides
- Fondant Rolling Pin (a small, non-stick one is perfect)
- A sharp Paring Knife or a food-safe X-Acto knife
- Toothpicks or thin wooden skewers
- A small bowl of water or edible glue
Step-by-Step Instructions: Creating Your Alien
Ready to build your Stitch? Let’s break it down into easy, manageable steps.
H3: Step 1: Bake the Tropical Cake Base
- Prep Your Planet: Preheat your oven to 350°F (175°C). Grease and flour your cake pans and line the bottoms with parchment paper.
- Mix Dry Goods: In a medium bowl, whisk together the flour, baking powder, salt, and shredded coconut.
- Cream Butter & Sugar: In your stand mixer, beat the softened butter and sugar on medium-high speed for 3-4 minutes until it’s light and fluffy.
- Add Eggs & Extracts: Add the eggs one at a time, mixing well after each one. Then, mix in the vanilla and coconut extracts.
- Alternate Coconut Milk & Dry Mix: On low speed, add about one-third of your dry ingredients, then half of the coconut milk. Repeat, ending with the dry ingredients. Mix only until just combined. Don’t overdo it!
- Bake the Cakes: Divide the batter evenly between your pans. Bake for 30-35 minutes, or until a toothpick inserted into the center comes out clean. Let them cool in the pans for 15 minutes before turning them out onto a wire rack to cool completely.
H3: Step 2: Make the Fondant Details (Do This First!)
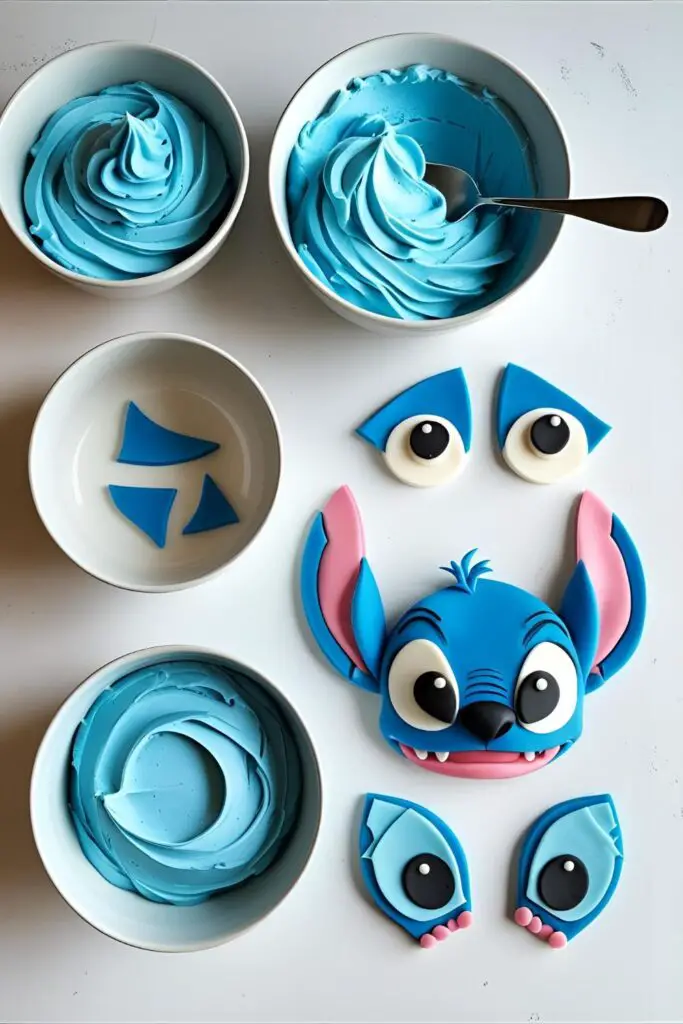
- Create the Ears: This is the most important part! Roll out your blue fondant. Cut out two large, long ear shapes with a notch on one side, just like Stitch’s. Insert a toothpick or skewer into the bottom of each ear, leaving half of it exposed. Roll out the pink fondant and cut out a smaller inner-ear shape for each. Attach them with a dab of water. Lay the ears on a curved surface (like a book spine) to dry for at least 12-24 hours until they are hard. This is not optional!
- Make the Face: Roll out the light blue fondant and cut out two large ovals for the eye patches. Roll out the dark blue/black fondant and cut two smaller ovals for the pupils and a large, rounded triangle for the nose.
H3: Step 3: Assembling Your Stitch Birthday Cake
- Build and Frost: Once the cakes are cool, level them if needed. Fill and stack the layers with a layer of uncolored vanilla buttercream.
- Get the Blue Hue: Tint the rest of your buttercream with the blue gel food coloring until you get that perfect “Stitch blue.”
- Crumb Coat & Chill: Apply a thin layer of blue buttercream all over the cake to trap the crumbs. Chill in the fridge for 30 minutes until firm.
- Final Coat: Apply a final, smooth coat of the blue buttercream. Use your bench scraper and turntable to get the sides as smooth as possible.
- Assemble the Face: Now, gently press the fondant pieces onto the cake. Place the light blue eye patches first, then the pupils on top. Add the big nose in the center. You can use your paring knife to gently draw on his wide, mischievous smile.
- Add the Ears: Carefully insert the hardened fondant ears (with their toothpick supports) into the top sides of the cake at an angle. Stand back and marvel at your creation!
Calories & Nutritional Info
This little alien is not designed for calorie counting.
- Calories: Approximately 600-750 kcal per slice of intergalactic goodness.
- Sugar: A delightful amount, perfect for a little chaos.
- Cuteness Overload: 1000%
- Best Paired With: A Lilo & Stitch movie marathon.
Common Mistakes to Avoid (Or, How to Avoid a Glitch)
- Droopy, Sad Ears: This is the #1 problem. You must let the fondant ears dry completely until they are hard. If you stick soft, floppy ears into the cake, they will droop and look tragic. Give them at least a day to dry.
- The Wrong Shade of Blue: Using liquid food coloring will thin out your frosting and give you a pale, sad blue. Use gel food coloring for a vibrant, true-to-character color without compromising your frosting’s texture.
- A “Badness Level” Face: Don’t just guess where the facial features go! Look at a picture of Stitch. Gently mapping out the placement with a toothpick before you stick on the fondant can prevent him from looking like a weird cousin.
- Sticky Fondant: Is your fondant sticking to everything? You need to lightly dust your work surface and rolling pin with a little cornstarch or powdered sugar.
Variations & Customizations
Feel like causing a little more chaos? Try these variations.
- Angel (Experiment 624) Cake: It’s Stitch’s pink, slightly more devious counterpart! Simply swap the color palette. Make the frosting and main fondant pieces pink, with darker pink and lilac accents for her ears and antennae.
- Tropical Paradise Cake: If a full face seems too daunting, just frost the cake in a beautiful ocean blue. Use green fondant or buttercream to create tropical leaf shapes around the base and top it with a few edible hibiscus flowers. It’s a chic nod to the theme.
- Stitch & Angel Cupcakes: This is a much simpler approach. Frost cupcakes in blue or pink. Create small, simple fondant ears to stick on top, or use a piping tip to create a fluffy swirl of fur and add a small fondant nose.
FAQ: Your Alien Experiment Questions
Let’s answer the questions from your home laboratory.
H3: How do I get the perfect “Stitch blue”?
Use a good quality royal blue or sky blue gel food coloring. Start with a small amount and add more until you reach the desired shade. It’s always easier to add more color than to take it away.
H3: How do I make the fondant ears stand up securely?
The two keys are drying them until they are hard and using a toothpick or skewer as an internal support. The skewer acts like rebar, giving the ear structure and a secure way to anchor it into the cake.
H3: Can I make this Stitch birthday cake ahead of time?
Yes! Bake the cake layers and make the fondant details 1-2 days in advance. You can frost and assemble the cake the day before the party and store it in the fridge. Add the ears just before serving for best results.
H3: Do I have to use fondant?
You could try to pipe the facial features with buttercream, but fondant gives you those clean, sharp shapes that really make the character recognizable. For the ears, fondant is really the only way to get them to stand up.
H3: What cake flavor should I use?
I love a coconut or pineapple cake to match the Hawaiian theme, but honestly, any sturdy cake will work! Vanilla, chocolate, or funfetti are all great choices.
H3: How do I store a cake with fondant decorations?
Store the cake in a cake box in the refrigerator. The cold, dry air of the fridge is actually great for keeping fondant firm. Just be aware that condensation can form when you take it out, so let it sit for a bit before serving.
H3: My fondant is tearing when I roll it. What do I do?
It’s likely too dry. Knead in a tiny, tiny amount of vegetable shortening to make it more pliable. If it’s too soft and sticky, knead in a little powdered sugar.
Final Thoughts: ‘Ohana Means Cake
You did it! You created your very own cute and fluffy alien, and you didn’t even have to break him out of a galactic prison. You have a Stitch birthday cake that is guaranteed to be the star of the show.
So go ahead, show off your masterpiece. Because ‘Ohana means family, and family means nobody gets left behind… or gets a smaller slice of cake. Enjoy!


