The Ultimate Spiderman Cake Topper Printable: Your Last-Minute Party Rescue!
Picture this: It’s 9 PM the night before your kid’s birthday party. The cake is baked (or, let’s be honest, you courageously rescued it from the local grocery store). It’s sitting on your counter, looking depressingly plain. Your child is dreaming of web-slinging action, and you’ve got… a distinct lack of web-slingers. Panic starts to set in. What if I told you the perfect, show-stopping solution is already in your house, just a click and a print away? This is your ultimate guide to creating a spiderman cake topper printable, the secret weapon in your party-planning arsenal that will make you look like the coolest parent on the block.
Forget spending a small fortune on a custom cake that gets demolished in five minutes flat. We’re going down the DIY route, my friend. And trust me, it’s so easy you’ll wonder why you ever considered anything else. This isn’t just about saving money; it’s about crafting a little piece of party magic with your own two hands. Ready to become a hero?
Why This “Recipe” Is a Game-Changer
So, why should you bother with a spiderman cake topper printable instead of just grabbing a generic plastic figurine? Oh, let me count the ways.
First, it’s ridiculously easy. Can you click a mouse, operate a printer, and handle a pair of scissors without causing a major incident? Congratulations, you’re overqualified. This “recipe” is less about culinary skill and more about channeling your inner crafty genius that you know is hiding in there somewhere.
Second, it’s a budget superhero. Custom cake decorations can cost an arm and a leg. A spiderman cake topper printable? We’re talking about the cost of a sheet of paper and a bit of ink. You can save that cash for more important things, like extra pizza or, you know, a well-deserved bottle of wine for yourself after the party chaos subsides.

Finally, it delivers that “wow” factor. A crisp, vibrant, and perfectly cut Spiderman soaring over a sea of frosting looks seriously impressive. Your kid will be ecstatic, the other parents will be secretly jealous of your skills, and you’ll get to do a little victory dance. What’s not to love? It’s the ultimate party hack for a truly memorable celebration.
Ingredients (Or, You Know, Supplies)
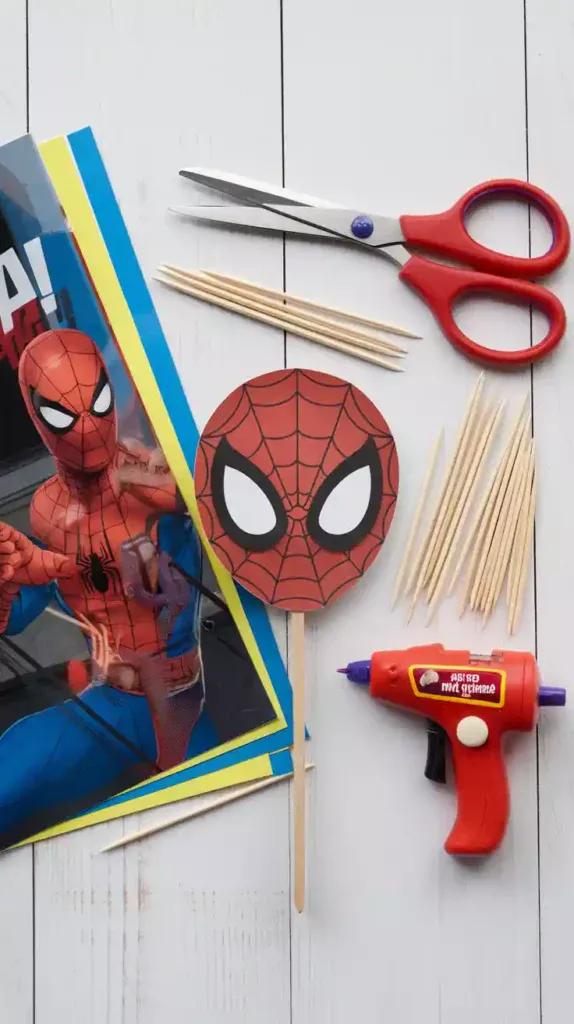
This is the easiest shopping list you’ll ever have. No need to hunt down obscure spices or wonder what a “creamed” butter is.
- Your Chosen Spiderman Printable File: The star of the show! A quick search for a high-resolution spiderman cake topper printable will give you tons of options. Look for a dynamic pose.
- White Cardstock Paper: Do not use regular printer paper. Seriously. You need something sturdy. I recommend 8.5″ x 11″ white cardstock, at least 65 lb (176 gsm) or heavier. Glossy photo paper also works wonders for a vibrant finish.
- A Color Printer: One that’s not running on fumes. Make sure you have enough ink, especially red and blue.
- Wooden Skewers or Lollipop Sticks: These will form the backbone of your topper, allowing it to stand tall and proud on the cake. Two is usually a safe bet.
- Adhesive: Your choice of a hot glue gun (for speed and strength), super glue, or strong double-sided tape.
Tools & Kitchen Gadgets of the Trade
Every great chef—or crafter—needs their trusty tools. Here’s what you’ll need to pull this off flawlessly. I’ve linked some of my go-tos that make life easier.
- A Reliable Color Printer: You don’t need a professional press, but a solid inkjet printer like a Canon PIXMA or an Epson EcoTank will give you the vibrant, true-to-character colors Spidey deserves.
- Sharp Scissors: A good pair of Fiskars scissors with a fine tip is essential for navigating all those Spidey-bends and angles.
- Craft Knife (Optional but Recommended): For those super tricky, intricate cuts (like between an arm and the body), an X-Acto knife is your best friend. Just use a cutting mat underneath!
- Mini Hot Glue Gun: For instant, rock-solid adhesion, nothing beats a mini hot glue gun. It’s faster and stronger than waiting for craft glue to dry.
Step-by-Step Instructions: Assembling Your Hero
Alright, let’s bring this hero to life. Deep breaths. You can do this.
Step 1: Find and Print Your Spiderman First things first, find your perfect spiderman cake topper printable online. Choose a high-resolution PNG file with a transparent background if you can—it makes life easier. Load your cardstock into the printer and print using the highest quality setting. Let the ink dry for a few minutes to avoid smudging. Don’t you dare touch it too early!
Step 2: The Great Cut-Out Now for the delicate part. Using your sharp scissors or craft knife, carefully cut out your Spiderman. Go slow. Take your time. Think of it as a meditative practice. If you’re using a craft knife, remember to protect your table with a cutting mat. A clean cut is what separates an amazing topper from a tragic, jagged-edged mess.

Step 3: Give Him a Backbone Flip your beautifully cut Spiderman over. Decide where you want the support sticks to go. You’ll want them to extend from the back of the topper down far enough to securely anchor into the cake. Usually, one stick behind the torso and head and another behind the legs works well.
Step 4: Secure the Sticks Fire up that hot glue gun! Apply a line of hot glue to the back of the printable where you want a stick to go, then press the skewer or lollipop stick firmly into the glue. Hold it for a few seconds until it sets. If you don’t have a glue gun, strong tape or super glue will also work, but hot glue is IMO, the superior choice for a sturdy result.
Step 5: The Final Flourish (Optional) Feeling fancy? You can make your spiderman cake topper printable double-sided! Just print a second, mirrored image of Spiderman, cut it out, and glue it to the back to hide the sticks. This gives it a professional, 360-degree finish.
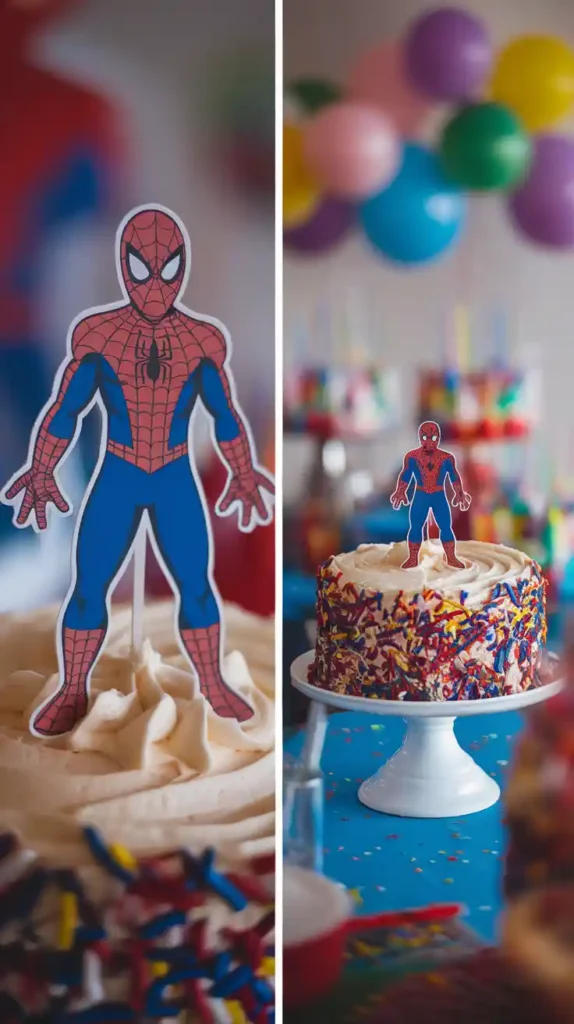
Step 6: Plant Your Hero Once the glue is completely dry and the topper feels solid, it’s time for the main event. Gently press the sticks into the top of your cake. Stand back and admire your work. You’ve just made the coolest cake in town.
Calories & Nutritional Info
I know you’re dying to know the nutritional breakdown of this delectable creation. Here you go:
- Calories: 0
- Sugar: 0g
- Fat: 0g
- Gluten: 0g (It’s gluten-free!)
- Joy and Awesomeness: 100% of your recommended daily value.
- Parental Cool Points: Off the charts. May cause spontaneous high-fives from children.
Common Mistakes to Avoid (Please Read This!)
I’ve seen it all. The floppy heroes, the smudged ink, the toppers that face-plant into the frosting. Let’s make sure that’s not you.
- Using Flimsy Paper: This is the #1 sin. Regular printer paper will absorb moisture from the frosting and wilt into a sad, droopy mess. You MUST use heavy cardstock or photo paper. No exceptions.
- The Hasty Haircut: Rushing the cutting phase with dull scissors will give your Spidey frayed, fuzzy edges. Take a deep breath and cut slowly with a sharp tool. Your hero deserves better.
- Visible Stick Syndrome: Don’t let the stick poke out above Spiderman’s head. It’s just tacky. Make sure the top of the skewer is hidden behind the printable.
- Procrastination-Induced Smudging: Touching the print before the ink is fully dry. Give it a solid 5-10 minutes. Go get a coffee. Just let it be. A smudged spiderman cake topper printable is a sad sight.
Variations & Customizations

Think you have to stick to the script? Of course not! This is your party.
- The Personalized Hero: Use a simple photo editor like Canva to add a speech bubble next to Spiderman saying “Happy 7th Birthday, [Kid’s Name]!” or their age. This adds a super cute, custom touch to your spiderman cake topper printable.
- The Shaker Topper: Feeling extra? Create a 3D shaker topper. Cut out a Spiderman frame, add a clear acetate sheet, and fill it with red and blue glitter or sequins before sealing it with a backing. It’s a bit more work, but the effect is dazzling.
- The Edible Edition: For a fully edible creation, buy edible wafer paper and edible ink cartridges for your printer. Print the spiderman cake topper printable on the wafer paper, and voilà! Your hero is now delicious. FYI, the colors might be slightly less vibrant, but the coolness factor is undeniable.
Frequently Asked Questions (FAQ)
You’ve got questions? I’ve got answers. Here are some common queries that pop up when making a printable topper.
1. What is the best paper to use for a spiderman cake topper printable? Hands down, heavy white cardstock (65lb/176gsm or more) is the best all-around choice. It’s sturdy, prints well, and holds up against a bit of frosting moisture. For a high-impact, glossy finish, you can also use photo paper.
2. How do I make my printable cake topper stand up straight? The key is a strong backbone! Use two sticks instead of one for better stability, especially for larger toppers. Position them strategically behind the widest parts of the printable. Also, make sure you push the sticks deep enough into the cake to anchor them securely.
3. Can I resize a spiderman cake topper printable file? Absolutely! Most image viewers have a print settings menu where you can scale the image. You can adjust the percentage (e.g., print at 80% or 120%) to fit the size of your cake perfectly. Just be careful not to enlarge a low-resolution image too much, or it will become pixelated.
4. Is it legal to use a character image for a personal party cake? For personal use, like your own child’s birthday party, you are generally in the clear. You are not selling the cake or the topper. The issues arise when you start selling items with copyrighted characters on them. So, for your own party? Go for it!
5. What’s the best way to attach the stick to the printable? A hot glue gun is the fastest and most secure method. It creates a strong bond in seconds. If you don’t have one, strong double-sided tape or a powerful craft glue like E6000 will also work, but you may need to let it dry completely before handling.
6. Can I make the topper double-sided? Yes, and it looks fantastic! Simply print a second copy of the image, making sure it’s mirrored. After attaching the sticks to the back of the first cutout, glue the mirrored cutout over it to conceal the sticks entirely.
7. How far in advance can I make my spiderman cake topper printable? You can make it days or even weeks ahead of time! Since it’s just paper and wood, it’s not perishable. Store it flat in a cool, dry place (like inside a book or a folder) to keep it from bending or getting damaged. This is one party task you can definitely check off your list early.
Final Thoughts
There you have it. You’ve successfully dodged a pricey bakery bill and created a custom spiderman cake topper printable that’s dripping with personality. You’ve proven that with a little paper, a printer, and a dash of can-do spirit, you can create something truly special.
So go ahead, stick that masterpiece on your cake and get ready for the oohs and aahs. You’ve earned it. Now, go share your creation! I’d love to see how your web-slinging hero turns out. You’ll probably never buy a boring plastic cake topper again. Why would you?