As a homeowner or plumbing professional, sewer camera systems are a valuable tool for diagnosing and identifying pipe problems. However, like any technology, these systems can experience issues, and hiring a professional for repairs can be costly. Fortunately, there are several DIY fixes and maintenance tips you can implement to save time and money.
In this section, we will discuss common issues with sewer camera systems, and provide step-by-step instructions on how to troubleshoot and fix them yourself. By following these DIY solutions, you can ensure your sewer camera system is functioning optimally, and avoid the need for professional repairs.
Key Takeaways:
- Regular maintenance can prevent major issues with your sewer camera system.
- Clogs are a common problem and can be detected and solved with DIY solutions.
- Conducting your own drainage survey can identify issues with your pipes, which can be repaired with self-fix solutions.
- Sewer line checks can prevent major issues, and DIY repairs are possible with the right tips and knowledge.
- By following the DIY fixes and maintenance tips provided in this article, you can effectively repair and maintain your sewer camera system.
Troubleshooting Sewer Camera Problems
In this section, we will guide you through the process of troubleshooting common issues with your sewer camera. Before attempting any repairs, it is essential to identify and diagnose the problem with your camera. By following these steps, you can save time and money by avoiding unnecessary professional repairs.
Drain Camera Troubleshooting
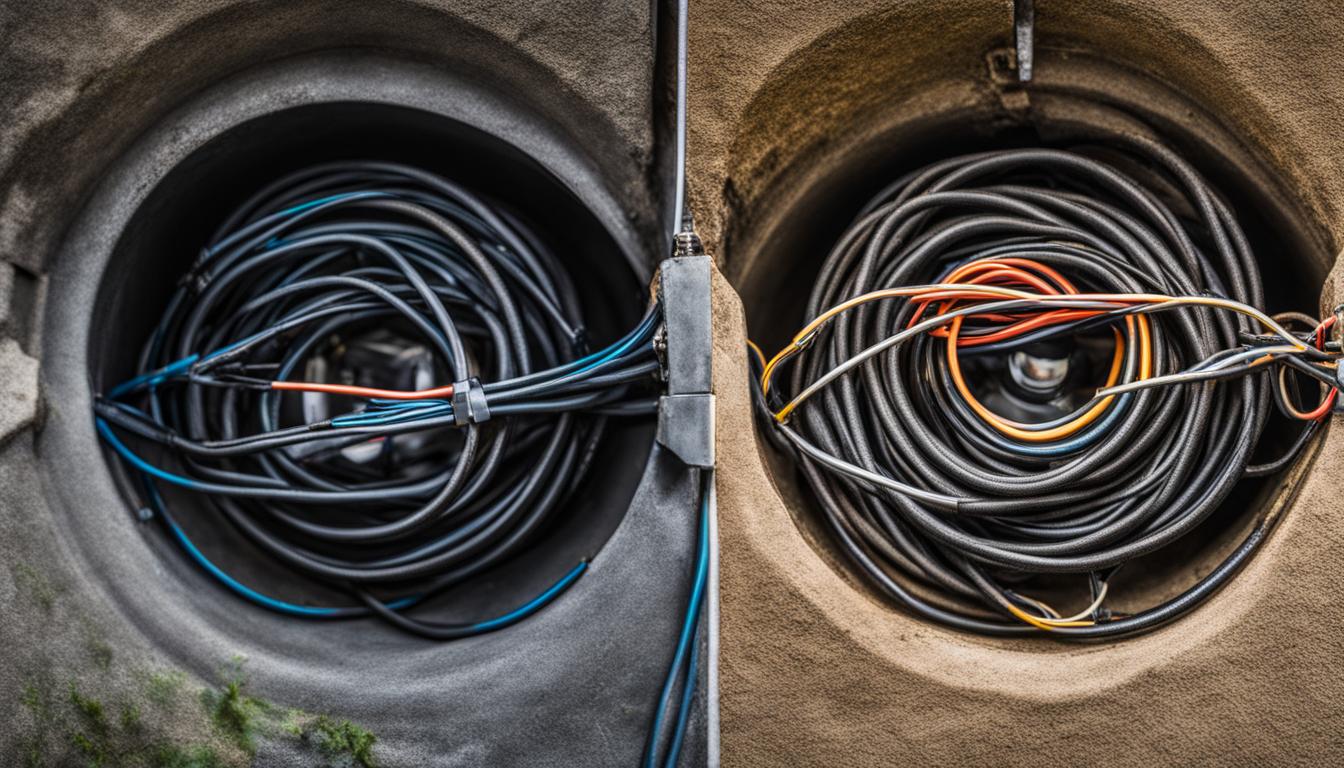
The first thing to check when troubleshooting your sewer camera is the cable. Inspect the cable for any damage or bends that may have occurred during the previous use. If you find any issues, replace or repair the cable as necessary.
If the cable is in good condition, the next thing to check is the power source. Make sure that your camera’s battery is charged or that it is properly connected to an external power source. Check the power cables for any damage or fraying that may be causing an electrical issue.
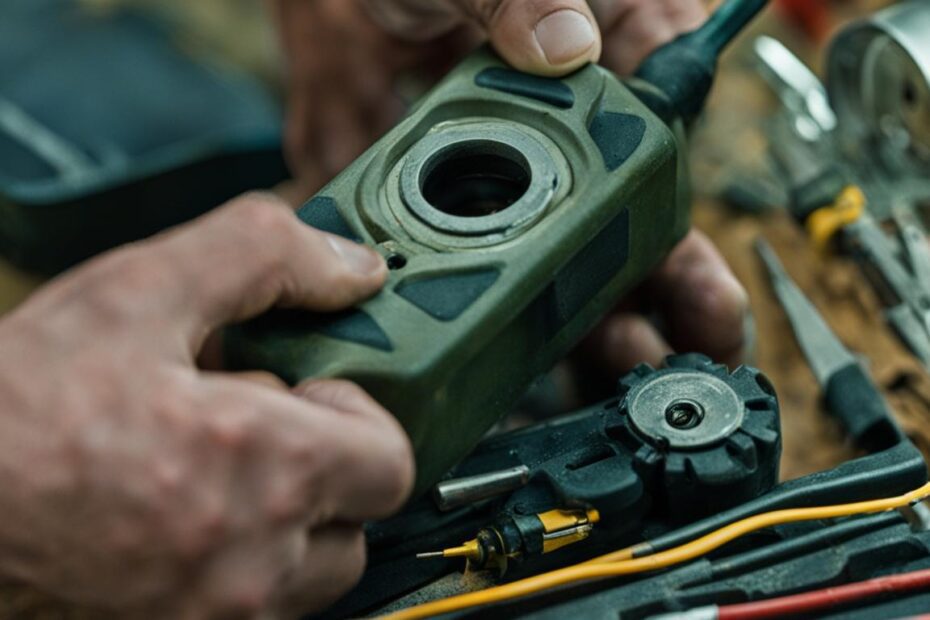
If your camera is still not working, the problem may be related to the camera head or lens. Inspect the camera head for any dirt or debris that may be obstructing the view. Clean the head and lens if necessary. If the camera head is damaged, replace it with a new one.
Plumbing Diagnosis Self-Repair
If you are experiencing issues with your sewer camera’s image quality, the problem may lie in the camera’s monitor or display. Check the monitor for any damage or wear, and inspect the cables for any fraying or damage. If you find any issues, replace or repair the monitor and cables as necessary.

If you are still having issues with your camera, the problem may be related to the plumbing itself. Use your sewer camera to inspect the pipes and look for any signs of damage or blockages. If you find any issues, consider using a plumbing snake or hydro jetting to remove the blockage and repair any damage.
Conclusion
By following these troubleshooting steps, you can diagnose and repair common issues with your sewer camera system. If you’re still having issues after attempting these DIY solutions, it may be time to call in a professional. Regular maintenance and inspections can help prevent future issues with your camera system, saving you time and money in the long run.
DIY Clog Detection and Solutions
Clogs are a common problem when it comes to sewer cameras. If you suspect a clog in your system, it’s important to address it as soon as possible to prevent further damage to your pipes. In this section, we will provide step-by-step instructions on how to detect and solve clogs in your sewer camera system, saving you the hassle of hiring a professional.
Detecting Clogs
The first step in detecting a clog in your sewer camera system is to locate the blockage. This can be done by inspecting the footage of your camera, looking for signs of slow water flow, standing water, or debris accumulation.
If you’ve identified signs of a clog, the next step is to determine the cause. Common causes of clogs in sewer cameras include tree roots, grease buildup, foreign objects, and sediment accumulation. Once you’ve pinpointed the cause, you can move on to addressing the issue.
Solving Clogs
There are several DIY solutions you can try to remove clogs from your sewer camera system. One effective method is using a plumbing snake or auger to break up the clog and clear the blockage. This can be done by inserting the snake or auger into the affected pipe and twisting it to dislodge the clog.
Another solution is the use of a hydro jet, which utilizes high-pressure water to blast away the clog and clean the inside of the pipes. This solution is particularly effective for removing tough clogs caused by grease buildup or sediment accumulation.
Preventative Measures
Prevention is key when it comes to clogs in your sewer camera system. Regular maintenance, such as flushing your pipes with hot water and vinegar, can help prevent clogs caused by buildup and sediment accumulation.
Additionally, being mindful of what you put down your drains can also prevent clogs. Avoid pouring grease or oils down your drains, and use drain filters to catch hair and other debris before it can enter your pipes.
Conclusion
By following the DIY clog detection and solutions provided in this section, you can effectively remove clogs from your sewer camera system and prevent further damage to your pipes. Remember to practice preventative measures to maintain the health and longevity of your system.
Maintaining Your Sewer Camera System
To ensure your sewer camera system continues to perform optimally, it’s essential to conduct regular internal pipe viewing self-maintenance. By taking the time to clean and inspect your camera and its components, you can extend its lifespan and avoid costly repairs.
Cleaning Your Sewer Camera
One of the most crucial steps in maintaining your sewer camera system is regular cleaning. Build-up of debris, dirt, and other materials can affect the clarity of your camera’s image and performance, making it challenging to diagnose and repair pipe issues accurately.
To clean your sewer camera, begin by disconnecting it from its power source and removing any obstructions. Next, use a soft, damp cloth to wipe down the camera and its components thoroughly. Avoid using harsh chemicals or abrasive materials that could damage the camera’s lens or other parts.
Inspecting Your Sewer Camera
Along with regular cleaning, inspecting your sewer camera is crucial to ensure its optimal performance. By conducting regular inspections of your camera and its components, you can identify any issues before they become costly repairs.
During your inspection, check for any cracks or damage to the camera’s lens or cable. Also, ensure that the camera is functioning correctly, including adjusting the focus and zoom as needed. If you notice any issues, consider contacting a professional plumber for assistance or referring to the manufacturer’s manual for guidance.
Do-it-Yourself Pipe Video Self-fixes
While regular cleaning and inspection of your sewer camera is essential, you may also encounter minor issues that require immediate attention. Fortunately, some do-it-yourself pipe video self-fixes can help you address these problems and avoid costly repairs.
For example, if you notice a loose or weak connection, you can use electrical tape to secure the cable in place. If you notice that the camera’s image is blurry, you may need to adjust the focus or clean the lens using a gentle lens cleaner.
Conclusion
By taking the necessary steps to maintain your sewer camera system, you can avoid costly repairs and ensure optimal performance. Regular cleaning and inspection and do-it-yourself pipe video self-fixes are easy and cost-effective ways to protect your investment and ensure that your system continues to function at its best.
Diagnosing Pipe Issues with Your Sewer Camera
Your sewer camera is a valuable tool for diagnosing pipe issues, allowing you to make informed repair decisions. By using your camera effectively, you can identify and assess pipe problems, from clogs to cracks and leaks.
Identifying Clogs
One of the most common issues with pipes is clogs. These can be caused by a variety of factors, including debris buildup, tree roots, and grease accumulation. To identify a clog, look for slow drainage or complete blockages in your pipes. You may also notice foul odors or gurgling sounds coming from your drains.
To use your sewer camera to diagnose a clog, insert the camera into your pipes and look for any obstructions. Clogs may appear as a dark mass or buildup of debris, or as a dense, impenetrable blockage. Once you have identified the location and severity of the clog, you can use DIY solutions to clear it.
Assessing Cracks and Leaks
Cracks and leaks in pipes can lead to serious water damage and require prompt repairs. Signs of cracks and leaks include water stains or discoloration on walls or ceilings, dampness or mold growth, and low water pressure.
To assess the extent of these issues with your sewer camera, look for any visible cracks or gaps in your pipes. You may also notice water seeping through small holes or tears. Depending on the severity of the issue, you may need to call a professional for repairs.
Conducting Regular Inspections
Regular inspections with your sewer camera can help identify pipe issues before they become major problems. By inspecting your pipes at least once a year, you can catch small cracks, leaks, or clogs before they cause serious damage.
To conduct a DIY inspection, insert your sewer camera into your pipes and look for any signs of wear, damage, or debris buildup. Take note of any issues you find and address them promptly, using DIY repairs or calling a professional as needed.
Conclusion
By properly diagnosing pipe issues with your sewer camera, you can make informed repair decisions and ensure the longevity of your pipes. Regular inspections and maintenance are key to preventing major problems and avoiding costly repairs.
DIY Sewer Scope Repair Tips
At times, your sewer scope camera may experience issues, and you may not want to hire a professional to fix it. In this section, we will provide you with valuable tips on how to repair your sewer scope camera yourself, helping you save time and money in the process.
Identify the Problem
The first step in DIY sewer scope repair is to identify the problem with your camera. Some common issues include a cracked or damaged lens, a malfunctioning light, or a loose connection in the wiring. Once you have identified the issue, you can move on to the repair process.
Repairing the Lens
If your camera lens is cracked or damaged, you may need to replace it. To do this, you will need to remove the old lens and replace it with a new one. If you are unsure how to do this, refer to the manufacturer’s instructions.
Fixing the Wiring Connections
Loose wiring connections can cause your sewer scope camera to malfunction. To fix this, you will need to locate the loose connection and reattach it. This may require some soldering or wire stripping, so it’s important to have the necessary tools and experience before attempting this repair.
Replacing the Light
If the light on your sewer scope camera is not functioning correctly, you may need to replace it. To do this, you will need to disconnect the old light and connect the new one. Again, refer to the manufacturer’s instructions if you are unsure how to do this.
Conclusion
With these DIY sewer scope repair tips, you can fix common issues with your camera without the need for a professional repair service. Remember to always refer to the manufacturer’s instructions and exercise caution when handling electrical components. By following these steps, you can save time and money while maintaining your sewer scope camera’s functionality and performance.
DIY Drainage Survey Repair
Performing a drainage survey with your sewer camera can help you identify issues with your pipes. By conducting regular surveys, you can catch problems early and prevent major issues from developing. In this section, we will guide you through the process of performing a DIY drainage survey and provide self-repair solutions for any problems you may encounter.
Step-by-Step Guide for a Drainage Survey
Follow these steps to perform your own drainage survey:
- Insert the sewer camera into the drain or pipe you wish to inspect.
- Slowly advance the camera through the pipe, examining the walls and floor as you go.
- Look for any signs of damage, such as cracks, breaks, or leaks.
- Pay particular attention to any areas that may be prone to blockages, such as bends or junctions.
- If you encounter a blockage, carefully maneuver the camera around it to get a better look at the source of the problem.
- Record any issues you find for later reference.
Performing a drainage survey with your sewer camera may reveal a number of problems, including clogs, leaks, and damaged pipes. Luckily, many of these issues can be repaired with simple DIY solutions.
DIY Solutions for Drainage Survey Problems
If you encounter any issues during your drainage survey, follow these DIY solutions to fix the problem:
| Issue | Solution |
|---|---|
| Clogs | Use a drain snake or auger to clear the blockage. For stubborn clogs, try using a high-pressure water jet to blast debris away. |
| Leaks | Depending on the severity of the leak, you may be able to fix it with epoxy putty or sealant. For more serious leaks, you may need to replace the damaged section of pipe. |
| Cracks or breaks | If you encounter cracks or breaks in the pipe, you can repair them with resin or tape. For more serious damage, you may need to replace the affected section of pipe. |
Performing your own drainage survey can save you time and money by identifying issues before they become serious problems. By following these DIY solutions, you can fix many problems on your own, without the need for a professional repair.
Tips for Sewer Line Check DIY Repair
Regular sewer line checks are an essential part of maintaining your plumbing system. Not only do they prevent major issues, but they also allow you to catch and address minor problems before they become costly repairs. In this section, we will provide you with some valuable tips for conducting a DIY sewer line check and offer repair solutions for any issues you may encounter.
Step 1: Gather the Necessary Tools
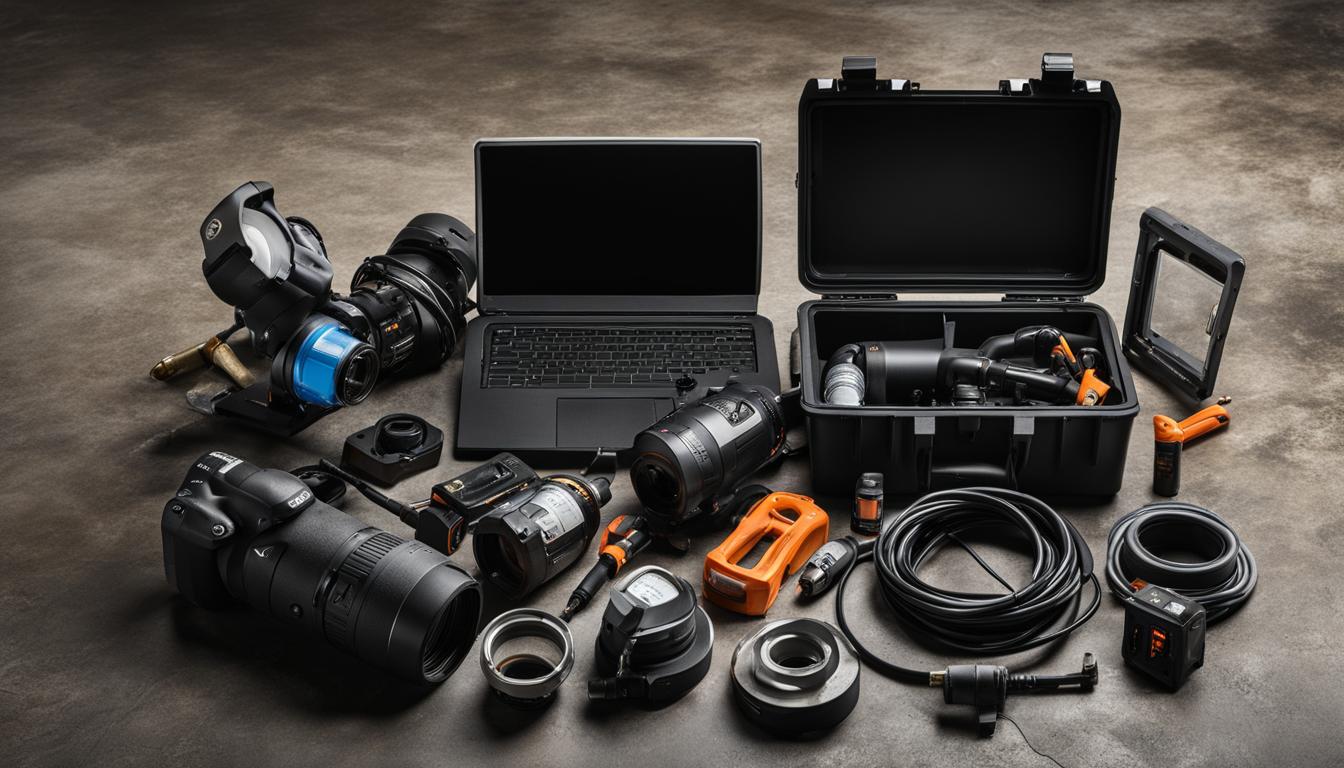
Before you begin, make sure you have all the necessary tools on hand. This includes a sewer camera, gloves, safety glasses, and a plumbing snake. Having these tools readily available will save you time and make the process smoother.
Step 2: Conduct the Inspection
Begin by inserting the sewer camera into the main sewer line. Use the camera to inspect the entire length of the pipe, checking for any signs of damage or blockages. If you encounter any issues, make note of where they are located.
Step 3: Clear Any Blockages
If you encounter a blockage during the inspection, use a plumbing snake to clear it. Insert the snake into the pipe and twist it to dislodge the blockage. Once the blockage is cleared, use the sewer camera to make sure there are no additional issues in that area.
Step 4: Address Any Damage
If you encounter any damage during the inspection, such as cracks or leaks, you may need to make some repairs. Depending on the extent of the damage, you may be able to patch it up yourself or hire a professional. Regardless of the approach, it’s important to address any damage as soon as possible to prevent further problems.
Step 5: Schedule Regular Inspections
Finally, make sure to schedule regular sewer line checks to prevent future issues. By conducting inspections on a regular basis, you can catch minor problems before they become major repairs, saving you time and money in the long run.
Conclusion
Regular sewer line checks are an essential part of maintaining your plumbing system. By following these tips and conducting regular inspections, you can catch minor problems before they become major repairs. If you do encounter any issues, be sure to address them as soon as possible to prevent further damage. By taking a proactive approach, you can ensure your sewer line remains in good working condition for years to come.
Common DIY Fixes for Sewer Camera Systems
When it comes to maintaining your sewer camera system, there are several DIY fixes you can perform to ensure it remains in optimal condition. By following these simple steps, you can avoid costly professional repairs and keep your system functioning properly.
Troubleshooting and Diagnosing Issues
Before attempting any repairs, it’s important to troubleshoot and diagnose the issue with your sewer camera. If you’re experiencing issues with the camera’s image quality, be sure to clean the lens and check for any visible damage. If the camera won’t turn on, check the batteries or power source. Identifying and diagnosing the problem is key to determining the next steps.
Cleaning Your Sewer Camera System
Regular cleaning of your sewer camera system is essential for maintaining its performance. To clean the camera, remove any debris or buildup in the camera head and clean it with a mild detergent solution. Run water through the cable to flush out any buildup or debris and wipe down any external elements with a dry cloth.
Clog Detection and Solutions
If you’re experiencing clogs in your sewer camera system, there are several DIY solutions to try before calling in a professional. Run a snake through the system to dislodge any debris or buildup, or try using a plunger to remove any clogs. If these methods don’t work, you may need to use a sewer jetter to blast out the blockage.
Repairs and Replacements
If your sewer camera system requires repairs or replacements, there are several DIY options available. Replace any damaged cables or bendable sections, and make sure all connections are secure and tight. If the camera head is damaged beyond repair, consider purchasing a new one or renting a replacement to save on professional repair costs.
Regular Inspections
Regular inspections of your sewer camera system are crucial for detecting and addressing any issues before they become major problems. Run regular checks of the camera head and cable, and schedule professional inspections every few years to ensure your system is functioning properly.
By following these simple DIY fixes and maintenance tips, you can save time and money on professional sewer camera repairs and keep your system in optimal condition.
Conclusion
In conclusion, we hope that this article has provided you with valuable insights into DIY fixes and maintenance tips for your sewer camera system. By following the guidelines outlined in this article, you can avoid costly repairs and maintain the optimal performance of your camera.
Regular inspections and proper care are essential for the longevity and functionality of your sewer camera system. Remember to troubleshoot any issues before attempting any repairs, and use your camera effectively for diagnosing pipe problems.
Final Thoughts
As a professional copywriting journalist, we understand the importance of having a reliable sewer camera system that can detect and diagnose pipe problems. We hope that the tips and tricks provided in this article will help you maintain your system and save you time and money in the long run.
Don’t forget to refer back to this article as a comprehensive guide for common DIY fixes and maintenance tips, including clog detection, sewer scope repair, and drainage survey repair.
Thank you for reading, and we wish you the best of luck in your sewer camera repair and maintenance journey!
FAQ
Can I repair my sewer camera on my own?
Yes, there are DIY fixes for common issues with sewer cameras that you can try before calling a professional repair service. By following the steps provided in this guide, you can save time and money.
How do I troubleshoot problems with my sewer camera?
Before attempting any repairs, it’s important to troubleshoot the problem. This section will guide you through the process of identifying issues and diagnosing problems with your camera.
How can I detect and solve clogs in my sewer camera system?
Clogs are a common problem when it comes to sewer cameras. In this section, you will find step-by-step instructions on how to detect and solve clogs on your own, without the need for professional assistance.
What maintenance steps should I take to keep my sewer camera system in good condition?
Proper maintenance is essential for the longevity of your sewer camera system. Here, we will discuss the necessary steps, including cleaning and regular inspections, to ensure your camera’s optimal performance.
How can I use my sewer camera to diagnose pipe issues?
Your sewer camera can be a valuable tool for diagnosing pipe issues. In this section, we will explain how to effectively use your camera to identify and assess pipe problems, empowering you to make informed repair decisions.
Are there any tips for repairing my sewer scope camera on my own?
If your sewer scope camera is experiencing issues, you don’t always need to call a professional. This section will provide you with valuable tips on repairing your sewer scope camera, saving you time and money.
How do I perform a DIY drainage survey and address any problems I find?
Conducting a drainage survey can help identify issues with your pipes. In this section, we will guide you through the process of performing your own survey and provide self-repair solutions for any problems you may encounter.
What are some tips for conducting a DIY sewer line check and addressing any problems?
Regular sewer line checks can prevent major issues. This section will discuss the steps to conduct a DIY sewer line check and provide repair tips to address any problems found.
What are some common DIY fixes for sewer camera systems?
This section will cover common DIY fixes for sewer camera systems, including troubleshooting, cleaning, and minor repairs. By following these steps, you can maintain your camera’s functionality and avoid costly repairs.
What should I remember about repairing and maintaining my sewer camera system?
In conclusion, by following the DIY fixes and maintenance tips provided in this article, you can effectively repair and maintain your sewer camera system. Remember, regular inspections and proper care are key to ensuring your camera’s longevity and optimal performance.
- 5 Fun Things to Do in Jindabyne - April 1, 2024
- 7 Fun Things to Do With Kids at the Park - April 1, 2024
- 5 Fun Things to Do in Owen Sound This Weekend - April 1, 2024