How to Make a Stunning Red Vintage Cake (That Actually Tastes Amazing)
Have you been scrolling through Pinterest or TikTok lately and felt personally attacked by the sheer beauty of those over-the-top, frilly, hyper-feminine cakes? You know the ones. They’re adorned with intricate piping, delicate ruffles, and a level of extra that seems completely unattainable for a mere mortal. Well, I’m here to pull back the curtain on this gorgeous trend and show you how to make a jaw-dropping red vintage cake yourself.
Yes, you. The one who thinks their baking skills peak at box-mix brownies. This cake looks like it requires a fine arts degree and the patience of a saint, but I promise it’s more about having the right recipe and a few cheeky tricks up your sleeve. So, let’s get ridiculously fancy, shall we?
Why This Cake Recipe Will Make You a Legend
Okay, so it’s pretty. We get it. But why should you spend your precious time making this specific cake? Let me convince you.
First, the sheer “wow” factor is off the charts. This isn’t just a dessert; it’s a statement piece. It’s the cake you make for a best friend’s birthday, a super romantic Valentine’s Day, or honestly, for a random Tuesday when you need to feel like royalty. Prepare for gasps of admiration.
Second, unlike many beautiful cakes that taste like sweet cardboard, this one is insanely delicious. We’re making a classic, southern-style red velvet cake with a tender, moist crumb and a hint of cocoa. And we’re pairing it with a tangy, not-too-sweet cream cheese frosting that is—and this is crucial—sturdy enough to hold all those glorious piped details.

Finally, it’s a genuinely fun project. Worried about the piping? Don’t be. I’ll walk you through it step-by-step. It’s like playing with edible Play-Doh, but the result is something you can proudly show off before you devour it. IMO, that’s the best kind of art.
The Royal Ingredients List
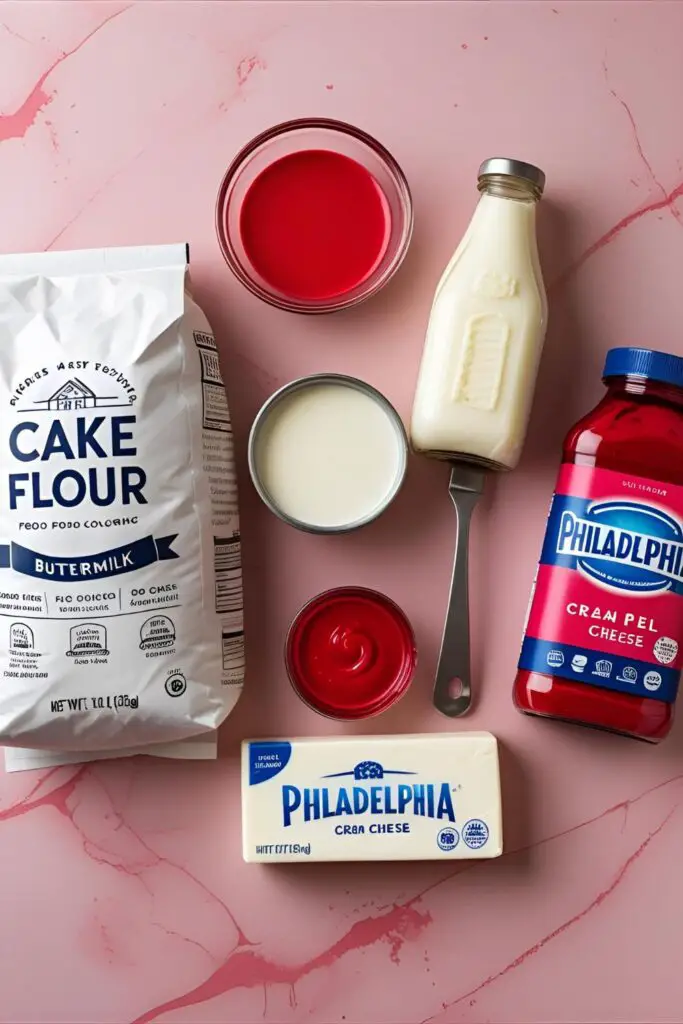
A cake this fabulous requires two main components: the cake itself and the frosting that makes it famous.
For the Red Velvet Cake:
- Cake Flour: 2 ½ cups. Cake flour is less of a suggestion and more of a demand for that super tender, velvety crumb.
- Unsweetened Cocoa Powder: 2 tablespoons. Just enough for a hint of chocolatey depth.
- Baking Soda: 1 teaspoon.
- Salt: 1 teaspoon.
- Unsalted Butter: ½ cup (1 stick), at room temperature. Don’t you dare use it straight from the fridge!
- Granulated Sugar: 1 ½ cups.
- Eggs: 2 large, at room temperature.
- Vegetable Oil: 1 cup. This is the secret to a ridiculously moist cake.
- Buttermilk: 1 cup, at room temperature. If you don’t have any, make your own by adding 1 tablespoon of white vinegar or lemon juice to 1 cup of regular milk and letting it sit for 5 minutes.
- Red Gel Food Coloring: 1-2 tablespoons. Use gel, not liquid! Gel gives you a vibrant color without a chemical aftertaste or watering down your batter.
- White Vinegar: 1 teaspoon.
- Vanilla Extract: 2 teaspoons.
For the Stable, Pipeable Cream Cheese Frosting:
- Unsalted Butter: 1 ½ cups (3 sticks), at a cool room temperature (not mushy!).
- Cream Cheese: 12 ounces (1 ½ blocks), cold, straight from the fridge. This is critical for a firm frosting!
- Powdered Sugar: 6 cups, sifted to remove lumps.
- Vanilla Extract: 1 tablespoon. Use clear vanilla extract if you want a snow-white frosting.
- Salt: ½ teaspoon.
Your Royal Toolkit: Gadgets for a Gorgeous Cake
You don’t need a professional bakery, but a few key tools will make your life infinitely easier and your cake look way more impressive.
- Stand Mixer or a powerful Hand Mixer: This is non-negotiable for the frosting. You need to whip it good.
- Two 8-inch Round Cake Pans or a Heart-Shaped Cake Pan: For that iconic vintage look.
- Piping Bags: You’ll need a few of these.
- Piping Tips: The soul of the vintage look. I recommend a basic set including a large star tip (like a Wilton 1M) for shells, a medium round tip (like a Wilton 12), and a small shell/border tip (like a Wilton 32).
- Offset Spatula: For getting those smooth, clean frosting surfaces.
- Cake Turntable: I know, it seems extra. But trust me, it makes frosting and piping a million times easier. You’ll feel like a pro.
- Sifter or Fine-Mesh Sieve: To banish lumpy frosting forever.
Step-by-Step Guide to Your Vintage Masterpiece
Deep breath. We’re doing this. I’ve broken it down into three manageable stages.
Stage 1: Baking the Glorious Red Velvet Cake
- Prep Your Station: Preheat your oven to 350°F(175°C). Grease and flour your cake pans, or line the bottoms with parchment paper for easy release.
- Combine Dry Ingredients: In a medium bowl, sift or whisk together the cake flour, cocoa powder, baking soda, and salt. Set it aside.
- Cream Butter & Sugar: In the bowl of your stand mixer (or using a hand mixer), beat the room temperature butter and sugar together on medium-high speed until light and fluffy, about 3-4 minutes.
- Add the Wet Stuff: Add the eggs one at a time, mixing well after each addition. With the mixer on low, slowly stream in the vegetable oil. In a separate bowl or measuring cup, whisk together the buttermilk, red gel food coloring, vinegar, and vanilla.
- Combine It All: Add the dry ingredients to the butter mixture in three additions, alternating with the wet buttermilk mixture (Dry, Wet, Dry, Wet, Dry). Mix on low speed until just combined. Do not, I repeat, DO NOT overmix, or you’ll get a tough cake.
- Bake It: Divide the batter evenly between your prepared pans. Bake for 30-35 minutes, or until a toothpick inserted into the center comes out clean. Let the cakes cool in the pans for 10 minutes before inverting them onto a wire rack to cool completely.
Stage 2: Whipping Up the Flawless Frosting
- Beat the Butter: In your stand mixer with the paddle attachment, beat the butter on medium-high speed for about 5-7 minutes until it’s very pale and fluffy. This step is key to a light texture.
- Add the Cold Cream Cheese: Cut the cold cream cheese into small cubes and add it to the butter. Mix on medium-low speed until just combined, about 30 seconds. Don’t overbeat, or it will get runny!
- Add Sugar and Flavor: Turn the mixer to low and gradually add the sifted powdered sugar. Once it’s mostly incorporated, add the vanilla and salt.
- Whip It!: Increase the speed to medium-high and beat for 2-3 minutes until the frosting is smooth, light, and holds its shape. If it feels too soft, pop the whole bowl in the fridge for 15-20 minutes before piping.
Stage 3: The Main Event – Assembling & Decorating
- Level Your Cakes: Once cooled, use a serrated knife to level the tops of your cakes if they have a dome. Save the scraps for snacking—baker’s treat!
- The Crumb Coat: Place one cake layer on your turntable. Apply a thin layer of frosting all over the top and sides. This is the crumb coat, and it traps all the loose red crumbs. Chill the cake in the fridge for 30 minutes until the frosting is firm.
- Final Frosting Layer: Apply a thicker, final layer of frosting over the chilled crumb coat. Use your offset spatula to get it as smooth as you can. Perfection isn’t the goal; vintage is about charm, remember?
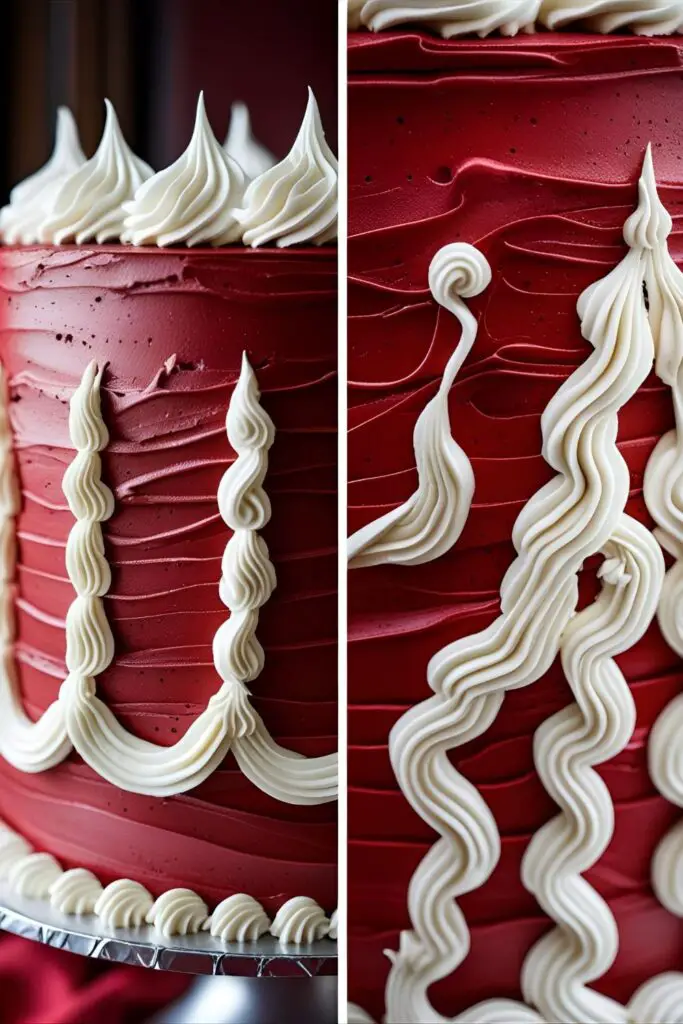
- Time to Pipe!: Now for the fun part. Fill your piping bags with the remaining frosting and your chosen tips.
- Bottom Border: Use a star tip (like Wilton 1M) or a shell tip (Wilton 32) to pipe a border around the bottom edge of the cake.
- Top Border: Pipe a matching border around the top edge.
- Get Frilly: This is where you can get creative! Pipe swags, ruffles, or little rosettes on the sides and top. Don’t be afraid to layer different piping styles. If you mess up, just scrape it off and try again!
- Finishing Touches: Add some maraschino cherries or sprinkles if you’re feeling extra.
The Damage Report: Calories & Nutrition

Let’s be real for a second. This is a celebration cake, not health food. But if you must know…
- Calories: Approximately 600-750 per generous slice.
- Sugar: A glorious, unapologetic amount.
- Fat: Yes, there’s butter and cream cheese in here.
- Joy: 100% of your daily recommended value.
- TBH: Just enjoy the slice. You can eat a salad tomorrow.
Common Cake-tastrophes and How to Avoid Them
- Using Liquid Red Food Coloring. This will throw off the moisture balance of your cake and can leave a bitter aftertaste. Stick to gel coloring.
- A Runny Mess of a Frosting. This happens when your butter or cream cheese is too warm, or you overbeat the cream cheese. Use cold cream cheese and cool room-temp butter, and don’t be afraid to chill the frosting if it feels soft.
- Skipping the Crumb Coat. If you skip this, your beautiful white frosting will be tragically flecked with red crumbs. Take the extra 30 minutes to chill a crumb coat. It’s worth it.
- Overmixing the Cake Batter. This develops too much gluten and leads to a dense, tough cake instead of a soft, velvety one. Mix until the flour just disappears.
Let’s Get Creative: Fun Variations
Once you’re a vintage cake pro, why not mix it up?
H3: Dramatic Chocolate Vintage Cake
Not a red velvet fan? Use your favorite rich, dark chocolate cake recipe instead. The contrast of the dark cake with the stark white, frilly piping is incredibly dramatic and sophisticated.
H3: Pastel Dream Cake
Who says vintage is only red? Use the same recipe but swap the red gel for pastel pink, lavender, baby blue, or mint green. This is perfect for baby showers, Easter, or a tea party.
H3: Gluten-Free Glamour
You can easily make this cake gluten-free! Simply substitute the cake flour with a high-quality, 1-to-1 measure gluten-free baking flour blend (one that contains xanthan gum). The texture will be just as divine.
Your Burning Questions, Answered
Here are the answers to the questions probably floating around in your head right now.
H3: What’s the real difference between a “vintage” cake and a regular cake?

It’s all in the decorating style! Vintage cakes, often inspired by the Lambeth piping method, are characterized by over-the-top, ornate piping—think lots of shells, swags, ruffles, and scrolls layered on top of each other.
H3: My cream cheese frosting is too soft to pipe. HELP!
Don’t panic! The quickest fix is to chill it. Pop the bowl in the fridge for 20-30 minutes. If it’s still too soft, you can beat in a bit more sifted powdered sugar, about ¼ cup at a time, until it reaches a stiffer consistency.
H3: Can I make this cake ahead of time?
Absolutely. You can bake the cake layers up to two days in advance. Let them cool completely, then wrap them tightly in plastic wrap and store them at room temperature. You can even frost the cake (crumb coat and final layer) a day ahead and keep it in the fridge. Just do the final decorative piping the day of serving for the best results.
H3: What are the absolute best piping tips for a vintage look?
A great starter kit would be a Wilton 1M (large open star), a Wilton 32 (shell/small star), and a Wilton 12 (medium round). With these three, you can create borders, rosettes, swags, and dots.
H3: How do I get my frosting super white?
Two tricks: use clear vanilla extract instead of regular brown vanilla, and beat your butter for a full 5-7 minutes at the beginning until it’s very pale before adding anything else.
H3: Do I have to use red velvet for the cake base?
Not at all! A sturdy vanilla, almond, or chocolate cake works beautifully. The key is to have a cake that can support the weight of all that glorious frosting.
H3: Is a cake turntable really necessary?
I mean, you can decorate a cake without one, but it makes getting a smooth finish and even borders about a thousand times easier. If you think you’ll decorate more than one cake in your life, it’s a worthy investment.
Final Thoughts: You Are Now a Cake Artist
There you have it! You’ve faced the flour, wrangled the frosting, and piped your heart out. You are now the proud creator of a stunning red vintage cake. Go ahead, take a million photos from every angle. Post it on Instagram and make everyone jealous.
Then, and this is the most important step, grab a fork and cut a giant slice. You’ve more than earned it. Welcome to the fancy cake club.