The Ultimate Red Heart Cake Recipe (With a Secret Pan Hack!)
Let’s be real. Sometimes a flimsy card or a generic box of chocolates just doesn’t cut it. You want to make a statement, a grand, edible gesture that screams “I love you,” “I’m sorry,” or perhaps even, “I know I forgot our anniversary but please look at this magnificent thing I made!” My friend, you need the ultimate expression of affection: the homemade red heart cake.
Forget timid cupcakes or boring sheet cakes. We’re going straight for the heart—literally. This isn’t just a dessert; it’s a culinary mic drop. It’s the kind of cake that stops conversations and elicits genuine, wide-eyed gasps of delight.
And the best part? It’s so much easier than it looks. I’m going to show you how to create a stunning red heart cake, including a brilliant trick that means you don’t even need a special pan. Ready to bake your heart out?
Why This Recipe Is Basically a Love Potion
So why this cake? Why go to the trouble of making a shaped, frosted masterpiece?
First, it’s an absolute showstopper. Nothing says “I went the extra mile” quite like a beautifully crafted red heart cake. Whether it’s for Valentine’s Day, an anniversary, or just a random Tuesday, this cake has a massive visual impact. It’s edible art that tastes as good as it looks.

Second, it’s shockingly easy, especially with my pan hack. Worried you don’t have a heart-shaped pan collecting dust in your cupboard? Who does?! I’ll show you how to create a perfect heart shape using a standard square and round pan you already own. It’s like a magic trick, but with more butter.
And finally, the flavor is to die for. We’re making a classic, tangy, and moist red velvet cake with a luscious, velvety cream cheese frosting. It’s the perfect flavor combination—a little bit tangy, a little bit sweet, with a hint of chocolate. It’s the flavor of love, people!
The Ingredients for Love
To create this masterpiece, you’ll need a few key ingredients. No funny business, just classic, delicious stuff.
For the Red Velvet Cake:
- 2 1/2 cups all-purpose flour
- 1 1/2 cups granulated sugar
- 1 teaspoon baking soda
- 1 teaspoon salt
- 1 teaspoon unsweetened cocoa powder
- 1 1/2 cups vegetable oil
- 1 cup buttermilk, at room temperature
- 2 large eggs, at room temperature
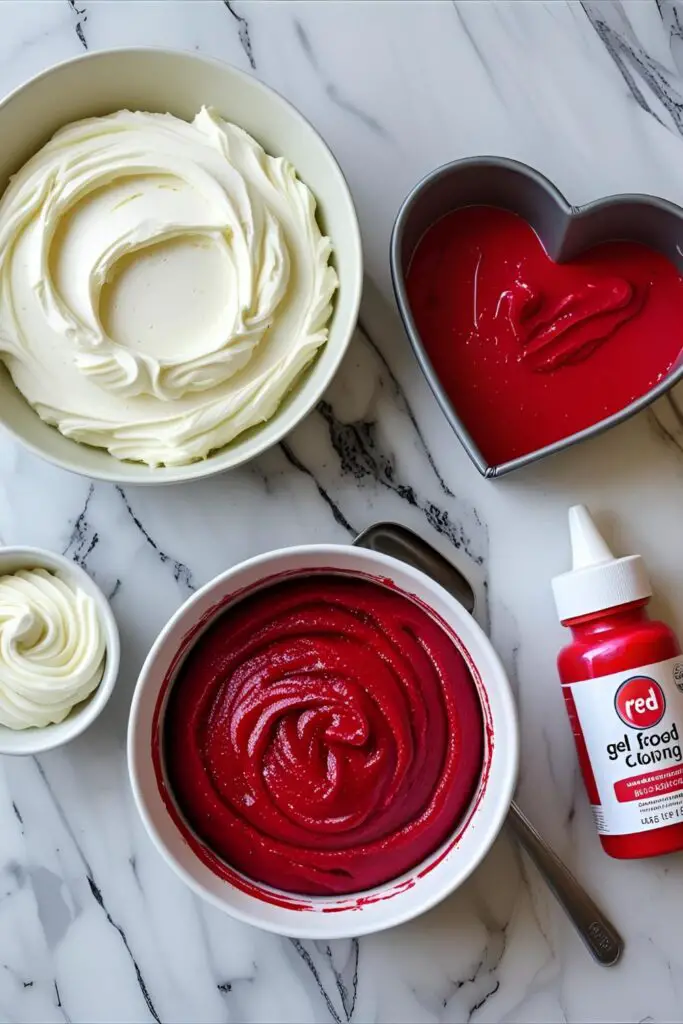
- 2 tablespoons (1 oz) red gel food coloring (this is important!)
- 1 teaspoon white vinegar
- 1 teaspoon vanilla extract
For the Irresistible Cream Cheese Frosting:
- 16 oz (2 blocks) full-fat brick cream cheese, softened
- 1 cup unsalted butter, softened
- 4 cups powdered sugar, sifted
- 1 tablespoon vanilla extract
- 1/2 teaspoon salt
The Baker’s Toolkit (Tools & Gadgets)
Having the right equipment will make this process a walk in the park. Or a love story in the kitchen. Whatever.
- Heart-Shaped Cake Pan: If you want to go the traditional route, a 9-inch heart-shaped cake pan is your most direct path to victory.
- The Magic Pan Combo: For my secret hack, you’ll need one 8-inch square cake pan and one 8-inch round cake pan. This is my favorite method!
- An Offset Spatula: The key to smooth, dreamy frosting. A long offset spatula gives you professional-level control.
- Piping Bags and Tips: Optional, but great for adding a decorative border. A simple piping set with a star tip is perfect.
- High-Quality Red Gel Food Coloring: This is non-negotiable for a true red heart cake. I swear by Americolor Super Red for a deep, vibrant red that doesn’t taste bitter.
Step-by-Step: How to Build Your Heart

Alright, let’s get down to business. Follow these steps, and you’ll have a perfect cake in no time.
Part 1: Making the Red Velvet Dream
Step 1: Prep Your Station Preheat your oven to 350°F (175°C). Grease and flour your pan(s) of choice. Whether you’re using the heart pan or the square/round combo, be thorough!
Step 2: Mix the Dry Ingredients In a large bowl, whisk together the flour, sugar, baking soda, salt, and cocoa powder.
Step 3: Combine the Wet Ingredients In a separate medium bowl, whisk together the oil, buttermilk, eggs, red gel food coloring, vinegar, and vanilla. Whisk until it’s a terrifyingly vibrant red color and everything is well combined.
Step 4: Bring It All Together Pour the wet ingredients into the dry ingredients. Mix on low speed (or by hand with a whisk) until everything is just combined. Do not overmix the batter, or you’ll get a tough cake.
Step 5: Bake! Pour the batter into your prepared pan(s). Bake for 30-40 minutes, or until a toothpick inserted into the center comes out with moist crumbs attached. Let the cake(s) cool in the pans for 15 minutes before carefully inverting them onto a wire rack to cool completely. A completely cool cake is crucial for the next steps!
Part 2: The Easiest Cream Cheese Frosting Ever

While the cake cools, make the frosting. In a large bowl, beat the softened cream cheese and butter together until smooth and creamy, about 3 minutes. Gradually add the sifted powdered sugar, then beat in the vanilla and salt. Beat on high for another 2-3 minutes until it’s light and fluffy. Try not to eat it all with a spoon.
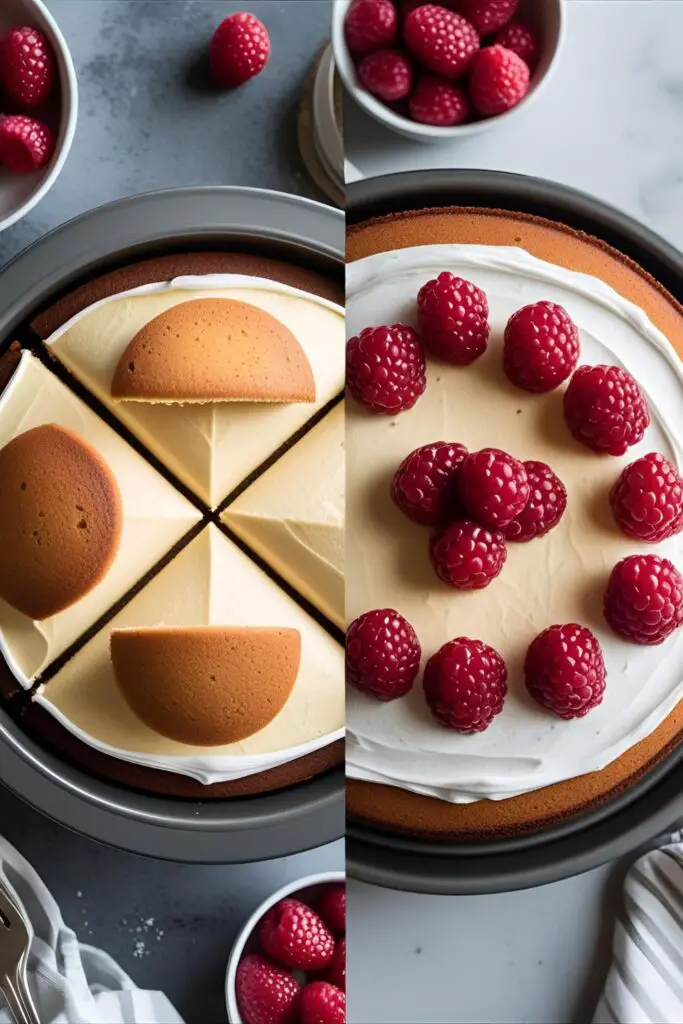
Part 3: Assembling Your Red Heart Cake
If using a heart-shaped pan: You’re golden! Move on to frosting.
If using the pan hack:
- Let the cakes cool COMPLETELY. I cannot stress this enough.
- Cut the round cake cleanly in half, creating two semi-circles.
- Place the square cake on your serving platter, but orient it so it looks like a diamond.
- Take your two semi-circle halves and place the flat edge of each one against two adjacent top sides of the diamond.
- Stand back and marvel. You just made a perfect heart shape out of a square and a circle. It’s delicious geometry!
Frosting Your Masterpiece: Use a long offset spatula to apply a thin “crumb coat” of frosting all over the cake. This traps the crumbs. Chill the cake for 20-30 minutes. Once chilled, apply a generous, final layer of frosting and smooth it out as best you can. You can create swoops and swirls for a rustic look or aim for a perfectly smooth finish.
Calories & Nutritional Info
A formal statement from my heart to yours.
- Serving Size: 1 slice of pure love
- Calories: Don’t you dare. It’s a red heart cake. The calories fall in love with each other and cancel themselves out. (Okay, probably around 600 per slice. Worth it.)
- Main Vitamin: Vitamin L (for Love).
- Recommendation: Serve with a side of compliments.
Common Mistakes to Avoid (Or, How Not to Break a Heart)
Let’s avoid any romantic tragedies in the kitchen.
- The Sad, Brownish Heart: You used cheap, liquid red food coloring from the back of your pantry. You must use a high-quality, concentrated red gel food coloring to get a true, vibrant red.
- The Broken Heart: Your cake crumbled when you tried to assemble the heart shape. Your cakes were not fully cooled. Chilled cakes are firm and much easier to handle. Patience, my friend.
- The Soupy Frosting: Your cream cheese frosting is runny and sad. You used cream cheese from a tub or it wasn’t softened properly. Always use full-fat, brick-style cream cheese, and make sure both it and the butter are at a similar, soft room temperature.
- The Lopsided Heart: Your finished shape looks a little… off. You didn’t cut your round cake exactly in half. Use a ruler or just eyeball it carefully for a symmetrical look.
Variations & Customizations
Want to add your own signature touch to your red heart cake? I love that for you.
- The “Bleeding” Heart Cake: Before you put the top layer of frosting on, core out a small section from the center of the cake and fill it with a seedless raspberry or strawberry jam. When you cut into it, it will “bleed” a delicious, fruity sauce. So dramatic!
- The Chocolate Decadence Heart: Not a red velvet fan? Make your favorite rich, dark chocolate cake instead. Frost it with a deep pink raspberry buttercream for a stunning color and flavor contrast.
- The Naked Heart: For a more rustic, modern look, go for a “naked” or “semi-naked” cake. Just apply a very thin layer of frosting, allowing the deep red cake to peek through. It’s effortlessly chic.
Frequently Asked Questions (Love Queries)
You have questions about this labor of love? I have answers.
1. How do you make a heart-shaped cake without a heart pan? It’s the best trick! Bake one 8-inch square cake and one 8-inch round cake. Cool them completely. Cut the round cake in half. Place the square cake like a diamond and arrange the two semi-circles on the top adjacent sides to form a perfect heart.
2. What is the best red food coloring to use? A concentrated gel food coloring is a must. Brands like Americolor (Super Red) or Chefmaster provide intense color without a bitter taste or watering down your batter.
3. Why did my red velvet cake turn out brown? This is usually due to using weak food coloring or not enough of it. The reaction between the cocoa powder, vinegar, and buttermilk gives a reddish-brown tint, but for a truly red red heart cake, you need the power of a good gel color.
4. What flavor is a red heart cake? While you can make it any flavor, the classic choice is Red Velvet. It has a unique flavor that’s not quite vanilla and not quite chocolate, with a slight tangy finish that pairs perfectly with cream cheese frosting.
5. How do you get a super smooth frosting finish? After your crumb coat, apply a thick final layer of frosting. Then, heat a long metal spatula or bench scraper under hot water, wipe it dry, and gently run it over the frosting to melt and smooth the surface.
6. Can I make this cake ahead of time? Yes! You can bake the cake layers up to two days in advance and store them tightly wrapped at room temperature. The frosted cake can be stored in the fridge for up to 3 days, but let it sit at room temperature for about an hour before serving for the best texture.
7. What are some simple decorating ideas? Keep it simple! A smooth coat of white cream cheese frosting is classic. You can also press chocolate curls or festive sprinkles around the bottom edge, or top it with fresh raspberries to accentuate the red theme.
Final Thoughts
You did it. You faced the flour, you conquered the frosting, and you created a masterpiece that is so much more than a dessert. This red heart cake is a statement, a centerpiece, and a testament to the fact that the most loving gestures are the ones you make with your own two hands.
So go on, present your beautiful creation. Watch the smiles. Accept the compliments. You’ve officially proven that the way to anyone’s heart is, quite literally, through a stunning, homemade cake.