The Ultimate Red and White Cake (A Perfect Red Velvet Recipe!)
Let’s talk about the most mysterious, most debated, and most dramatically colored cake in the entire baking universe: Red Velvet. Is it just a chocolate cake with a dye job? Is it a weird vanilla cake having an identity crisis? What is the deal with this crimson-hued enigma? If you’ve ever found yourself pondering these questions while staring into a bakery case, you’re in the right place. Today, we’re demystifying this Southern icon and showing you how to make a truly spectacular red and white cake from scratch.
This isn’t one of those recipes that just uses a white cake mix and a gallon of food coloring. We’re making the real deal—a cake with a unique, subtle flavor and a texture so soft, so tender, it can only be described as “velvet.”
So, forget the impostors. Get ready to bake a legendary red velvet cake with a tangy cream cheese frosting so good, it will become your new go-to for every celebration.
Why This Recipe is an Instant Classic
In a world full of cakes, Red Velvet is a celebrity. Here’s why this specific recipe deserves a standing ovation.
First, it has an authentic, unforgettable flavor. A true red velvet cake isn’t aggressively chocolatey. It’s a delicate dance of flavors—a hint of cocoa, a touch of vanilla, and a slight, pleasant tang from buttermilk and vinegar. It’s a unique taste that keeps you coming back for another bite, trying to figure out its delicious secrets.

Second, the texture is right there in the name: VELVET. This isn’t a marketing gimmick. A specific chemical reaction between the acidic ingredients (buttermilk and vinegar) and the baking soda creates an incredibly fine, soft, and tender crumb that is unlike any other cake you’ve ever had. It literally feels velvety in your mouth.
Finally, it’s paired with its one true soulmate: cream cheese frosting. The rich, sweet, and tangy frosting is the perfect counterpart to the mild-mannered cake. The combination is iconic for a reason. It’s a culinary power couple, and frankly, it would be a crime to separate them.
The Cast of Characters: Ingredients
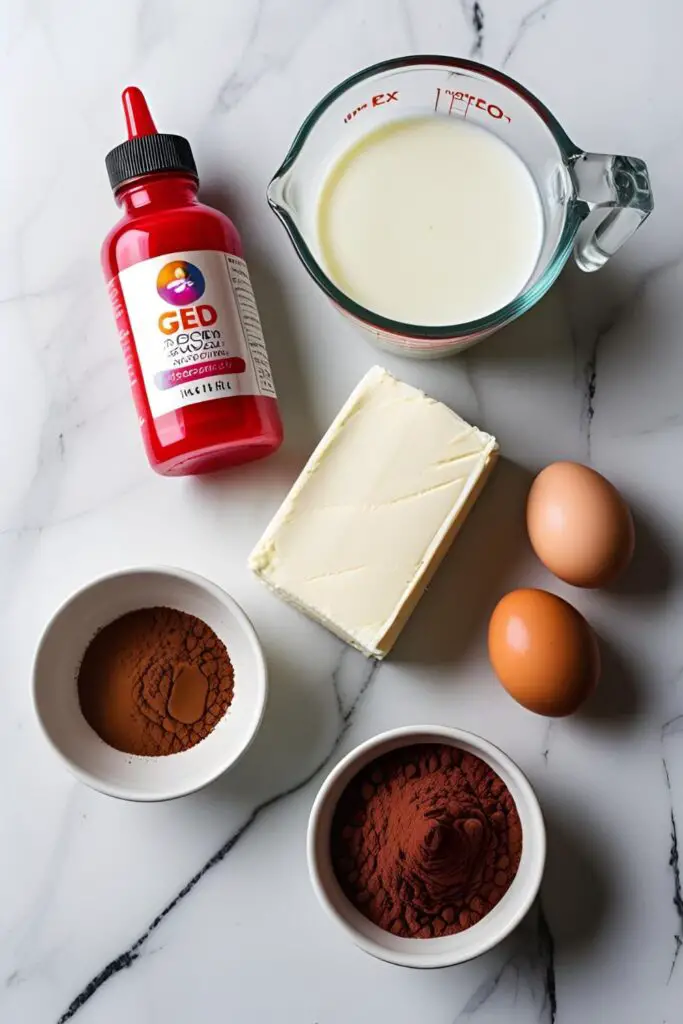
A great performance requires a great cast. Here are the stars of our show.
For the Velvety Red Cake:
- 221 cups (300g) all-purpose flour
- 2 tablespoons (15g) unsweetened cocoa powder (natural, not Dutch-processed)
- 1 teaspoon baking soda
- 1 teaspoon salt
- 1 cup (226g) unsalted butter, softened
- 121 cups (300g) granulated sugar
- 2 large eggs, at room temperature
- 1 cup (240ml) vegetable oil
- 1 cup (240ml) buttermilk, at room temperature
- 1 tablespoon red gel food coloring (This is a must for a vibrant color!)
- 1 teaspoon pure vanilla extract
- 1 teaspoon white distilled vinegar
For the Perfect Cream Cheese Frosting:
- 16 ounces (452g) full-fat block cream cheese, softened to room temperature
- 1 cup (226g) unsalted butter, softened to room temperature
- 4 cups (480g) powdered sugar, sifted
- 2 teaspoons pure vanilla extract
- A pinch of salt
The Backstage Crew: Tools & Gadgets
Having the right equipment ensures a flawless performance.
- Stand Mixer or Electric Hand Mixer: A must for properly creaming the butter and sugar and for whipping up a lump-free frosting.
- Mixing Bowls, Sifter, and a Silicone Spatula: The essential supporting cast.
- Measuring Cups and Spoons: For a consistent, reliable result every time.
- Two or Three 8-inch Round Cake Pans: Using three pans will give you more dramatic, thinner layers.
- Parchment Paper & Wire Cooling Rack: For a drama-free release and proper cooling.
- Offset Spatula & Bench Scraper: Your secret weapons for achieving that beautiful, smooth, professional frosting finish.
- Cake Turntable: Makes frosting the cake feel less like a chore and more like an art project.
Step-by-Step: The Script to a Perfect Cake
Follow these scenes in order, and you’re guaranteed a hit.
H3: Part 1: The Red Velvet Cake
- Set the Stage: Preheat your oven to 350°F (175°C). Grease and flour your cake pans, and line the bottoms with parchment paper.
- Sift the Dry Ingredients: In a medium bowl, sift together the flour, cocoa powder, baking soda, and salt. Sifting is key for a fine, velvety crumb.
- Cream Butter and Sugar: In the bowl of your stand mixer, beat the softened butter and granulated sugar together on medium-high speed for 3-4 minutes until pale and fluffy.
- Add Eggs and Oil: Add the eggs one at a time, mixing well after each. Scrape down the bowl, then, with the mixer on low, slowly stream in the vegetable oil until it’s combined.
- The Color and Flavor Base: In a separate small bowl, whisk together the buttermilk, red gel food coloring, vanilla, and vinegar. It will look alarmingly red. This is good.
- Alternate and Combine: With the mixer on its lowest speed, add the dry ingredients in three additions, alternating with the wet ingredients (begin and end with the dry). Mix only until the last streaks of flour disappear. Do not overmix!
- Bake and Cool: Divide the stunningly red batter evenly among your prepared pans. Bake for 30-35 minutes (for two pans) or 20-25 minutes (for three pans), or until a toothpick inserted into the center comes out with moist crumbs. Let the cakes cool in the pans for 15 minutes before turning them out onto a wire rack to cool completely.
H3: Part 2: The Cream Cheese Frosting
- Beat the Fats: In a clean mixer bowl, beat the room temperature cream cheese and butter together on medium-high speed for 2-3 minutes until completely smooth and free of lumps. This step is critical.
- Add Sugar and Vanilla: With the mixer on low, gradually add the sifted powdered sugar. Once it’s mostly incorporated, add the vanilla and salt.
- Whip to Perfection: Increase the speed to medium-high and whip for another 2-3 minutes until the frosting is light, fluffy, and smooth. Do not overbeat, or it can become runny.
H3: Part 3: The Grand Finale Assembly
- Level and Layer: If your cakes have a dome, use a serrated knife to level the tops (save the scraps!). Place your first layer on a turntable or cake stand.
- Fill and Stack: Top the first layer with a generous amount of cream cheese frosting. Spread it evenly. Add the next layer and repeat.
- Crumb Coat and Chill: Apply a thin layer of frosting all over the cake to trap the crumbs. Chill the cake in the fridge for at least 30 minutes until the frosting is firm.
- The Final Coat: Cover the chilled cake with the remaining frosting, using your offset spatula and bench scraper to create a beautiful, smooth finish. For a classic decoration, take the red cake scraps, crumble them up, and press them around the base of the cake or sprinkle them on top.
Nutritional Info (The Applause-o-Meter)
Here’s what the critics are saying.
- Serving Size: 1 slice (assuming 16 slices)
- Estimated Calories: Around 650 kcal of pure, velvety bliss.
- Key Components: A standing ovation for your taste buds.
- Note: This is a celebration cake. It is meant to be indulgent. Enjoy it.
Common Mistakes to Avoid (Show-Stopping Disasters)
- A Dull, Brownish-Red Cake: You used liquid food coloring. It’s not potent enough and can add a weird flavor. You must use a high-quality red gel food coloring for that iconic, vibrant color.
- A Dry, Disappointing Cake: You overbaked it. Red velvet cake is notoriously easy to dry out. Keep a close eye on it and pull it from the oven as soon as a toothpick comes out with moist crumbs attached, not perfectly clean.
- Lumpy, Runny Frosting: Your cream cheese and/or butter were too cold. This is the #1 cause of lumpy frosting. They must be softened to the same room temperature to emulsify properly. If your frosting is too runny, it’s likely been overbeaten; chill it for 20-30 minutes and try mixing it again briefly.
- A Dense, Heavy Crumb: You either overmixed the flour or you skipped the buttermilk. The acidity in the buttermilk and vinegar is essential for creating the tender, velvety texture.
- Forgetting the Cocoa: You thought, “it’s not a chocolate cake, I’ll just skip it.” Don’t! The small amount of cocoa powder is crucial for the authentic, nuanced flavor of Red Velvet.
Variations & Customizations (Creative Encores)

Ready to put your own spin on this classic?
- Red and White Cupcakes: A perfect, party-friendly option. This recipe will make about 24 cupcakes. Bake for 18-22 minutes and top with a swirl of cream cheese frosting.
- The “Naked” Cake: For a more modern, rustic look. Apply frosting only between the cake layers and then use your bench scraper to apply a very thin, scraped layer on the outside, letting the beautiful red layers show through.
- Naturally Colored (and Honest): If you’re staunchly against food coloring, you can use beet powder. Mix about 2-3 tablespoons of beet powder into the buttermilk. FYI, the color will be more of a deep maroon than a vibrant red, and it will have a very subtle earthy note, but it’s a great natural alternative.
Frequently Asked Questions (Your Backstage Pass)
So, what flavor is Red Velvet, really?
It’s not quite chocolate and not quite vanilla. It has a very mild cocoa flavor with a slight tanginess from the buttermilk and vinegar. The primary flavor most people associate with it is the tangy-sweet cream cheese frosting it’s paired with.
Do I have to use buttermilk and vinegar? Can’t I just use regular milk?
You really need the acidity from both the buttermilk and vinegar. It reacts with the baking soda to create the cake’s signature lift and tender crumb. You can make a “sour milk” substitute in a pinch by adding a tablespoon of vinegar or lemon juice to a cup of regular milk and letting it sit for 10 minutes.
How do I get a super vibrant red color without it tasting weird?
Use a high-quality, concentrated gel food coloring. Gels like Americolor “Super Red” or Chefmaster “Red Red” are designed to give you a deep color without a bitter aftertaste. You need far less gel than liquid coloring.
Why is my cream cheese frosting always so runny?
Either your cream cheese and butter were too warm, or you overbeat it after adding the sugar. It should be beaten until just light and fluffy. If it’s runny, chilling it in the fridge is your best bet to help it firm up.
Can I make this red and white cake ahead of time?
Yes! The cake layers can be baked, cooled, and wrapped tightly in plastic wrap up to two days in advance. The fully frosted cake can be made a day ahead and stored in the refrigerator.
What’s the best way to decorate a Red Velvet cake?

The most traditional decoration is to use the red cake scraps from leveling the layers. Crumble them up and press them onto the sides or top of the cake. A simple piped border or fresh berries also looks beautiful.
Can I freeze Red Velvet cake?
Absolutely. You can freeze the unfrosted cake layers, tightly wrapped, for up to 3 months. You can also freeze the frosted cake, though it’s best to let it “flash freeze” on a tray first before wrapping it to protect the frosting. Thaw in the refrigerator.
Final Thoughts
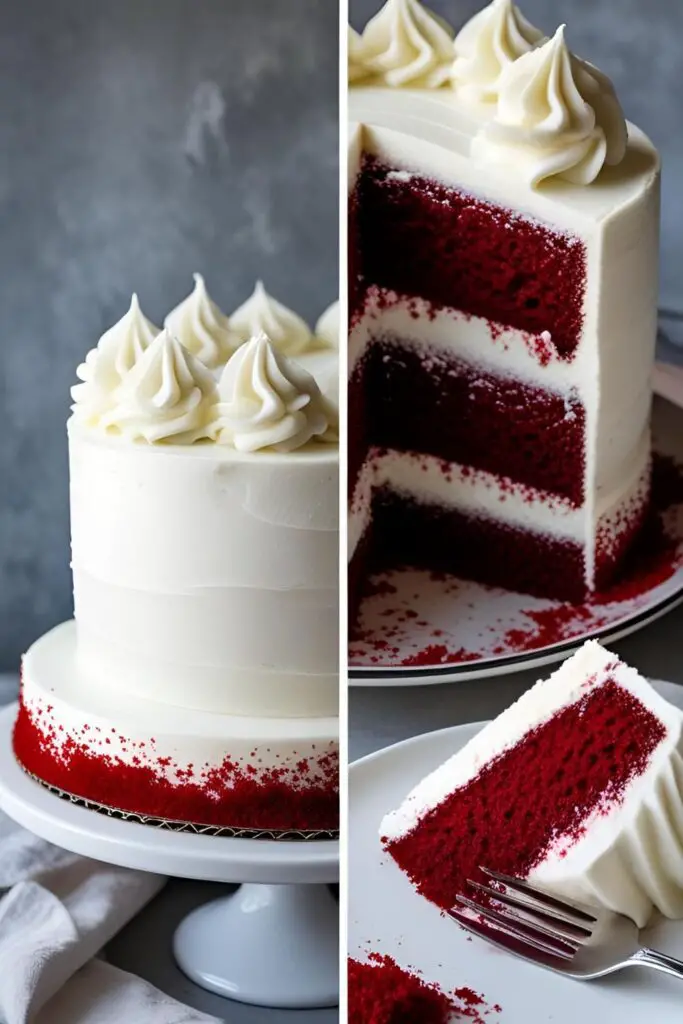
Congratulations. You’ve just pulled back the curtain on one of the most beloved and misunderstood cakes of all time. You’ve mastered its secrets, from its unique flavor to its iconic color. You are now the keeper of an incredible recipe that will make you a legend at birthdays, holidays, and any occasion that calls for a truly spectacular dessert.
Now, go forth and bake. Cut a slice and marvel at the stunning contrast between the deep red cake and the pristine white frosting. You have officially joined the velvet revolution.