Perfect Roasted Chicken Breast: Say Goodbye to Dry, Flavorless Chicken (Finally!)
Let’s face it, roasting a chicken breast can feel like a culinary tightrope walk, right? One wrong move and BAM! You’re stuck with a dry, chewy disappointment that even your dog gives the side-eye. But what if I told you that achieving a perfectly juicy, flavorful roasted chicken breast is actually ridiculously easy? Yep, we’re talking about chicken so good, it’ll make you wanna slap your mama (affectionately, of course). Ready to unlock the secrets to chicken breast nirvana?
If you’re tired of chicken that tastes like sadness and cardboard, then you’ve landed in the right place. We’re about to demystify the process and show you how to roast chicken breast that’s tender, juicy, and bursting with flavor. Even here in Khulna, where fresh, quality ingredients are key, mastering this simple technique will elevate your home cooking game to a whole new level.
Why This Roasted Chicken Breast Recipe Is Your New BFF
Why should you trust this particular recipe amidst the sea of internet chicken advice? Let me break it down for you.
First, it’s foolproof (almost). We’re talking simple steps and minimal ingredients. Even if your culinary skills lean more towards boiling water than Michelin-star creations, you can nail this. Trust me.
Second, it’s all about the flavor. We’re not just roasting plain chicken here. We’re using a few key seasonings and techniques to create a truly delicious and versatile protein. It’s the perfect blank canvas for countless meals.
Finally, it’s healthy and efficient. Roasted chicken breast is a fantastic source of lean protein. Plus, it cooks relatively quickly, making it ideal for those busy weeknights when ordering takeout seems like the only viable option.
The Simple Yet Mighty Ingredients
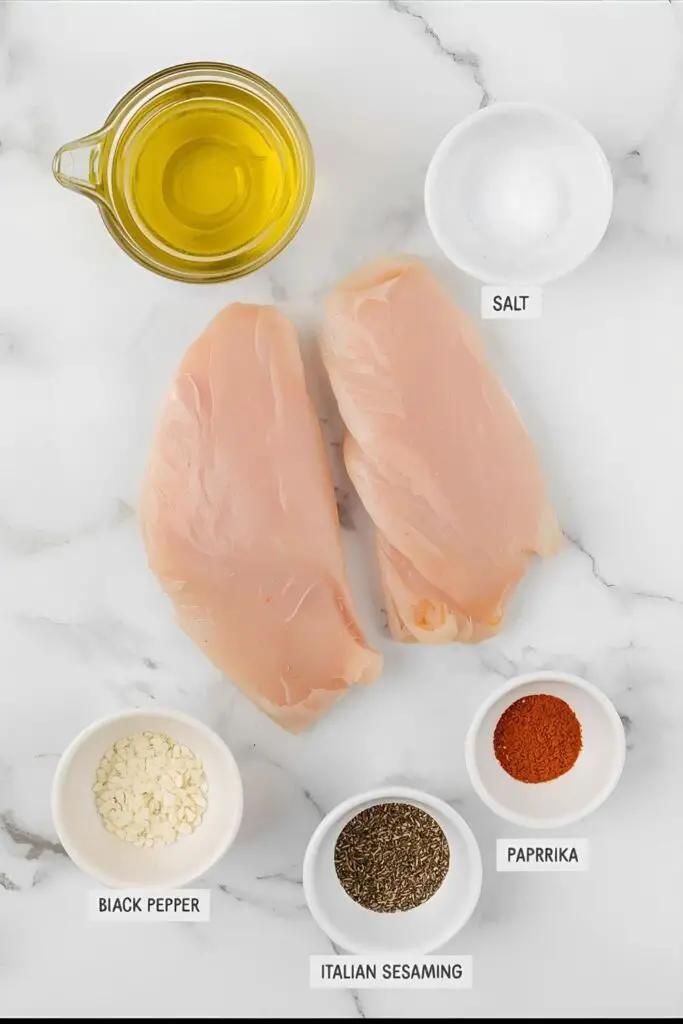
You don’t need a pantry overflowing with exotic spices for this magic to happen.
- The Star:
- Boneless, Skinless Chicken Breasts: 2-4, about 6-8 ounces each. Try to choose breasts that are similar in size for even cooking.
- The Flavor Makers:
- Olive Oil: 2 tablespoons (helps with browning and adds flavor).
- Salt: 1 teaspoon (essential for bringing out the flavor).
- Black Pepper: ½ teaspoon (freshly ground is always better, FYI).
- Garlic Powder: ½ teaspoon (adds a subtle savory note).
- Dried Paprika: ½ teaspoon (adds a touch of sweetness and color).
- Dried Italian Seasoning: ½ teaspoon (for that classic herby goodness).
- Optional Flavor Boosters:
- Fresh Herbs (rosemary, thyme): A few sprigs (adds amazing aromatics).
- Lemon Slices: 2-3 (adds a bright, citrusy flavor).
Your Minimalist Roasting Arsenal
Good news! You probably already have everything you need.
- A Baking Sheet: The workhorse of this operation.
- Aluminum Foil (Optional): For lining the baking sheet for easier cleanup.
- A Meat Thermometer: This is your secret weapon for perfectly cooked, juicy chicken. Seriously, get one.
- A Small Bowl: For mixing the seasonings.
- A Pastry Brush or Your Hands: For coating the chicken with oil and seasonings.
Step-by-Step to Chicken Breast Perfection
Ready to roast like a pro? Let’s do this!
Step 1: Preheat Your Oven (Get That Heat Going!)
Preheat your oven to a moderate 400°F (200°C). This temperature allows the chicken to cook through without drying out too quickly.
Step 2: Prep Your Chicken (A Little TLC Goes a Long Way)
Pat the chicken breasts dry with paper towels. This helps them brown better. Trust me on this one. Place them on your baking sheet (lined with foil if you’re feeling lazy about cleanup).
Step 3: Season Like You Mean It!
In your small bowl, combine the olive oil, salt, pepper, garlic powder, paprika, and Italian seasoning. Mix it all together. Now, using a pastry brush or your clean hands, rub this flavorful mixture all over the chicken breasts, making sure they’re evenly coated. If you’re using fresh herbs or lemon slices, tuck them around or under the chicken breasts now.
Step 4: Roast to Juicy Glory (The Waiting Game)
Place the baking sheet in the preheated oven and roast for 20-30 minutes. The exact cooking time will depend on the thickness of your chicken breasts. This is where that meat thermometer comes in handy!
Step 5: The All-Important Temperature Check!
The chicken is done when a meat thermometer inserted into the thickest part of the breast registers 165°F (74°C). Do not guess! Undercooked chicken is a no-go zone. Overcooked chicken is the aforementioned sad, chewy situation we’re trying to avoid.
Step 6: Rest is Best (Seriously, Don’t Skip This!)
Once the chicken reaches 165°F, remove it from the oven and let it rest on the baking sheet for 5-10 minutes before slicing. This allows the juices to redistribute throughout the meat, resulting in a much more tender and flavorful chicken breast. Impatience will be punished with dry chicken. You’ve been warned.
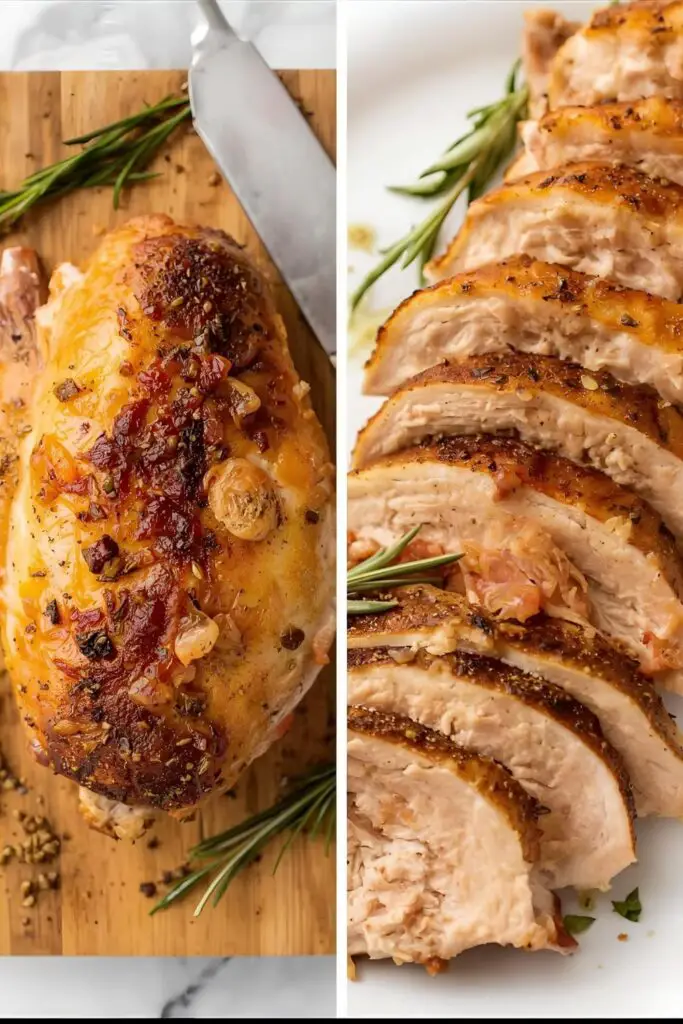
Step 7: Slice and Enjoy Your Perfectly Roasted Chicken!
That’s it! Slice your beautifully roasted chicken breast and serve it with your favorite sides. Bask in your culinary achievement. You did it!
Calories & Nutritional Info (Lean Protein Powerhouse)
Roasted chicken breast is a fantastic source of lean protein and relatively low in calories. Here’s a rough estimate for one 6-ounce cooked chicken breast:
- Serving Size: 1 (6-ounce) cooked chicken breast
- Estimated Calories: 180-220
- Protein: 35-40g (a fantastic amount of lean protein!)
- Fat: 5-8g (mostly healthy monounsaturated fats from the olive oil)
- Carbohydrates: 0g (unless you count trace amounts from seasonings)
- Nutritional Note: An excellent source of niacin, selenium, and phosphorus.
Common Mistakes to Avoid (The Chicken Crime Scene)
- Starting with Cold Chicken: Take your chicken out of the fridge about 15-20 minutes before roasting. This helps it cook more evenly. Room temperature-ish chicken cooks better!
- Uneven Thickness Issues: If your chicken breasts are significantly different in thickness, they’ll cook unevenly. You can either pound the thicker parts to a more uniform thickness or cook them separately. Uniformity is your friend!
- Under-Seasoning Agony: Bland chicken is a culinary tragedy. Don’t be shy with the salt and other seasonings!
- Overcrowding the Baking Sheet: Give your chicken some space! Overcrowding will cause it to steam rather than roast, hindering that lovely golden-brown crust. Space them out!
- Not Using a Meat Thermometer: Seriously, just get one. It’s the only way to accurately know when your chicken is cooked to a safe and juicy 165°F. The thermometer is your bestie!
- Skipping the Resting Period: As tempting as it is to slice into that hot chicken right away, resist! That resting time makes a HUGE difference in the juiciness. Patience is a virtue (especially with chicken)!
Variations & Customizations (Spice Up Your Chicken Life!)
This basic recipe is a blank canvas for endless flavor adventures.
1. Herbaceous Lemon Garlic Chicken
Use fresh rosemary, thyme, and oregano along with the garlic powder. Stuff a few slices of lemon under the chicken skin (if it has skin) or place them around the breasts while roasting.
2. Spicy Chili-Lime Chicken
Rub the chicken with olive oil and a mixture of chili powder, cumin, smoked paprika, garlic powder, onion powder, salt, and pepper. After roasting, squeeze fresh lime juice over the top for a zesty finish.
3. Mediterranean Marinated Chicken
Marinate the chicken breasts for at least 30 minutes (or up to a few hours) in a mixture of olive oil, lemon juice, minced garlic, dried oregano, salt, and pepper before roasting.
FAQ Section: Your Roasted Chicken Breast Questions, Answered
Let’s tackle those common chicken conundrums.
1. How long should I marinate chicken breast for roasting? For the best flavor and tenderness, marinate for at least 30 minutes, but no more than a few hours. Over-marinating can sometimes make the chicken texture mushy.
2. Can I roast chicken breast from frozen? While it’s not ideal for the best texture, you can roast chicken breast from frozen. You’ll need to increase the cooking time significantly (about 1.5 to 2 times longer) and ensure it reaches 165°F. Season it after it has thawed slightly under the heat.
3. What’s the best way to check if chicken breast is cooked without a thermometer? The most reliable way is with a thermometer. However, if you don’t have one, you can cut into the thickest part of the breast. The juices should run clear, not pink, and the meat should be opaque with no pink remaining.
4. How do I keep roasted chicken breast from drying out? Don’t overcook it! Use a meat thermometer. Resting the chicken after cooking is also crucial for retaining moisture. You can also brine the chicken before roasting for extra juiciness (though our basic recipe works great without brining).
5. What are some good side dishes to serve with roasted chicken breast? The possibilities are endless! Roasted vegetables, mashed potatoes, rice pilaf, quinoa, and a fresh salad are all fantastic options.
6. Can I roast chicken breast with the skin on? Absolutely! Skin-on, bone-in chicken breast tends to be more flavorful and stay moister. You’ll likely need to roast it for a bit longer, and the skin will get wonderfully crispy.
7. How long does cooked roasted chicken breast last in the refrigerator? Cooked roasted chicken breast will last in an airtight container in the refrigerator for 3-4 days.
Final Thoughts
There you have it! You’ve now mastered the art (or at least the very simple science) of roasting a perfect chicken breast. Say goodbye to dry, flavorless poultry and hello to juicy, deliciousness that you can confidently serve any night of the week. Go forth, roast with confidence, and enjoy the satisfaction of a simple meal done right. You might even find yourself saying, “Winner, winner, chicken dinner!” (Corny, I know, but you get the idea. ;))