The “Wait, Is That a Real Cake?” Cartoon Birthday Cake Tutorial
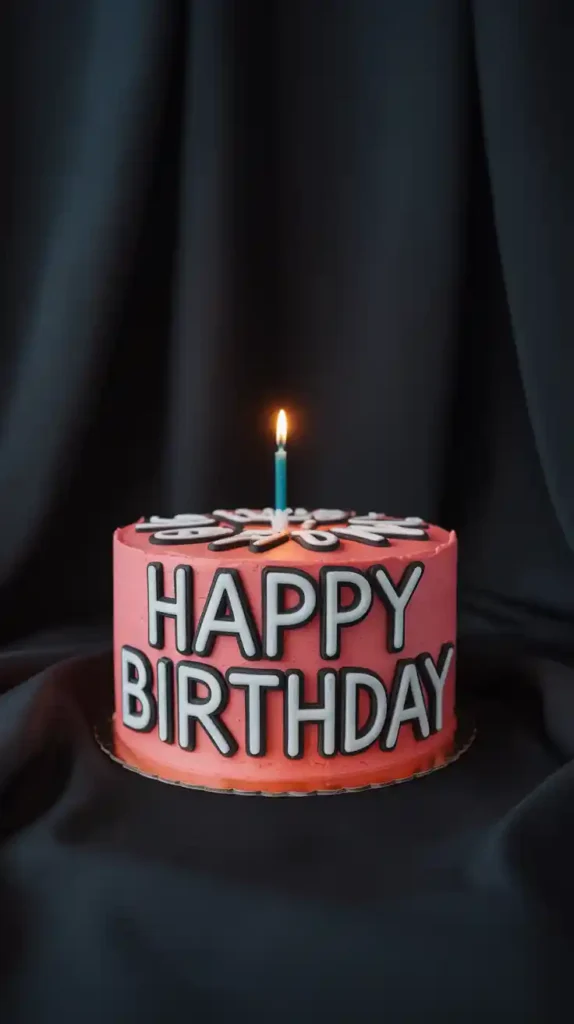
Alright, get ready to break some brains. Have you been scrolling online and seen them? Those cakes that look… fake? Like they jumped straight out of a Saturday morning cartoon or the pages of a comic book, complete with bold black outlines and graphic highlights? You stare at it, tilting your phone, trying to figure out if it’s a drawing or an actual, edible object. Well, I’m here to tell you it’s real, and you are about to learn how to make your very own, mind-bending cartoon birthday cake.
This is the ultimate cake for anyone who loves pop art, a good optical illusion, and being the coolest person at the party. We’re going to use some clever but surprisingly simple tricks to turn a regular 3D cake into a stunning 2D masterpiece. Get ready to make a cake that doesn’t just get eaten; it gets talked about.
Why This Cake is an Absolute Masterpiece
So, why should you take on this delightful, brain-bending project?
- It’s a Show-Stopping Optical Illusion: This is, without a doubt, one of the most unique and eye-catching cake designs out there. It’s a guaranteed showstopper that will have every single guest doing a double-take and pulling out their phone to take a picture.
- It’s Way Easier Than It Looks: I know it looks like it requires a degree in graphic design, but the secret is just some strategic black outlines and a few well-placed highlights. You don’t need to be a professional artist—in fact, a slightly imperfect, hand-drawn look adds to the charm!
- It’s Endlessly Creative: Once you master the basic technique, you can apply it to anything! You can make a cake that looks like a cartoon slice of cheese, a stack of pancakes, or even a simplified version of a favorite character.
The Ingredient List: Your Art Supplies

To create our edible illustration, we need a sturdy canvas and some vibrant, pipeable “paint.”
For the Sturdy Cake Canvas:
- All-Purpose Flour: 3 cups.
- Granulated Sugar: 2 cups.
- Baking Powder: 2 teaspoons.
- Salt: 1 teaspoon.
- Unsalted Butter: 1 ½ cups (3 sticks), at room temperature. A butter-heavy cake will be nice and sturdy for decorating.
- Large Eggs: 5, at room temperature.
- Vanilla Extract: 1 tablespoon.
- Buttermilk: 1 cup, at room temperature.
- The Quick Cartoon Shortcut: A box of pound cake mix or a sturdy yellow cake mix is a fantastic base that will hold its shape perfectly.
For the “Paint” and “Ink” Buttercream:
- Unsalted Butter: 3 cups (6 sticks), softened.
- Powdered Sugar: 8-9 cups, sifted.
- Heavy Cream or Milk: 6-8 tablespoons.
- Clear Vanilla Extract: 1 tablespoon.
- A Pinch of Salt.
- Gel Food Colorings:
- A bright pastel for the main body (like pink, yellow, or baby blue).
- A vibrant red for the “cherry.”
- Black gel food coloring for the “ink” outlines. This is crucial.
Tools & Kitchen Gadgets: The Artist’s Studio
Every artist needs their tools. Here’s what you’ll need for your pop-art project.
- Two or three 8-inch Round Cake Pans.
- A Stand Mixer: For that big, beautiful batch of buttercream.
- A Cake Turntable: Essential for getting that smooth base coat.
- An Offset Spatula and a Bench Scraper: The dynamic duo for a flawless canvas.
- Piping Bags and Small Round Piping Tips: You will absolutely need these. I recommend having a #5 round tip for the main outlines and a #3 round tip for finer details.
Step-by-Step Instructions: Let’s Get Sketchy
Ready to draw with frosting? Let’s create some pop art.
Step 1: Build Your 3D Canvas
- Prep: Preheat your oven to 350°F (175°C). Grease and flour your cake pans.
- Bake the Cake: Prepare your cake batter from scratch or a box mix. A sturdy vanilla or pound cake is ideal.
- Divide the batter between your pans and bake until a toothpick comes out clean. Let the cake layers cool completely.
Step 2: Mix Your Paints
- Whip up your buttercream until it’s light and fluffy.
- Divide the frosting. Keep about half of it white for highlights. Tint the other half with your chosen bright pastel color (e.g., pink).
- Take a small amount of the pink frosting and tint it a vibrant red for the cherry.
- Finally, take about 1 cup of the white frosting, add a tablespoon of cocoa powder (to create a dark base), and then mix in your black gel food coloring until you have a deep, inky black.
Step 3: Prime the Canvas
Level and stack your cooled cake layers on a cake board with a layer of your main pastel frosting in between. Apply a thin crumb coat and chill for 30 minutes. Once firm, apply a final, perfectly smooth coat of the pastel frosting. A smooth canvas is the key to the whole illusion.
Step 4: The Ink and Outlines
This is where the magic happens.
- Fit a piping bag with a #5 round tip and fill it with your black buttercream.
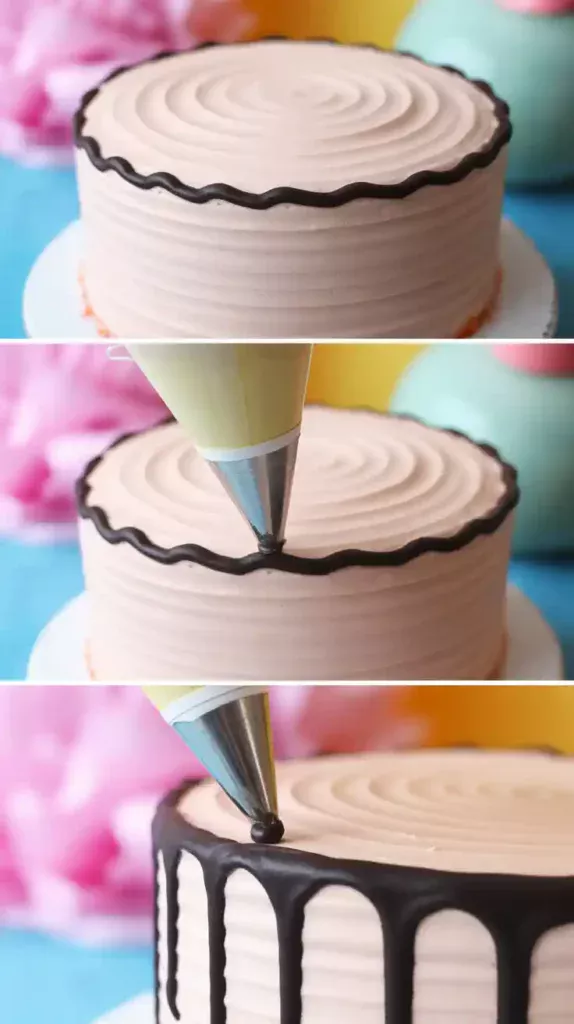
- Carefully pipe a bold black line around the top edge of the cake and the bottom edge of the cake.
- Now, create the cartoon drip. Pipe a wiggly, drippy-looking outline down one side of the cake.
- For the ultimate trick, pipe the outline of a “missing slice” on the front of the cake. Just pipe a triangle shape.
Step 5: Add the Highlights and Details
- Using your white buttercream and a clean piping bag, pipe on some simple, graphic “shines” and highlights. Add a few small lines and a small C-shape on the drip to make it look shiny and 2D.
- On top of the cake, pipe a round dollop of your main pastel frosting. On top of that, pipe a smaller ball of the red frosting for the cherry.
- Outline the cherry and the dollop it sits on with your black frosting. Add a small black line for the stem and a white dot on the cherry for a highlight.
Calories & Nutritional Info (A 2D Experience)
This cake might look like it’s from another dimension, but its calories are very much real.
- Serving Size: One mind-bending slice.
- Calories: A respectable amount of delicious, 3D energy.
- Good For: Parties, art installations, and confusing your friends.
Common Mistakes to Avoid (Art Class Fails)
- A Lumpy, Bumpy Canvas: The entire 2D illusion rests on having a clean, smooth base coat of frosting. If your base is messy, your outlines will look sloppy. Take the time to get it smooth with a bench scraper.
- Shaky, Blobby Lines: If your black outlines are looking less than crisp, your black frosting is probably too soft. It needs to be a nice, stiff consistency to hold a clean line. If it’s too soft, chill it in the fridge for 15 minutes.
- Trying to be Too Perfect: The charm of this cake is that it looks hand-drawn. Your lines shouldn’t be perfectly straight or flawlessly smooth. A little bit of a hand-drawn feel adds to the cartoonish authenticity.
- Forgetting the White Highlights: The black outlines are half the battle, but the simple, graphic white highlights are what truly sell the 2D illusion. They are not optional! They are the final touch that makes the cake “pop.”
Variations & Customizations (Choose Your Cartoon)
Once you’ve mastered the technique, the world is your comic book.
1. The Real Missing Slice
For a truly mind-bending effect. After your cake is frosted with its base coat, actually cut a perfect slice out. Place the slice on a small plate next to the cake. Now, use your black frosting to outline the exposed interior layers of both the cake and the slice. It looks absolutely incredible.
2. The Monochromatic Masterpiece
For a super chic, high-fashion take. Frost the entire cake in white buttercream. Then, use your black frosting to do all of the outlines. The final result looks like a 3D sketch, and it is stunningly elegant.
3. The Character Cake
Use this technique to create a cake that looks like a simplified cartoon character. A yellow frosted square cake can become SpongeBob with a few outlines. A round pink cake can become Kirby. It’s a great way to do a “character cake” without needing any sculpting skills.
FAQ: Your Most Animated Questions
What is this style of cake called?
It goes by a few names! It’s most commonly known as a “comic book cake” or a “2D cake.” It’s a style of decorating that uses bold, black outlines to make a three-dimensional cake look like a two-dimensional illustration.
What is the best kind of frosting for the black outlines?
A stiff, crusting American buttercream is your best friend. It will hold a nice, clean, sharp line without drooping or spreading.
Is this cake design hard for a beginner?
It looks harder than it is! It’s more about patience and having a steady hand than it is about complex skills. The lines don’t have to be perfect. As long as you can pipe a relatively straight line, you can do this. Always practice on parchment paper first!
How do I get my black frosting so black?
The secret is to start with a dark base. Take some of your white buttercream and mix in a few tablespoons of black cocoa powder or regular cocoa powder to make a dark chocolate frosting first. Then, add a few drops of a high-quality black gel food coloring. This will give you a deep black without a bitter taste.
What if I mess up one of the black lines?
Don’t panic! The best fix is to chill the entire cake in the refrigerator until the frosting is very firm. Then, you can use the tip of a small, sharp knife to carefully scrape off the mistake.
Does the cake look weird from other angles?
It looks cool from all angles, but the optical illusion is definitely strongest when you view it from the front or a three-quarter angle, just like in the photos.
Final Thoughts
You did it. You have created a cake that defies logic and delights the senses. You have baked a piece of pop art, a conversation starter, a dessert that will make everyone at the party question reality in the most delicious way possible.
So go on, present your masterpiece. Watch as your friends and family try to figure out what they’re looking at. And then, blow their minds one more time when you cut a slice out of your “drawing” and serve it up.


