The “Wait, That’s a Cake?” Guide to a Magical Fairy Garden Cake
Let’s be honest, wouldn’t life be just a little bit better if we all believed in fairies? In a world of spreadsheets and traffic jams, we could all use a dose of pure, unadulterated enchantment. While I can’t promise you a real-life pixie, I can offer you the next best thing: an edible, enchanted world. Get ready, because we are about to create the most whimsical, magical, and surprisingly easy fairy garden cake.
Forget perfect, smooth edges and flawless piping. We are about to embrace the beautiful, rustic chaos of nature. We’re talking rich, chocolatey “dirt,” mossy green frosting, pretzel log benches, and tiny mint-sprig bushes. This isn’t just a cake; it’s a story, a playscape, and the most charming centerpiece you’ll ever create.
Why This Cake is Pure Enchantment
So, why should you spend your afternoon creating this tiny, edible ecosystem?
- It’s a Storytelling Masterpiece: This cake is an entire world on a platter. It’s a guaranteed showstopper that will spark the imagination of kids and adults alike. It’s perfect for a whimsical birthday, a spring celebration, or any time you want to make life a little more magical.
- It’s Incredibly Fun and Forgiving: This is less about technical baking skill and more about playing with your food in the most creative way possible. The beauty of a garden is that it’s not perfect! A lumpy patch of “moss” or a crooked “log” only adds to its rustic charm.
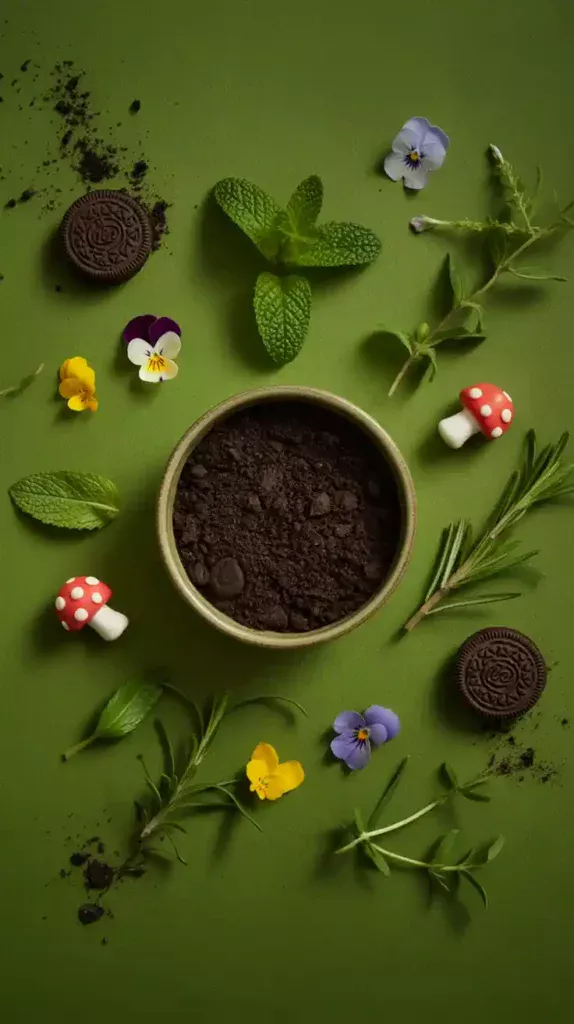
- The Decorations are Delicious (and Easy!): The “dirt” is crushed Oreos. The “logs” are pretzel sticks. The “bushes” are fresh mint. We’re using simple, clever, and mostly edible elements to create a stunning scene with minimal stress.
The Ingredient List: Your Magical Pantry
To build our enchanted forest, we need a rich, earthy foundation and a whole lot of natural-looking decorations.
For the “Enchanted Forest” Chocolate Cake:
- All-Purpose Flour: 2 cups.
- Granulated Sugar: 2 cups.
- Unsweetened Cocoa Powder: ¾ cup. A rich chocolate cake makes the perfect “earth.”
- Baking Soda: 2 teaspoons.
- Baking Powder: 1 teaspoon.
- Salt: 1 teaspoon.
- Large Eggs: 2.
- Hot Coffee or Hot Water: 1 cup.
- Buttermilk: 1 cup.
- Vegetable Oil: ½ cup.
- Vanilla Extract: 1 teaspoon.
- The “No Time for Magic” Shortcut: One box of your favorite devil’s food cake mix works perfectly.
For the “Mossy” Frosting & Garden Elements:
- Unsalted Butter: 1 ½ cups (3 sticks), softened.
- Powdered Sugar: 5 cups, sifted.
- Unsweetened Cocoa Powder: 1 cup, sifted, for the “mud.”
- Milk or Heavy Cream: 4-6 tablespoons.
- Gel Food Colorings: Leaf Green.
- The “Dirt”: One package of Oreo cookies.
- The “Logs & Branches”: Pretzel sticks and rods.
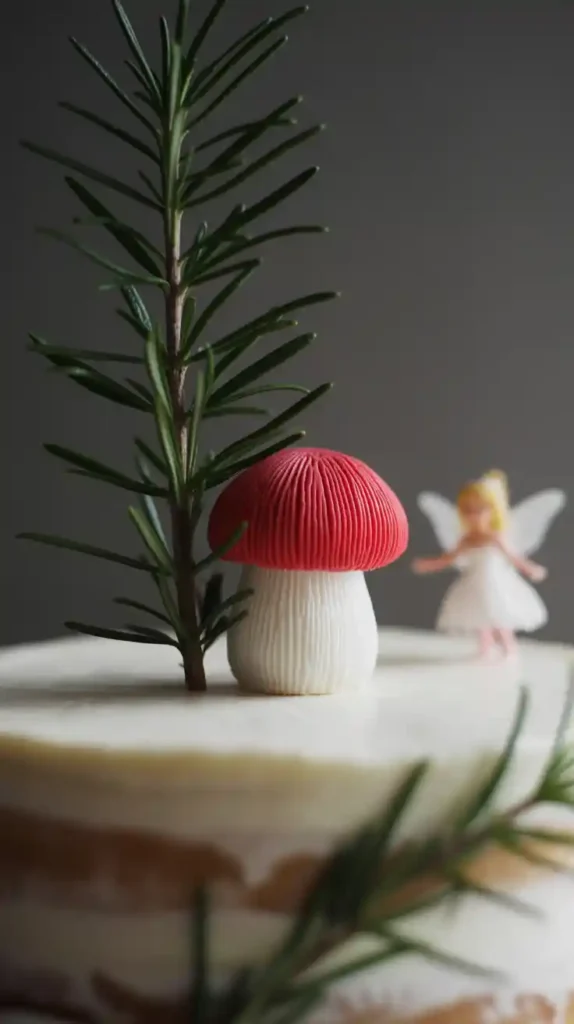
- The “Bushes & Trees”: Sprigs of fresh mint or rosemary.
- The “Flowers & Mushrooms”: Edible flowers (like pansies or violas) and/or candy mushrooms.
- Optional: A clean, new fairy figurine or a small fairy house cake topper.
Tools & Kitchen Gadgets: Your Fairy Godmother’s Kit
You don’t need a magic wand, just a few helpful tools.
- A 9×13 inch Rectangular Cake Pan: A sheet cake provides the perfect landscape.
- A Stand Mixer or Hand Mixer.
- An Offset Spatula.
- A Food Processor or a Ziploc Bag and a Heavy Object: For making your “dirt.”
- Piping Bags and a Grass Tip (Wilton #233): Optional, but amazing for creating realistic-looking grass.
- Parchment Paper.
Step-by-Step Instructions: Creating Your Edible World
Ready to get your hands dirty (with delicious cookie dirt)? Let’s build a garden.
Step 1: Lay the Foundation

Bake your chocolate sheet cake from scratch or a box mix in your 9×13 inch pan. Let the cake cool completely. A warm foundation will lead to a mudslide, and not the delicious cocktail kind.
Step 2: Landscape the Terrain
- While the cake cools, make your buttercream. Divide it into two bowls. Mix sifted cocoa powder into one bowl to create a rich chocolate “mud” frosting. Tint the other bowl a mossy green.
- Once the cake is cool, it’s time to landscape. There are no rules here! Plop spoonfuls of the chocolate and green frosting randomly over the cake.
- Use your offset spatula to gently swirl and spread the two colors together to create a rustic, earthy, and uneven “ground” texture. Don’t overmix! You want distinct patches of green and brown.
Step 3: Create the “Dirt” Path
Take your Oreo cookies and crush them into a coarse “dirt” (a food processor or a Ziploc bag and rolling pin works great). Carefully spoon the Oreo crumbs onto your frosted cake to create a winding, dark dirt path from one end to the other.
Step 4: Add the Logs and Boulders
Break some of your pretzel rods and sticks into different lengths and arrange them in little piles to look like fallen logs or a firewood stack. If you have some chocolate rocks or Whoppers, now is the time to place them around to look like boulders.
Step 5: Plant Your Garden
This is where it all comes to life!
- Take your sprigs of fresh mint or rosemary and “plant” them around the cake to look like tiny, fragrant bushes and trees.
- If you have a grass tip, pipe on some tufts of grass along your dirt path or around the logs.
- Carefully place your edible flowers or candy mushrooms in little clusters.
Step 6: Invite the Fairies
The final, magical touch. Wash and dry your fairy figurine and place her in the garden. If you have a little fairy house, place it at the end of the path. Your enchanted forest is now complete!
Calories & Nutritional Info (Fueled by Fantasy)
This cake is made from magic, daydreams, and a little bit of pixie dust.
- Serving Size: One enchanted slice.
- Calories: Let’s just say they’re magical and don’t count.
- Good For: Sparking imagination and making people incredibly happy.
Common Mistakes to Avoid (Garden Gaffes)
- A Flat, Boring Landscape: A real garden has hills and valleys. Don’t be afraid to make your frosting layer a little lumpy and uneven. It adds to the realism and charm.
- Using Unsafe Decorations: This is a big one. If you’re using fresh flowers or herbs, you must ensure they are non-toxic and pesticide-free. If you’re using a toy figurine, it must be new and washed thoroughly with soap and water before it touches the cake.
- A Muddy, Brown Mess: When you’re swirling your green and chocolate frostings, be gentle. Two or three swirls is all you need. If you overmix, you’ll just end up with one uniform, uninteresting shade of brownish-green.
- Wilted, Sad Greenery: The fresh mint and rosemary will look their best if you add them within a few hours of serving the cake. If you add them the day before, they can start to wilt.
Variations & Customizations (Choose Your Enchantment)

Every enchanted forest is different. Here are a few other magical ideas.
1. The Magical Mushroom Forest
For a more whimsical, woodland vibe. Use a rich chocolate cake and cover the entire thing in chocolate frosting and Oreo dirt. Then, go to town creating a forest floor filled with adorable meringue mushrooms (pipe meringue kisses for the stems and caps, dust with cocoa powder) and candy rocks.
2. The “Secret Garden” Gate
A beautiful and slightly more advanced design. Frost your cake with a grey-tinted buttercream. Use the back of a spoon or an impression mat to create a “stone wall” texture. Leave an opening in the center for a “gate.” Inside that gate, create a lush, vibrant garden scene with lots of piped green vines and colorful buttercream flowers.
3. The Delicate Pressed Flower Cake
For a more ethereal, cottagecore fairy vibe. Frost your cake smoothly with a pale green or cream-colored buttercream. Gently use tweezers to arrange and press edible, pressed flowers all over the top and sides of the cake. It creates a stunning, delicate, stained-glass effect.
FAQ: Your Most Magical Questions
What are the best, safe-to-use flowers for a cake?
Pansies, violas, roses, lavender, carnations, and chamomile are all generally considered safe and non-toxic. Always source them from an organic, pesticide-free source (like your own garden or a reputable online seller) and never use flowers from a florist unless they are specifically sold as edible.
How do I make those cute little mushrooms?
The easiest way is to use candies! A gumdrop or a DOTS candy for the cap and a piece of a mini marshmallow or a white sprinkle for the stem. You can also make them by piping small meringue kisses and baking them until dry.
Is this design good for a beginner?

This is one of the best possible cake designs for a beginner! Because it’s meant to look like a rustic, natural scene, it is incredibly forgiving. Messy is good!
Final Thoughts
You’ve done it. You have cultivated a garden of pure, edible enchantment. You’ve turned a simple sheet cake into a magical world that’s destined to be the star of the party. You have proven that with a little creativity and some cookie crumbs, you can bake a little bit of magic.
So go on, make a wish (the fairies are definitely listening!) and cut a slice of your delicious, enchanted forest. You’ve earned it.