The Kuromi Birthday Cake For When You’re Cute But a Little Punk Rock
Tired of all the sunshine and rainbows? Over the endless parade of sickeningly sweet characters? Let’s talk about Sanrio’s resident punk-rock princess, the queen of cheeky attitude, Kuromi. She’s the perfect blend of dark and adorable, and frankly, she deserves a cake that matches her vibe. Get ready to make the ultimate Kuromi birthday cake.
Forget the pastel pinks and polite-looking cakes. We’re diving into a world of black, pink, and playful rebellion. This isn’t just a dessert; it’s a statement. A delicious, edgy statement that says, “I’m here to party, and I might cause a little bit of trouble.” This guide will show you how to create a Kuromi birthday cake that’s so cool, it’s criminal.
Why This Kuromi Cake Recipe is a Total Vibe
So, why should you pledge your allegiance to this dark and delightful cake? Let’s get into the mischief.
First, it has major attitude. The bold black and hot pink color scheme is an instant head-turner. It’s a cake that stands out from the crowd, just like Kuromi herself. It’s perfect for anyone who appreciates a little bit of goth-glam with their cuteness.
Second, the flavor is a perfect match. We’re pairing a rich, dark chocolate cake (because, of course) with a surprising burst of tangy raspberry filling and a not-too-sweet buttercream. It’s a little bit dark, a little bit sweet, and has a spark of attitude—just like the birthday ghoul herself.
Finally, the design is deceptively simple. This cake looks super impressive, but it’s all based on simple shapes and clever color placement. There’s no need for advanced sculpting skills. You’ll look like a rockstar baker with minimal stress. What’s not to love?
Your List of Devious Ingredients

To create this punk-rock masterpiece, you’ll need to assemble your crew.
- For the Dark “Black Heart” Chocolate Cake:
- 2 cups all-purpose flour
- 2 cups sugar
- ¾ cup black cocoa powder (for an extra dark, almost black color) or Dutch-process cocoa
- 2 teaspoons baking soda
- 1 teaspoon baking powder
- 1 teaspoon salt
- 1 cup buttermilk
- ½ cup vegetable oil
- 2 large eggs
- 1 teaspoon vanilla extract
- 1 cup hot coffee
- For the Frosting & Filling:
- 1 large batch of vanilla buttercream (about 6 cups)
- ½ cup seedless raspberry jam for the filling
- Black and pink gel food coloring
- For the Fondant Details:
- Small amounts of black, white, and pink fondant
Key Substitutions: You can use any chocolate cake recipe you love, but one with coffee and black cocoa will give you the best dark color. A simple pink-tinted buttercream can be used for the filling instead of jam.
The Tools of the Trade
Every rebel needs their gear. Here’s what you’ll need for your cake heist.
- Two 8-inch Round Cake Pans
- Parchment Paper
- Stand Mixer or a Hand Mixer
- Cake Turntable
- Offset Spatula
- Bench Scraper
- Fondant Rolling Pin
- A sharp Paring Knife or food-safe X-Acto knife
- Piping Bags and tips (optional, for borders)
Step-by-Step Instructions: Let the Mischief Begin
Ready to embrace your inner punk? Let’s bake.
H3: Step 1: Bake the Dark & Moody Cake
- Prep Your Lair: Preheat your oven to 350°F (175°C). Grease and flour your cake pans and line the bottoms with parchment paper.
- Mix the Dry Ingredients: In a large bowl, whisk together the flour, sugar, black cocoa powder, baking soda, baking powder, and salt.
- Combine the Wet: In a separate bowl, whisk the buttermilk, oil, eggs, and vanilla. Pour the wet ingredients into the dry and mix until just combined.
- The Coffee Trick: Carefully stir in the hot coffee. The batter will be very thin. This is the secret to a moist, dark cake.
- Bake: Pour the batter evenly between your two pans. Bake for 30-35 minutes, until a toothpick inserted into the center comes out clean. Let the cakes cool completely on a wire rack.
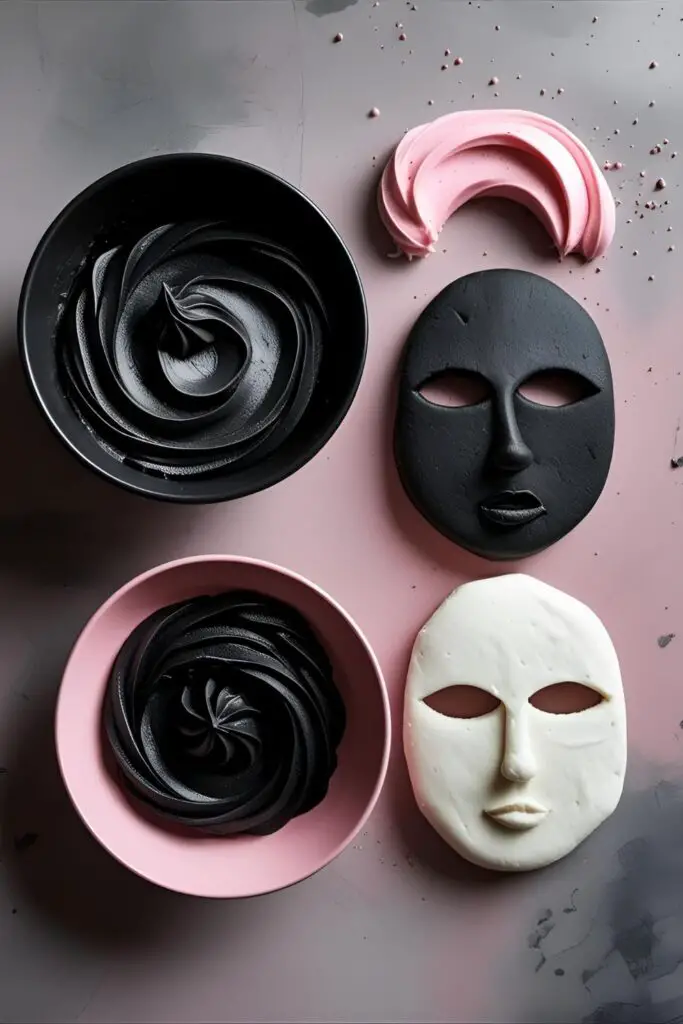
H3: Step 2: Make the Fondant Face
- The Jester Hat: While the cake cools, make the fondant details. Roll out your black fondant. Cut out the two iconic “jester” points for her hat.
- The Skull: From the same black fondant, cut out a simple skull shape. Use white fondant to create the eyes and nose for the skull. Attach them with a dab of water.
- The Face: Roll out white fondant and cut out two ovals for her eyes and a tiny “v” shape for her mouth. From the black fondant, cut out two smaller dots for her pupils.
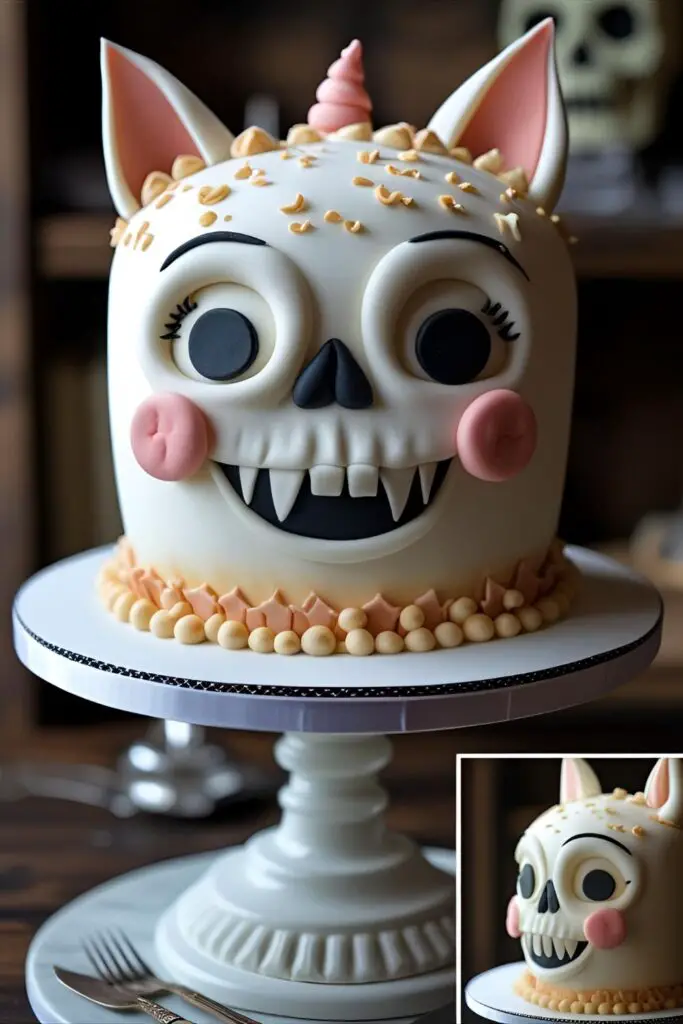
H3: Step 3: Assembling Your Kuromi Birthday Cake
- Build the Cake: Level your cooled cake layers. Place one layer on your cake stand. Pipe a dam of buttercream around the edge, then fill the center with the raspberry jam. Place the second layer on top.
- Color Your Frosting: Divide your buttercream. Tint the majority of it with black gel food coloring. Pro Tip: Start with a chocolate buttercream base to get a deep black with less food coloring and a better taste. Tint a smaller amount with pink gel food coloring.
- Crumb Coat & Chill: Apply a thin layer of the black buttercream all over the cake to trap crumbs. Chill for 30 minutes until firm.
- The Final Coat: Frost the entire cake with a smooth, final coat of the black buttercream.
- Add the Details: Now, carefully place your fondant pieces on the cake to create Kuromi’s face. Place the white ovals for her eyes, then the black pupils. Add her “v” mouth.
- The Finishing Touches: Use the pink buttercream to pipe her little pink nose right above her mouth. Finally, arrange the black jester “ears” and the skull on top of the cake. For 3D ears, make them ahead of time with a toothpick support and let them dry hard before inserting them into the cake.
Calories & Nutritional Info
A cake with this much attitude doesn’t care about your diet.
- Calories: A slice of this mischief will run you about 600-800 calories.
- Main Nutrients: Chocolate, sugar, and pure, unadulterated sass.
- Goes Well With: Listening to punk rock and plotting world domination.
Common Mistakes to Avoid (Or, How Not to Be a Baku)
- Bitter Black Frosting: The #1 complaint about black cakes. To avoid a bitter, chemical taste, start with a chocolate buttercream before adding black gel food coloring. The chocolate base means you need way less dye.
- A Sad Grey Cake: Don’t be shy with the black food coloring! A timid hand will result in a murky, sad grey cake. You want a bold, unapologetic black. Use gel coloring for the most intense pigment.
- A Melty Mess: Never, ever, ever try to frost a cake that is even slightly warm. You will have black streaks of sadness, and your raspberry filling will try to escape. Let the cake layers cool completely.
- A Wonky Face: Kuromi’s features are simple, but their placement is key. Look at a picture of her as you place the fondant pieces to make sure her expression is more “cheeky” than “confused.”
Variations & Customizations
Feel like changing up the rebellion? Here are a few ideas.
- The My Melody Counterpart: The ultimate rival cake. Bake a strawberry or vanilla cake. Frost it in pink and white and create My Melody’s classic pink hood and yellow nose out of fondant.
- “Goth Glam” Kuromi: Take your finished Kuromi cake and give it some sparkle. Add edible black or silver glitter to the frosting. Use silver dragées for a “studded” look on her hat, or place black rock candy shards on top.
- Kuromi Cupcakes: For an easier, shareable option, frost chocolate cupcakes with black buttercream. Top each one with a simple, pre-made fondant skull bow or just her iconic jester ears.
FAQ: Your Cheeky Questions, Answered

Let’s get into the nitty-gritty.
H3: How do you make black frosting that actually tastes good?
The secret is to not start with a white vanilla frosting. Make a rich chocolate buttercream first. The dark brown color gives you a huge head start, so you only need a small amount of black gel coloring to get to a deep black, which avoids the bitter taste.
H3: What is black cocoa powder?
It’s a type of Dutch-process cocoa powder that has been heavily alkalized, giving it a striking black color and a smooth, non-bitter flavor, famously used in Oreo cookies. It’s perfect for this cake.
H3: Do I have to use fondant for the decorations?
For the cleanest, most character-accurate look, fondant is best. However, you could try piping the facial features on with buttercream. You could also find a printable Kuromi topper online as a last resort.
H3: Can I make this Kuromi birthday cake ahead of time?
Yes! The cake layers can be baked and wrapped well at room temperature for up to 2 days. The fully assembled cake can be stored in the fridge for a day before the party. Add any 3D fondant ears just before serving.
H3: What other cake flavors would work?
A dark chocolate cake is most fitting, but a vibrant red velvet would also look amazing with the black and pink. A simple vanilla cake would work too if you’re not a chocolate fan.
H3: How do I store a cake with black frosting?

In a cake carrier in the fridge. Be aware that dark-colored frosting, especially black, can sometimes slightly stain teeth and tongues temporarily. It’s part of the fun!
H3: My fondant is sticky/tearing. What do I do?
If it’s sticky, dust your work surface with a little cornstarch or powdered sugar. If it’s dry and tearing, knead in a tiny dot of vegetable shortening to make it more pliable.
Final Thoughts: Look Cute, Cause Trouble
You did it. You stared into the adorable abyss and created a masterpiece of cute chaos. You’ve made a cake that’s as cool and unique as the person you’re celebrating.
So go ahead, put on your favorite spiky accessories, blast some punk rock, and serve up a slice of your incredible Kuromi birthday cake. You’re not just a baker; you’re a rebel with a cause. And that cause is awesome cake.