How to Bake Cake Without an Oven (Yes, Really! It’s Magic!)
Picture this: It’s a rainy afternoon in Barishal. You’re craving something sweet, something comforting, a fluffy slice of cake. But wait – your oven is on the fritz, or maybe you don’t even have an oven (totally common, no judgment here!). Does that mean your cake dreams are shattered? Absolutely not! What if I told you there’s a magical way to conjure up a delicious, perfectly baked cake using just your stovetop? Today, my friend, we’re diving into how to bake cake without an oven, turning your kitchen into a no-oven baking wonderland. Prepare to be amazed, and possibly, to never turn on your actual oven for cake again.
Why This Recipe Is Awesome (And Will Make You a Kitchen Wizard)
So, why bother with this stovetop sorcery when ovens exist? Because this method is a game-changer for anyone without a conventional oven, for those times your oven is busy, or even if you just want to save on electricity! This recipe proves you don’t need fancy equipment to create a genuinely delicious, moist cake.
You’ll get a beautifully tender crumb and a perfectly cooked cake, all thanks to the power of steam and indirect heat. It’s incredibly satisfying to pull off a “baked” cake without, well, baking it. You’ll impress your family and friends, silence the skeptics, and probably wonder why you didn’t try this sooner. Plus, it’s a fantastic skill to have in your back pocket.
Ingredients: Your Simple Cake Arsenal
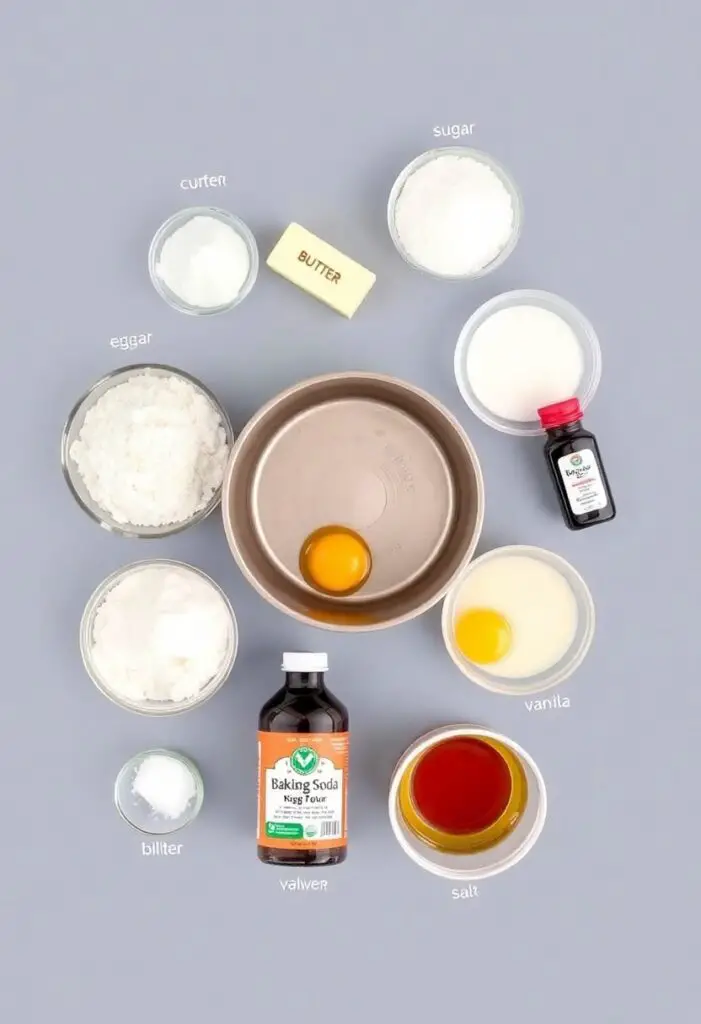
We’re going for a classic vanilla cake here, but the beauty is, you can adapt many of your favorite recipes to this method!
- 1 ½ cups all-purpose flour
- 1 teaspoon baking powder
- ½ teaspoon baking soda
- ¼ teaspoon salt
- ½ cup (1 stick) unsalted butter, softened at room temperature
- 1 cup granulated sugar
- 2 large eggs, room temperature
- 1 teaspoon vanilla extract
- ¾ cup whole milk, room temperature
Key Substitutions:
- Butter: You can use vegetable oil instead of butter for a slightly denser, but still delicious, cake. Use ½ cup oil for ½ cup butter.
- Milk: Any dairy or non-dairy milk (like almond or soy milk) will work here.
- Flavor: Swap vanilla extract for almond extract, lemon zest, or even a tablespoon of cocoa powder for a chocolate version.
Tools & Kitchen Gadgets Used: Your Stovetop Bakery Set-Up
This is where it gets interesting! You don’t need an oven, but you do need a few clever substitutes.
- Large, Heavy-Bottomed Pot or Deep Pan with a Tight-Fitting Lid (Your “oven”!)
- A Trivet or Metal Rack that fits inside your large pot (to elevate the cake pan)
- 8-inch Round Cake Pan (or a 6-inch if you want a taller cake that cooks longer)
- Mixing Bowls (at least two: one large, one medium)
- Electric Hand Mixer or Whisk (for creaming butter and sugar)
- Rubber Spatula
- Measuring Cups and Spoons
- Parchment Paper (for lining the cake pan)
Step-by-Step Instructions: The Stovetop Cake Saga
Don’t let the “no oven” part scare you. This is simpler than it sounds, I promise.
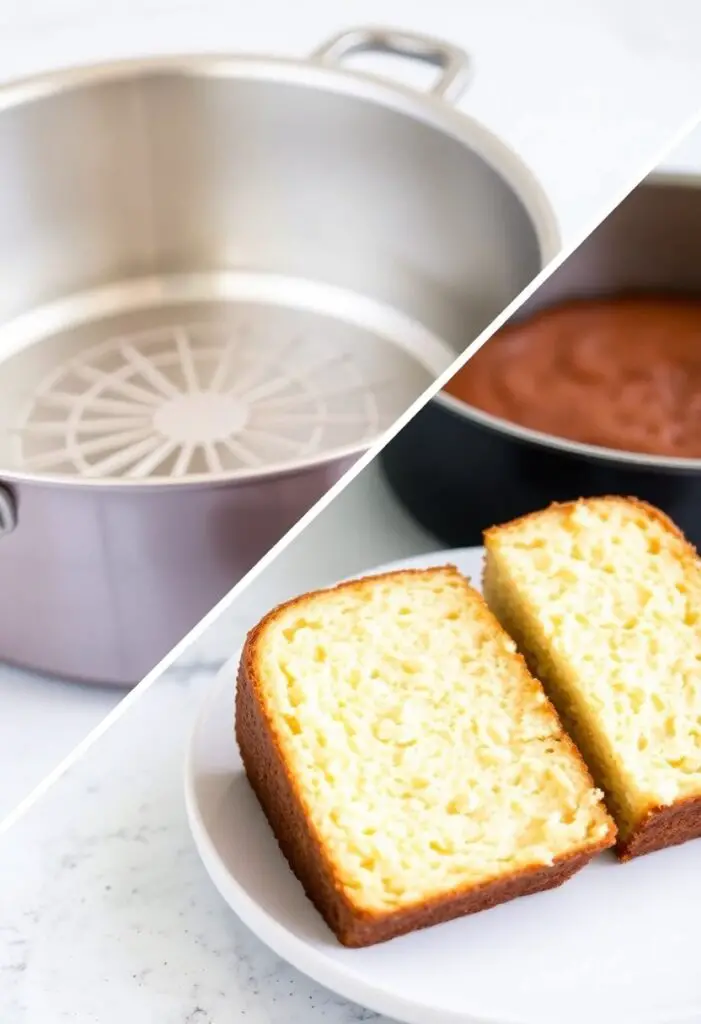
- Prep Your “Oven”: Grab your large, heavy-bottomed pot. Place the trivet or metal rack at the bottom. Pour about 1-2 cups of water into the pot, just enough to come below the top of your trivet (you don’t want the water touching your cake pan!). Cover the pot with its tight-fitting lid and place it over medium-low heat on your stovetop. Let it heat up while you make the batter. This preheating is crucial, FYI.
- Prep Your Cake Pan: Grease and flour your 8-inch round cake pan. Line the bottom with a circle of parchment paper. This prevents sticking.
- Whisk the Dry Stuff: In a medium bowl, whisk together the flour, baking powder, baking soda, and salt. Set this aside.
- Cream the Wet Stuff (Mostly): In your large mixing bowl, beat the softened butter and granulated sugar with your electric mixer (or whisk like a maniac!) until light and fluffy. This should take about 3-5 minutes.
- Add Eggs and Vanilla: Beat in the eggs, one at a time, mixing well after each addition. Scrape down the sides of the bowl. Stir in the vanilla extract.
- Alternate Wet and Dry: With the mixer on low, gradually add the dry ingredients to the butter mixture, alternating with the milk. Start and end with the dry ingredients. Mix just until combined; do not overmix! Overmixing leads to tough cake, and we’re aiming for fluffy.
- Into the Pan It Goes: Pour the cake batter into your prepared cake pan. Gently tap the pan on the counter a couple of times to release any large air bubbles.
- “Bake” the Cake: Carefully remove the lid from your preheated large pot (watch out for steam!). Gently lower the cake pan onto the trivet inside the pot. Make sure the water isn’t touching the bottom of the cake pan.
- Cover and Cook: Place the lid back on the large pot, making sure it’s tight. Reduce the heat to low. Cook for 35-50 minutes (for an 8-inch pan). The cooking time will vary depending on your stovetop and pot. Do NOT lift the lid for at least the first 30 minutes! Every peek lets out crucial heat.
- Check for Doneness: After 35 minutes, you can carefully lift the lid. A toothpick inserted into the center of the cake should come out clean. If not, replace the lid and continue cooking for another 5-10 minutes, checking again.
- Cool Down: Once cooked, carefully remove the cake pan from the large pot. Let the cake cool in the pan on a wire cooling rack for 10-15 minutes before inverting it onto the rack to cool completely. This prevents it from getting soggy.
- Frost and Enjoy: Once completely cool, frost it with your favorite frosting (buttercream, ganache, whatever your heart desires!) and decorate as you wish. Slice and serve your oven-free masterpiece!
Calories & Nutritional Info (Per Slice, Estimated)

This is a general estimate for one slice, assuming the cake is cut into 12 servings. Remember, this is about satisfying that cake craving!
- Estimated Calories per slice: ~300-350 calories
- Fat: ~15-20g
- Carbohydrates: ~40-45g
- Protein: ~4-5g
- Sugar: A delightful amount, as expected for cake.
Nutritional Notes:
- Provides a good dose of happiness.
- Contains dairy and gluten (unless substitutions are made).
- Pairs perfectly with a cup of hot tea or coffee.
Common Mistakes to Avoid: Stovetop Snafus to Sidestep
Even without an oven, cake baking has its quirks. Avoid these pitfalls!
- Lifting the Lid Too Early: This is the #1 rule of stovetop baking! Every time you lift the lid, you release steam and heat, drastically extending the cooking time and potentially making your cake dense. Be patient!
- Too Much Water: Ensure the water in your large pot doesn’t touch the bottom of your cake pan. If it does, your cake will steam unevenly and get a weird texture.
- High Heat: Resist the urge to crank up the heat to speed things up. Low and slow is the name of the game here. High heat will burn the bottom of your pot (and potentially your cake) without cooking the center.
- Not Greasing and Flourishing the Pan: Just because it’s not an oven doesn’t mean the cake won’t stick! Proper pan prep is essential.
- Overmixing the Batter: This rule applies no matter how you bake. Overmixing develops gluten, leading to a tough, rubbery cake instead of a tender, fluffy one. Mix just until ingredients are combined.
Variations & Customizations: Your Stovetop Cake, Your Rules
Once you’ve mastered the basic vanilla, let your imagination run wild!
- Chocolate Stovetop Cake: Replace ¼ cup of flour with ¼ cup of unsweetened cocoa powder. Add a few chocolate chips to the batter for extra indulgence.
- Lemon Zest Cake: Add the zest of one large lemon to your butter and sugar mixture. A lemon glaze (powdered sugar + lemon juice) would be divine on top!
- Spiced Apple Cake: Fold in ½ cup of finely diced apple and ½ teaspoon of cinnamon and a pinch of nutmeg to the batter. Serve with a dollop of whipped cream.
- “Caramel” Stovetop Cake: Drizzle a layer of caramel sauce (store-bought or homemade) into the bottom of your cake pan before adding the batter for an upside-down caramel cake!
FAQ Section: All Your No-Oven Cake Questions, Answered
Got more burning questions (pun intended!) about baking without an oven? I’ve got you.
- Q: Will the cake have a crust without an oven? A: It won’t develop a golden-brown, crispy crust like an oven-baked cake. It will be much softer on top, more like a steamed cake. You can get a slightly firmer top by cooking for a few extra minutes, but don’t expect a typical oven crust.
- Q: Can I use a regular pressure cooker instead of a large pot? A: Yes, many people successfully use a pressure cooker! Just ensure it’s a dry heat method (no pressure/whistle). You’ll still need a trivet. Cook on low heat, likely for less time (check after 20-25 mins).
- Q: How do I know how much water to put in the large pot? A: The water level should be below the bottom of your cake pan when it’s resting on the trivet. About 1-2 inches of water is usually sufficient. You want steam, not a water bath for the cake itself.
- Q: My cake is sinking in the middle. What happened? A: This usually means you either opened the lid too early/too often (letting out heat and causing it to collapse) or the baking soda/powder wasn’t fresh (no leavening power). Ensure your leavening agents aren’t expired!
- Q: Can I bake multiple cakes at once? A: Only if your large pot is big enough to fit multiple cake pans without them touching each other or the sides of the pot, and if you can maintain even heat. For best results, stick to one cake at a time.
- Q: How long does this cake last? A: Store leftover cake in an airtight container at room temperature for 2-3 days, or in the refrigerator for up to 5 days.
- Q: Why do some recipes suggest sand or salt instead of water? A: That’s another valid method! Using a layer of sand or salt in the bottom of the pot can provide a more even, dry heat, similar to an oven. You’d place the cake pan directly on the sand/salt (with a trivet underneath for very delicate pans).
Final Thoughts: Oven? Who Needs One?!
You’ve officially broken free from the tyranny of the oven! You now possess the ancient, mystical knowledge of how to bake cake without an oven. Go forth, impress your friends, enjoy your perfectly moist, homemade cake, and never let a broken oven (or lack thereof) stop your dessert dreams again. You’re a baking legend, and you didn’t even break a sweat. Mostly.