How to Make Boxed Brownies Better (Transforming Basic into BEYOND!)
Let’s be real: sometimes, you just need a brownie, and you need it now. You don’t have time for fancy from-scratch recipes with obscure ingredients and a paragraph-long preamble about the history of chocolate. You’ve got a box mix in the pantry, and that’s perfectly fine! But here’s the thing: “fine” isn’t “fudgy,” and “okay” isn’t “oh-my-god-I-need-another-one.” You, my friend, deserve better. And today, we’re going to unlock the secrets of how to make boxed brownies better – turning that humble mix into a dessert so decadent, people will swear you spent hours slaving away. They don’t need to know our little secret. 😉
Why This “Recipe” Is Awesome (And Will Fool Everyone)
Why bother with these extra steps when the box promises brownies in under an hour? Because you’re not just making brownies; you’re making an experience. This isn’t about snobbery; it’s about maximizing deliciousness with minimal effort. We’re talking about taking a basic, sometimes-dry, often-forgettable boxed mix and transforming it into something fudgy, rich, moist, and absolutely irresistible.
These simple tweaks will give your brownies a depth of flavor and a texture that rivals any bakery. You’ll impress guests, win bake sales (don’t tell anyone your secret!), and seriously elevate your own snack game. Plus, it’s still way faster than making them from scratch. Why settle for mediocrity when greatness is just a few extra ingredients away?
Ingredients: Your Secret Weapons for Brownie Domination
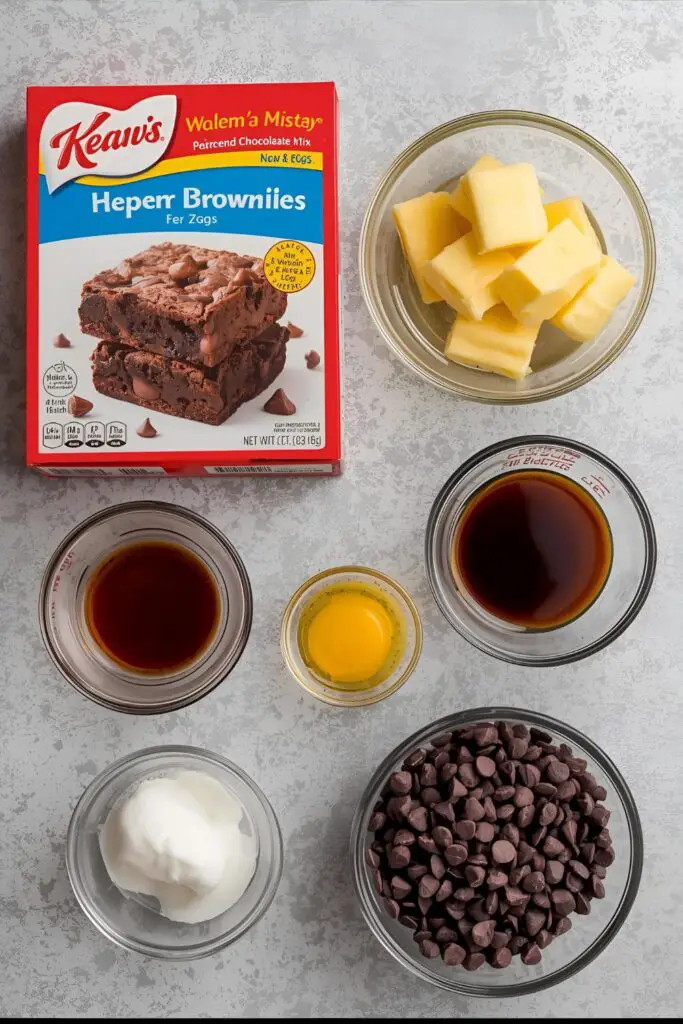
You’ll still use your trusty box mix, but we’re adding some heavy hitters.
- 1 box (standard 18-19 oz) brownie mix (your favorite brand!)
- ½ cup unsalted butter, melted (instead of oil, trust me)
- 3 large eggs (instead of the 2 usually called for on the box)
- ¼ cup strong brewed coffee or espresso (instead of water – game-changer!)
- 1 teaspoon pure vanilla extract (more than the box usually calls for, if any)
- ¼ cup all-purpose flour (adds a little structure and chew)
- ½ cup chocolate chips or chunks (milk, dark, white – your choice!)
- Pinch of flaky sea salt (for sprinkling on top, after baking)
Key Substitutions:
- Coffee: Don’t have coffee? Use hot water mixed with 1 teaspoon of instant espresso powder. Or, if you absolutely detest coffee flavor, use an equal amount of milk or even buttermilk for extra tang.
- Butter: You can use coconut oil for a slight tropical hint, but butter really provides that rich, bakery-style flavor.
- Chocolate Chips: Get creative! Chopped nuts, caramel bits, toffee pieces, or even crushed peppermint candies are all fair game.
Tools & Kitchen Gadgets Used: Your Baking Battle Station

You don’t need a professional kitchen, just a few essentials.
- 9×13 inch baking pan (or an 8×8/9×9 if the box mix is for a smaller pan, adjust baking time)
- Parchment Paper (makes for easy removal and cleanup!)
- Large Mixing Bowl
- Whisk or Electric Mixer (a whisk is usually fine, but a mixer makes it extra smooth)
- Rubber Spatula
- Measuring Cups and Spoons
- Small Saucepan or Microwave-Safe Bowl (for melting butter)
- Wire Cooling Rack
Step-by-Step Instructions: Unleash the Fudginess!
This is almost as easy as following the box, but with superior results. Don’t blink, you might miss the magic.
- Preheat and Prep: Preheat your oven to 325°F (160°C). Lowering the temperature slightly helps ensure a fudgier brownie. Line your baking pan with parchment paper, leaving an overhang on two sides (this creates “handles” for easy removal later). Lightly grease the exposed pan and parchment.
- Melt the Butter: In a small saucepan or microwave-safe bowl, melt your ½ cup of unsalted butter. Let it cool for a minute or two; you don’t want it scorching your eggs.
- Combine the Wet Ingredients (The Upgrade!): In your large mixing bowl, whisk together the melted butter, 3 large eggs, strong brewed coffee (or espresso), and vanilla extract. Whisk until well combined and slightly frothy.
- Add the Dry Ingredients: Pour the brownie mix (the entire contents of the box) into the wet ingredients. Add the ¼ cup all-purpose flour.
- Mix (But Don’t Overmix!): Using a rubber spatula or a whisk, mix the batter just until combined. You’ll see a few streaks of flour; that’s totally fine, even desirable. Overmixing develops gluten, which leads to cakey, not fudgy, brownies. And we are NOT doing cakey.
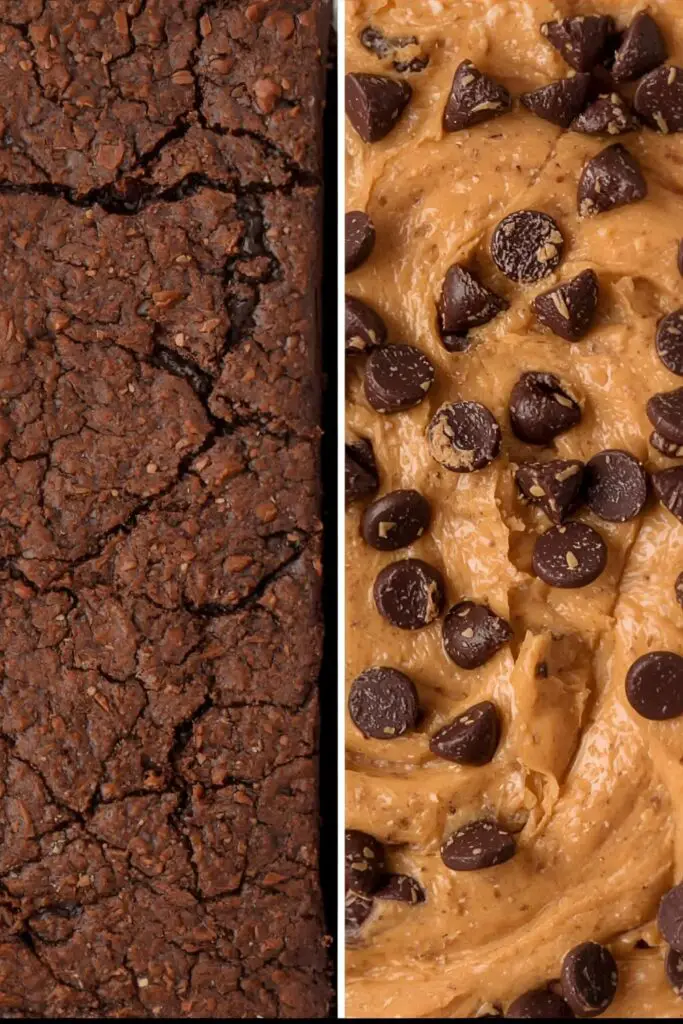
- Fold in the Chips: Gently fold in the chocolate chips or chunks. They’re not just for show; they add extra pockets of melted chocolate goodness.
- Pour and Bake: Pour the glorious, thick batter into your prepared baking pan. Spread it evenly with your spatula.
- Bake to Perfection: Bake for 30-40 minutes (for a 9×13 pan). If using an 8×8 or 9×9, it might take 25-35 minutes. You’ll know they’re done when a toothpick inserted near the edge comes out clean, but a toothpick inserted into the center still has moist crumbs clinging to it. This is the secret to fudginess!
- The Flaky Salt Finish: As soon as you pull the brownies from the oven, immediately sprinkle them with a pinch of flaky sea salt. The salt enhances the chocolate flavor and adds a little textural pop. Don’t skip this, IMO.
- Cool (The Hardest Part): Let the brownies cool completely in the pan on a wire rack. Seriously, completely. Warm brownies are delicate and will fall apart. Cool brownies slice beautifully and are fudgier. This is where patience pays off.
- Slice and Serve: Once fully cooled, use the parchment paper overhang to lift the entire slab of brownies out of the pan. Place on a cutting board, slice into squares, and prepare for adoration.
Calories & Nutritional Info (Per Serving, Estimated)
This is an estimate for a standard box mix, assuming 16 servings, with our added ingredients. Remember, this is about indulgence, not deprivation. 😉
- Estimated Calories per brownie: ~250-350 calories (depends on mix & add-ins)
- Fat: ~15-20g
- Carbohydrates: ~30-45g
- Protein: ~3-5g
- Sugar: Yes, lots. It’s a brownie, not a salad.
Nutritional Notes:
- Contains the essential nutrient of happiness.
- Pairs well with a scoop of vanilla ice cream.
- May cause extreme cravings.
Common Mistakes to Avoid: Don’t Ruin Your Masterpiece!
Even with a box mix, you can go wrong. Avoid these common blunders.
- Overmixing the Batter: This is the cardinal sin! Too much mixing develops gluten, leading to a cakey texture instead of that coveted fudgy chew. Mix just until combined.
- Overbaking: Another huge culprit for dry, crumbly brownies. Pull them out when the center still looks a little underdone and a toothpick has moist crumbs (not wet batter!). They will continue to cook slightly in the hot pan.
- Not Cooling Completely: I know, the smell is intoxicating. But warm brownies are a crumbly mess. Let them cool fully for clean cuts and maximum fudginess.
- Using a Small Pan for a Large Mix: If your box calls for a 9×13 pan, use a 9×13. If you use a smaller pan, your brownies will be thicker, potentially undercooked in the middle, and need significantly longer bake times (which increases overbaking risk!).
- Forgetting the Salt: That flaky sea salt at the end? It’s not optional. It enhances the chocolate flavor and cuts through the sweetness beautifully.
Variations & Customizations: Get Wild With Your Boxed Brownies
Now that you’ve mastered the basic upgrade, let’s get creative!
- Peanut Butter Swirl: After pouring half the batter into the pan, dollop in warmed, creamy peanut butter. Top with the remaining batter and swirl gently with a knife for a beautiful marbling effect.
- Raspberry Ripple: Gently fold in 1 cup of fresh or frozen (not thawed) raspberries with the chocolate chips. The tartness is a fantastic contrast to the rich chocolate.
- Mint Chocolate Chip: Add ½ teaspoon of peppermint extract to the wet ingredients and fold in mint chocolate chips or chopped Andes mints. Frost with a simple mint buttercream after cooling.
- Boozy Brownies: Replace 2 tablespoons of the coffee with a rich liqueur like Kahlúa, Bailey’s, or a raspberry liqueur. Hello, adult brownies!
FAQ Section: All Your Boxed Brownie Brain-Busters Answered

Still got questions about turning that humble box into a hero? I’ve got you.
- Q: Why use melted butter instead of oil? A: Butter adds richness, flavor, and contributes to a fudgier texture that oil can’t quite replicate. It makes a noticeable difference!
- Q: Can I use milk instead of coffee? A: Yes, you can! Use an equal amount of milk. The coffee enhances the chocolate flavor without making the brownies taste like coffee, but milk works fine for moisture.
- Q: What if my box mix calls for a different pan size? A: Adjust accordingly! If it’s for an 8×8 or 9×9, stick with that. Just remember, thicker brownies (in a smaller pan) will need more baking time, and thinner ones (in a larger pan) less. Keep an eye on the center for fudginess.
- Q: How do I get that shiny, crackly top on my brownies? A: The ratio of fat and sugar, along with eggs, contributes to this! Using melted butter and slightly more eggs (as in this recipe) often helps. Also, ensuring your batter is well-whisked (but not overmixed with flour) helps create that meringue-like crust.
- Q: Can I make these ahead of time? A: Absolutely! Brownies are often even better on day two, as the flavors meld and the fudginess intensifies. Store them in an airtight container at room temperature for up to 3-4 days.
- Q: My brownies are too cakey. What went wrong? A: Usually, this means you overmixed the batter or overbaked them. Remember, mix just until combined and pull them out when the center is still slightly gooey.
- Q: Can I freeze these brownies? A: Yes! Once completely cooled, wrap individual brownies or the whole slab tightly in plastic wrap, then foil. Freeze for up to 3 months. Thaw at room temperature or warm briefly in the microwave.
Final Thoughts: The Box Mix Glow-Up Is Real
You’ve done it. You’ve taken a basic box of brownie mix and elevated it to a level of deliciousness you might not have thought possible. No more bland, dry squares for you! You are now a brownie whisperer, a culinary alchemist, turning everyday into extraordinary. So go forth, bake, devour, and bask in the glory of your fudgy, perfect creation. Just remember to occasionally buy a new box mix; we wouldn’t want the secret getting out.