Okay, friend, let’s talk steak. Specifically, that glorious cut, the top sirloin. It’s often overlooked, but when you treat it right, it delivers amazing flavor and tenderness without the price tag of a ribeye or filet. Ever wonder why some home-cooked steaks just don’t quite hit that steakhouse vibe? Most of the time, it comes down to a few simple techniques. And guess what? You don’t need a fancy grill or an expensive sous vide setup. Nope, we’re going to master how to cook top sirloin steak on stove. Get ready to impress yourself (and anyone lucky enough to share your dinner!).
Why Top Sirloin on the Stove? Your Best Steak Secret!
You might be thinking, “Isn’t sirloin better on the grill?” While a good char from the grill is undeniably fantastic, cooking top sirloin on the stove, especially in a screaming hot skillet, offers some serious advantages.
First, control. You’re right there, monitoring that beautiful crust as it forms. No worrying about flare-ups or uneven grill grates. You get an incredibly consistent sear that locks in juices, which is key for a tender top sirloin steak recipe.
Second, accessibility. Not everyone has a grill, especially if you live in an apartment or battle unpredictable weather (like, say, a sudden monsoon, FYI). But almost everyone has a stovetop and a pan! This makes stove top sirloin steak an absolute game-changer for easy, delicious steak anytime. Plus, the pan drippings? Gold for making a quick sauce, but more on that later. This method truly offers a path to cooking the perfect steak in your own kitchen.
The Steak Basics: What You Need for Stovetop Success
Before we even think about turning on the heat, let’s gather our star player and its supporting cast. Getting these elements right sets you up for victory.
- The Steak Itself: Look for a top sirloin steak that’s at least 1 to 1.5 inches thick. Thinner steaks cook too quickly and can dry out before you get a good crust. Aim for a nice, deep red color with some marbling (those little streaks of fat) for flavor and moisture.
- The Pan: A cast iron skillet is truly king here. Why? Because it gets incredibly hot and retains that heat like a champ, giving you that ultimate sear. If you don’t have one, a heavy-bottomed stainless steel or other oven-safe skillet will work for stovetop steak without cast iron, but cast iron is the ultimate tool for cook a steak in cast iron skillet.
- High Smoke Point Oil: You need an oil that can handle intense heat without smoking up your entire kitchen. Grapeseed, avocado, canola, or refined olive oil are all excellent choices. Avoid extra virgin olive oil for searing; save that for drizzling.
- Seasoning: A good steak doesn’t need much. Coarse salt (like kosher or sea salt) and freshly cracked black pepper are absolute non-negotiables. Beyond that, it’s optional, but a pinch of garlic powder or onion powder can be nice.
Prep Perfection: The Steps Before the Sizzle

This is where many people skip steps, and it makes all the difference! Don’t be that person. These prep steps are crucial for the best steak on stove.
- Bring it to Room Temp: Take your top sirloin out of the fridge at least 30-60 minutes before cooking. A cold steak hitting a hot pan will cook unevenly (outside done, inside still cold and raw). Letting it come to room temperature allows for a more even cook from edge to edge. This is a top tip for cooking the perfect steak.
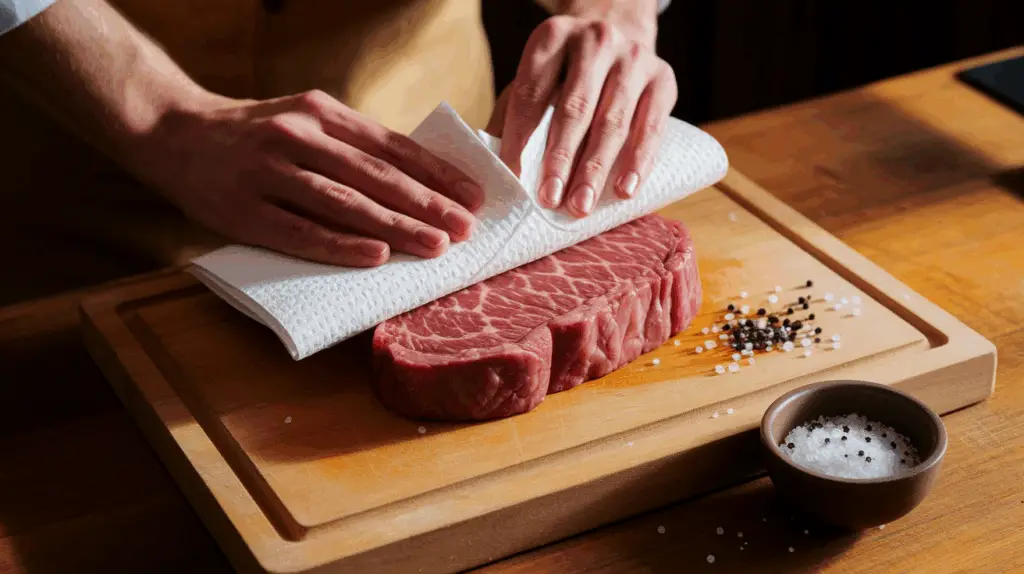
- Pat it DRY, DRY, DRY: Use paper towels to vigorously pat both sides of your steak completely dry. Any moisture on the surface will create steam, not sear, leading to a gray, sad steak instead of a beautiful, browned crust. This is probably the most overlooked, yet vital, step for stove top steak searing.
- Season Liberally: Don’t be shy with the salt and pepper! Sprinkle both sides generously. The salt helps draw out some moisture initially (which you then pat dry!), then allows the steak to reabsorb it, creating a more tender and flavorful result. Some people even prefer a “dry brine” by salting it a few hours or even overnight in the fridge. This really helps infuse flavor.
- Oil the Steak, Not (Necessarily) the Pan: Lightly coat both sides of the steak with your high smoke point oil. This helps conduct heat and ensures an even crust. You can add a tiny bit more oil to the pan too if you like, but oiling the steak directly gives you better coverage.
The Searing Science: How to Cook Top Sirloin Steak on Stove
Now for the main event! This is where you get that incredible crust and perfectly cooked interior.
- Preheat Your Pan Like a Pro: Place your cast iron skillet (or heavy-bottomed pan) over medium-high to high heat. Let it heat up for at least 3-5 minutes, until it’s smoking slightly. This is critical. A hot pan equals a great sear. You want it hot.
- Add the Steak: Gently place the seasoned, oiled, room-temperature sirloin steak into the smoking hot pan. It should sizzle immediately and loudly. Do not crowd the pan; if cooking more than one steak, cook them in batches. Crowding lowers the pan’s temperature and prevents proper searing.
- Sear, Don’t Touch (Initially!): Let the steak sear undisturbed for 2-4 minutes on the first side. This is where the magic happens – that beautiful Maillard reaction creating a deep brown, flavorful crust. Resisting the urge to move it is key for stove top steak perfection.
- Flip and Repeat: Once you have a deep golden-brown crust, flip the steak. Now, you’ll sear the second side for another 2-4 minutes.
- Add Butter & Aromatics (Optional, but Amazing!): For the last minute or two of cooking, drop in a tablespoon or two of unsalted butter, a few smashed garlic cloves, and a sprig of fresh rosemary or thyme. Tilt the pan slightly and use a spoon to continuously baste the steak with the rosemary garlic butter. This infuses incredible flavor and helps create an even crust. This is where your steak rosemary garlic butter dreams come true!
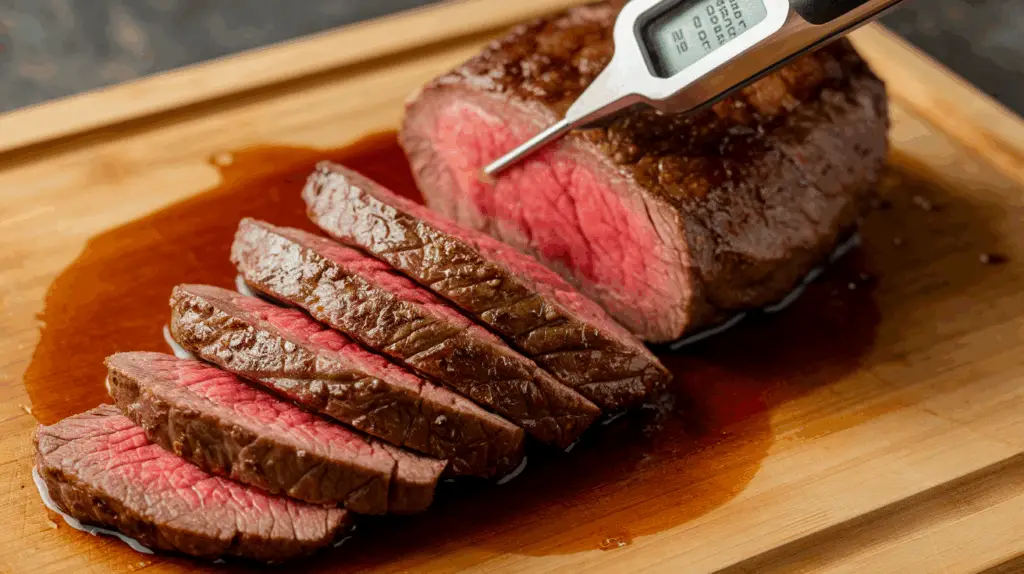
- Check for Doneness: Use an instant-read meat thermometer inserted into the thickest part of the steak (avoiding bone).
- Rare: 120-125°F (49-52°C)
- Medium-Rare: 130-135°F (54-57°C) – My personal favorite and highly recommended for sirloin!
- Medium: 135-140°F (57-60°C)
- Medium-Well: 145-150°F (63-66°C)
- Well-Done: 155°F (68°C) and up (handle with care; it can get tough quickly!)
- Remember, the steak’s temperature will rise another 5-10 degrees while resting.
The Golden Rule: Rest Your Steak!
Once your steak reaches your desired doneness, remove it from the pan and immediately place it on a cutting board. Tent it loosely with foil and let it rest for at least 5-10 minutes (longer for thicker steaks). I cannot stress this enough! This crucial step allows the juices, which have been pushed to the center during cooking, to redistribute throughout the entire steak, resulting in a much juicier and more tender bite. If you cut into it too soon, all those delicious juices will just run out onto your cutting board. Nobody wants that.
Beyond the Top Sirloin: Other Stove-Top Steak Stars
While we’re focusing on how to cook top sirloin steak on stove, these techniques work beautifully for other cuts too!
- Pan Seared New York Strip Steak: This cut also shines in a hot skillet. Follow the same principles for searing and resting for a rich, flavorful result. The distinct fat cap renders beautifully, adding to the flavor.
- Strip Steak Recipe: Similar to a New York Strip, a good strip steak recipe cooked on the stove top in a skillet will give you an amazing crust and tender interior.
- Porterhouse Steak: A thicker cut like a Porterhouse steak can certainly be cooked on the stovetop, but you might need to finish it in the oven after searing to ensure even doneness without overcooking the outside. Sear it hard on both sides, then transfer the skillet to a preheated 375°F (190°C) oven for 5-10 minutes, checking internal temperature.
- Stove Top Grill Pan Steak: If you have a stove top grill pan, you can still get those appealing grill marks indoors! Preheat it very well, then follow similar searing times. Just remember, a grill pan won’t give you the same all-over crust as a flat cast iron skillet.
Delicious Companions: What to Serve with Your Perfect Steak
You’ve got a perfectly cooked steak. Now, what do you serve with it? The right side dishes recipes can elevate your meal into a true feast.
- Classic Comforts: Mashed potatoes (creamy, buttery, perfection!), crispy roasted potatoes, or a baked potato loaded with all the fixings. A simple green salad with a sharp vinaigrette also offers a nice counterpoint.
- Veggies that Sizzle: Asparagus, green beans, or broccoli, lightly sautéed or roasted, are always fantastic.
- Sauce It Up!
- Pan Sauce: Deglaze your hot skillet with a splash of wine or broth after removing the steak. Add a knob of butter and any leftover garlic/herb bits. Simmer until slightly thickened. Pure magic!
- Steak Diane Recipe: For something truly classic and impressive, try a Steak Diane recipe. This retro dish involves a quick pan sauce with shallots, mustard, Worcestershire, and a flambé (carefully!) that is incredibly flavorful with top sirloin.
- Compound Butter: A simple steak rosemary garlic butter or a blue cheese butter melting over a hot steak is divine.
- Easy Steak Marinade Recipes: While we focused on pan-searing, don’t forget the power of a good marinade, even for stovetop cooking. Steak Marinade Recipes can tenderize leaner cuts and infuse them with deep flavor before they even hit the pan. Think balsamic-garlic, soy-ginger, or a zesty lemon-herb marinade.
Tips & Tricks for Next-Level Steak
- Don’t Crowd the Pan: This bears repeating. Cook in batches if necessary.
- Ventilation is Key: Searing steak creates smoke. Turn on your exhaust fan and open a window if possible.
- Cleanliness: After handling raw meat, always wash your hands and cutting board thoroughly.
- Don’t Poke It! Avoid pressing on the steak with a spatula or cutting it to check doneness. Every poke and cut releases precious juices. Use a thermometer.
- Adjust for Thickness: Thicker steaks will need more cooking time after the initial sear, sometimes requiring a finish in a hot oven (transfer the skillet directly to a 375-400°F oven for a few minutes). Thinner steaks are better for quick, high-heat searing only.
- Consider a Dry Brine: For an even juicier steak, season generously with salt 1-24 hours before cooking and leave uncovered in the fridge. Pat dry before searing.
Related Culinary Adventures!
While you’re mastering steak, perhaps you’re also curious about crispy roasted chicken (another stovetop-to-oven marvel!), or simple chicken tender recipes for quick weeknight dinners. And if you’re exploring other beef cuts, mastering a pan seared New York Strip steak or even a Ny Strip Steak on the stovetop uses many of the same techniques we’ve discussed for sirloin. The principles of a good sear, proper resting, and thoughtful seasoning are universal for truly great meat dishes.
Frequently Asked Questions

Q1: What’s the best pan for cooking sirloin steak on the stove?
– cast iron skillet is highly recommended due to its ability to get and retain very high heat, which is crucial for developing a good sear and even cooking on a steak.
Q2: How long should I cook a top sirloin steak on the stove for medium-rare?
– For a 1 to 1.5-inch thick top sirloin steak, aim for about 2-4 minutes per side for a good sear, then continue cooking for another few minutes, flipping every minute or so, until the internal temperature reaches 130-135°F (54-57°C). Remember to let it rest.
Q3: Should I marinate top sirloin steak before cooking on the stove?
– Marinating top sirloin steak is optional but can add significant flavor and tenderize the meat, especially for leaner cuts. Marinate for at least 30 minutes, or up to 4-6 hours, then pat it dry before searing.

Q4: How do I get a good crust on my stovetop steak?
– To get a good crust, ensure your steak is at room temperature, patted completely dry, and liberally seasoned. Use a high smoke point oil and preheat your skillet until it’s smoking hot before adding the steak. Don’t move the steak for the first few minutes of searing on each side.
Q5: What internal temperature is considered medium-rare for steak?
– Medium-rare steak typically reaches an internal temperature of 130-135°F (54-57°C). Keep in mind the temperature will rise a few degrees after you remove it from the heat due to carryover cooking.
Q6: Do I need to rest my steak after cooking on the stove?
– Yes, resting your steak is crucial. Rest it for at least 5-10 minutes (tenting loosely with foil) after cooking to allow the juices to redistribute throughout the meat, ensuring a tender and juicy result.
Q7: Can I cook a top sirloin steak on the stove without a cast iron skillet?
– Yes, you can cook top sirloin steak on the stove without a cast iron skillet. Use another heavy-bottomed, oven-safe skillet (like stainless steel). Ensure it’s very hot before adding the steak to achieve a good sear.
Conclusion
So there you have it, aspiring steak master! Mastering how to cook top sirloin steak on stove really boils down to a few key techniques: proper prep, a screaming hot pan, and the essential rest. It’s not about expensive cuts or complicated gadgets; it’s about understanding the science of the sear and treating that beautiful steak with the respect it deserves. Go forth, grab a top sirloin, and transform your weeknight dinner into a steakhouse-quality experience. Your taste buds (and your ego!) will thank you. Happy searing! 🙂