To resize an image on Photoshop without losing quality, start by opening the image file in Photoshop. From there, go to “Image” and then select “Image Size”. In this window, you can enter a new width or height value for the size of your image.
Make sure that the resample option is set to Bicubic Sharper (best for reduction) or Bicubic Smoother (best for enlargement). After adjusting your desired settings, click OK and save changes to complete your resizing process. It is important not to forget that when resizing an image it will always lose some quality due to stretching pixels out; however if you follow these steps correctly it should be minimal compared with other methods.
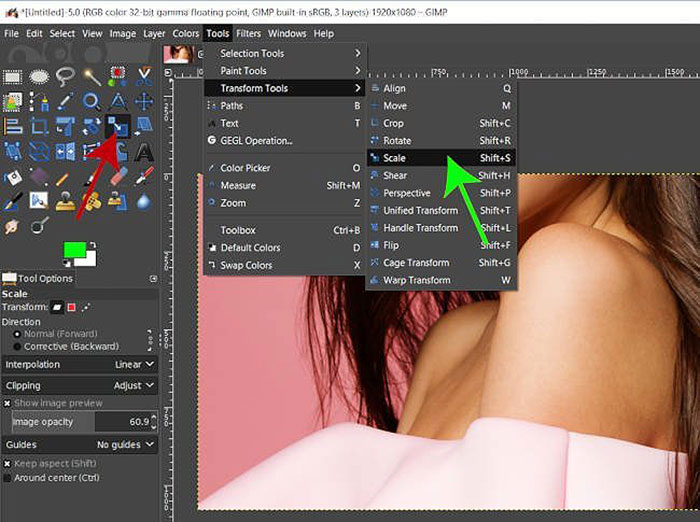
- Launch Photoshop and open the image: Open your desired photo in Adobe Photoshop by selecting “File”, then “Open”, and locating the image on your computer
- Select Image Size: Choose “Image” from the top menu bar and select “Image Size” from the dropdown list
- A dialogue box will appear with information about dimensions, resolution, file size and more for your image
- Adjust Resampling Settings: In order to resize an image without losing quality you must adjust resampling settings which can be found at the bottom of this dialogue box; choose Bicubic Smoother if enlarging or Bicubic Sharper if reducing as these options provide a smoother version of any changes that are made to an image when it is enlarged or reduced in size respectively
- 4
- Enter New Dimensions: Input new values into Width and Height boxes under Pixel Dimension to resize your photo; make sure that checkbox next to Constrain Proportions is ticked so proportions are maintained while resizing (and avoiding distortion)
- Once all necessary adjustments have been made click OK button to apply these changes
- 5
- Save Your Changes : Finally save all changes you have made by clicking File > Save As… command , give your document a suitable name and choose format like JPEG or PNG before hitting Save button
Credit: www.designyourway.net
Q1: How Do I Resize an Image on Photoshop Without Losing Quality
Resizing an image in Photoshop without losing quality is easy. By default, when you resize an image in Photoshop, it will automatically resample the pixels to make up for any changes that occur as a result of scaling the image. This process preserves the original quality and detail of your photograph while also making it smaller or larger depending on your desired outcome.
To begin, open your image file in Adobe Photoshop by selecting “File” > “Open” from the top menu bar. Once opened, select “Image” > “Image Size” from this same menu bar to bring up a pop-up window with all of your sizing options. Here you can adjust both width and height measurements individually or at once as well as choose between different measurement units such as inches or centimeters.
If you are looking to keep the same aspect ratio of your photo then be sure to check off the box next to Scale Styles before adjusting any measurements so that everything stays proportionate throughout this process. Finally press OK after double checking all settings and seeing how they affect the overall size of your image before saving and closing out of Adobe Photoshop entirely!
Enter Your Desired Dimensions in the Width And Height Fields And Check the Resample Image Box before Clicking Ok
If you want to change the dimensions of an image, then enter your desired width and height into the appropriate fields in the dialog box. It is important that you also check the “Resample Image” box before clicking OK. This will ensure that your image is resampled correctly so that it maintains its quality when scaled to different sizes.
Resampling basically means changing a picture from one set of pixel values to another while maintaining or improving its overall appearance as much as possible. Without resampling, scaling an image can result in blurriness or pixilation due to improper calculation of how many pixels should be assigned at each size ratio – which results in visible distortion onscreen. Checking this box ensures that all calculations are done accurately and with less noticeable flaws in terms of quality loss upon enlargement or reduction.
Q2: Is There a Way to Make Sure My Resized Image Looks Sharp
Yes, there are a few ways to make sure your resized image looks sharp. The first and most important is to use an image editor that has the ability to resize images without losing quality. This will ensure that when you enlarge or reduce the size of an image, it won’t lose its sharpness.
Another way is to use a tool like Photoshop’s “Smart Sharpen” feature which can help sharpen up blurred edges or other artifacts from downsizing an image. You can also adjust the brightness and contrast levels in order to bring out more details in your resized photo. Finally, using anti-aliasing tools such as Gaussian Blur or Unsharp Masking may be helpful when trying to achieve maximum detail in a reduced size version of an image without introducing pixelation artifacts.
With these tips in mind, you should have no problem creating beautiful and high-quality images even after they’ve been resized!
You Can Find This Tool by Selecting Filter > Sharpen from the Main Menu
Using the Sharpen tool in Photoshop is an effective way to make your images look sharper and more defined. To use this tool, open up an image in Photoshop that you want to sharpen and then select Filter > Sharpen from the main menu. After selecting this option, several sharpening options will become available for you to choose from depending on what type of effect you’re looking for.
The most popular sharpening filter is Unsharp Mask, which allows you to control both the amount of sharpening applied as well as a radius setting which determines how wide or small of an area around each pixel gets affected by the filter. You can also try using Smart Sharpen if you prefer a one-click solution with less manual tweaking required. Once satisfied with your settings, click “OK” and see how much sharper and clearer your image appears!
Adjust Its Settings Until You Get Your Desired Result
When it comes to achieving your desired results, adjusting the settings of whatever you are trying to work with is key. Whether it’s a camera, computer program, or even an appliance – understanding how to adjust its settings can make all the difference in reaching success. When making adjustments be sure to pay special attention and take notes if needed so that you can refer back if necessary.
It’s important not to get too overwhelmed – start by adjusting one setting at a time and observe what happens before moving on to other settings. This slow and steady approach may take some extra time but will ultimately lead you closer towards getting your desired result.
Q3: What Should I Keep in Mind When Resizing Images on Photoshop
When resizing images on Photoshop, it is important to keep a few things in mind. First and foremost, always use the ‘Image Size’ menu option rather than just stretching or shrinking with free transform as this will affect the pixel density of your image. Additionally, if you are planning on increasing an image size beyond its original resolution, be sure to apply some kind of interpolation technique such as bicubic sharper or bicubic smoother so that the quality remains intact.
Furthermore, when reducing an image size make sure to uncheck ‘Resample Image’ in order to prevent any accidental loss of detail from occurring. Finally, consider using a plugin like Perfect Resize which can help automate these processes for larger batches of images whilst keeping them at high quality levels.
Additionally, If You are Working With Vector Graphics Always Remember to Convert Them into Pixels First before Applying Any Changes As This Will Maintain a Higher Level of Quality Throughout the Process
When working with vector graphics, it is essential to remember that any changes you make must be applied before they are converted into pixels. Vector images can look great at the original resolution, but once they are converted into pixels, they can lose quality and become distorted. This means that making adjustments after converting them will not yield the same results as if you had made those adjustments in their original vector form.
Therefore, always convert your vector graphics into pixels first before applying any changes in order to maintain a higher level of quality throughout the process. Additionally, when resizing or scaling your image for printing purposes, try to keep your image dimensions within the same range as their original size for best results; otherwise this could lead to pixelation or blurry edges on parts of the graphic.
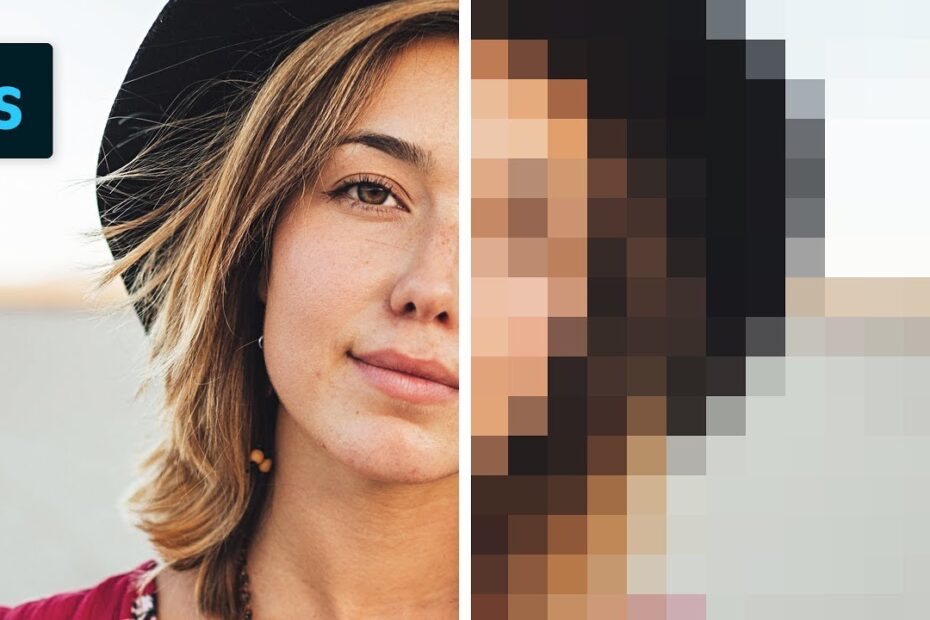
Resize Images Without Losing Quality | Photoshop Tutorial
How to Enlarge an Image in Photoshop Without Losing Quality
Enlarging an image in Photoshop without losing quality is a relatively straightforward process. To begin, open the desired photo file in Photoshop and select “Image” from the top menu bar. Then click on “Image Size” to bring up a dialog box with various resizing options.
Make sure the “Resample Image” checkbox is selected, then adjust either the width or height of your image as needed (keeping both dimensions equal will help retain original proportions). Finally, choose a high-quality interpolation option like Bicubic Smoother or Bicubic Sharper for best results and hit OK to apply changes. With these easy steps you can now enlarge any digital image while preserving its sharpness and clarity!
How to Resize a Layer in Photoshop Without Losing Quality
Resizing a layer in Photoshop without losing quality is easy! All you need to do is select the layer, go to Edit > Free Transform, adjust the size of your layer with the handles in the corners, then press ‘Enter’. To keep your image from becoming pixelated or blurry while resizing, be sure to check on the ‘Interpolation’ setting.
By default it should be set at ‘Bicubic Sharper’; if not just change it and click OK. With this simple trick you can resize layers and maintain their high-quality appearance.
How to Resize Image in Photoshop by Dragging
If you need to resize an image in Adobe Photoshop, there is a simple way to do it by dragging. All you have to do is open the image, select the “Rectangular Marquee Tool” from the Tools Panel on the left side of your screen and click and drag over the area that needs resizing. When you’re done, go to Image > Image Size and enter a new size for the width or height.
This will automatically adjust your selection box accordingly. Finally hit “OK” and your image should be perfectly resized!
Resize Image Without Losing Quality App
If you need to quickly resize an image without losing its quality, then the Resize Image Without Losing Quality app is the perfect tool for you! This user-friendly application allows you to quickly and easily adjust an image’s size while maintaining its original resolution. It supports a variety of popular file formats, including JPG, PNG, GIF, BMP and TIF.
With just a few clicks of your mouse, you can instantly reduce or enlarge any image without sacrificing its visual integrity.
Conclusion
In conclusion, resizing an image on Photoshop without losing quality is a relatively simple process. By first selecting the ‘Image Size’ menu and then adjusting the settings to suit your needs, you can quickly and easily resize any image without sacrificing its original quality. With this helpful guide in mind, you’ll now be able to confidently resize all of your images with ease!