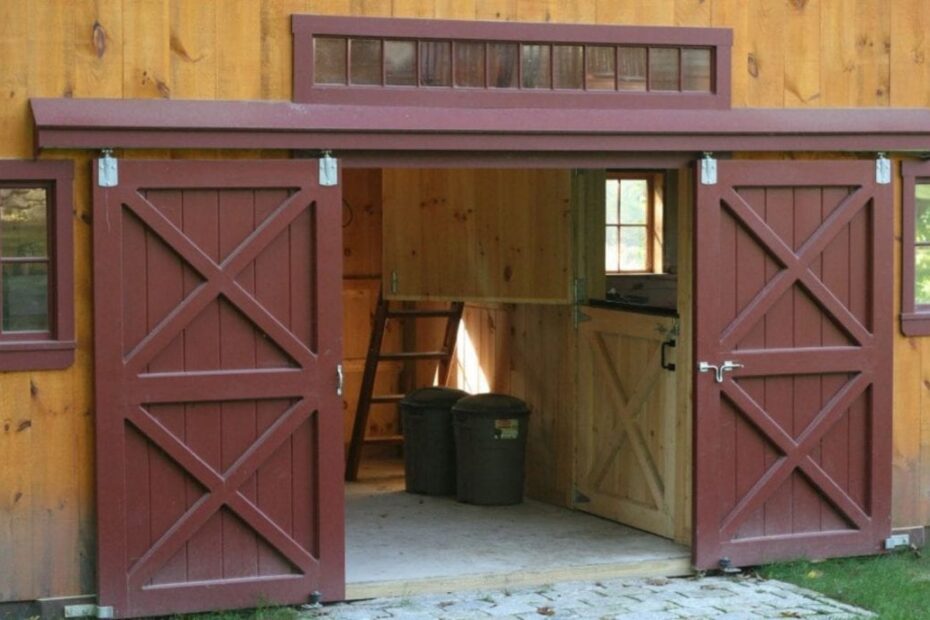
To repair a rotted garage door bottom, remove the rotted wood and replace it with new wood or a vinyl composite material. When faced with a rotted garage door bottom, it is crucial to act fast and repair or replace the damaged area to keep your garage secure and weather-resistant.
The bottom of a garage door is especially susceptible to rot because it is constantly exposed to moisture, which can cause wood deterioration. To tackle this problem, the best solution is to remove the rotted area and replace it with new wood or a vinyl composite material that will resist moisture damage.
A diy project, repairing a rotted garage door bottom, can be simple and cost-effective, and once completed, will provide a secure garage door that will protect your property from outside elements.
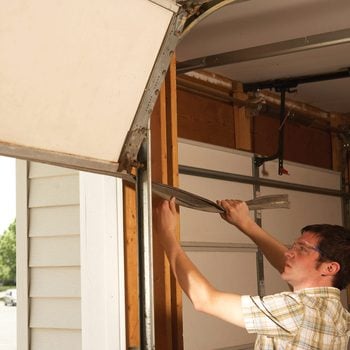
Credit: www.familyhandyman.com
Materials Required
If you’ve been experiencing problems with your garage door, such as difficulty opening and closing it, then the culprit may be a rotted garage door bottom. Don’t worry, with a little diy know-how and some materials, you can fix this issue on your own.
Here is a list of all materials required for the repair, along with the length of each material required and suggestions on where to buy.
List Of All Materials Required For The Repair
- Pressure-treated lumber: You’ll need a 2×6 piece of pressure-treated lumber that is the same length as your garage door, plus an additional inch.
- Nails: You’ll need 16d galvanized nails, which are 3.5 inches long.
- Wood screws: You’ll need a 1.5-inch wood screw for screwing the pressure-treated lumber onto the bottom of your garage door.
- Carpenter’s glue: You’ll need this to help hold the pressure-treated lumber in place while you screw it on.
- Saw: You’ll need a saw to cut the pressure-treated lumber to the right length.
- Hammer: You’ll need a hammer to hammer in the 16d galvanized nails.
- Drill: You’ll need a drill to drill pilot holes for the wood screws.
- Level: You’ll need a level to ensure that the pressure-treated lumber is straight.
- Safety glasses: You’ll need to protect your eyes while you’re working.
Length Of Each Material Required
- Pressure-treated lumber: The length of your pressure-treated lumber should be the same as your garage door, plus an additional inch.
- Nails: You’ll need four nails for each end of the pressure-treated lumber, so a total of eight nails.
- Wood screws: You’ll need two wood screws for each end of the pressure-treated lumber, so a total of four wood screws.
Suggestions On Where To Buy
- Pressure-treated lumber: You can purchase this at any home improvement store, such as home depot or lowe’s.
- Nails: You can purchase these at any hardware store, such as ace hardware or true value.
- Wood screws: You can purchase these at any hardware store, such as ace hardware or true value.
- Carpenter’s glue: You can purchase this at any home improvement store, such as home depot or lowe’s.
- Saw: You can purchase this at any hardware store, such as ace hardware or true value.
- Hammer: You can purchase this at any hardware store, such as ace hardware or true value.
- Drill: You can purchase this at any hardware store, such as ace hardware or true value.
- Level: You can purchase this at any home improvement store, such as home depot or lowe’s.
- Safety glasses: You can purchase these at any hardware store, such as ace hardware or true value.
Preparation
Safety Precautions To Take
Before beginning to work on fixing a rotted garage door bottom, it’s essential to take proper safety precautions. This includes wearing safety gloves and goggles to protect your hands and eyes from any debris or sharp tools. Also, don’t forget to wear sturdy shoes or boots with a slip-resistant sole to prevent any accidents.
Here are some other safety tips for you to keep in mind:
- Make sure to disconnect the garage door opener from the power source before starting the repair process.
- Keep children and pets away from the work area to avoid any accidents.
- Store all the tools and materials away from the work area to avoid tripping hazards.
Proper Removal Of The Rotted Part
Now that you’ve taken the necessary safety precautions, it’s time to remove the rotted part of the garage door bottom. Here are the steps to follow:
- Use a pry bar to remove the trim around the bottom of the garage door.
- Cut away the rotted wood section using a circular saw with a new blade.
- Remove any nails or screws that are still attached to the wooden frame.
- Use a hammer and chisel to remove any remaining wood pieces that are still attached to the door frame.
Cleaning Up The Area
Once you’ve removed the rotted part of the garage door bottom, it’s time to clean up the area. Here’s how:
- Use a vacuum cleaner to remove any wood chips or debris from the work area.
- Use a wire brush or sandpaper to clean any rust or dirt off the door frame.
- Apply a wood preservative to the door frame to prevent further damage from moisture or pests.
Final Thoughts
By following these preparation steps, you’ll be well on your way to fixing a rotted garage door bottom. Remember to take the necessary safety precautions, properly remove the rotted part with the right tools, and clean up the area to ensure a successful repair.
With a little patience and effort, you can save money by diy fixing a rotted garage door bottom.
The Repair
Now that you’ve identified the problem and sourced the necessary tools and materials, it’s time to get to work. Here are the steps to follow for a successful repair:
- Begin by removing any remaining rotten wood with a pry bar or chisel, being careful not to damage the surrounding area.
- Next, carefully measure the size of the hole created by the rot, being sure to account for any irregularities or bends in the surface.
- Using a circular saw, carefully cut a new piece of wood to size. Double-check your measurements before making any cuts to ensure that your new piece will fit properly.
Cutting and measuring of the new material:
- Cut a new piece of wood to size, making sure to account for any irregularities or bends in the surface.
- Measure twice, cut once: Double-check your measurements before making any cuts to ensure that your new piece will fit properly.
Attaching the new material to the garage door:
- Apply a strong adhesive to both the surface of the wood and the area where it will attach to the garage door.
- Carefully position the new piece of wood in place, checking to ensure that it is level and flush with the surrounding area.
- Use a clamp to hold the new piece of wood in place while the adhesive dries.

Tips for a seamless process:
- Wear protective gear such as gloves and goggles to protect yourself from debris and splinters.
- Take your time and work carefully to avoid causing additional damage or needing to repeat the repair process.
- Consider using a wood putty to fill any gaps or imperfections in the repair.
By following these steps and tips, you’ll be able to successfully repair your rotted garage door bottom without requiring professional help. Remember to prioritize safety and take your time to ensure a lasting and effective repair.
Finishing Up
Rotted garage door sections can be an eyesore and can pose a safety hazard if not attended to promptly. But don’t worry, fixing it is not as difficult as you may think, and it can be done at your convenience.
In the previous sections, we discussed the steps involved in fixing a rotted garage door bottom. In this section, we will cover the final touches needed to complete the repair: priming and painting. Let’s delve into it.
Importance Of Proper Primer And Paint
Priming and painting are crucial parts of the repair process. It not only gives your garage door a refreshed look but also helps to prevent future damages. The primary goal of primer is to make it easier to apply paint to your door, and it provides a protective layer between the wood and the paint.
Primer also fills in any small holes or imperfections in the wood, preventing further rotting.
When it comes to painting your garage door, a good quality latex paint is the best option. It is more flexible and durable, making it less susceptible to cracks and fading. A high-quality paint helps protect the wood against moisture, resists chipping and flaking, and improves the overall appearance of the garage door.
Steps To Follow For Priming And Painting The Repaired Section
Now that your garage door is repaired, priming and painting will complete the job and make it look as good as new. Here are a few steps to get you started:
- Sand the repaired area with fine-grit sandpaper and wipe it down with a cloth to remove any dust.
- Select a high-quality primer that is specially designed for exterior wood surfaces.
- Apply the primer to the repaired section of the door using a brush or roller, making sure to apply it evenly.
- Let the primer dry for at least 24 hours before applying paint.
- Choose a high-quality latex paint that is specifically designed for exterior wood surfaces.
- Apply the paint to the primed area using a brush or roller, being sure to apply it evenly with smooth, long strokes.
- Allow the paint to dry for at least 24 hours before applying a second coat.
Cost-Effective Options And Tips For Painting
When it comes to painting your garage door, there are a few cost-effective options and tips that can be considered:
- If you have leftover paint from another project, use it to paint your garage door to save money on purchasing new paint.
- Purchase a paint and primer combination to cut down on costs and time.
- Consider painting the entire garage door instead of just the section that was repaired, as it will give the door a more uniform look.
- Use a roller instead of a brush to save time and achieve a smoother finish.
- Avoid painting on hot days as the sun can cause the paint to dry too quickly, causing brush marks and an uneven finish.
Considering the importance of primer and paint enhances the outcome of the final look of your garage door. By following the recommended steps and tips for priming and painting the repaired section, you can complete your diy project with ease and cost-effectively.
Plus, you can take pride in the fact that you repaired your garage door yourself, saving money and giving your home a fresh look.
Frequently Asked Questions On How To Repair Rotted Garage Door Bottom
How Do I Know If My Garage Door Bottom Is Rotted?
Inspect the bottom of your garage door for signs of damage, such as cracks, holes, or softness.
What Are The Causes Of Garage Door Bottom Rot?
Exposure to moisture, insects, and regular wear and tear are the primary causes of garage door rot.
Can I Repair A Rotted Garage Door Bottom Myself?
Yes, with the right tools and materials, repairing a rotted garage door bottom can be done as a diy project.
What Materials Do I Need To Repair A Rotted Garage Door Bottom?
You’ll need a new piece of wood, screws, a saw, sandpaper, paint, and putty to fill any gaps or holes.
How Long Will It Take For Me To Repair A Rotted Garage Door Bottom?
The amount of time it takes to repair a rotted garage door bottom varies based on the extent of the damage, but it can be completed within a day.
Conclusion
It is never too late to repair your rotted garage door bottom! Taking the time to fix the issue can save you money and prevent further damage to your garage door and home. By following the steps outlined in this guide, you can confidently repair your rotted garage door bottom without the need for professional help.
With the right tools and materials, replacing the wood and weatherstripping can be done in just a few simple steps. Remember to regularly inspect your garage door’s bottom and address any issues as soon as they arise. By doing so, you can prolong the life of your garage door and ensure its proper functioning for years to come.
Don’t wait too long to take action – start repairing your garage door bottom now!