How to Melt Chocolate Chips in the Microwave (Without Ruining Them!)
We’ve all been there. You have a beautiful pile of chocolate chips. You have a microwave. You have a brilliant dessert idea that requires a river of luscious, melted chocolate. You think to yourself, “This will be easy. What could possibly go wrong?” You pop the bowl in, press a few buttons, and ninety seconds later, you pull out a lumpy, grainy, clay-like brick of sadness that was once beautiful, promising chocolate. You have seized your chocolate. You have scorched it. You have failed.
Today, we’re putting an end to that tragedy. The cycle of chocolate abuse stops now. This is a public service announcement disguised as a recipe. You’re going to learn how to melt chocolate chips in microwave so perfectly, so smoothly, and so flawlessly that it will feel like you’ve unlocked a culinary superpower. Prepare to become a master of the meltdown.
Why This “Recipe” Is a Crucial Life Skill
Why dedicate an entire article to a task that seemingly takes 60 seconds? Because mastering this simple technique is the key that unlocks a universe of delicious possibilities, and doing it wrong is a one-way ticket to frustration and wasted chocolate (which is a crime).
First, it’s the fastest, easiest method on the planet. Forget messing around with a double boiler, simmering water, and a whole lot of steam. The microwave is a powerful tool for this job if you know how to wield its power for good, not evil. It’s quick, efficient, and keeps your stovetop free.
Second, the cleanup is an absolute dream. You need one bowl and one spatula. That’s it. You’re not left with multiple pots and pans. This is the definition of a low-mess, high-reward kitchen hack.

Finally, it’s a foundational technique for countless desserts. Want to dip strawberries? You need melted chocolate. Want to drizzle over a cake or make a ganache? You need melted chocolate. Want to just eat a bowl of melted chocolate with a spoon? Hey, I’m not judging. You need melted chocolate for that, too.
The “Ingredients” (A Very Short List)
The list of ingredients for this complex operation is, thankfully, quite short.
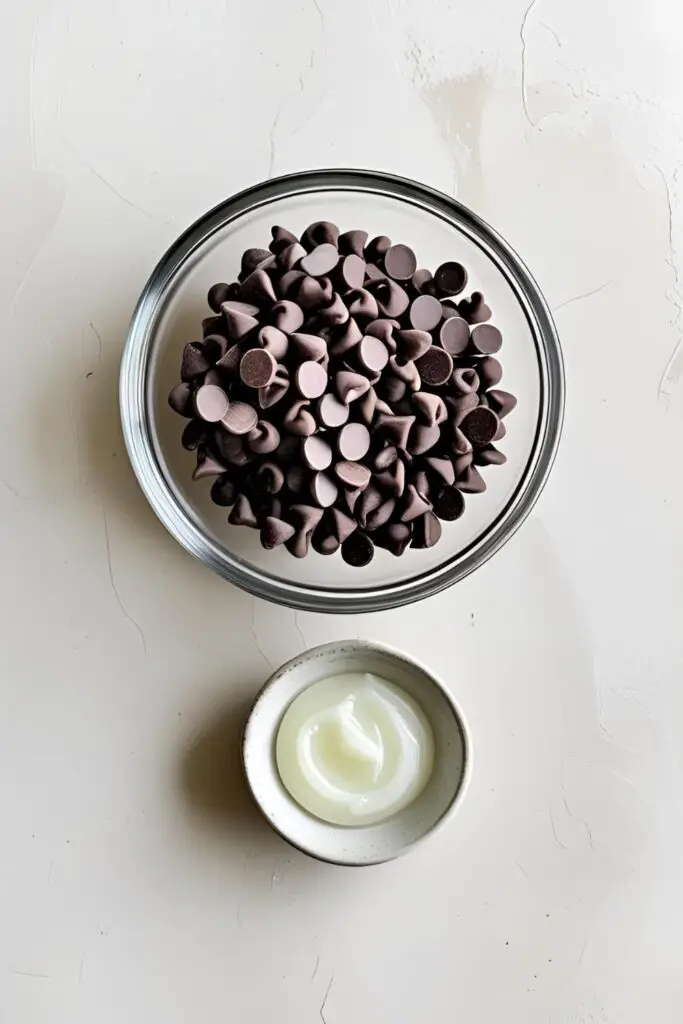
- Chocolate Chips: About 1-2 cups. You can use semi-sweet, milk chocolate, or dark chocolate chips. We’ll discuss the special case of the diva that is white chocolate later.
- Optional Secret Weapon: 1 teaspoon of shortening or coconut oil per cup of chocolate chips. This is not for flavor; it’s the magic ingredient that ensures a super smooth, glossy finish and a perfect consistency for dipping and drizzling.
The Meltdown Arsenal (Your Toolkit)
To perform this delicate operation, you will need a few key pieces of highly specialized equipment.
- A Microwave: The powerful, slightly unpredictable beast we are about to tame.
- A Microwave-Safe Bowl: A glass or ceramic bowl is highly recommended. Plastic bowls can retain too much heat and are more likely to scorch your chocolate.
- A Completely Dry Silicone Spatula or Spoon: Emphasis on COMPLETELY DRY.
- Oven Mitts: Because a bowl of what is essentially molten chocolate is, in fact, hot. Shocking, I know.
Step-by-Step: The Surgical Procedure for Perfect Melted Chocolate
Read this carefully. We are about to perform a delicate operation. The keys are low power and frequent stirring.
Step 1: The Prep Place your chocolate chips (and the optional shortening or coconut oil) into a completely clean and bone-dry microwave-safe bowl. Even a single, rogue drop of water can ruin everything.
Step 2: The First Zap (The 50% Power Rule) This is the most important rule. Set your microwave to 50% power. Do not, under any circumstances, use full power. Place the bowl in the microwave and heat for 30 seconds.

Step 3: The First (and Most Deceiving) Stir Take the bowl out of the microwave. Now, look at the chocolate chips. They will look almost exactly the same. They will still be holding their chip-like shape. They are lying to you. You must stir them. Use your dry spatula to move them around the bowl. This distributes the heat.
Step 4: The Subsequent Zaps (Short Intervals Are Key) Place the bowl back in the microwave. Continue to heat at 50% power in 15 to 20-second intervals. After every single interval, take the bowl out and stir thoroughly. The chips will slowly start to melt and get gooey.
Step 5: The Final Melt (Use the Residual Heat!) Continue the zap-and-stir process until the chocolate chips are about 90% melted, with just a few small, stubborn lumps remaining. Now, stop microwaving. Remove the bowl and just keep stirring gently. The residual heat in the bowl and the already-melted chocolate will be more than enough to melt those last few lumps, leaving you with a perfectly smooth, glossy, and un-scorched river of liquid chocolate.
Congratulations. You have successfully negotiated with your microwave and won.
The Science of the Melt (Why This Works)
Ever wondered why your chocolate turns into a sad brick? It’s all about science.
- Why 50% Power is Crucial: Microwaves are actually pretty brutal. They work by blasting your food with energy, which can create intense hot spots. At full power, the inside of your chocolate chips can scorch and burn long before the outside has even started to melt. Using 50% power (or the defrost setting) heats the chocolate much more gently and evenly.
- What is “Seizing”? Seizing is the mortal enemy of melted chocolate. It’s what happens when a tiny, minuscule drop of water touches your melting chocolate. The water causes the sugar and cocoa particles in the chocolate to instantly clump together, turning your smooth, liquid dreams into a thick, grainy, unusable paste. This is why using a bone-dry bowl and spatula is non-negotiable.
- Why Do Chips Hold Their Shape? Chocolate chips contain stabilizers that are designed to help them hold their classic chip shape during baking. This is why, even when they are molten on the inside, they might still look solid. The act of stirring is what makes them collapse into a smooth liquid. If you don’t stir, you’ll just keep heating them until they burn from the inside out.
Common Meltdown Mistakes to Avoid
Don’t let these simple mistakes lead you down the path to seized, scorched sadness.
- The “Full Power and Pray” Method. This is the #1 mistake. It’s tempting to just hit “1:00” and hope for the best. You will scorch your chocolate. It will taste burnt. Your dessert will be ruined, and your kitchen will smell of failure. Use 50% power or the defrost setting. It is the law.
- The “Wet Bowl or Spoon” Sabotage. I cannot say this enough. Water is the mortal enemy of melting chocolate. Make sure your bowl, your spatula, and anything else that might touch the chocolate is completely, utterly, bone-dry.
- The “I’ll Just Nuke it for 2 Minutes Straight” Folly. Chocolate is delicate. It melts best with gentle, distributed heat. You absolutely must use short intervals and stir thoroughly in between to ensure it melts evenly without any hot spots that can cause it to burn.
- Forgetting to Stir. The stirring is not optional. It is as important as the heating. The chips will look whole, but they are molten on the inside. The stirring is what brings it all together into a smooth liquid. If you don’t stir, you’ll just end up with burnt-bottomed chips that are still solid on top.
Variations & Customizations (What to Do With Your Power)

Now that you have a bowl of perfectly melted chocolate, the world is your oyster (a chocolate-covered oyster, perhaps?).
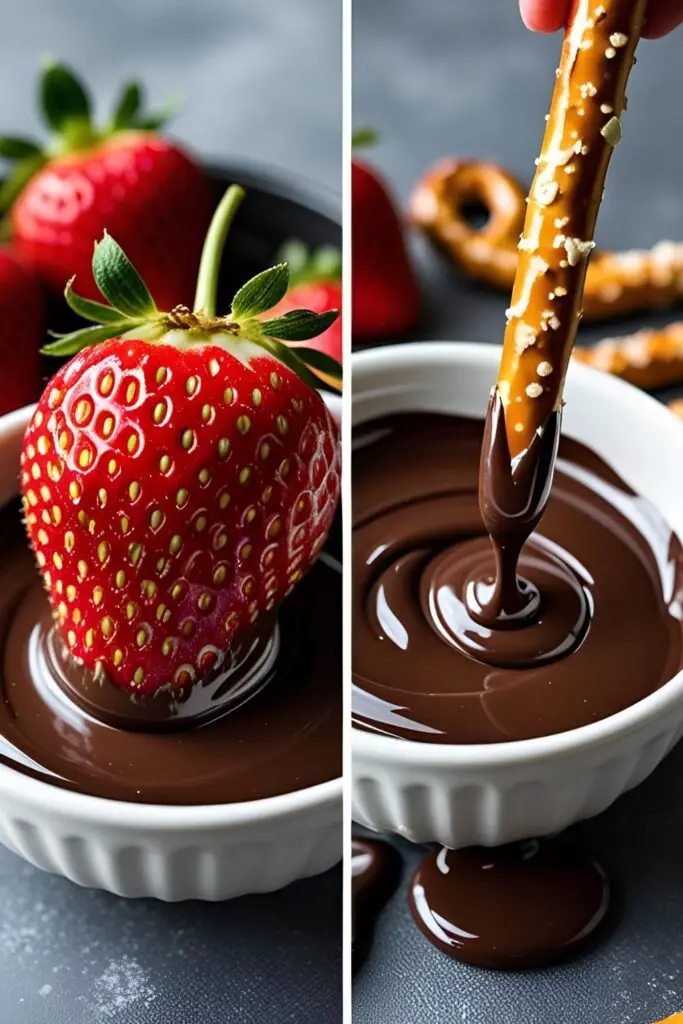
- Perfect Chocolate-Dipped Strawberries: The ultimate elegant treat. Hold a clean, dry strawberry by the stem, dip it into your smooth, melted chocolate, let the excess drip off, and place it on a parchment-lined baking sheet to set.
- Homemade “Magic Shell” for Ice Cream: This is a game-changer. For every 1 cup of melted chocolate chips, stir in 2 tablespoons of coconut oil until completely smooth. When you pour this mixture over cold ice cream, it will instantly harden into a delicious, crackly shell.
- Easy Drizzling and Decorating: Carefully pour your melted chocolate into a small, sturdy Ziploc bag. Snip off a minuscule corner of the bag, and you now have a perfect, disposable piping bag for drizzling over cookies, cakes, or brownies.
Your Burning Chocolate Questions, Answered
Let’s clear up some of the most common questions about this seemingly simple task.
Help! I think my chocolate seized! Why did it happen and can I fix it?
It seized because it came into contact with water. For every 6 ounces of chocolate, try vigorously stirring in 1 tablespoon of boiling water (or milk, or cream). It sounds counterintuitive, but adding more liquid can sometimes smooth out the grainy mixture. It won’t be perfect for dipping, but it can be saved for use in a batter or a sauce.
My melted chocolate is too thick for dipping. How can I thin it out?
This is where our secret weapon comes in. Stir in 1-2 teaspoons of shortening or coconut oil per cup of chocolate chips. This will make it much smoother and more fluid, perfect for getting a thin, even coat on your treats.
What’s the difference between melting chocolate chips and a high-quality chocolate bar?
Chocolate chips contain stabilizers to help them hold their shape. High-quality baking bars do not, and they will melt much more smoothly and easily. The bar will also have a better flavor and texture. For dipping, a chopped bar is always superior, but chips work great with the thinning trick!
Can I melt white chocolate chips the same way?
Yes, but you must be even more careful. White chocolate has a lower melting point and is much more prone to scorching. Use 50% power, use even shorter intervals (15 seconds), and stir, stir, stir.
How do I find 50% power on my microwave?
Most microwaves have a “Power Level” button. You would press it and then press “5.” If yours doesn’t, the “Defrost” setting is often a good, low-power alternative.
How do I store and re-melt any leftover melted chocolate?
Let the chocolate cool and harden completely in the bowl at room temperature. Once solid, you can cover it. To re-melt, just pop it back in the microwave and repeat the same low-and-slow process.
Is it okay to use a plastic bowl?
It’s not recommended. Plastic can retain heat and develop hot spots, making it much more likely that you’ll scorch your chocolate. A glass or ceramic bowl heats more evenly and is a much safer choice.
Final Thoughts
You’ve done it. You have stared into the unpredictable, chaotic energy field of a microwave and a bowl of innocent chocolate chips, and you have emerged victorious. You have conquered the seized chocolate beast and vanquished the scorched-bottom dragon. You now hold the key to a world of drizzled, dipped, and delicious desserts.
So go forth and melt responsibly. Your strawberries, your pretzels, your ice cream, and your cakes will thank you.