Ban the Bland: How to Make White Gravy That Doesn’t Suck
Let’s be honest, white gravy has a bit of a reputation, doesn’t it? It can be bland, lumpy, and generally disappointing – the culinary equivalent of a beige cardigan. But what if I told you that learning how to make white gravy that’s actually creamy, flavorful, and downright addictive is easier than finding a decent rickshaw at rush hour in Barishal? Yeah, you heard me. We’re about to banish blandness forever.
Ready to ditch the watery, flavorless stuff and whip up a white gravy so good it’ll make you want to slather it on everything? Of course, you are. Mastering how to make white gravy is a fundamental kitchen skill, and once you nail it, your biscuits, chicken-fried steak, and mashed potatoes will thank you profusely. Get ready to unlock a whole new level of comfort food goodness.
Why This White Gravy Recipe Is Your New Best Friend
So, why should you bother learning to make this seemingly simple sauce from scratch? Let me count the creamy, dreamy ways.
First, the flavor is a revelation. Forget those sad, pasty excuses for gravy. Homemade white gravy, when done right, is rich, savory, and has a subtle hint of nutmeg (trust me on this). It’s a taste sensation that will make you wonder why you ever settled for less.
Second, texture matters, people! We’re talking smooth, velvety gravy that coats your food like a warm hug. No lumps allowed in this kitchen. We’ll show you the secrets to achieving that perfect, pourable consistency.
Finally, it’s surprisingly versatile. While classic with biscuits and sausage, this gravy is also fantastic with chicken, vegetables, and even as a base for other sauces. It’s the little black dress of the condiment world.
The Short and Sweet Ingredient List
You probably have most of these pantry staples already. That’s the beauty of it!
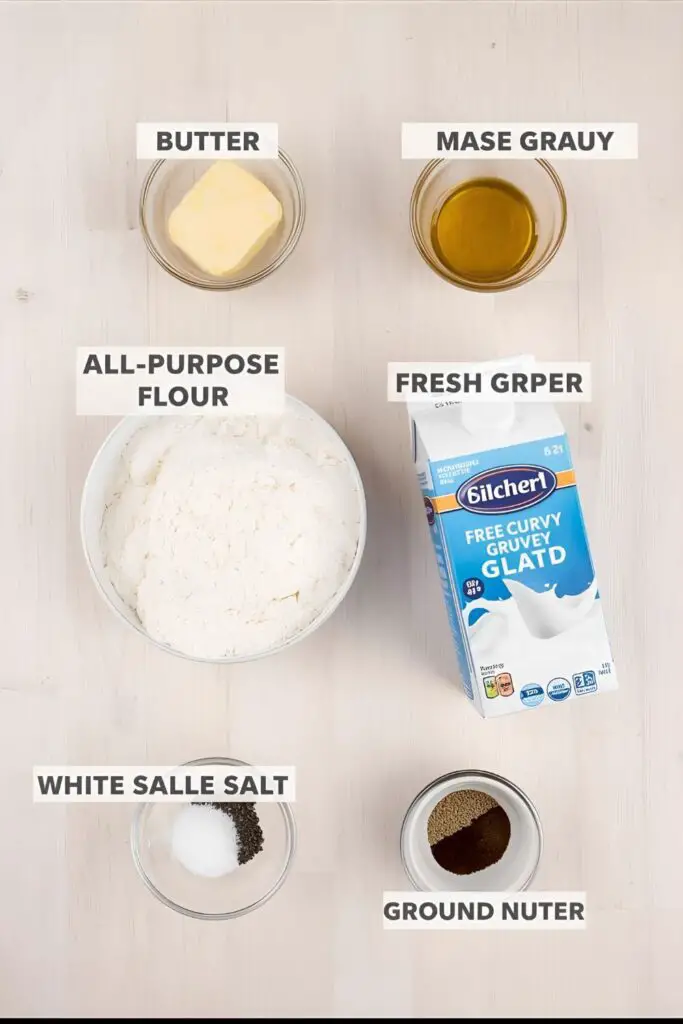
- 2 tablespoons Butter: The foundation of our flavor. Unsalted is best so you can control the saltiness.
- 2 tablespoons All-Purpose Flour: Our thickening agent.
- 2 cups Milk (whole milk preferred for richness, but 2% will work): The liquid base of our creamy concoction. Don’t even think about using skim milk here, IMO.
- 1/4 teaspoon Salt, or to taste: Seasoning is key!
- 1/4 teaspoon Black Pepper, freshly ground is always better: Adds a little warmth and bite.
- Pinch of Ground Nutmeg (optional, but trust me): This little secret ingredient elevates the flavor.
Your Gravy-Making Command Center: Tools & Gadgets
You don’t need fancy equipment for this. Just a few basic kitchen essentials.
- Medium Skillet or Saucepan: With a sturdy bottom to prevent scorching.
- Whisk: Essential for creating a smooth roux and preventing lumps.
- Measuring Spoons: For precise ingredient amounts.
- Liquid Measuring Cup: For the milk.
Let’s Get Gravy-fying: Step-by-Step Instructions
Ready to transform simple ingredients into creamy gold? Let’s do this!
Step 1: Melt the Butter
Place your skillet or saucepan over medium heat. Add the butter and let it melt completely, swirling the pan occasionally. It should melt quickly and evenly.
Step 2: Make the Roux (The Magic Begins)
Once the butter is melted, sprinkle the flour evenly over the butter. Using your whisk, immediately begin to whisk the butter and flour together constantly. This mixture is called a roux, and it’s the secret to a smooth, lump-free gravy. Cook the roux for 1-2 minutes, whisking continuously. It should look like a pale golden paste. Don’t let it brown too much, or your gravy will have a different flavor profile.
Step 3: Gradually Add the Milk
Now comes the crucial part: adding the milk. Take your pan off the heat for a moment (this helps prevent lumps, trust me). Pour in about 1/4 cup of the milk and whisk vigorously until it’s completely smooth and incorporated into the roux. It will look like a thick paste again.
Step 4: Whisk and Simmer
Place the pan back over medium-low heat. Gradually add the remaining milk, about 1/2 cup at a time, whisking constantly after each addition until smooth. This gradual addition and constant whisking are key to preventing lumps. Once all the milk is added, continue to whisk the gravy as it heats up. It will start to thicken.
Step 5: Season to Perfection
Once the gravy has thickened to your desired consistency (it should coat the back of a spoon), reduce the heat to low and simmer gently for 2-3 minutes, stirring occasionally. This cooks out the raw flour taste. Now, stir in the salt, pepper, and that little pinch of nutmeg (if you’re feeling fancy – and you should be!). Taste the gravy and adjust the seasonings as needed. Does it need a little more salt? Go for it! A bit more pepper? Why not!
Step 6: Serve and Enjoy!
Your beautiful, creamy white gravy is now ready to grace your breakfast, lunch, or dinner table. Pour it generously over biscuits, fried chicken, mashed potatoes, or whatever your heart desires.
Calories & Nutritional Info
Alright, let’s talk numbers. White gravy isn’t exactly a health food, but it’s a delicious indulgence. Here’s a rough estimate for a 1/4 cup serving:
- Calories: Approximately 100-150 kcal
- Fat: Around 8-12g (mostly from the butter and milk)
- Carbohydrates: Roughly 5-8g
- Protein: About 3-5g
- Note: These values can vary depending on the type of milk you use. Whole milk will be higher in fat and calories than 2%.
Common Mistakes to Avoid (Gravy Gremlins)
- Not Whisking Constantly (Especially When Making the Roux and Adding Milk): This is the number one culprit for lumpy gravy. Whisk like your life depends on it!
- Adding All the Milk at Once: Trust the process. Adding the milk gradually and whisking until smooth after each addition is essential for a lump-free result.
- Cooking the Roux for Too Long or Burning It: You want a pale golden roux, not a brown one. A burnt roux will give your gravy a bitter taste.
- Not Cooking the Gravy Long Enough After Adding the Milk: Simmering for a few minutes after the gravy thickens cooks out the raw flour taste and improves the overall flavor.
- Under-Seasoning: Don’t be afraid to season your gravy properly with salt and pepper. That little pinch of nutmeg also works wonders!
Variations & Customizations
White gravy is a blank canvas! Here are a few fun ways to jazz it up:
- Sausage Gravy: The classic! Brown and crumble some breakfast sausage in your skillet before you melt the butter. Remove the sausage, make your roux in the leftover fat, then stir the cooked sausage back into the finished gravy.
- Herbaceous White Gravy: Stir in some finely chopped fresh herbs like parsley, chives, or thyme at the end of cooking for a fresh, herby twist.
- Spicy White Gravy: Add a pinch of cayenne pepper or a few dashes of your favorite hot sauce to the gravy for a little heat.
Frequently Asked Questions (Your Gravy Quandaries, Quelled)
1. Why is my white gravy lumpy? Lumps are usually caused by not whisking constantly enough, especially when making the roux and adding the milk. Try taking the pan off the heat when adding the first bit of milk to the roux and whisking vigorously.
2. How do I fix lumpy white gravy? Don’t panic! You have a few options. You can try whisking the gravy very vigorously. If that doesn’t work, you can pour the gravy through a fine-mesh sieve into another saucepan. This will catch any lumps.
3. Can I use evaporated milk for white gravy? Yes, you can! Evaporated milk will result in a richer, thicker gravy. Use the same amount as you would regular milk.
4. Can I make white gravy without butter? You can substitute another fat, like bacon grease or vegetable oil, but butter adds a lot of flavor. If using oil, be sure it’s heated before you add the flour.
5. How long does white gravy last in the refrigerator? Properly stored in an airtight container, white gravy will last for 3-4 days in the refrigerator.
6. Can I freeze white gravy? Freezing gravy can sometimes change the texture, making it slightly grainy. However, if you need to, let it cool completely, then freeze it in an airtight container for up to 3 months. Thaw it in the refrigerator and reheat gently, whisking constantly. You might need to add a splash of milk to restore the creamy consistency.
7. What’s the difference between white gravy and béchamel sauce? White gravy is a more rustic, often thinner sauce, typically seasoned with just salt and pepper (and maybe nutmeg). Béchamel is one of the French mother sauces and often includes onion or other aromatics simmered in the milk for added flavor. Béchamel is also often a base for more complex sauces.
Final Thoughts
Congratulations! You’ve officially conquered the art of making smooth, delicious white gravy that will elevate all your comfort food favorites. No more settling for bland, lumpy disappointments. You now possess the power to create creamy perfection with just a few simple ingredients.
So go forth and smother your biscuits, celebrate your chicken-fried steak, and luxuriate in the velvety goodness on your mashed potatoes. You are now a gravy guru. Just try not to get too smug about it. Maybe. Enjoy every delicious, creamy bite!


