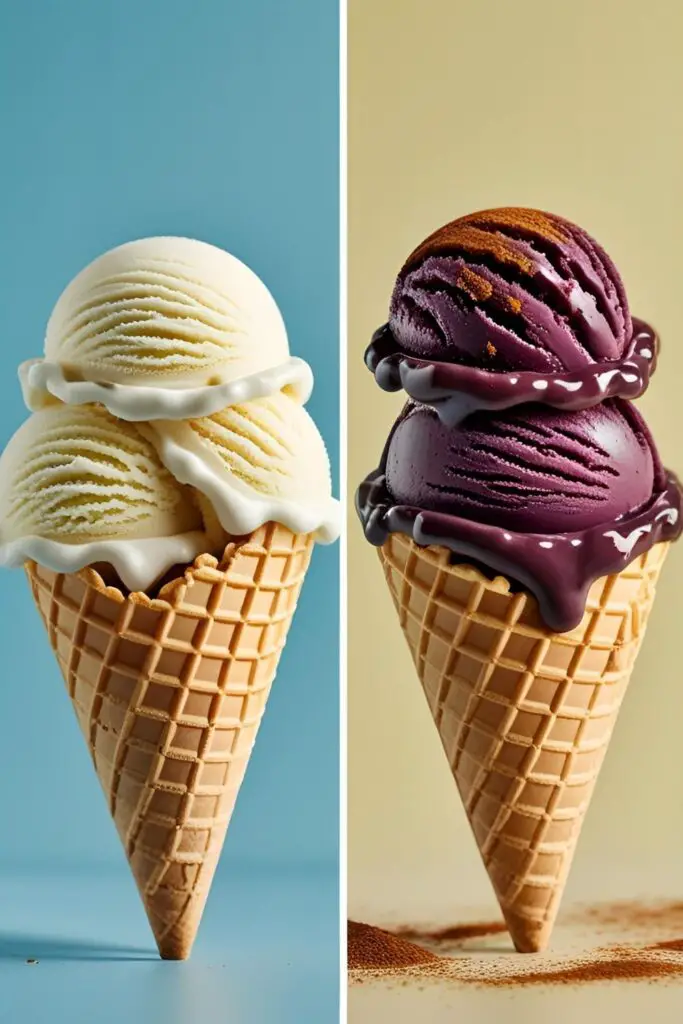
How to Make Vanilla Ice Cream That Ruins Store-Bought Forever
Let’s be honest. You’re here because you’ve been hurt. Hurt by that freezer-burned tub of “vanilla-flavored frozen dessert” sitting in your freezer. It promised creamy, dreamy satisfaction but delivered icy disappointment and a weird, artificial aftertaste. Sound familiar? Well, today we’re staging an intervention. You’re about to learn how to make vanilla ice cream—real, honest-to-goodness, life-changing vanilla ice cream. The kind that makes you question all your previous life choices.
Ready to embark on a journey to frozen nirvana? Good. Because once you taste this, there’s no going back. You’ve been warned.
Why This Recipe Is Basically a Superpower
So, why this specific recipe? Why should you devote a tiny bit of your precious time to this frozen concoction?
First, flavor. We’re not talking about a vague hint of vanilla. We’re talking about a deep, complex, floral vanilla flavor that sings. This is a French-style, custard-based ice cream, which sounds fancy but just means we’re using egg yolks. Those little golden orbs are the secret to an impossibly rich and velvety texture that store-bought brands can only dream of.
Second, it’s shockingly easy. If you can stir something in a pot without setting off the smoke alarm, you can make this. The process is straightforward, and I’ll hold your hand the entire way. No, not literally. That would be weird.

Finally, the bragging rights. Imagine serving a scoop of this masterpiece to your friends. The silence, followed by “You made this?!” is worth the (minimal) effort alone. This recipe isn’t just a dessert; it’s a statement. A delicious, creamy statement.
The Sacred Ingredients List
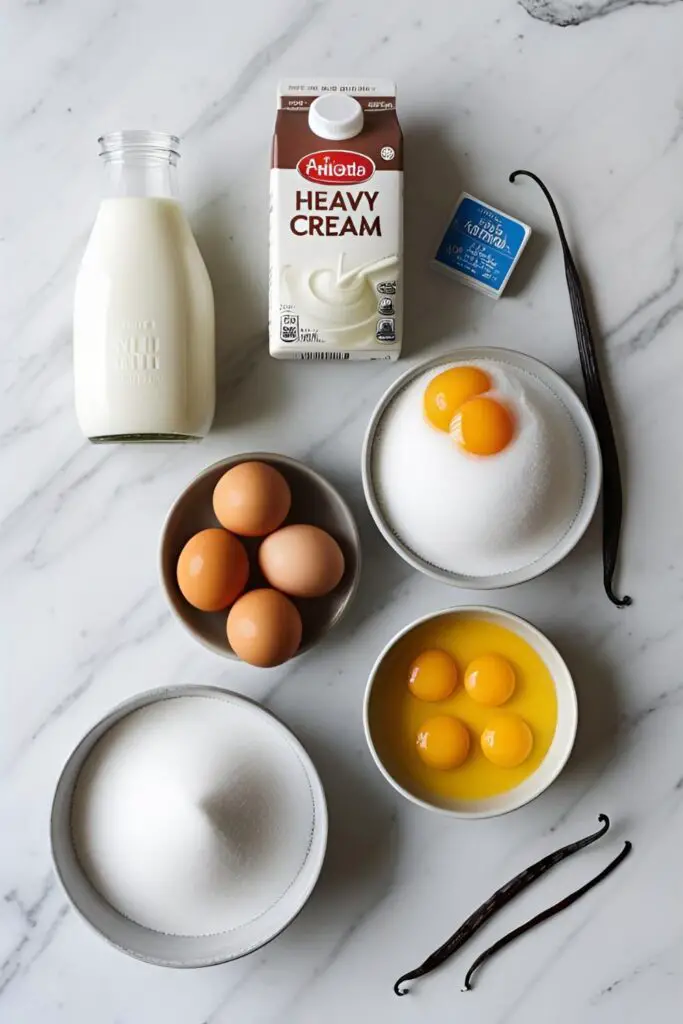
No weird chemicals or unpronounceable stabilizers here. Just pure, simple goodness. Don’t skimp on quality—your taste buds will thank you.
- 2 cups (480ml) Heavy Cream, the good stuff. This is not the time for “light” versions.
- 1 cup (240ml) Whole Milk. Fat is our friend today.
- 3/4 cup (150g) Granulated Sugar, divided.
- 5 Large Egg Yolks. Save the whites for an omelet or a meringue. You’re a multi-tasker!
- 1 Vanilla Bean OR 1 tablespoon of high-quality vanilla extract. A vanilla bean will give you those gorgeous little black specks and a more intense flavor, but good extract works wonders too.
- A pinch of Salt. Trust me, it makes everything taste better.
Your Trusty Kitchen Arsenal (aka Tools & Gadgets)
To achieve ice cream glory, you’ll need a few key players. Think of these as your culinary sidekicks.
- Ice Cream Maker: An absolute must for that churned, creamy texture. A 1.5-quart model from Cuisinart or a similar brand is perfect. Remember to freeze the bowl for at least 24 hours beforehand!
- Heavy-Bottomed Saucepan: Prevents your precious custard from scorching.
- Whisk: For emulsifying those eggs into submission.
- Fine-Mesh Sieve/Strainer: This is your quality control. It catches any bits of accidentally-scrambled egg. No one wants that.
- Mixing Bowls: You’ll need at least two.
- Silicone Spatula: For scraping every last drop of custard from the pot. We don’t waste greatness.
- Airtight Freezer Container: A dedicated ice cream tub, a loaf pan tightly wrapped in plastic, or any freezer-safe container will do.
Step-by-Step to Creamy Perfection
Alright, deep breath. You can do this. Follow these steps, and you’ll be in dessert heaven in no time.
Step 1: Prepare the Custard Base
In your heavy-bottomed saucepan, combine the heavy cream, whole milk, and a pinch of salt. If you’re using a vanilla bean, split it lengthwise, scrape out the glorious seeds with the back of a knife, and add both the seeds and the pod to the pot. Add half of your sugar (about 6 tablespoons) to the pot as well.
Warm this mixture over medium-low heat, stirring occasionally, until it’s steamy and small bubbles form around the edge. Do not let it boil! We’re just infusing the cream with vanilla, not making a dairy volcano.
Step 2: The Art of Tempering Eggs

While your cream mixture is warming up, grab a separate mixing bowl. Add the egg yolks and the remaining sugar. Whisk them together vigorously until the mixture is thick, pale yellow, and falls off the whisk in a ribbon. This should take about 2-3 minutes.
Now for the most important part: tempering. This prevents the hot cream from turning your yolks into scrambled eggs. While whisking the yolks constantly, very slowly ladle about a cup of the hot cream mixture into the yolks. Go slow! Are you still whisking? Good. Once that’s incorporated, pour the tempered egg mixture back into the saucepan with the rest of the cream.
Step 3: Cook the Custard (Gently!)
Return the saucepan to the stove over low heat. Cook, stirring constantly with your spatula, scraping the bottom and sides. The mixture will slowly thicken. This takes patience, maybe 5-8 minutes.
How do you know it’s done? It should be thick enough to coat the back of a spoon (this is called nappage if you want to sound fancy). When you run your finger across the spatula, it should leave a clean line that doesn’t run. Remove from the heat immediately.
Step 4: Strain and Chill
Immediately pour the hot custard through your fine-mesh sieve into a clean bowl. This is your insurance policy against lumps. If you used a vanilla bean pod, fish it out now. If you’re using vanilla extract, stir it in at this stage.
Cover the bowl with plastic wrap, pressing it directly onto the surface of the custard to prevent a skin from forming. Now for the hardest part: waiting. The custard needs to be completely cold. Refrigerate it for at least 4 hours, but honestly, overnight is best.
Step 5: Churn, Baby, Churn!

Your ice cream maker bowl is frozen solid, right? And your custard base is ice-cold? Excellent.
Give the chilled custard a good stir, then pour it into your pre-chilled ice cream maker. Churn according to the manufacturer’s instructions, usually for about 20-25 minutes. It will have the consistency of a very thick, glorious soft-serve ice cream. Try not to eat it all right out of the machine. I dare you.
Step 6: The Final Freeze (Ripening)
Transfer your freshly churned ice cream into your airtight freezer container. Use your spatula to smooth the top. Press a piece of parchment paper or plastic wrap directly on the surface to prevent ice crystals.
Seal the container and freeze for at least 2-4 hours to allow it to “ripen” and harden to a scoopable consistency. Then, and only then, may you claim your delicious prize.
The Nutritional Lowdown (Per 1/2 Cup Serving)
Let’s be real, you’re not making this because it’s a health food. But knowledge is power, right? FYI, these are estimates.
- Calories: ~280 kcal
- Fat: ~22g (This is where the creamy magic comes from!)
- Carbohydrates: ~18g
- Sugar: ~17g
- Protein: ~4g
- Note: This is a full-fat, full-sugar, full-joy dessert. Enjoy it mindfully as the glorious treat it is.
Common Mistakes That Will Make You Sad (And How to Avoid Them)
We’ve all been there. Here’s how to sidestep the most common ice cream-making pitfalls.
- Mistake #1: Scrambled Egg Custard. You got impatient and poured the hot cream into the eggs too quickly. The Fix: Temper S-L-O-W-L-Y while whisking like your life depends on it. And if it still curdles a bit, your trusty sieve will save the day.
- Mistake #2: Icy Ice Cream. This is the ultimate betrayal. It usually means your base wasn’t cold enough before churning, or your machine’s bowl wasn’t frozen solid. The Fix: Chill the base overnight. No exceptions. And make sure that freezer bowl is a block of ice.
- Mistake #3: A Soupy Mess After Churning. Your freezer bowl wasn’t frozen enough. The Fix: Shake the bowl before you use it. If you hear any sloshing liquid, it’s not ready. Back in the freezer it goes.
- Mistake #4: Skimping on the Fat. You used 2% milk and light cream to “make it healthier.” The Fix: Don’t. Just don’t. Fat equals creaminess. Embrace it. This is dessert. Live a little!
Pimp Your Scoop: Fun Variations
Vanilla is a perfect canvas. Once you’ve mastered this, the world is your oyster… or, your ice cream tub.
- The “No-Churn” Lifesaver: Don’t have an ice cream maker? No problem. Whisk 1 tablespoon of vanilla and a pinch of salt into one 14-ounce can of sweetened condensed milk. In a separate bowl, whip 2 cups of heavy cream to stiff peaks. Gently fold the condensed milk mixture into the whipped cream until just combined. Freeze in an airtight container for at least 6 hours. The texture is different—denser and quicker to melt—but still delicious!
- Spicy Aztec Vanilla: Craving something with a kick? Add 1/2 teaspoon of ground cinnamon and a pinch (just a pinch!) of cayenne pepper to the cream mixture in Step 1. It creates a surprising, warming finish that’s incredibly addictive.
- Keto Vanilla Dream: To make this low-carb, replace the sugar with an equal amount of a keto-friendly sweetener like allulose or an erythritol/monk fruit blend. Allulose works best for maintaining a soft, scoopable texture.
Frequently Asked Questions (Because You’re Not Alone)
Why is my homemade ice cream not creamy?
This is the million-dollar question! It’s almost always due to one of three things: not enough fat (use whole milk and heavy cream!), ice crystals from a slow freeze (make sure your base and bowl are frigid), or not enough sugar (sugar lowers the freezing point, keeping it softer).
Do I really need an ice cream maker?
TBH, for a true custard-style ice cream, yes. Churning breaks up ice crystals as they form, which is the key to a smooth texture. However, the no-churn variation above is a fantastic alternative that gets you 90% of the way there with 10% of the equipment.
What’s the difference between vanilla and French vanilla?
You just made it! French vanilla is defined by its custard base made with egg yolks. Regular “vanilla” ice cream often has no eggs, which is why it can be paler and less rich.
How long does homemade ice cream last in the freezer?
For the best texture and flavor, you should aim to eat it within 1-2 weeks. After that, it’s still safe to eat, but it can start to absorb freezer smells and develop a slightly icier texture. Good luck making it last that long, though.
Why do you put egg yolks in ice cream?
Egg yolks are natural emulsifiers. The lecithin in them helps bind the fat and water together, preventing ice crystals and creating an ultra-smooth, stable, and rich mouthfeel. They are the secret to that luxurious texture.
Can I use vanilla extract instead of a vanilla bean?
Absolutely! A whole vanilla bean gives a more complex, floral flavor and those pretty specks, but 1 tablespoon of a high-quality pure vanilla extract will still make a phenomenal ice cream. Just add it after you take the custard off the heat.
How do I prevent my ice cream from getting hard as a rock in the freezer?
High fat and sugar content are your first line of defense. Storing it in a proper airtight container with plastic wrap pressed on the surface also helps immensely. For a pro-tip, adding a tablespoon of a neutral spirit like vodka or light rum to the custard base before chilling will lower the freezing point even more, keeping it perfectly scoopable.
Final Thoughts
You did it. You’re officially an ice cream artisan. Go ahead, take a bow. Now you hold the keys to the kingdom of creamy, dreamy, vanilla-flecked perfection.
Serve it on pie, alongside a brownie, or just eat it straight from the container with a spoon while standing in front of the open freezer. I won’t judge. In fact, I’ll be doing the same thing. Welcome to the other side—you’ll never look at that store-bought aisle the same way again.