The Last Vanilla Cupcake Recipe You’ll Ever Need (Seriously)
Picture this: you’re at a party, and you spot a platter of perfect-looking vanilla cupcakes. You grab one, take a hopeful bite, and… disappointment. It’s dry. It’s bland. It tastes vaguely of cardboard and regret. Why is it so hard to find a good vanilla cupcake? It’s the most fundamental of flavors, yet it’s so often a letdown. Well, I’m here to tell you that your search is over. This is your official guide on how to make vanilla cupcakes that are moist, fluffy, and packed with so much flavor you’ll wonder if they’re even legal.
Let’s make a pact. From this day forward, we will no longer tolerate sad, beige, flavorless cupcakes. We are raising our standards. We are embracing the vanilla bean in all its glory. Are you with me?
Why This Recipe Is Basically Magic
Okay, “magic” might be a strong word, but it’s pretty darn close. Here’s why this recipe will become your go-to for every birthday, bake sale, and “I need a cupcake right now” emergency.
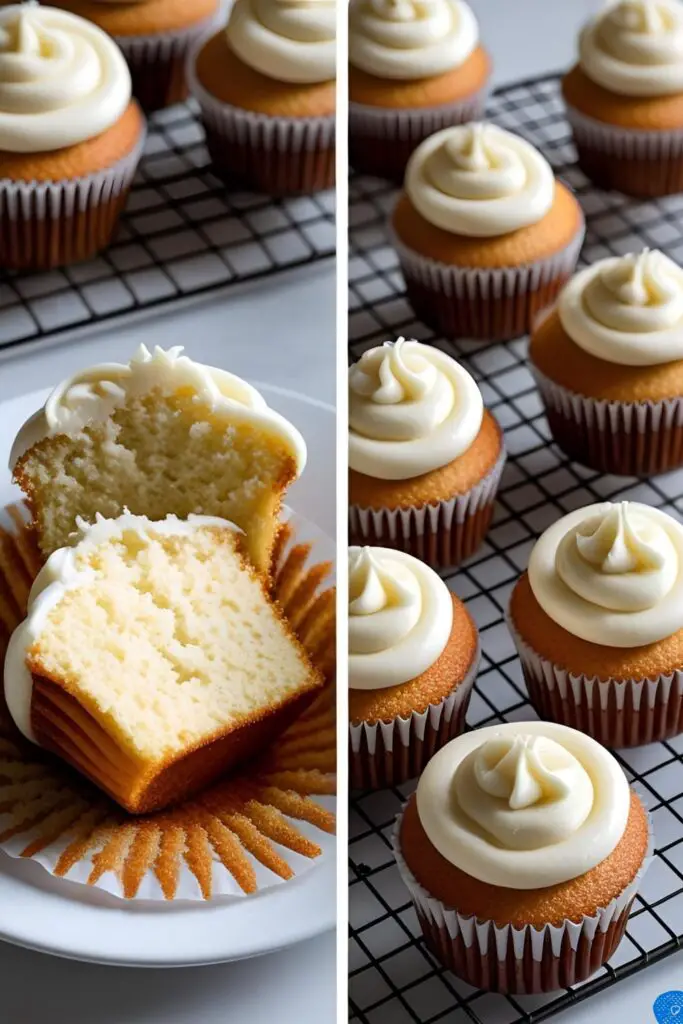
First and foremost, these cupcakes are unbelievably moist. We’re talking a tender, delicate crumb that practically melts in your mouth. This is thanks to a few key ingredients and techniques that we’ll get into. No more choking down a dry cake with a gallon of milk.
Second, they are foolproof. I’ve designed this recipe to be as straightforward as possible. Whether you’re a seasoned baker or someone who considers turning on the oven a major accomplishment, you can nail this. The steps are simple, and the results are consistent.
Finally, they are the perfect blank canvas. This classic vanilla flavor is the ideal base for any frosting, filling, or decoration you can dream of. It’s elegant on its own but also plays well with others. You’ll look like a baking prodigy, and I won’t even ask for credit. (Maybe just a little.)
The All-Star Ingredient Lineup
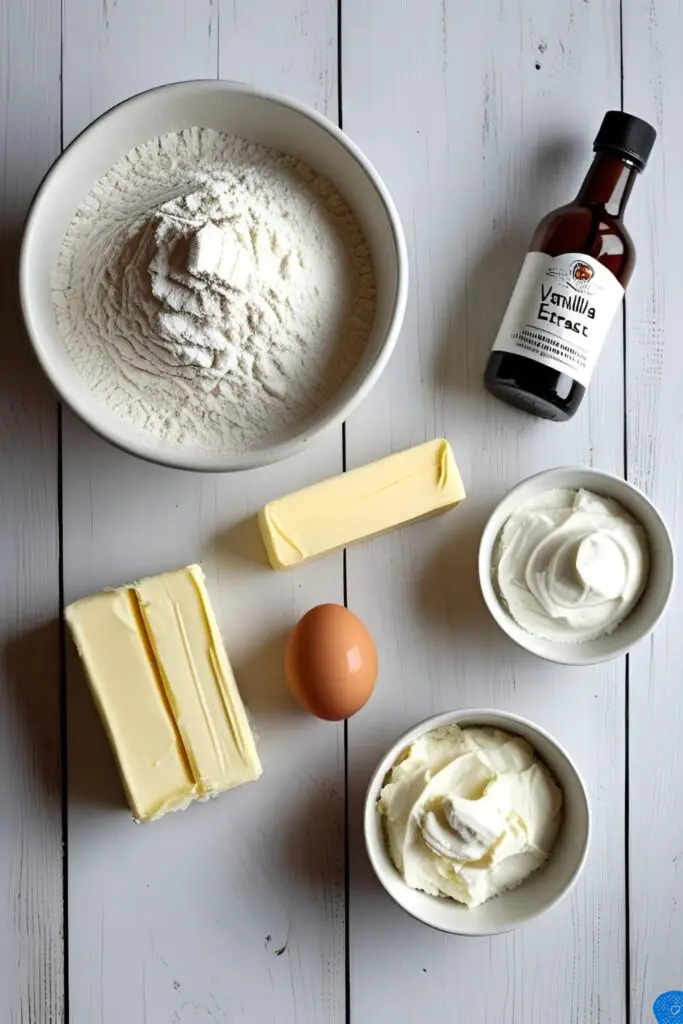

To create cupcake perfection, you need a solid team of ingredients. Don’t worry, there’s nothing here you can’t find at a regular grocery store.
- 1 ½ cups (190g) All-Purpose Flour: The foundation of our cupcake dreams.
- 1 ½ teaspoons Baking Powder: This is what gives our cupcakes their lift, making them light and airy.
- ¼ teaspoon Fine Sea Salt: A tiny amount that makes a huge difference in balancing the sweetness and enhancing the vanilla flavor.
- ½ cup (113g) Unsalted Butter: Must be softened to room temperature. I can’t stress this enough. Cold butter is the enemy of a smooth batter.
- 1 cup (200g) Granulated Sugar: For that perfect sweetness.
- 2 Large Eggs: Also at room temperature. This helps them incorporate into the batter smoothly, creating a better emulsion.
- 2 teaspoons Pure Vanilla Extract: This is a vanilla cupcake recipe. Please, for the love of all that is holy, use pure vanilla extract, not the imitation stuff. Vanilla bean paste is even better if you want those pretty little specks.
- ½ cup (120ml) Whole Milk: You guessed it—room temperature! Using cold milk with your creamed butter will cause the batter to curdle.
- 2 tablespoons Sour Cream or Full-Fat Greek Yogurt: My secret weapon! This adds a touch of acidity that tenderizes the crumb and guarantees a moist cupcake. Also at room temperature.
The Essential Kitchen Arsenal
Having the right tools makes baking infinitely more enjoyable (and less messy). Here’s what you’ll need to pull this off without a hitch.
- 12-Cup Muffin Pan: The vessel for our precious cupcakes.
- Paper Cupcake Liners: To prevent sticking and make for easy cleanup. Plus, they come in cute colors!
- Electric Mixer: A stand mixer with the paddle attachment is ideal, but a good electric hand mixer works perfectly fine.
- Mixing Bowls: You’ll need at least one large one for the main batter and a medium one for your dry ingredients.
- Whisk: For combining the dry ingredients thoroughly.
- Silicone Spatula: Your best friend for scraping every last bit of delicious batter from the bowl.
- Measuring Cups and Spoons: Baking is a science! Accuracy matters.
- Ice Cream or Cookie Scoop: The secret to getting perfectly uniform cupcakes. A 3-tablespoon scoop is the perfect size.
Step-by-Step to Cupcake Heaven
Alright, put on your apron and let’s make some magic. Follow these steps, and I promise you won’t be disappointed.
Step 1: Prep and Preheat
First things first. Preheat your oven to 350°F (175°C). Place cupcake liners in your 12-cup muffin pan. Get this done now so you’re not scrambling later. A prepared baker is a happy baker.
Step 2: Combine the Dry Stuff
In a medium bowl, whisk together the flour, baking powder, and salt. Whisking them together ensures the baking powder is evenly distributed, which means no lopsided cupcakes. Set this bowl aside.
Step 3: The Creaming Ceremony
In a large bowl using your electric mixer, beat the softened butter on medium speed for about a minute until it’s smooth and creamy. Add the granulated sugar and beat on medium-high speed for a full 3-4 minutes. The mixture should become pale, light, and fluffy. Don’t skimp on this step; this is where you’re whipping air into the batter.
Step 4: Add the Eggs and Flavor

Turn the mixer down to medium speed. Add the room-temperature eggs, one at a time, beating well after each addition until it’s fully incorporated. Scrape down the sides of the bowl with your spatula. Then, beat in the vanilla extract and the sour cream (or Greek yogurt). The mixture might look a little curdled at this point—that’s okay, just trust the process.
Step 5: The Alternating Game
Now, we’ll combine the wet and dry. With the mixer on low speed, add about one-third of the dry ingredient mixture to the butter mixture, followed by half of the milk. Mix until just combined. Repeat with another third of the dry ingredients, the rest of the milk, and finally, the last of the dry ingredients. Be careful not to over-mix! Mix only until you no longer see streaks of flour.
Step 6: Fill ‘er Up!
Use your trusty ice cream scoop (or a spoon) to divide the batter evenly among the 12 cupcake liners. Fill each liner about two-thirds full. This is the sweet spot for a perfectly domed top that doesn’t spill over.
Step 7: Bake and Cool
Place the pan in the preheated oven and bake for 18-22 minutes. You’ll know they’re done when the tops are lightly golden and a toothpick inserted into the center comes out clean or with a few moist crumbs attached. Let the cupcakes cool in the pan for 5 minutes before transferring them to a wire rack to cool completely. You must let them cool completely before frosting! A warm cupcake will melt your frosting into a sad, soupy puddle.
Nutritional Information (The Part We Skim)
This is an estimate for one unfrosted cupcake. Let’s be real, you’re adding frosting, so just enjoy the moment.
- Calories: Approximately 190
- Fat: Approximately 10g
- Carbohydrates: Approximately 23g
- Sugar: Approximately 14g
- Protein: Approximately 3g
Disclaimer: This is just a ballpark figure. It’s a cupcake, not a kale smoothie. Live a little.
Common Cupcake Crimes & How to Avoid Them

We’ve all committed them. Let’s make sure it doesn’t happen again.
- Over-mixing the Batter: Once you add the flour, you are developing gluten. The more you mix, the tougher your cupcakes will be. Mix until just combined and then stop. Seriously. Put the mixer down.
- Using Cold Ingredients: I sound like a broken record, but it’s that important. Using cold eggs, milk, or butter will result in a lumpy, curdled batter and dense cupcakes. Let everything come to room temperature.
- Over-filling the Liners: It’s tempting, I know. But filling them to the top will cause them to overflow and create a muffin-top mess in your oven. Two-thirds full is the golden rule.
- Baking in a “Maybe It’s Hot Enough” Oven: Wait until your oven is fully preheated! An oven that isn’t hot enough will mess with the rise and texture of your cupcakes. Most ovens have a light that turns off when they’re ready. Heed the light.
Mix It Up: Fun Variations
Once you’ve mastered the classic, why not get a little wild?
1. The Life of the Party (Funfetti!)
This is the easiest and most joyful variation. After your batter is mixed, gently fold in ⅓ cup of rainbow jimmies (the long, skinny sprinkles). Avoid using nonpareils (the little balls), as their color tends to bleed and make the batter look murky.
2. Lemon Sunshine Cupcakes
Add 1 tablespoon of fresh lemon zest to the sugar before you cream it with the butter. This releases the oils from the zest and infuses the entire cupcake with a bright, citrusy flavor that’s simply divine.
3. Surprise-Inside Cupcakes
Once your cupcakes are completely cooled, use an apple corer or a small knife to remove the center of each cupcake. Fill the hole with raspberry jam, lemon curd, chocolate ganache, or caramel sauce before frosting. It’s a delightful little secret. FYI, this sturdy vanilla base is so versatile you could even bake it as a sheet cake and use it to build a fun themed cake, like a cookie monster cake, for a kids’ party!
Your Burning Questions, Answered
Here are the answers to some things you might be wondering.
1. Why did my cupcakes sink in the middle? Sinking is usually caused by opening the oven door too early, which causes a sudden drop in temperature. It can also be from underbaking. Make sure to do the toothpick test!
2. How do I really know when they’re done? The toothpick test is the most reliable method. Insert it into the center of a cupcake; if it comes out clean or with a few moist crumbs clinging to it, they’re done. If it has wet batter, they need more time. You can also gently press on the top of a cupcake—if it springs back, it’s ready.
3. What’s the secret to super moist cupcakes? Don’t overbake them! And the combination of whole milk and sour cream in this recipe is a game-changer for moisture. Using room temperature ingredients also helps create a smoother batter that bakes up more evenly and stays moist.
4. Can I use oil instead of butter in this recipe? You could, but you would lose that delicious buttery flavor which is key in a simple vanilla cupcake. Butter also contributes to a finer crumb structure. IMO, it’s worth sticking with butter for this one.
5. Should my cupcake batter be thick or thin? This batter should be fairly thick but still spreadable. It won’t be runny or pourable like a box mix. This thickness helps create a cupcake with a sturdy yet tender structure.
6. How long should cupcakes cool before I can frost them? They need to be 100% completely cool. Not slightly warm, not “good enough.” Completely cool to the touch. This can take at least an hour on a wire rack. Be patient; your perfectly piped frosting depends on it.
7. Can I make these cupcakes ahead of time? Yes! You can bake the cupcakes, let them cool completely, and then store them in an airtight container at room temperature for up to 2 days before frosting.
Final Thoughts
You did it! You are now the proud owner of a recipe for vanilla cupcakes that don’t suck. In fact, they’re spectacular. You’re ready to be the hero of the office potluck, the star of the bake sale, and the legend of every family birthday.
Go ahead, whip up a batch. Pair them with a creamy vanilla buttercream. Share them with people you love (or people you want to impress). And the next time you see a sad-looking cupcake, you can smile smugly, knowing you have the power to create something so much better.