Why This Molten Masterpiece Is Your New Obsession
Why should you dedicate a precious few minutes to creating these individual chocolate volcanoes? Let me count the ways. Firstly, the flavor is intensely chocolatey. We’re talking rich, dark, melt-in-your-mouth goodness in every single bite. Secondly, the texture is pure magic. You get that slight resistance from the baked edges giving way to a warm, flowing center. It’s like a dessert hug.
But the real kicker? These look incredibly fancy and impressive, like something you’d order at a swanky restaurant and pay an exorbitant amount for. The truth? They are surprisingly easy and quick to make. We’re talking minimal ingredients and a short baking time. You can literally whip these up on a whim when a chocolate craving strikes. Plus, imagine the look on your guests’ faces when they dig into their own personal molten chocolate cake. Instant rockstar status, guaranteed.
The Chocolate Dream Team (aka The Ingredients)
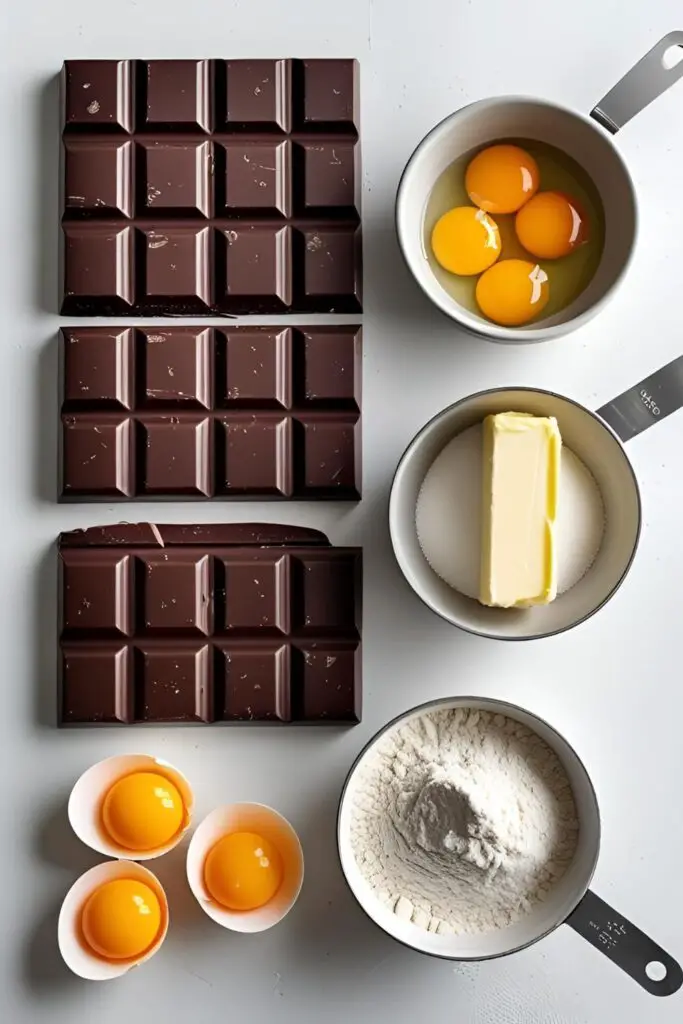
For a truly sublime lava cake, quality ingredients are key. Don’t skimp on the good stuff.
- Good Quality Dark Chocolate (4 oz): Use a chocolate with a cocoa content of at least 60-70% for that intense flavor. Chocolate chips will work in a pinch, but a good quality bar makes a difference.
- Unsalted Butter (½ cup / 1 stick): Adds richness and that perfect melt-in-your-mouth texture.
- Large Eggs (2): Provide structure.
- Egg Yolks (2): These are the secret weapon for that extra gooey, molten center.
- Granulated Sugar (¼ cup): Just enough sweetness to balance the dark chocolate.
- All-Purpose Flour (2 tablespoons): Just a little to give the cake its outer structure.
- Pinch of Salt: Enhances the chocolate flavor.
- Optional for Serving: Powdered sugar, fresh berries, vanilla ice cream (because what’s lava without a little cool contrast?).
Your Lava Lab Equipment (Tools & Kitchen Gadgets)
You don’t need a professional kitchen for this, just a few essential tools.
- Oven: Obviously. Preheated to 425°F (220°C).
- Small Oven-Safe Ramekins (4-6 oz capacity): These are your individual lava vessels. Make sure they are oven-safe!
- A Small Microwave-Safe Bowl or Double Boiler: For melting the chocolate and butter.
- Two Mixing Bowls: One for the melted chocolate mixture and one for the eggs and sugar.
- An Electric Mixer (Hand or Stand): While you can whisk by hand, an electric mixer makes things easier and ensures a smoother batter.
- A Rubber Spatula: For gently folding ingredients and scraping bowls.
- Measuring Cups and Spoons.
- Optional: A Fine-Mesh Sieve: For dusting with powdered sugar.
Step-by-Step to Molten Chocolate Nirvana
Follow these simple steps and prepare for a chocolate eruption in your mouth.
Step 1: Prep Your Lava Vessels

Generously grease and lightly flour your ramekins. This ensures the cakes release easily after baking. Don’t skip the flouring step, unless you want a chocolate mess.
Step 2: Melt the Chocolatey Goodness
In your microwave-safe bowl or over a double boiler, melt the dark chocolate and butter together, stirring occasionally until completely smooth and glossy. Be careful not to overheat the chocolate, or it can seize (and that’s just sad).
Step 3: Egg Power
In your other mixing bowl, whisk together the whole eggs, egg yolks, and granulated sugar until the mixture is pale and slightly thickened. This usually takes about 2-3 minutes with an electric mixer on medium speed.
Step 4: The Chocolate Embrace
Gently fold the melted chocolate mixture into the egg mixture using your rubber spatula. Be careful not to overmix; just combine until everything is just incorporated.
Step 5: The Final Flourish
Sift the flour and salt over the chocolate-egg mixture. Gently fold it in until just combined. Again, resist the urge to overmix. Overmixing develops gluten, which can make your lava cakes tough. And nobody wants a tough volcano.
Step 6: Pour and Bake
Divide the batter evenly among your prepared ramekins. Place them on a baking sheet (just in case of any molten mishaps) and bake in the preheated oven for 10-15 minutes. The exact baking time will depend on your oven and the size of your ramekins. You want the edges to be set but the centers to still look slightly soft and wobbly.
Step 7: The Grand Unveiling

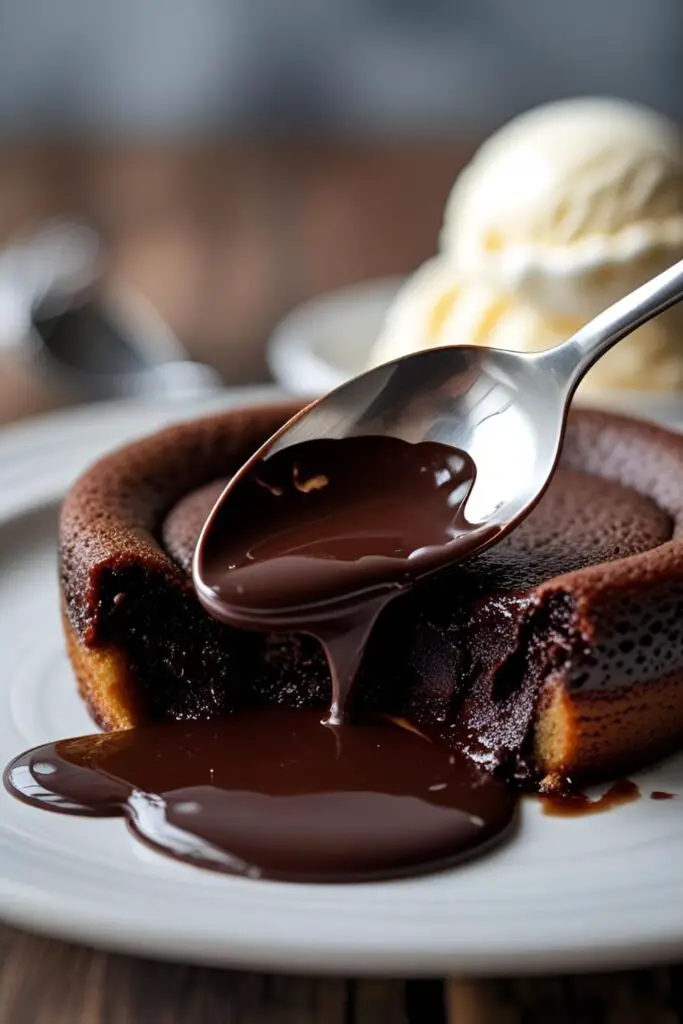
Carefully remove the baking sheet from the oven. Let the ramekins cool for about 1 minute (just enough so you don’t burn your tongue off). Then, place a serving plate upside down over each ramekin and quickly flip it over. Give it a gentle tap if needed. The lava cake should slide out, revealing its glorious molten center.
Step 8: Indulge!
Serve immediately, dusted with powdered sugar and accompanied by fresh berries or a scoop of cold vanilla ice cream for the ultimate experience. Seriously, eat these while they’re still warm and gooey. That’s the whole point!
Calories & Nutritional Info (The Delicious Price)
Let’s not pretend these are diet food. They’re a rich, decadent treat. Enjoy them in moderation (if you can resist!).
- Serving Size: 1 lava cake.
- Calories: Approximately 300-400 kcal (depending on the amount of chocolate and butter used).
- Main Components: Chocolate, butter, eggs, and a little sugar and flour.
- The Good News: They are intensely satisfying, so a little goes a long way… maybe.
Common Mistakes to Avoid (Lava Lake Disasters)
Don’t let these rookie errors ruin your molten dreams.
- Overbaking: This is the cardinal sin of lava cake making! Overbake them, and you’ll end up with a regular chocolate cake with no lava. Keep a close eye on them and take them out when the edges are set but the centers are still jiggly.
- Not Greasing and Flouring the Ramekins Properly: If you skip this step, your beautiful lava cakes will stubbornly stick to the ramekins, and you’ll end up with a sad, deformed mess instead of a glorious molten reveal.
- Overmixing the Batter: As mentioned before, overmixing develops gluten, leading to a tougher cake. Be gentle when folding in the flour.
- Using Low-Quality Chocolate: The quality of your chocolate directly impacts the flavor of your lava cake. Use the best dark chocolate you can afford for the most intense and delicious results.
Variations & Customizations (Spice Up Your Molten Core)
While the classic is perfection, here are a few fun twists to try.
- Mocha Lava Cakes: Add 1 teaspoon of instant coffee granules to your melted chocolate mixture for a hint of coffee flavor that enhances the chocolate beautifully.
- Spicy Chocolate Lava Cakes: Add a pinch of cayenne pepper to your melted chocolate for a subtle warmth that complements the richness of the chocolate.
- Peanut Butter Lava Cakes: Place a small spoonful of peanut butter in the center of the batter in each ramekin before baking. You’ll get a gooey peanut butter surprise in the molten chocolate.
FAQ: Your Lava Cake Conundrums, Conquered
Let’s address some of the most common questions about these irresistible treats.
1. Can I make lava cakes ahead of time?

While the best experience is eating them fresh out of the oven, you can prepare the batter ahead of time and store it covered in the refrigerator for up to 24 hours. Just let it come to room temperature for about 30 minutes before baking and you might need to add a minute or two to the baking time.
2. What if I don’t have ramekins? Can I use muffin tins?
You can, but the baking time will likely be shorter, and the presentation won’t be quite the same. Keep a close eye on them.
3. How do I know when they are done?
The edges should look set and slightly firm, but the center will still look soft and a little jiggly. If you gently tap the side of a ramekin, the edges should be firm, but the very center should still wobble slightly.
4. Can I freeze lava cakes?
It’s not really recommended, as the texture can change upon thawing and reheating, and you might lose that perfect molten center. They are best enjoyed fresh.
5. What’s the best chocolate to use?
A good quality dark chocolate with a cocoa content of 60-70% is ideal for a rich, intense chocolate flavor that melts beautifully.
6. My lava cake didn’t have a molten center. What went wrong?
Likely you overbaked it. Try reducing the baking time by a minute or two in your next attempt. Oven temperatures can vary, so it might take a little experimentation to find the sweet spot for your oven.
7. What are some good toppings for lava cake?
Powdered sugar is classic. Fresh berries like raspberries, strawberries, or blueberries add a nice tart contrast. A scoop of vanilla, chocolate, or even raspberry ice cream is always a winner. A drizzle of chocolate sauce or a sprinkle of chopped nuts also works well.
Final Thoughts
You, my friend, are now armed with the knowledge to create pure chocolate bliss. You can whip up these lava cakes and instantly become the hero of dessert. Prepare for gasps of delight, satisfied sighs, and maybe even a marriage proposal or two (results may vary, IMO).
So go forth, melt some chocolate, and unleash your inner dessert volcano. Just remember the golden rule: don’t overbake! Now, if you’ll excuse me, I think I deserve a lava cake… or three. Enjoy!