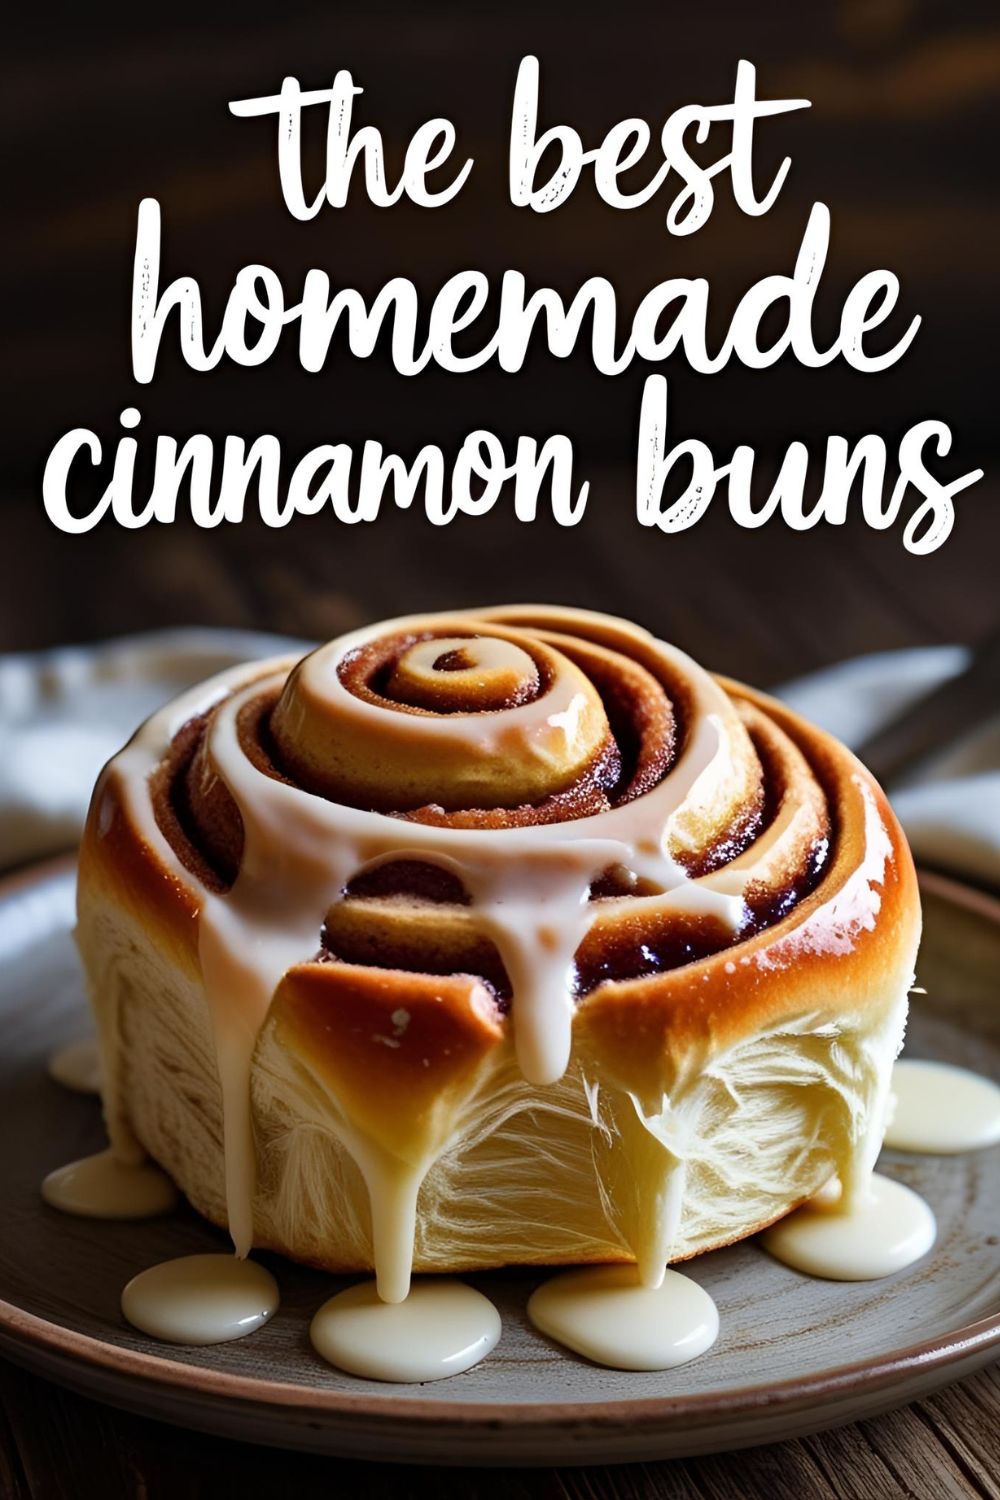
How to Make The Best Homemade Cinnamon Buns (Fluffy, Sweet & Simple!)
How to Make The Best Homemade Cinnamon Buns (Fluffy, Sweet & Simple!)
Let’s get into it. The great debate that has plagued brunch tables for generations: is it a cinnamon roll or a cinnamon bun? Are they the same thing? Is one simply a more sophisticated version of the other? Honestly, who has the time to argue when there’s baking to be done? For the purpose of this recipe, we’re planting our flag firmly in the “bun” camp, and I’ll tell you why. Today, we’re learning how to make cinnamon buns that are the perfect, glorious balance between a fluffy, satisfying bread and a sweet, swirly treat.
Forget the overly saccharine, frosting-drowned behemoths you see at the mall. We’re crafting something a little more refined, yet just as comforting. These are the kind of warm, pillowy buns that make your entire house smell like a cozy paradise and will have you wondering why you ever settled for the stuff that comes in a cardboard tube.
So, roll up your sleeves and dust off your rolling pin. We’re about to bake a batch of buns so good, you’ll want to keep them all for yourself.
Why This Recipe Will Become Your Go-To
This isn’t just another recipe; it’s a weekend-winning, brunch-elevating, friend-impressing masterpiece.
First, the texture is perfection. We’re talking about a bun that’s substantial enough to feel like a proper baked good, but with a dough so soft and pillowy it practically melts in your mouth. It’s the ideal middle ground for those who want more than just a sugar bomb.
Second, the flavor is classic and clean. The star here is the warm, aromatic cinnamon swirl nestled inside the tender, slightly sweet bread. We’re topping it with a simple, elegant vanilla glaze that complements the bun without overwhelming it, letting the quality of your bake truly shine.
Finally, IMO, it’s the ultimate comfort bake. There is something deeply satisfying about the process of working with yeast dough—watching it rise, rolling it out, and filling your home with that incredible aroma. It’s a therapeutic process with a ridiculously delicious reward.
The Baker’s Checklist: Ingredients


A perfect bun is a sum of its parts. Here’s what you’ll need.
For the Fluffy Bun Dough:
- 1 cup (240ml) whole milk, warmed to about 110°F (43°C) (the temperature of a nice, warm bath)
- 241 teaspoons (one 7g packet) active dry yeast
- 41 cup (50g) granulated sugar
- 1 large egg, at room temperature
- 41 cup (57g) unsalted butter, melted and cooled slightly
- 321 cups (420g) all-purpose flour
- 1 teaspoon salt
For the Classic Cinnamon Filling:
- 21 cup (113g) unsalted butter, very soft (you should be able to spread it easily with a spoon)
- 43 cup (165g) packed light brown sugar
- 2 tablespoons ground cinnamon
For the Simple Vanilla Glaze:
- 121 cups (180g) powdered sugar, sifted
- 2−3 tablespoons milk or heavy cream
- 1 teaspoon pure vanilla extract
The Essential Toolkit: Gadgets & Gear
Gather your tools. A prepared baker is a happy baker.
- Stand Mixer (with dough hook): Not strictly necessary, but it turns the 10-minute task of kneading into a 10-minute task of drinking coffee while a machine does the work.
- Mixing Bowls: A large one for the dough to perform its rising magic.
- Instant-Read Thermometer: Your best friend for making sure you don’t commit yeast-murder with overly hot milk.
- Measuring Cups and Spoons: For the science part of baking.
- Rolling Pin: To create your perfect canvas of dough.
- One 9-inch Round Cake Pan or a 9×13 inch Baking Pan: The round pan gives you a beautiful, pull-apart floral shape.
- Bench Scraper: Incredibly useful for dividing dough and cleaning up flour.
- Unflavored Dental Floss: The undisputed champion for cutting clean, non-squished buns. Trust me on this.
- Whisk and an Offset Spatula: For a perfect glaze and easy spreading.
Step-by-Step: Your Journey to Bun-vana
Follow this map, and you will arrive at a delicious destination.
H3: Part 1: Waking the Beast (The Dough)
- Activate the Yeast: In the large bowl of your stand mixer, gently whisk the warm milk, yeast, and a tablespoon of the granulated sugar. Let this mixture sit for 5-10 minutes. It should become foamy and fragrant. If it doesn’t, your yeast is a dud. Pour it out and start again with fresh yeast.
- Mix the Dough: To your bubbly yeast mixture, add the remaining sugar, the egg, and the melted butter. Attach the dough hook and give it a quick mix.
- Add Flour and Salt: With the mixer on its lowest speed, gradually add the flour and salt. Mix until the dough starts to come together in a shaggy ball.
- Knead to Perfection: Increase the mixer speed to medium and let it knead the dough for about 7-8 minutes. The dough should be smooth, elastic, and pull away from the sides of the bowl. If kneading by hand, do so on a lightly floured surface for about 10 minutes.
H3: Part 2: The Magic of the Rise
- The First Rise: Form your dough into a ball. Place it in a lightly greased bowl, cover with plastic wrap, and set it in a warm, draft-free place for about 1 to 1.5 hours. Your goal is for the dough to double in size.
- Prepare the Filling: While the dough is having its nap, mix the very soft butter, brown sugar, and cinnamon in a small bowl until you have a smooth, thick paste.
H3: Part 3: The Art of the Roll
- Roll Out Your Dough: Gently punch down the beautifully risen dough to release the air. On a lightly floured surface, roll it out into a large rectangle, roughly 12 inches by 18 inches.
- Spread the Filling: Using an offset spatula, spread the cinnamon-sugar paste evenly over the entire surface of the dough, leaving a half-inch border on one of the long sides.
- Create the Log: Starting from the long side with the filling all the way to the edge, roll the dough up into a snug, tight log. Pinch the seam at the end to seal it completely.
- The Floss Trick: Grab a long piece of unflavored dental floss. Slide it under the log to where you want to make a cut. Bring the ends of the floss up, cross them over the top, and pull in opposite directions. You’ll get a perfect, clean slice every time. Cut the log into 9-12 even buns.
- The Second Rise: Arrange the cut buns in your greased round or rectangular pan. Cover them and let them rise again for another 30-45 minutes, until they’re puffy and snuggled up against each other.
H3: Part 4: The Bake and Glaze
- Preheat and Bake: While the buns are on their second rise, preheat your oven to 375°F (190°C). Bake the puffed-up buns for 20-25 minutes, until they are beautifully golden brown on top.
- Whisk the Glaze: While the buns are baking, whisk together the sifted powdered sugar, vanilla, and 2 tablespoons of milk in a small bowl. If it’s too thick, add another tablespoon of milk until it reaches a thick but pourable consistency.
- Drizzle It On: Let the buns cool in the pan for about 10-15 minutes. You want them warm, but not scorching hot. Drizzle the vanilla glaze all over the warm buns.
Nutritional Info (A Moment for the Facts)

Here’s the data. Make of it what you will.
- Serving Size: 1 cinnamon bun
- Estimated Calories: Roughly 400-450 kcal
- Key Components: Happiness, coziness, and a complete disregard for your diet for one glorious morning.
- Note: Eating one of these warm from the oven is a form of self-care. It’s practically a health food.
Common Mistakes to Avoid (How Not to Have a Bad Bun Day)
- Yeast-slaughter: Using milk that is too hot is the fastest way to ruin your day. It will kill the yeast instantly. Use a thermometer or test it on your wrist; it should feel pleasantly warm, not hot.
- The Flour Overload: Your dough should be soft and slightly tacky. If you add too much flour to combat stickiness, you’ll end up with tough, dry buns. Resist the urge!
- A Leaky, Greasy Mess: Using melted butter for the filling is a common error. It will just pool at the bottom of your pan. You need a thick, soft paste that stays inside the swirl where it belongs.
- Sad, Dense Buns: If you don’t let your buns rise long enough (both the first and second time), they won’t be light and fluffy. Be patient and let the yeast do its magical work.
- A Watery, Transparent Glaze: Don’t just dump all the milk into your powdered sugar at once. Add it slowly, whisking constantly, until you get the perfect consistency. It’s easier to thin a thick glaze than to thicken a thin one.
Variations & Customizations (Remix Your Buns)
The classic is classic for a reason, but sometimes you want to walk on the wild side.
- Nordic-Inspired Cardamom Buns: This is a game-changer. Reduce the cinnamon to 1 tablespoon and add 2 teaspoons of ground cardamom to the filling. The fragrant, floral spice is absolutely divine.
- The Breakfast Bun: Add a cup of chopped, toasted walnuts and a half cup of raisins to the filling before rolling up the dough. It adds a wonderful texture and flavor.
- Coffee Lover’s Dream: Replace the milk in the glaze with 2-3 tablespoons of strongly brewed, cooled coffee or espresso. It creates a delicious coffee glaze that pairs perfectly with the cinnamon.
Frequently Asked Questions (Your Bun Support Group)
What is the real difference between a cinnamon roll and a cinnamon bun?
It often comes down to regional dialect! However, some argue that “buns” are more bread-like and often feature a simple glaze or nuts, while American-style “rolls” are known for being extremely soft, gooey, and slathered in a thick cream cheese frosting.
My dough is super sticky! What do I do?
First, don’t panic. Enriched doughs are naturally sticky. Try kneading it for a few more minutes, as this develops the gluten and can make it less sticky. If it’s still unworkable, add flour one tablespoon at a time until it’s just manageable.
Can I really make these without a stand mixer?
Yes, absolutely! It just requires about 10-12 minutes of therapeutic (or rage-fueled, depending on your day) kneading by hand on a lightly floured surface. Consider it your arm workout for the day.
Why are my buns dry?
The most common culprits are adding too much flour to the dough or overbaking them. Bake them until they are just golden brown, not dark brown.
How do I know when the buns have risen enough?
They should look visibly puffy and about doubled in size. A good test is the “poke test”: gently poke the side of the risen dough. If the indentation springs back slowly and leaves a small indent, it’s ready.
Can I use a different frosting?
Of course! A classic cream cheese frosting is always a popular choice. You could also just brush them with melted butter and sprinkle with coarse sugar when they come out of the oven.
How long will these homemade buns last?
They are at their absolute best the day they are baked. However, you can store them in an airtight container at room temperature for up to 3 days. A quick 15 seconds in the microwave will bring back some of their original softness.
Final Thoughts
You did it. You navigated the world of yeast, you mastered the roll, and you created a pan of beautiful, fragrant, and ridiculously tasty cinnamon buns. You are a certified baker, a brunch champion, a hero to your household.
Go on, pour yourself a cup of coffee and enjoy the warm, gooey fruits of your labor. You’ve earned it. And be warned: after tasting these, you may find it physically impossible to ever buy the canned version again. Don’t say I didn’t warn you.