How to Make the Best Homemade Chicken Tenders (Seriously, Throw Out the Frozen Ones)
Let’s take a trip down memory lane. Picture the chicken tenders of your youth. They probably came from a crinkly bag in the freezer, were vaguely chicken-shaped, and had the textural integrity of cardboard. We ate them, we dipped them in ketchup, and we didn’t know any better. But my friend, we are adults now. Our palates have evolved. We deserve better.
We deserve chicken tenders that are audibly crispy on the outside, unbelievably juicy on the inside, and seasoned to absolute perfection. We deserve tenders that are made from, you know, actual chicken. Get ready, because I’m about to show you how to make homemade chicken tenders that will completely change your life and make you look at that freezer aisle with nothing but pity.
Why This Recipe Is a Certified Banger
So, why are these the best chicken tenders you’ll ever make? I’m so glad you asked.
First, the CRUNCH is legendary. We’re using a two-stage breading process with Panko breadcrumbs, creating a craggy, golden-brown crust that shatters when you bite into it. This is not a flimsy, sad breading. This is an armor of crispiness.
Second, the secret to the juiciest chicken ever is a quick buttermilk brine. It tenderizes the meat and infuses it with flavor, guaranteeing that every single bite is succulent and delicious. Say goodbye to dry, stringy chicken forever.
Finally, they’re ridiculously versatile and easy. You can bake them, air fry them, or pan-fry them. They’re a guaranteed hit with kids and, more importantly, a sophisticated-enough-for-adults-to-not-feel-childish-eating-them kind of meal. It’s a win-win.
The A-Team: Your Ingredient Lineup
This isn’t complicated. We’re using simple ingredients to create something truly spectacular. We’ll break it down into our three key teams.
The Chicken:
- 1.5 lbs (about 700g) Boneless, Skinless Chicken Breasts: We’ll be slicing these into tenders ourselves for maximum freshness.
The Buttermilk Brine (The Juicy-Maker):
- 1 cup Buttermilk: This is our tenderizing powerhouse. No buttermilk? See the FAQ!
- 1 tsp Hot Sauce (like Frank’s or Cholula): Don’t worry, this doesn’t make them spicy! It just adds a tiny background tang that deepens the flavor.
- 1 tsp Kosher Salt:
- 1/2 tsp Black Pepper:
The Crispy Breading Station (The Crunch Crew):
- 1 cup All-Purpose Flour:
- 1 tsp Smoked Paprika: For color and a subtle smoky flavor.
- 1 tsp Garlic Powder:
- 1 tsp Onion Powder:
- 1 tsp Kosher Salt & 1/2 tsp Black Pepper:
- 2 Large Eggs:
- 2 cups Panko Breadcrumbs: Panko is a must for that light, airy, super-crispy texture. Regular breadcrumbs will be much denser.
Your Kitchen Gadget Squad
Grab these tools to make your tender-making journey smooth and successful.
- Three Shallow Dishes or Pie Plates: Essential for setting up your breading station.
- Large Bowl or Ziploc Bag: For the buttermilk brine.
- Sharp Knife and Cutting Board:
- Baking Sheet and a Wire Rack: The wire rack is key for getting crispy tenders in the oven or air fryer.
- Tongs: To keep your fingers clean and to flip the tenders without piercing them.
- Large Skillet (if pan-frying):
- Air Fryer (if air frying):
- Instant-Read Meat Thermometer: The only way to guarantee perfectly cooked, juicy chicken without any guesswork.
Let’s Make Some Magic: Step-by-Step
Alright, let’s turn that plain chicken into golden-brown treasure. It’s easier than you think.
Step 1: Create Your Tenders
Place your chicken breasts on the cutting board. Using your sharp knife, slice them lengthwise into strips that are about 1-inch thick. Don’t stress about making them perfect; rustic is charming. Set them aside.
Step 2: The Buttermilk Bath
In your large bowl or Ziploc bag, combine the buttermilk, hot sauce, salt, and pepper. Give it a good whisk. Add your chicken tenders to the bowl and make sure each one is fully submerged in the glorious brine.
Cover the bowl (or seal the bag) and let it marinate in the fridge for at least 30 minutes. You can go up to 4 hours, but even 30 minutes will make a huge difference. This is where the juicy magic happens.
Step 3: Set Up Your Breading Assembly Line
This is the fun part. Grab your three shallow dishes.
- Dish #1: Combine the flour, smoked paprika, garlic powder, onion powder, salt, and pepper.
- Dish #2: Crack the two eggs and beat them lightly with a fork.
- Dish #3: Pour in the Panko breadcrumbs.
Arrange them in a line: Flour -> Egg -> Panko. Your assembly line is ready for action.
Step 4: Bread ‘Em Up
Take a piece of chicken out of the buttermilk, letting any excess drip off.
- Dredge it thoroughly in the seasoned flour, shaking off the excess.
- Move it to the egg wash, ensuring it’s completely coated.
- Finally, press it firmly into the Panko breadcrumbs, coating all sides. Gently pressing helps the Panko stick.
Place the breaded tender on your wire rack and repeat with the remaining chicken.
Step 5: Cook to Crispy Perfection (Choose Your Method!)
You have three paths to crispy chicken glory. Choose your destiny.
Method 1: Baking (The Healthier Option) Preheat your oven to 425°F (220°C). Arrange the breaded tenders on the wire rack set inside a baking sheet. Lightly spray the tops with cooking spray. Bake for 15-20 minutes, flipping halfway through, until golden brown and cooked through.
Method 2: Air Frying (The Crispiest & Fastest) Preheat your air fryer to 400°F (200°C). Place the tenders in a single layer in the air fryer basket (work in batches!). Spray the tops with cooking spray. Air fry for 10-12 minutes, flipping halfway, until impossibly crispy and golden.
Method 3: Pan-Frying (The Classic) Heat about 1/2 inch of neutral oil in a large skillet over medium-high heat. Once the oil is shimmering, carefully place the tenders in the pan. Fry for 3-4 minutes per side, until deep golden brown and cooked through. Transfer to a wire rack to drain.
No matter which method you choose, the internal temperature should reach 165°F (74°C) on your meat thermometer.
Calories & Nutritional Info
This will vary depending on your cooking method, but here’s a rough estimate for a serving (about 4-5 tenders) using the baked method:
- Calories: Approximately 350-400 kcal
- Protein: A whopping 40g
- Fat: Around 12g
- Carbohydrates: Roughly 25g
- Note: These are a fantastic source of lean protein! Pan-frying will significantly increase the fat and calorie content, FYI.
Common Mistakes to Avoid (Don’t Be a Chicken!)
- Skipping the Brine: Seriously, don’t. This is the single most important step for juicy chicken. Without it, you’re just making dry chicken with a nice crust. Give it at least 30 minutes!
- A Weak Breading Game: Don’t be timid. Make sure the tender is fully coated at each stage. When you get to the Panko, press it on firmly. You want a thick, crunchy shell.
- Crowding the Pan/Basket: Whether you’re baking, air frying, or pan-frying, your tenders need space. If they’re all crammed together, they will steam instead of crisp up. Cook in batches if you need to.
- Overcooking: Chicken tenders are small and they cook fast. The difference between juicy and rubbery is about two minutes. Use a meat thermometer and pull them as soon as they hit 165°F (74°C).
Variations & Customizations
Once you’ve mastered the classic, you can get creative.
- Nashville Hot Tenders: Add 1-2 tablespoons of cayenne pepper to your flour mixture. Once fried, brush them with a spicy oil made from hot ghee, more cayenne, brown sugar, and paprika.
- Garlic Parmesan Tenders: Add 1/2 cup of finely grated Parmesan cheese and 1 teaspoon of dried Italian seasoning to your Panko breadcrumbs. Serve with marinara for dipping.
- Keto / Low-Carb Tenders: Ditch the flour and Panko. Use a mix of almond flour and crushed pork rinds for the breading. Season it the same way and cook in the air fryer or pan-fry.
Frequently Asked Questions (Your Tender Inquiries, Answered)
1. How do you get the breading to actually stick to the chicken? The three-step process (flour -> egg -> breadcrumbs) is key. The flour gives the egg something to cling to, and the egg acts as the glue for the Panko. Also, make sure to press the Panko on firmly.
2. Is it better to bake or fry chicken tenders? It’s a matter of preference! Frying will give you that classic, deep golden, restaurant-style result. Baking or air frying is a fantastic healthier alternative that still gets them remarkably crispy, especially with Panko.
3. What makes chicken tenders tough and chewy? One culprit: overcooking. They cook so quickly that it’s easy to go too far. Use a thermometer! The other is skipping a brine, which helps keep them tender.
4. Can I make these ahead of time? Yes! You can bread the tenders, place them on a parchment-lined baking sheet, and refrigerate for up to 4 hours before cooking. You can also freeze the breaded, uncooked tenders on a baking sheet until solid, then transfer them to a freezer bag for up to 3 months. Cook from frozen, adding a few extra minutes to the cook time.
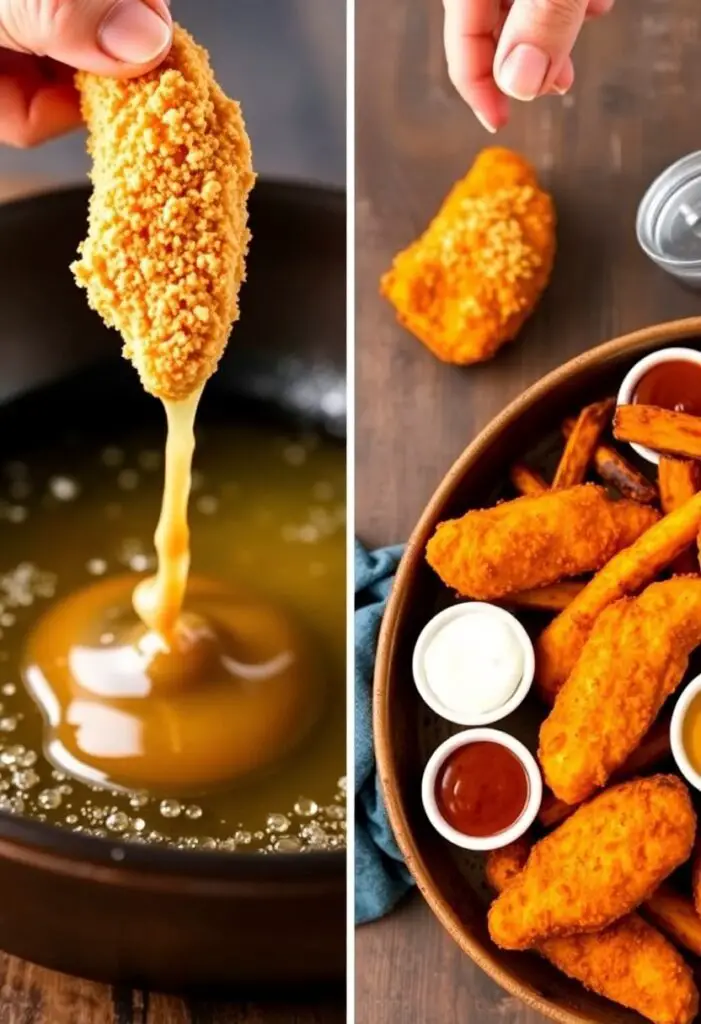
5. What are the best dipping sauces for these? The world is your oyster! Classic honey mustard is a winner. Homemade ranch, BBQ sauce, or a spicy aioli are also fantastic choices.
6. Why is Panko so much better than regular breadcrumbs? Panko breadcrumbs are made from crustless bread and are ground into larger, flakier pieces. They absorb less oil, which means they stay much crispier for much longer.
7. How can I make my tenders EXTRA crispy? For an even thicker crust, you can double-dredge them. Go flour -> egg -> flour -> egg -> Panko. It’s more work, but the crunch is insane. The air fryer method also yields incredible crispiness.
Final Thoughts
Congratulations! You have officially graduated from the freezer aisle. You are no longer a consumer of sad, beige chicken products. You are a creator of golden, crispy, juicy chicken masterpieces. You have the power to make any day better with a batch of these tenders.
So go on, whip up a batch. Experiment with dipping sauces. Serve them to your family, your friends, or just hoard them all for yourself while binge-watching your favorite show. You’ve earned it. Welcome to the better tenders club. 🙂