The Only Guide You’ll Ever Need on How to Make a Brownie (The Fudgy Kind, Obviously)
Let’s settle this once and for all. If you want a little chocolate cake, go make a chocolate cake. But if you’re here for a dense, rich, intensely chocolatey, and gloriously gooey brownie, you’ve come to the right place. This is your ultimate guide on how to make a brownie that will ruin all other brownies for you, forever.
We’re ditching the box mix. We’re ignoring the cakey imposters. We are about to create a pan of pure, unadulterated chocolate perfection using one bowl, a whisk, and a few simple secrets that will guarantee the fudgiest, most decadent brownies of your life.
Why This Recipe is an Absolute Legend
So, why is this the brownie recipe to end all brownie recipes?
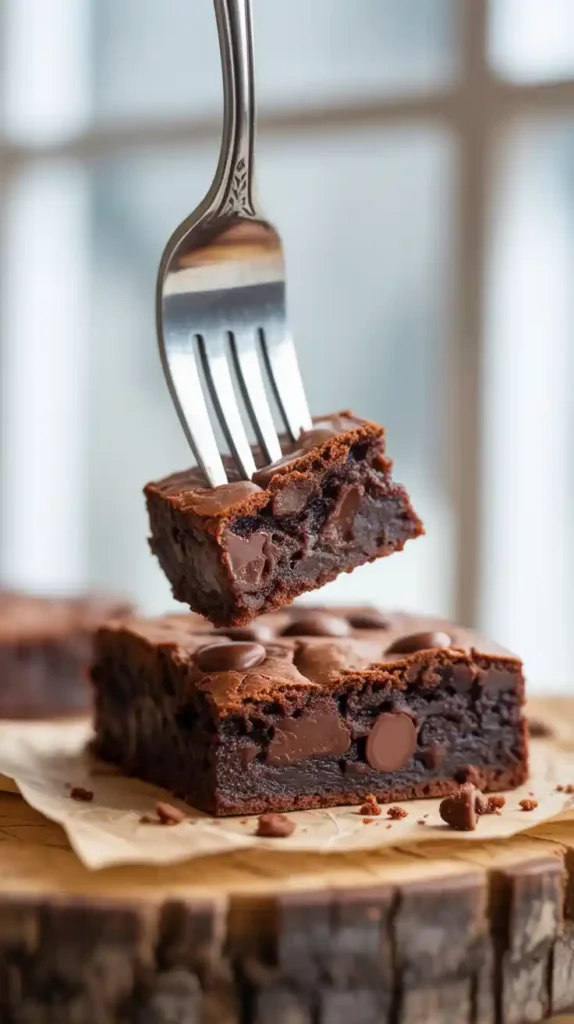
- It’s All About That Fudgy Texture: This recipe is scientifically engineered for maximum fudginess. By using melted butter and a low flour-to-fat ratio, we create a brownie that is dense, moist, and unbelievably chewy, not airy and cake-like.
- It Has That Coveted Shiny, Crackly Top: You know that beautiful, paper-thin, glossy crust on the best brownies? We’ve cracked the code. It’s a simple technique that we’ll cover, and it will make your brownies look as amazing as they taste.
- It’s a One-Bowl, No-Mixer Wonder: This is a beautifully low-effort recipe. You don’t need to lug out your heavy stand mixer. Everything comes together in one big bowl with just a whisk and a spatula. It’s almost insultingly easy for how good it is.
The Ingredient List: The Anatomy of a Fudgy Brownie
To achieve brownie greatness, you need the right players on your team.
- Unsalted Butter: 1 cup (2 sticks). We’re going to melt it, which is key for a fudgy texture.
- Good-Quality Dark or Semi-Sweet Chocolate: 4 ounces, chopped. Using both melted chocolate and cocoa powder is the secret to a deep, complex flavor.
- Granulated Sugar: 1 cup.
- Packed Brown Sugar: 1 cup. The molasses in brown sugar is a secret weapon for moisture and chewiness.
- Large Eggs: 3, at room temperature. This is important!
- Vanilla Extract: 1 tablespoon. Use the good stuff.
- Unsweetened Cocoa Powder: ¾ cup, sifted.
- All-Purpose Flour: ¾ cup. Notice how little flour there is? That’s a key to the fudgy texture.
- Salt: 1 teaspoon. Absolutely essential for balancing the sweetness and deepening the chocolate flavor.
- Optional: 1 cup of chocolate chips or chopped nuts.
Tools & Kitchen Gadgets: Your Brownie-Baking Kit
You don’t need anything fancy for this rustic classic.
- An 8×8 inch Square Baking Pan. A metal pan is best.
- Parchment Paper: The secret to getting your brownies out of the pan cleanly.
- A Large, Microwave-Safe Mixing Bowl: For our one-bowl magic.
- A Whisk.
- A Rubber Spatula.
- Measuring Cups and Spoons.
Step-by-Step Instructions: The Path to Fudgy Perfection
Ready to make the best brownies of your life? It’s all about the technique.
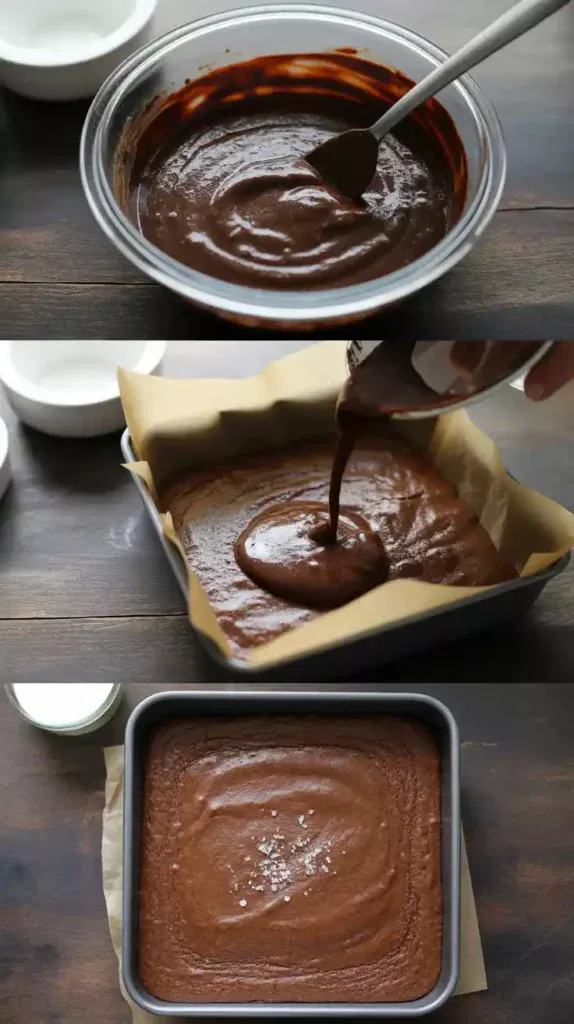
Step 1: The Melt

In your large, microwave-safe bowl, combine the 1 cup of butter and the 4 ounces of chopped chocolate. Microwave in 30-second bursts, stirring in between, until completely melted and smooth.
Step 2: The Sugar Whisk (Secret #1 for a Shiny Top)
While the chocolate-butter mixture is still hot, add both the granulated and brown sugar. Now, whisk vigorously for a full minute. You want the mixture to look glossy and for the sugar to start dissolving. This is a crucial step for that paper-thin, crackly top.
Step 3: The Egg Whisk (Secret #2 for a Shiny Top)
Let the mixture cool down for a few minutes until it’s just warm, not hot. Add your room temperature eggs, one at a time, and whisk very well after each addition. After the last egg, add your vanilla and whisk like you mean it for another full minute. The batter should be thick, glossy, and look like a glorious chocolate pudding.
Step 4: The Gentle Fold
Sift your cocoa powder, flour, and salt directly over the wet ingredients. Using a rubber spatula, gently fold the dry ingredients into the wet until it is just combined. A few streaks of flour are okay. Do not overmix! This is the key to a tender brownie. If you’re adding chocolate chips or nuts, fold them in now.
Step 5: The Bake (Don’t You Dare Overbake It!)
Line your 8×8 inch pan with parchment paper, leaving an overhang on the sides to act as handles. Pour your thick, glorious batter into the pan and spread it into an even layer.
Bake at 350°F (175°C) for 30-35 minutes. This is the most important part: The brownies are done when a wooden skewer or toothpick inserted into the center comes out with moist, fudgy crumbs attached, not clean. If it comes out clean, you’ve gone too far and have ventured into cake territory.
Step 6: The Agonizing, Mandatory Cool Down

Remove the pan from the oven and place it on a wire rack. Now for the hardest part of the entire recipe: you must let the brownies cool completely in the pan. I know. It’s torture. But if you try to cut them while they’re warm, you will have a gooey, delicious, but utter mess. Let them cool for at least 2-3 hours for clean, perfect squares.
Calories & Nutritional Info (A Square of Pure Joy)
This is a rich, decadent, and deeply satisfying treat.
- Serving Size: One perfect square (assuming you cut it into 16).
- Calories: Let’s just say it’s a worthy indulgence.
- Good For: Curing a bad day, celebrating a good day, and general chocolate-fueled happiness.
Common Mistakes to Avoid (Brownie Blunders)
- THE #1 SIN: OVERBAKING. I’m going to say this in all caps because it is the most tragic thing you can do to a brownie. If you bake it until a toothpick comes out perfectly clean, it will be dry and cakey once it cools. You want moist, fudgy crumbs on that toothpick. When in doubt, pull it out a minute early.
- Overmixing Your Batter: As soon as you add the flour, you want to mix as little as possible. Overmixing develops the gluten and will give you a tough, cakey brownie instead of a dense, fudgy one. Fold gently, just until the flour disappears.
- Using Cold Eggs: Room temperature eggs emulsify into the batter much better, which is a key part of creating that beautiful, glossy, shiny top. Let your eggs sit on the counter for an hour before you start.
- Cutting Them While They’re Warm: I know it’s tempting, but you will be rewarded for your patience. A completely cool pan of brownies is the secret to cutting those clean, perfect, professional-looking squares. For extra-clean cuts, chill them in the fridge for 30 minutes.
Variations & Customizations: The Brownie-verse
The classic is perfect, but brownies are a canvas for your chocolate-loving creativity.
1. The “Cosmic” Brownie Throwback
A nostalgic dream. Once your brownies are cool, top them with a simple, thin layer of chocolate ganache (equal parts chocolate and hot cream, stirred until smooth). Before the ganache sets, cover it with a generous shower of those rainbow chip sprinkles.
2. The Salted Caramel Swirl
Pure decadence. After you’ve spread your brownie batter in the pan, drop spoonfuls of a thick, high-quality salted caramel sauce over the top. Use a knife to gently swirl the caramel into the batter before baking.
3. The Ultimate “Brookiel” Brownie
The best dessert hybrid on the planet. Make your brownie batter and spread it in the pan. Then, make a half-batch of your favorite chocolate chip cookie dough and drop spoonfuls of it over the brownie batter. Gently press it down and bake as directed.
FAQ: Your Most Pressing Brownie Questions
What’s the real secret to getting that shiny, paper-thin, crackly top?

It’s a two-part secret! 1. Whisking your sugar into the hot, melted butter and chocolate mixture helps the sugar dissolve. 2. Vigorously whisking in your room-temperature eggs creates a meringue-like layer on top. That combination is the key to the glossy finish.
Fudgy vs. Cakey Brownies: What’s the actual difference?
It all comes down to the fat-to-flour ratio. Fudgy brownies have a higher ratio of fat (butter, chocolate, egg yolks) to flour. Cakey brownies have more flour and often a chemical leavener like baking powder, giving them a lighter, more cake-like texture.
Can I use oil instead of butter?
You can. Using oil will often result in an even fudgier, denser brownie. However, you will lose the rich, buttery flavor, which I think is a crucial part of the experience.
Final Thoughts
You’ve done it. You have created a pan of pure, unadulterated, chocolate perfection. You have mastered the art of the shiny top and the fudgy center. You are now the keeper of the secret to the best brownies on the block.
So go on. After that agonizing but necessary cool-down, lift that beautiful slab out of the pan. Cut a perfect square from the center (the best piece, obviously). Take a bite. That, my friend, is the taste of true victory. You’ll never look at a box mix the same way again.