How to Make Soft Chapati That Actually Puffs Up (Yes, You Can!)
Have you ever tried making chapatis and ended up with something that could double as a frisbee? A sad, crispy, cardboard-like disc of shattered dreams? Yeah, we’ve all been there. But I’m here to tell you that the secret to those perfectly soft, pillowy flatbreads that magically puff up like a little balloon isn’t some ancient, guarded family secret. Today, we’re demystifying how to make chapati, and by the end of this, you’ll be flipping and puffing them like a pro. Seriously.
Why This Chapati Recipe is a Total Game-Changer
So, why bother making your own when you can buy a pack of vaguely bread-like circles at the store? Three words: taste, texture, and triumph. Homemade chapati is ridiculously soft, warm, and has a nutty flavor that packaged versions can only dream of. It’s the perfect, humble vehicle for scooping up every last drop of a delicious curry. Plus, learning to make chapati is a foundational kitchen skill. It’s just flour and water! Imagine the bragging rights. “Oh, this dal is amazing!” your friend says. And you, casually, will reply, “Thanks, I made the chapatis from scratch too.” Boom. Mic drop.
The (Shockingly Short) Ingredient List
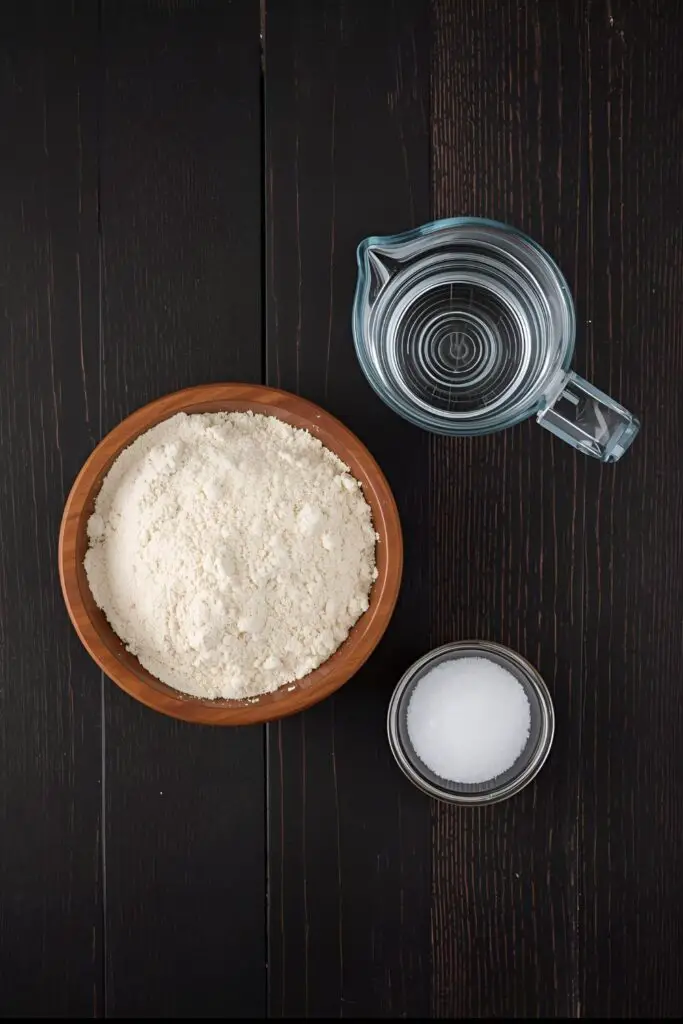
You’re going to laugh at how simple this is. No weird, hard-to-find ingredients. Just the basics.
- Whole Wheat Flour (Atta): 2 cups. This is the star of the show. Specifically, you want “Atta” flour, which is a finely ground whole wheat flour. You can find it at any Indian grocery store or in the international aisle of most large supermarkets. Regular whole wheat flour can work in a pinch, but Atta is what gives chapati its signature softness.
- Warm Water: Approximately 1 cup, give or take. The exact amount depends on your flour and the humidity. We’ll get into that.
- Salt (Optional): 1/2 teaspoon. I like a little salt for flavor, but it’s totally optional.
- Oil or Ghee (Optional): 1-2 teaspoons for the dough, plus more for brushing on the finished chapatis. This is your ticket to next-level softness.
Your Kitchen Arsenal for Chapati Domination
You don’t need a high-tech lab to make amazing chapatis. Here are the simple tools that will make your life easier:
- Large Mixing Bowl or Parat: A wide, shallow bowl called a parat is traditional, but any large mixing bowl works just fine.
- Rolling Pin (Belan): A thin, tapered rolling pin is ideal for chapatis, but your standard baker’s rolling pin will do the job.
- Rolling Board (Chakla): A flat, circular surface (wood, marble, or steel) for rolling. A clean countertop or a large cutting board works too.
- Flat Skillet (Tawa/Tava): A cast-iron or non-stick flat pan is essential. This is what you’ll cook the chapatis on.
- Tongs (Chimta): For flipping the chapati on the pan and holding it over the open flame to puff.
Let’s Make Some Magic: Step-by-Step Instructions
Alright, deep breath. You can do this. Let’s break it down into easy, manageable steps.
H3: Step 1: Make the Dough (The Beginning of Greatness)
In your large mixing bowl, combine the 2 cups of Atta flour and the 1/2 teaspoon of salt (if using). If you’re adding oil for extra softness, create a small well in the center and pour in 1-2 teaspoons of oil or melted ghee. Mix it into the flour with your fingertips until it resembles coarse breadcrumbs.
Now, start adding the warm water a little at a time. Mix with your hand, incorporating the flour as you go. Keep adding water until the dough comes together. The goal is a soft, pliable dough that is not sticky. If it feels too dry, add a tiny bit more water. If it’s a sticky mess, add a little more flour.
H3: Step 2: Knead It (Your Arm Workout for the Day)
Once the dough has come together, it’s time to knead. And I mean really knead. Turn the dough out onto a clean surface and knead it for a solid 8-10 minutes. Use the heel of your hand to push the dough away from you, then fold it over and repeat. This process develops the gluten, which is crucial for soft chapatis. The dough should be smooth, soft, and elastic when you’re done. IMO, this is cheaper than therapy.
H3: Step 3: Let It Rest (The Most Important, Non-Negotiable Step!)
Place the kneaded dough back in the bowl, cover it with a damp cloth or a lid, and let it rest for at least 20-30 minutes. You can even let it rest for up to 2 hours. DO NOT SKIP THIS STEP! Resting allows the gluten to relax, making the dough easier to roll and ensuring your chapatis are soft, not chewy.
H4: Step 4: Divide and Roll (The Quest for the Perfect Circle)
After its nap, give the dough a quick knead for about 30 seconds. Divide it into equal-sized balls, about the size of a golf ball. Take one ball and flatten it between your palms. Dip it lightly in some dry Atta flour to prevent sticking.
Now, place it on your rolling board and start rolling. The trick is to apply even pressure and rotate the dough as you roll. Don’t stress about making a perfect circle on your first try. An oddly shaped but evenly rolled chapati is better than a perfectly round but uneven one. Roll it out to a circle about 6-7 inches in diameter and fairly thin.
H5: Step 5: Cook It (The Flipping Dance)
Heat your tawa over medium-high heat. A properly heated pan is key. To check if it’s ready, flick a few drops of water on it; if they sizzle and evaporate immediately, you’re good to go.
Place the rolled-out chapati on the hot tawa. Let it cook for about 30 seconds, or until you see small bubbles start to form on the surface. Flip it over with your tongs. Cook the other side for about 45-60 seconds, until you see small brown spots appear.
H6: Step 6: The Puff! (The Moment of Truth)
This is the magic part. Flip the chapati one more time onto the tawa. Now, using a clean, folded kitchen towel or a spatula, gently press down on the edges of the chapati. This encourages it to puff up.
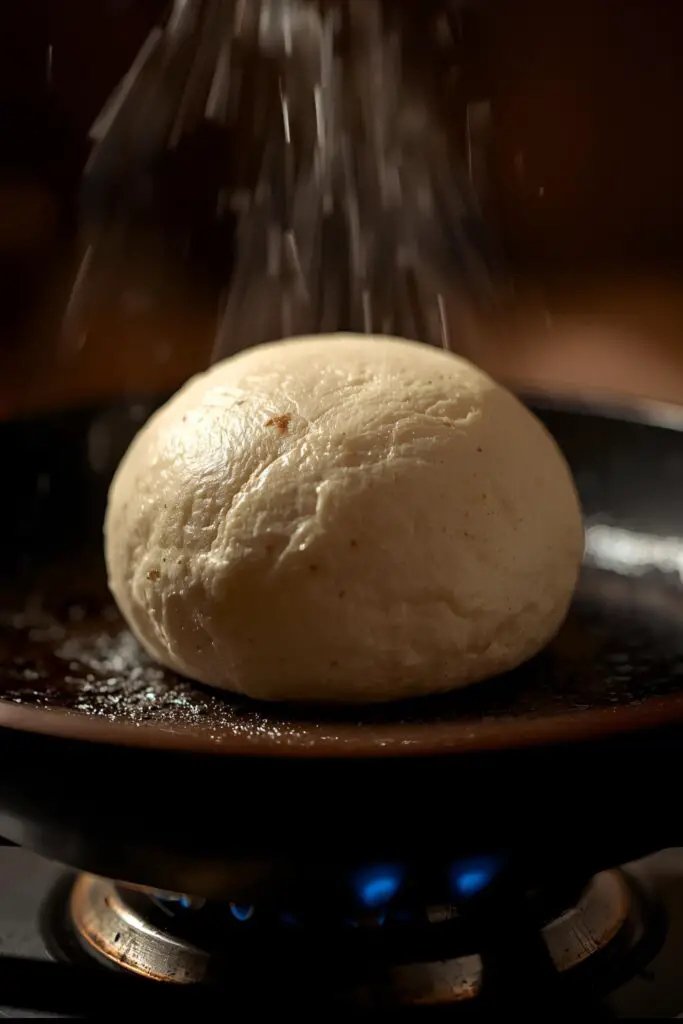
For a more dramatic puff, carefully pick up the chapati with your tongs and place it directly over a medium-high open flame on your gas stove. It should puff up into a beautiful balloon within seconds! Once it’s fully puffed, immediately remove it from the flame. Be careful not to burn it (or yourself!).
H7: Step 7: The Finishing Touch
Place the hot, puffed chapati in a container lined with a cloth (a tortilla warmer or casserole dish works well). Generously brush the top with ghee or butter. This keeps them soft and adds amazing flavor. Repeat the process with the remaining dough balls, stacking the finished chapatis on top of each other.
Calories & Nutritional Info: The Skinny on This Flatbread
A dramatic close-up shot of a chapati puffing up into a perfect balloon over the open flame of a gas stove
Chapati is a pretty wholesome food, TBH. Here’s a rough idea of what you get in one plain, 6-inch chapati:
- Calories: Approximately 70-85 kcal
- Carbohydrates: Around 15g
- Protein: About 3g
- Fat: Less than 1g (before you add that glorious ghee!)
- Fiber: A good source, with about 2-3g per chapati.
It’s a simple, unleavened whole-grain bread. What’s not to like?
Common Mistakes to Avoid: Don’t Make Chapati Frisbees!
We all make mistakes. Here are the most common ones and how to dodge them.
- Using the Wrong Flour: Using all-purpose flour will give you a chewy, tortilla-like flatbread, not a soft chapati. Stick to Atta!
- Making the Dough Too Hard or Too Soft: Dough that’s too firm will result in tough chapatis. Dough that’s too sticky is a nightmare to roll. Aim for that “soft and pliable” sweet spot.
- Skipping the Resting Time: I’ve said it before, and I’ll say it again. Rest your dough! An unrested dough is tense and will fight you every step of the way, resulting in tough chapatis.
- Uneven Rolling: If your chapati is thicker in some spots and thinner in others, it won’t puff up properly. Aim for uniform thickness.
- Incorrect Tawa Temperature: A tawa that’s not hot enough will dry out your chapati, making it hard. A tawa that’s scorching hot will burn the outside before the inside is cooked. Medium-high is your friend.
Variations & Customizations: Get Fancy with Your Flatbread
Once you’ve nailed the basic chapati, why not spice things up?
- Masala Chapati: Add 1/2 teaspoon of your favorite spices like turmeric, cumin powder, red chili powder, or garam masala to the flour before kneading.
- Veggie-Infused Chapati: Boost the nutrition by adding vegetable puree to the dough. Replace about half the water with spinach puree (palak chapati) or beetroot puree for a vibrant color and flavor.
- Avocado Chapati: For an extra soft, healthy-fat-boosted version, mash up half a ripe avocado and knead it into the dough. You’ll need less water. It’s surprisingly delicious!
FAQ Section: Your Chapati Queries, Answered
Let’s tackle some of the most common questions about making chapatis.
Q1: Why is my chapati hard and chewy?
A: This is the most common issue! It’s likely due to one of three things: the dough was too hard (not enough water), you didn’t rest the dough long enough, or you overcooked it on the tawa.
Q2: Why won’t my chapati puff up?
A: The puff failure is usually because the chapati was not rolled evenly, or there might be a tiny hole in it letting the steam escape. It could also be that your tawa wasn’t hot enough. Don’t worry, an un-puffed but soft chapati is still delicious!
Q3: What is the difference between chapati and roti?
A: The terms are often used interchangeably. Generally, “roti” is a broader term for any Indian round flatbread. A “chapati” is a specific type of roti made with whole wheat flour, cooked on a tawa, and puffed over a flame.
Q4: How do I store chapatis to keep them soft?
A: The best way is to stack them in a container with a lid, wrapped in a clean kitchen towel or paper towels. This traps the steam and keeps them soft for hours.
Q5: Can I make chapati dough in a food processor or stand mixer?
A: Yes, you can! Use the dough blade on your food processor or the dough hook on your stand mixer. It’s much faster, but you might need to give it a final quick knead by hand to get the texture just right.
Q6: Can I make chapatis without a gas stove to puff them?
A: Absolutely. After the second flip on the tawa, use a clean, folded kitchen towel to gently press around the edges of the chapati. The trapped steam will cause it to puff up right there in the pan.
Q7: Should I add oil or ghee to the dough?
A: It’s optional, but highly recommended for beginners. Adding a little fat to the dough makes it more forgiving and results in a guaranteed softer chapati.
Final Thoughts: You Are Now a Chapati Master!
You did it! You faced the flour, you conquered the knead, and you witnessed the magic puff. You are now officially a chapati-making boss. Go on, serve up a stack of these warm, soft, ghee-slathered beauties with your favorite curry and take a well-deserved bow. You’ll never look at a pre-packaged flatbread the same way again. Welcome to the club! 😉


