How to Make Snow Cream (The Magical 5-Minute Recipe!)
So, you want to know how to make snow? An ambitious goal! Are you a weather deity in training? A frustrated resident of a perpetually sunny climate staging a delicious protest? Or maybe, just maybe, you’ve heard the legends, the whispers on the winter wind of a magical, instant ice cream that you can only make on the coldest, most perfect of days.
Well, my friend, you’ve come to the right place. We are not going to be seeding any clouds today. Instead, we are about to make Snow Cream—the most exclusive, ephemeral, and ridiculously easy dessert on the entire planet. It’s a treat that requires you to work with nature, and the main ingredient is delivered right to your doorstep, free of charge.
If that doesn’t sound like magic, I don’t know what does. So, put on your boots. We’re going hunting for dessert.
Why This Recipe is Awesome
If the sheer, unadulterated whimsy of turning the weather into a snack isn’t enough for you, here are a few more reasons why this recipe is the best.
- It’s Actual, Literal Magic: You are taking a bowl of literal snow, adding a few simple ingredients, and transforming it into a delicious, creamy, scoop-able ice cream in about 30 seconds. This isn’t baking; it’s alchemy. You will feel like a powerful snow wizard.
- The Ultimate Nostalgic Treat: For anyone who grew up in a place with real winters, this is the taste of childhood. It’s a core memory in a bowl, a tradition passed down through generations of people who looked at a blizzard and thought, “Yes, but can I put sprinkles on it?”
- It’s the Fastest Ice Cream in the World: The “cooking” time is zero. The prep time is however long it takes you to put on your coat and find a big, clean bowl. There is no churning, no waiting, no ice baths. Just snow, stir, and serve.
Ingredients
The ingredient list is wonderfully short. Mother Nature does most of the heavy lifting.
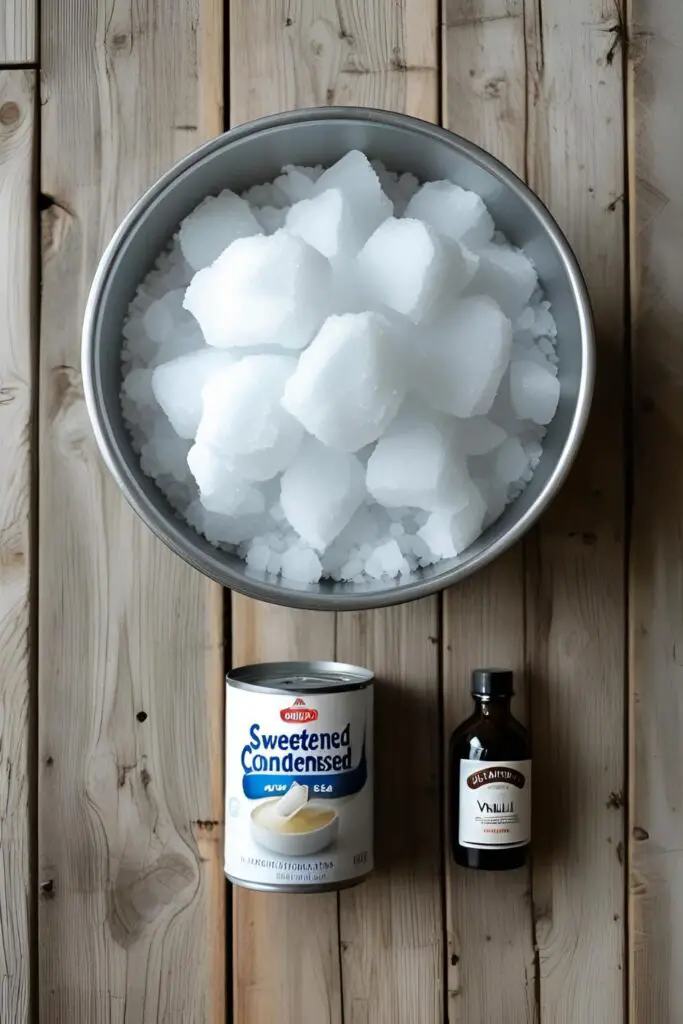
- 8-10 cups of FRESH, CLEAN SNOW: This is the star ingredient, and its quality is paramount. (See instructions for a full TED Talk on how to harvest this safely).
- 1 can (14 ounces) of sweetened condensed milk: This is the magic potion that provides the sweetness, creaminess, and perfect texture.
- 1-2 teaspoons of pure vanilla extract: Because everything is better with vanilla.
- A pinch of salt: To balance the sweetness and make the flavors pop.
- Optional but highly encouraged toppings: Rainbow sprinkles, chocolate syrup, crushed cookies, mini chocolate chips… go wild.
Tools & kitchen gadgets used
Your winter gear is just as important as your kitchen gear for this recipe.
- A Very Large Bowl: You need a big bowl to mix everything without creating a snow-storm in your kitchen. Chilling it in the freezer for 15 minutes beforehand is a pro move.
- A Sturdy Silicone Spatula or Large Spoon
- Measuring Cups and Spoons
- Your Winter Gear: A warm coat, boots, and gloves for the great snow harvest.
- Serving Bowls and Spoons
Step-by-step instructions
This is less of a recipe and more of a magical incantation. Timing is everything!
Step 1: The Great Snow Harvest (The Most Important Step!) First, we must hunt our main ingredient. You can’t just use any old snow. You must only use fresh, clean, pure white snow.
- Wait for a good snowfall. The best snow is the light, fluffy kind that has just fallen.
- Location, location, location. Go to an open, clean area of your yard, far away from roads (where salt and exhaust can contaminate it) and away from areas where pets… do their business. You get the picture.
- Be a snow snob. Don’t use the very top layer, which might have collected dust from the air. Gently scrape it away and collect the pristine, white snow from underneath. Never, ever, under any circumstances, use yellow snow. Or brown snow. Or any color other than pure white.
Step 2: Prepare Your Creamy Base Before you bring the snow inside, get your base ready. In your large (preferably chilled) bowl, whisk together the entire can of sweetened condensed milk, the vanilla extract, and the pinch of salt.
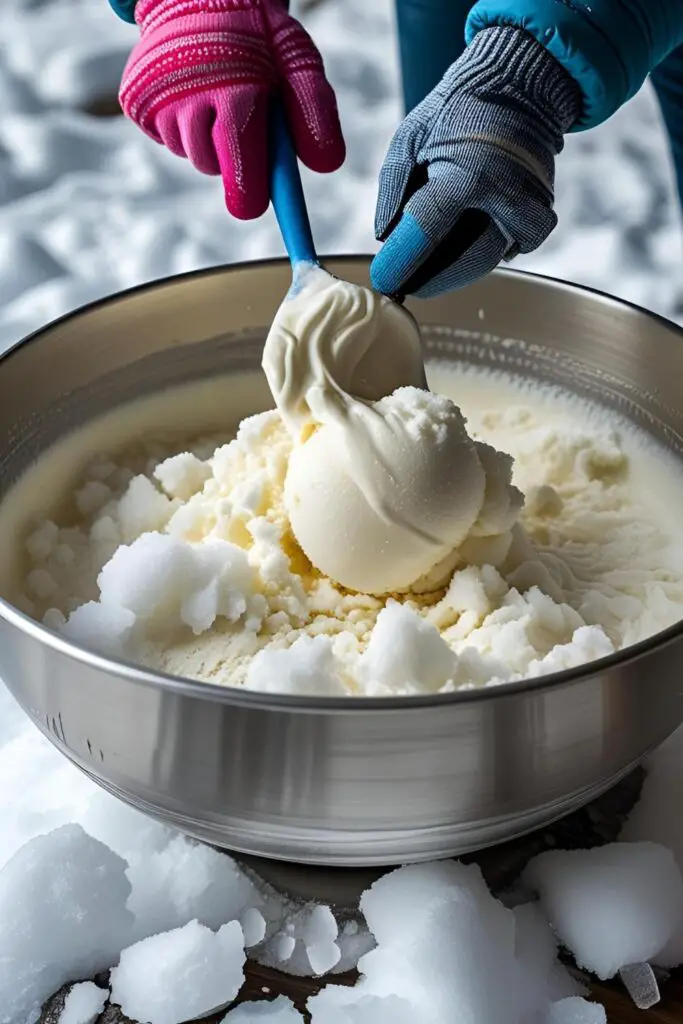
Step 3: The Magical Combination Now, work quickly! Bring your bounty of fresh snow inside. Add the snow, a few large scoops at a time, to the condensed milk mixture in your bowl.
Step 4: Stir Like You Mean It Using your spatula, stir and fold the snow into the milk mixture. At first, it will look like a sad, milky slushy. But keep stirring! Within about 30 seconds, it will magically transform. The mixture will thicken up and achieve the perfect, creamy, scoop-able texture of real ice cream.
Step 5: SERVE IMMEDIATELY! This is a fleeting pleasure, a dessert that exists only in the moment. Do not try to save it for later. The second it’s ready, scoop your glorious snow cream into your serving bowls, douse it in sprinkles and chocolate syrup, and enjoy your magical, weather-dependent treat right away.
Calories & Nutritional Info
It’s lighter than traditional ice cream, but it’s still a sweet treat!
- Serving Size: 1 cup
- Estimated Calories: Around 200-250 kcal (without toppings).
- Rich in: Calcium, winter magic, and pure joy.
- Note: It is generally considered safe to eat clean, fresh snow in moderation.
Common Mistakes to Avoid
Avoid these simple slip-ups for the best snow cream experience.
- Using Dirty or Old Snow: I’m going to say this one more time because it is the most important rule of snow cream. Be incredibly picky about your snow. Only use pristine, freshly fallen, pure white snow from a clean, untouched area. Your dessert (and your stomach) will thank you.
- Waiting Too Long to Mix: Snow melts. This is a scientific fact. This is a dessert with a very, very short lifespan. Have your condensed milk base completely ready to go before you bring your bowl of snow inside. The moment the snow enters your warm house, the clock is ticking.
- Adding Too Much Liquid to the Snow: The goal is a thick, creamy ice cream, not a sweet slushy. The ratio in this recipe is a great starting point, but the wetness of snow can vary. If your mixture seems too thin, the solution is simple: add more snow! Keep adding and stirring until it reaches a thick, scoop-able consistency.
- Trying to Store it in the Freezer: I know it seems logical. It’s an ice cream-like dessert, so you should be able to freeze it, right? Wrong. Unfortunately, snow cream does not freeze well. It will freeze into a solid, icy block that is nearly impossible to scoop. It is meant to be made and enjoyed immediately.
Variations & Customizations
Once you’ve mastered the classic, you can get creative with your snow day treat.
- Chocolate Bomb Snow Cream: Before you add the snow, whisk a few tablespoons of unsweetened cocoa powder or a generous squeeze of chocolate syrup into your condensed milk base.
- Peppermint Stick Snow Cream: Add ½ teaspoon of peppermint extract to the condensed milk base. After you’ve mixed in the snow, fold in some crushed candy canes for a festive, crunchy twist.
- The “I Live in Florida” Cheater’s Version: No snow? No problem! You can create an approximation. Take a large bag of ice and pulse it in a high-powered blender or food processor until it becomes a fine, snow-like powder. Quickly measure out about 8-10 cups of this “shaved ice” and immediately fold it into your condensed milk base. It’s not exactly the same, but it’s a fun and delicious way to join in on the snow cream party!
FAQ Section
All your frosty, flakey questions, answered.
1. Is it actually safe to eat snow? Generally, yes, as long as you are very careful about where you collect it. Only eat fresh, white snow from an area far away from roads, cars, and animal paths. The first few hours of a snowfall are the best, as the snow helps to clean pollutants from the air.
2. What does snow cream taste like? It tastes like a very light, milky, and sweet ice cream. The texture is unique—it’s softer and less dense than regular ice cream, almost like a very creamy Italian ice.
3. Can I make snow cream without sweetened condensed milk? Yes, you can! The old-fashioned way is to use regular milk, granulated sugar, and vanilla. Simply whisk about 1 cup of milk, ½ cup of sugar, and 1 tsp of vanilla together until the sugar is dissolved, then fold in your snow. It will be a bit icier and less creamy than the condensed milk version, but still delicious.
4. How do you get clean snow for eating? The best practice is to place a large, clean bowl outside at the beginning of a heavy snowfall to collect it as it falls. If you’re collecting it from the ground, choose a deep, untouched area and scrape off the top inch before scooping up the pristine snow underneath.
5. Can you really not store snow cream in the freezer? You really can’t. The unique crystalline structure of snowflakes is what makes snow cream light and fluffy. Once it melts and refreezes, it just becomes a solid block of sweetened ice. It’s a dessert that is meant to be enjoyed in the moment.
6. How much snow do I really need? A lot! You’ll need about 8-10 cups of light, fluffy snow. It seems like a huge amount, but it will compact down as you mix it. It’s always better to gather more than you think you’ll need.
7. I live in a warm climate and I’m feeling left out. What can I do? Try the “cheater’s version” listed in the variations! Blending ice in a powerful blender until it’s a fine powder is the closest you can get to real snow and makes a fantastic shaved ice-style dessert.
Final Thoughts
And there you have it. You’ve learned how to turn the weather into dessert. You’ve harnessed the power of a snow day to create something truly magical, nostalgic, and delicious, all in the span of about five minutes. You are now officially a snow wizard, and your kitchen is your frosty kingdom.
Now, go! Your magical creation is melting as we speak. Go enjoy it, and maybe make another batch. Who knows when the next perfect snowfall will be?


