How to Make Shawarma Bread (Because Store-Bought Just Isn’t Cutting It Anymore)
Let’s talk shawarma. Specifically, let’s talk about that moment you sink your teeth into a perfectly wrapped, juicy, flavorful shawarma, and the bread just gives. It’s soft, it’s pliable, it’s slightly chewy, and it holds all that glorious filling without tearing apart. It’s the unsung hero, the silent workhorse, the thing that makes or breaks your entire shawarma experience. And if you’re anything like me, you’ve probably thought, “Man, I wish I could make that at home!” Well, wish granted, my friend. Today, you are going to learn how to make shawarma bread from scratch, and it’s surprisingly easy, incredibly rewarding, and leagues beyond anything you can find in a plastic bag. Get ready to elevate your homemade shawarma game to legendary status.
Why This Recipe Is Awesome (It’s Your Passport to Authentic Shawarma Bliss)
Why bother making your own shawarma bread when you can just grab some store-bought tortillas or pita? Because this recipe is your golden ticket to authentic flavor, superior texture, and serious street-food cred. Homemade shawarma bread is softer, more elastic, and has that subtle, yeasty flavor that perfectly complements savory fillings. It truly makes all the difference.
This isn’t just about bread; it’s about achieving that perfect balance where the bread enhances, rather than merely contains, your delicious shawarma filling. It’s also incredibly versatile. While perfect for shawarma, you can use these soft flatbreads for wraps, dips, or even mini pizzas. And honestly, the satisfaction of pulling a perfectly puffed, slightly charred flatbread off the pan, knowing you made it yourself? Priceless. Your friends in Khulna will be begging for your secret recipe, IMO.
Ingredients: Your Simple Dough Dream Team
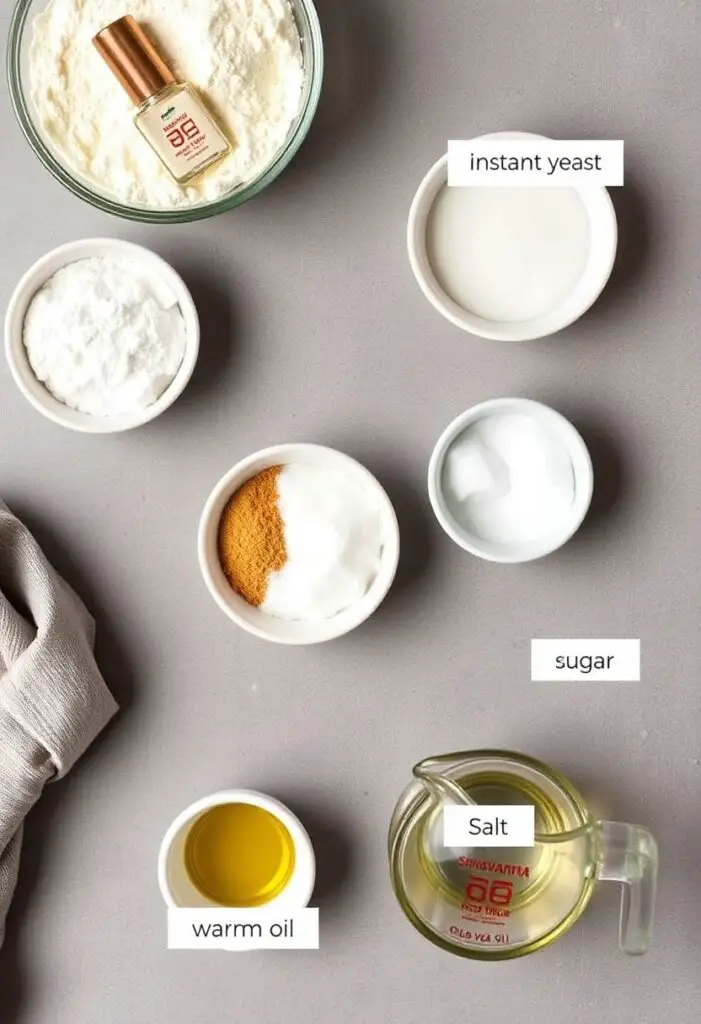
You only need a few basic pantry staples for this magic.
- 2 ½ cups all-purpose flour (plus extra for dusting)
- 1 teaspoon instant dry yeast
- 1 teaspoon granulated sugar
- 1 teaspoon salt
- 1 cup warm water (around 105-115°F / 40-46°C – warm to the touch, not hot!)
- 2 tablespoons olive oil (plus a little extra for greasing)
Key Ingredient Notes (Don’t Skimp Here!):
- Warm Water: This isn’t just a suggestion; it’s crucial for activating the yeast. Too hot, and you’ll kill it; too cold, and it won’t activate. Think lukewarm baby bathwater.
- Instant Dry Yeast: I recommend instant dry yeast because you can mix it directly with your dry ingredients without proofing first. If you only have active dry yeast, you’ll need to proof it in the warm water with sugar for 5-10 minutes until foamy before adding it to the flour.
Tools & Kitchen Gadgets Used: Your Bread-Making Arsenal
You don’t need a professional bakery, but a few tools make the process smooth.
- Large Mixing Bowl
- Measuring Cups and Spoons
- Whisk
- Clean Kitchen Towel or Plastic Wrap
- Rolling Pin
- Non-stick Skillet or Cast Iron Pan (heavy-bottomed is best for even heat!)
- Pastry Brush (Optional, for oiling the pan)
Step-by-Step Instructions: The Journey to Puffy Perfection

Don’t let working with yeast intimidate you. This is simpler than you think.
Act 1: The Dough Takes Shape
- Activate Your Yeast (The Magic Begins!): In your large mixing bowl, combine the warm water and sugar. Sprinkle the instant dry yeast over the top. Give it a gentle stir and let it sit for 5-10 minutes. You should see a foamy layer form on top – that means your yeast is alive and ready to party! If nothing happens, your water might have been too hot or cold, or your yeast is expired. Start over. :/
- Combine Dry Ingredients: While the yeast is doing its thing, in a separate small bowl, whisk together the flour and salt.
- Mix and Knead: Pour the yeast mixture and the olive oil into the large bowl with the flour mixture. Mix with a spoon or your hands until a shaggy dough forms.
- Knead That Dough: Turn the dough out onto a lightly floured surface. Knead for 5-7 minutes until the dough is smooth, elastic, and no longer sticky. If it’s too sticky, add a tiny bit more flour (½ tablespoon at a time). If it’s too dry, a tiny bit more warm water. You want it pliable and soft.
- First Rise (Patience, Young Padawan): Lightly grease your large mixing bowl with a little olive oil. Place the dough in the bowl, turning it once to coat. Cover the bowl with a clean kitchen towel or plastic wrap. Let it rise in a warm place for 1 to 1 ½ hours, or until it has doubled in size. A warm kitchen in Khulna is perfect for this!
Act 2: Forming and Frying Your Flatbreads
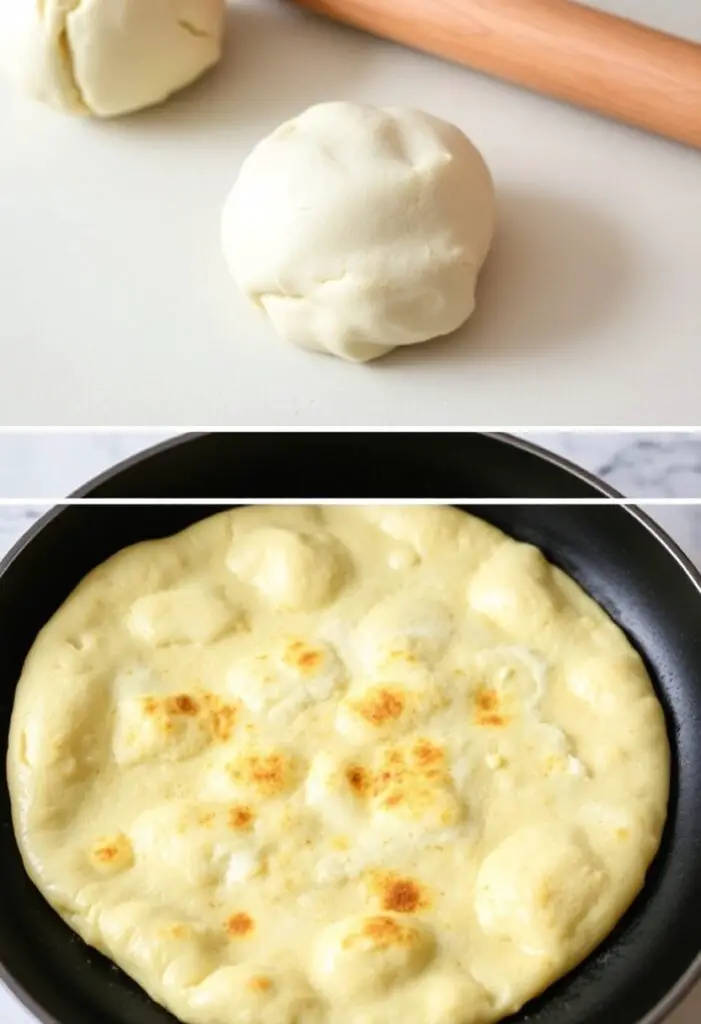
- Divide and Conquer: Once doubled, gently punch down the dough to release the air. Turn it out onto a lightly floured surface. Divide the dough into 8 equal pieces. (If you want smaller bread, make 10-12 pieces.) Roll each piece into a smooth ball.
- The Second Rest: Cover the dough balls with your kitchen towel and let them rest for 10-15 minutes. This helps the gluten relax, making them easier to roll.
- Roll ‘Em Out: Lightly flour your work surface again. Take one dough ball and use your rolling pin to roll it into a thin circle, about 7-8 inches in diameter and about ⅛-inch thick. Try to keep the thickness even. Don’t worry if they aren’t perfectly round; rustic is charming!
- Heat the Pan: Place your non-stick skillet or cast iron pan over medium-high heat. Let it get nice and hot for about 3-5 minutes. You want it hot enough to make the bread puff up, but not so hot it burns.
- Cook the Bread (The Fun Part!):
- Lightly brush the hot pan with a tiny bit of olive oil (or just use a paper towel with oil).
- Carefully place one rolled-out dough circle into the hot pan. Cook for 1-2 minutes, or until you see bubbles forming on the surface and the underside has golden-brown spots.
- Flip the bread over. Cook for another 1-2 minutes on the second side. This is when the magic happens: the bread should puff up beautifully! If it doesn’t, your pan might not be hot enough, or your dough might be too thick.
- Transfer the cooked bread to a plate and cover it with a clean kitchen towel to keep it warm and soft while you cook the rest.
- Repeat: Continue with the remaining dough balls, cooking them one by one. You might need to adjust the heat slightly as you go.
Calories & Nutritional Info (Per Flatbread, Estimated)
This is a much better choice than many store-bought options, FYI. (This is an estimate for one flatbread, assuming 8 servings.)
- Estimated Calories per flatbread: ~180-220 calories
- Carbohydrates: ~35-40g
- Protein: ~6-7g
- Fat: ~3-5g
Common Mistakes to Avoid: Don’t Let Your Bread Go Flat!
Even simple bread can throw a curveball. Avoid these common slip-ups.
- Wrong Water Temperature for Yeast: Too hot, and you kill the yeast. Too cold, and it stays dormant. Aim for lukewarm. This is seriously important.
- Not Letting Dough Rise Enough: Underrisen dough will result in dense, heavy flatbreads that don’t puff. Patience is a virtue here. Let it double in size.
- Over-Flouring While Kneading/Rolling: Too much flour makes the dough tough and dry. Use just enough to prevent sticking.
- Pan Not Hot Enough: If your pan isn’t hot enough, your bread won’t puff up beautifully and won’t get those nice golden-brown spots. It’ll just be pale and sad.
- Overcooking the Bread: Cook for too long, and your bread will become stiff and dry instead of soft and pliable. Keep an eye on those golden spots!
Variations & Customizations: Your Bread, Your Way
This basic recipe is a fantastic starting point. Here are a few ways to tweak it.
- Garlic Herb Bread: Before cooking, brush the rolled-out dough with a mixture of melted butter, minced garlic, and chopped fresh parsley. Cook as directed.
- Whole Wheat Twist: Replace ½ cup of the all-purpose flour with whole wheat flour for a nuttier, slightly chewier bread. You might need a tiny bit more water.
- Spiced Shawarma Bread: Add ½ teaspoon of garlic powder and ½ teaspoon of onion powder to the dry ingredients for an extra savory kick.
FAQ Section: All Your Doughy Dilemmas, Solved
You’ve got questions. I’ve got answers.
- Q: Can I use a stand mixer to knead the dough? A: Absolutely! Use the dough hook attachment and knead on low-medium speed for about 5-7 minutes until the dough is smooth and elastic.
- Q: My dough isn’t rising. What went wrong? A: Most likely, your yeast is either dead (expired) or your water temperature was off. Check the expiry date on your yeast and ensure your water is warm but not hot.
- Q: My bread isn’t puffing up in the pan. Why? A: This usually means your pan isn’t hot enough, or your dough is too thick. Ensure your pan is preheated well, and roll your dough as thin as possible without tearing.
- Q: How do I store leftover shawarma bread? A: Once completely cooled, store the bread in an airtight container or a large Ziploc bag at room temperature for up to 2-3 days.
- Q: How do I reheat shawarma bread? A: Lightly dampen a paper towel and wrap it around the bread. Microwave for 15-20 seconds. You can also quickly heat it in a dry skillet over medium heat for 30 seconds per side, or even in a toaster oven.
- Q: Can I freeze homemade shawarma bread? A: Yes! Once cooled, stack the bread with small pieces of parchment paper in between (to prevent sticking), then wrap the stack tightly in plastic wrap and place it in a freezer-safe bag. It will last for up to 2 months. Thaw at room temperature.
- Q: Is this the same as pita bread? A: While similar, shawarma bread (often like a thin laffa or Arabic flatbread) tends to be thinner and more pliable than traditional pita bread, which typically puffs up to create a large pocket. This recipe gives you a softer, more wrap-friendly texture.
Final Thoughts: Roll It, Fill It, Devour It!
You’ve done it! You’ve mastered the art of homemade shawarma bread. No more sad, crumbly wraps for you. You now possess the power to create the perfect vehicle for all your juicy, flavorful fillings. Go forth, roll out that dough, cook it to puffy perfection, and fill it with glorious shawarma chicken, a mountain of fresh veggies, and lashings of garlic sauce. Your taste buds (and your inner street-food enthusiast) will thank you. TBH, you might never buy bread again.