How to Make Samosas Step by Step (And Finally Ditch Sad Takeout)
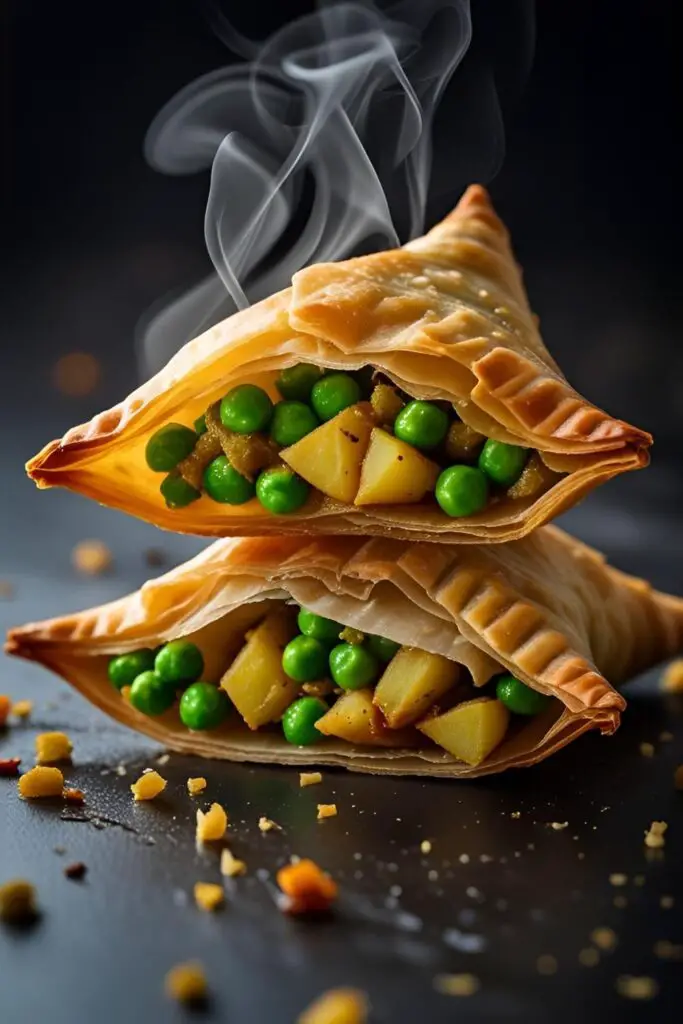
Let’s have a real talk about samosas. You know, those glorious, golden triangles of joy. We’ve all been burned by a bad one: a greasy, flabby pastry case holding a sad, bland mash of questionable origin. It’s a culinary tragedy. But what if I told you that you, yes YOU, hold the power to create the perfect samosa? I’m talking about a shatteringly crispy, flaky crust giving way to a warm, perfectly spiced potato and pea filling. Today, we’re learning how to make samosas step by step, and I promise, once you nail this, you’ll never look at that takeout menu the same way again.
My own journey to samosa nirvana was paved with many… let’s call them “learning experiences.” There were leaky seams, pastry bubbles the size of golf balls, and at least one batch that looked more like abstract sculptures. But through trial, error, and a whole lot of delicious research, I’ve cracked the code. And now, I’m sharing all the secrets with you.
Why This Samosa Recipe is a Certified Game-Changer
Still think this sounds like too much work? Are you really going to let a little dough stand between you and ultimate happiness? Let’s break down why this recipe is about to become your new party trick.
First, the crust. Forget those thick, chewy wrappers. We are making a traditional, flaky pastry from scratch. It’s bubbly, it’s crisp, and it has a satisfying crunch that will echo in your foodie dreams. This isn’t just a container for the filling; it’s the star of the show.
Second, the filling. This is where the magic happens. We’re building layers of flavor with toasted spices, aromatic ginger and garlic, sweet peas, and hearty potatoes. It’s savory, a little tangy, and has just the right amount of kick. You control the spice level, so you can make it as mild or as fiery as your heart desires.

Finally, the sheer “wow” factor. Imagine placing a platter of these perfectly golden, homemade samosas on the table. The silence, followed by the chorus of crunches, then the exclamations of delight. You’ll be a culinary legend. Your friends will ask for the recipe. You can just smile mysteriously and say, “Oh, it’s an old family secret.” I won’t tell. 😉
Your Samosa Mission: The Ingredients
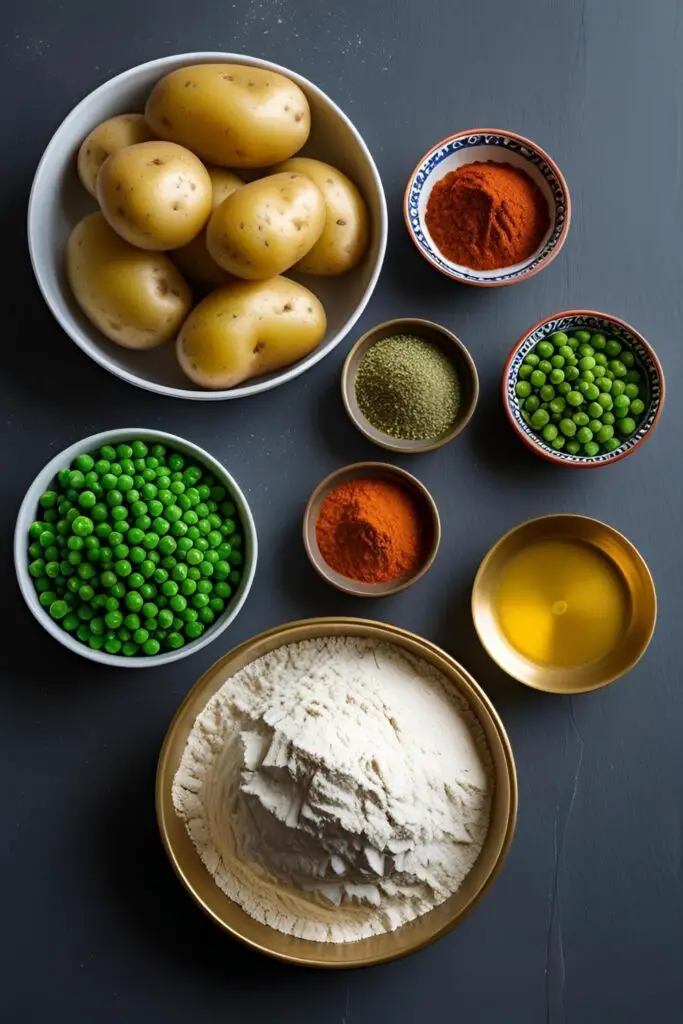
This is a two-part operation: the pastry and the filling. Don’t be intimidated by the list; it’s mostly pantry staples!
For the Flaky Pastry (The Golden Shell):
- All-Purpose Flour: 2 cups. The foundation of our crispy dreams.
- Ghee or Vegetable Oil: ¼ cup, melted. Ghee gives it an amazing flavor, but oil works perfectly for a crisp finish.
- Carom Seeds (Ajwain): 1 teaspoon. These tiny seeds have a unique, thyme-like flavor. If you can’t find them, you can substitute with cumin seeds, but it’s worth seeking them out!
- Salt: 1 teaspoon. Flavor enhancer, obviously.
- Cold Water: About ½ cup, plus or minus a tablespoon. The key is to add it slowly.
For the Spiced Potato Filling (The Heart and Soul):
- Potatoes: 3 medium-sized potatoes (about 1.5 lbs), boiled, peeled, and roughly mashed. Use a starchy potato like Russets for the best texture.
- Green Peas: ½ cup. Frozen works perfectly here; no need to thaw them first.
- Onion: 1 small, finely chopped.
- Ginger: 1 tablespoon, freshly grated or minced.
- Garlic: 2 cloves, minced.
- Green Chilies: 1-2, finely chopped (optional, but recommended for a little kick).
- Vegetable Oil: 2 tablespoons.
- Whole Spices: 1 teaspoon cumin seeds & 1 tablespoon crushed coriander seeds.
- Ground Spices: 1 teaspoon garam masala, ½ teaspoon turmeric powder, and ½ teaspoon amchur (dried mango powder) for that signature tang.
- Salt: To taste.
- Fresh Cilantro: ¼ cup, chopped.
- Frying Oil: Vegetable, canola, or any neutral oil with a high smoke point. You’ll need enough for deep frying.
The Essential Toolkit: Gadgets for Glory
You don’t need a professional kitchen, but these tools will make your samosa-making life significantly easier.
- Large Mixing Bowl: For making the dough and the filling.
- Rolling Pin: A must-have for rolling out the pastry.
- Deep Pan, Wok, or Kadai: For frying. You need something deep enough to submerge the samosas.
- Slotted Spoon: For safely removing the golden-brown samosas from the hot oil.
- Potato Masher: For getting that perfect, slightly chunky potato texture.
- Cutting Board & Sharp Knife: For all your chopping needs.
- Measuring Cups and Spoons: Baking is a science, people!
How to Make Samosas Step by Step: The Ultimate Guide
Ready to become a samosa-folding ninja? Let’s break it down.
Part 1: The Pastry – Create the Perfect Shell
Step 1: In a large bowl, mix the all-purpose flour, salt, and carom seeds (ajwain). Step 2: Pour in the melted ghee or oil. Using your fingertips, rub the fat into the flour until the mixture resembles coarse breadcrumbs. When you squeeze a handful, it should hold its shape. This step is crucial for a flaky crust. Step 3: Gradually add the cold water, a tablespoon at a time, and knead until you have a firm, stiff dough. Do not over-knead! We’re not making soft bread. Step 4: Cover the dough with a damp cloth and let it rest for at least 30 minutes. This allows the gluten to relax, making the dough easier to roll. Let it have its spa day.
Part 2: The Filling – Flavor Town, Population: You
Step 1: While the dough is resting, heat 2 tablespoons of oil in a pan over medium heat. Add the cumin seeds and let them sizzle. Step 2: Add the chopped onion and sauté until translucent. Then, add the ginger, garlic, and green chilies. Cook for another minute until fragrant. Step 3: Time for the spice parade! Add the crushed coriander seeds, turmeric powder, and garam masala. Stir and cook for 30 seconds until the spices are aromatic. Step 4: Add the green peas and cook for a couple of minutes. Then, add the mashed potatoes and salt. Mix everything well, gently breaking up any large potato chunks. Step 5: Turn off the heat. Stir in the amchur (mango powder) and fresh cilantro. Let the filling cool down completely. A hot filling will make your pastry soggy. No one wants that.
Part 3: The Assembly – Folding Like a Pro

Step 1: After the dough has rested, give it a quick knead and divide it into 6-8 equal-sized balls. Step 2: Take one ball and roll it into a thin oval or circle, about 6 inches in diameter. Step 3: Cut the circle in half. Now you have two semi-circles. Step 4: Take one semi-circle and form a cone. You do this by folding the straight edge over itself, using a dab of water as glue to seal the seam. You should have a neat little cone in your hand. This is the moment you become a true artist. Step 5: Fill the cone about two-thirds full with the cooled potato filling. Don’t overstuff it! Step 6: Dab a little water along the top edge of the cone. Pinch the edges together firmly to seal the samosa completely. Make sure it’s sealed tight, or it will leak in the oil. A leaky samosa is a sad samosa.
Part 4: The Golden Fry – The Final Frontier
Step 1: Heat the oil in your deep pan over low-medium heat. This is the most important secret! If the oil is too hot, you’ll get blisters on your pastry, and the inside will be raw. Step 2: To test the oil, drop a tiny piece of dough in. It should sizzle gently and rise to the top slowly. If it shoots up immediately, your oil is too hot. Step 3: Gently slide a few samosas into the oil. Don’t overcrowd the pan. Step 4: Fry for 10-15 minutes, turning them occasionally, until they are golden brown and crispy on all sides. Be patient! Low and slow is the key to perfection. Step 5: Remove the samosas with a slotted spoon and drain them on a wire rack or paper towels. Serve hot with your favorite chutney!
Calories & Nutritional Info (A Moment of Silence for Our Diets)
Let’s be real, this isn’t health food. But for the curious, here’s a rough estimate for one medium-sized fried samosa.
- Calories: ~250-300 kcal
- Fat: ~15-20g
- Carbohydrates: ~25-30g
- Protein: ~4-5g
FYI: The numbers are an approximation and can vary. The calories absolutely do not count if you share them with friends. That’s just science.
Common Mistakes to Avoid (Or, Your Samosa Troubleshooting Guide)
I’ve made all these mistakes so you don’t have to. You’re welcome.
- A Soft, Chewy Crust: You probably over-kneaded the dough or didn’t add enough fat (ghee/oil). The dough should be stiff, not soft like bread dough.
- The Dreaded Pastry Bubbles: Your frying oil was way too hot. Remember, low and slow wins the samosa race.
- Soggy, Oil-Logged Samosas: This happens if your oil is not hot enough. The samosa sits there absorbing oil instead of frying. Find that gentle, low-medium heat sweet spot.
- Leaky Samosas: You didn’t seal your edges properly! Use that water “glue” and pinch firmly. A well-sealed seam is a happy seam.
- A Bland Filling: Don’t be shy with the spices! And make sure to taste your filling and adjust the salt before you start stuffing.
Variations & Customizations (Because You’re a Rebel)
Once you’ve mastered the classic, why not play around?
- Keema Samosa (Meat Lover’s Delight): Swap the potato filling for a spiced ground lamb or chicken filling. A classic and incredibly delicious variation.
- Paneer & Corn Samosa: A fantastic vegetarian option using crumbled paneer (Indian cheese), sweet corn, and spices. It’s creamy, a little sweet, and totally addictive.
- The “Healthier” Air Fryer Samosa: For a less oily version, brush the assembled samosas lightly with oil and air fry at 350°F (175°C) for 15-20 minutes, flipping halfway, until golden and crisp. The texture is different, but still very tasty!
FAQ Section (All Your Samosa Questions, Answered)
Can I bake samosas instead of frying them?

Yes! Place them on a baking sheet, brush with oil, and bake at 400°F (200°C) for 20-25 minutes, flipping halfway through. They won’t be as evenly browned or flaky as the fried version, but they’re a great alternative.
How do I store samosas?
You can store uncooked samosas in the freezer. Place them on a tray in a single layer and freeze. Once frozen, transfer them to a freezer bag. You can fry them directly from frozen; just add a few extra minutes to the cooking time. Cooked samosas can be stored in the fridge and reheated in an oven or air fryer to bring back some crispiness.
Why is my samosa pastry hard and not flaky?
This usually means the ratio of fat to flour was off, or the dough was too dry. Ensure you rub the ghee/oil into the flour properly to create those flaky layers.
What kind of dipping sauces go well with samosas?
The classic pairing is a duo of chutneys: a spicy and fresh mint-cilantro chutney and a sweet and tangy tamarind chutney. Ketchup is also a popular, if less traditional, choice.
Can I use store-bought pastry?
In a pinch, you can use puff pastry or spring roll wrappers, but the result will be very different from a traditional samosa. It’s a shortcut, but IMO, the homemade pastry is worth the effort.
How do I get the perfect triangular shape?
It all comes down to the cone! Make sure your semi-circle is folded into a well-sealed cone before you add the filling. Practice makes perfect!
Is it necessary to let the dough rest?
Yes, 100%. Resting allows the gluten to relax, which makes the dough pliable and easy to roll out. If you skip this, you’ll be fighting with a tough, springy dough.
Final Thoughts
You did it! You’ve navigated the world of dough, spices, and hot oil to emerge as a true Samosa Champion. You’re now equipped with the skills to create a snack that will bring joy, comfort, and a satisfying crunch to anyone lucky enough to try one.
So go on, throw that takeout menu in the recycling bin. Your kitchen is now an official samosa-making headquarters. Welcome to the club. It’s a delicious place to be. 😉