How to Make Perfect Pancakes (And Banish Sad, Flat Flapjacks Forever)
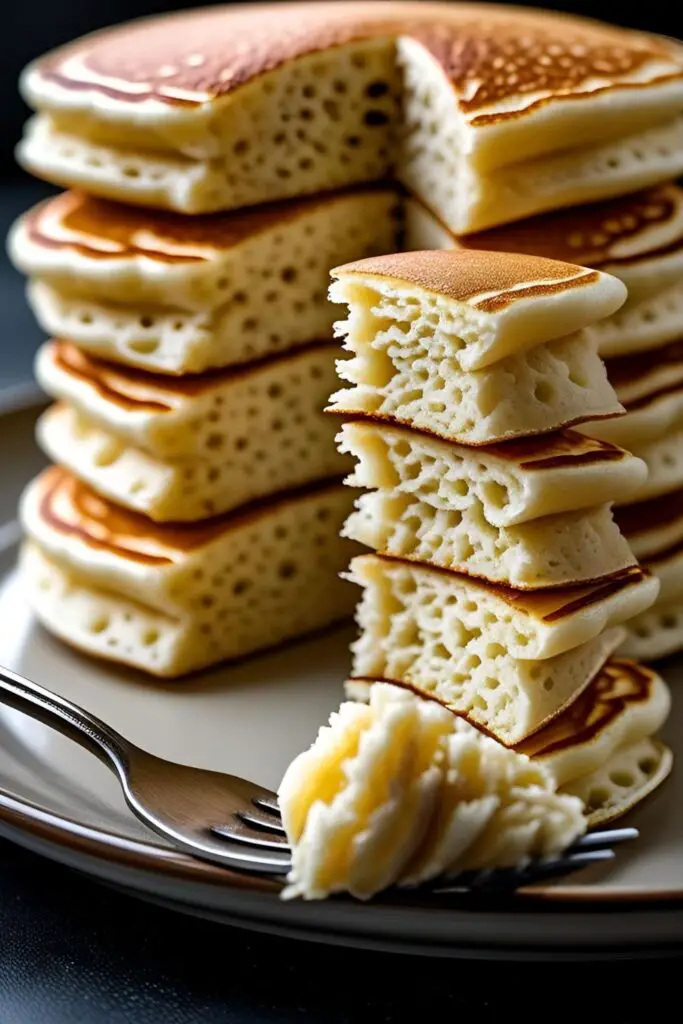
Let’s talk about the dream. It’s a lazy weekend morning, the coffee is brewing, and in front of you sits a glorious, golden-brown stack of pancakes. They’re impossibly fluffy, impossibly tall, and just waiting for a cascade of maple syrup. Now, let’s talk about the reality. More often than not, our attempts result in pancakes that are… well, a bit sad. Some are burnt, some are raw in the middle, and some have the distinct texture of a rubber tire.
The quest for the perfect pancake can feel like a mythical journey. But what if I told you that you don’t need a magic wand, just a few key secrets? Today, we are ending the tyranny of mediocre breakfast. I am going to show you how to make perfect pancakes—so fluffy, so tender, and so foolproof, you’ll wonder where this recipe has been all your life.
Forget the box mix. We’re building these beauties from scratch. Your brunch game is about to go from zero to hero.
Why This Recipe is Awesome (And Will Change Your Weekends)
This isn’t just a recipe; it’s a formula for success. These are the gold-standard, classic buttermilk pancakes that you dream of. They have a tender, melt-in-your-mouth crumb, a subtle, tangy flavor from the buttermilk, and they puff up beautifully on the griddle every single time.
This recipe is built on a few simple but non-negotiable techniques that guarantee a flawless result. We’re taking the guesswork out of the equation. Once you learn these secrets, you’ll be able to whip up a perfect stack with your eyes closed (please don’t actually do that, hot griddles are involved).

And the glory? Oh, the glory. Serving a stack of these perfect pancakes to friends or family will earn you a legendary status. People will talk about your pancakes. They will ask for your secrets. You will become the undisputed champion of breakfast.
Ingredients You’ll Need
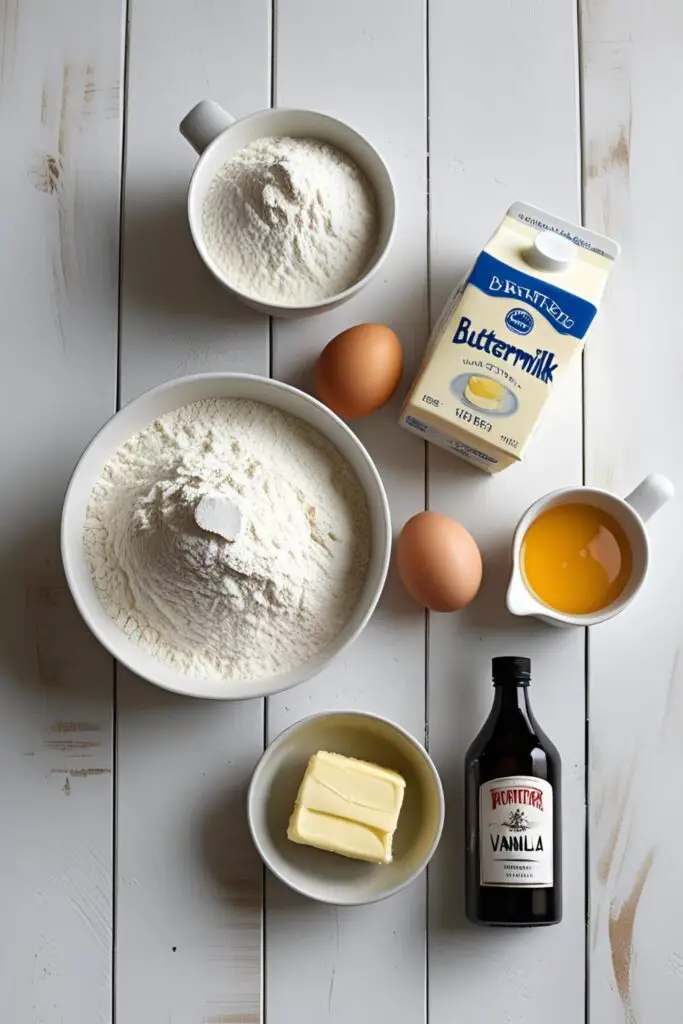
The ingredients are simple pantry staples. The magic is in how we combine them.
- 2 cups (240g) all-purpose flour
- 2 tablespoons granulated sugar
- 2 teaspoons baking powder
- 1 teaspoon baking soda
- ½ teaspoon salt
- 2 cups (480ml) buttermilk, at room temperature
- 2 large eggs, at room temperature
- ¼ cup (57g) unsalted butter, melted and slightly cooled
- 1 teaspoon pure vanilla extract
A word on Buttermilk: Yes, it’s important. The acidity in buttermilk reacts with the baking soda to create next-level fluffiness and gives the pancakes a classic tangy flavor. No buttermilk? Make your own! Stir 2 tablespoons of white vinegar or lemon juice into 2 cups of regular milk and let it sit for 10 minutes. It’ll look curdled. That’s a good thing.
Tools & Kitchen Gadgets Used
You don’t need a professional kitchen, but a few key items will make your journey to perfection much smoother.
- A Good Non-Stick Skillet or Electric Griddle: This is your stage. A large electric griddle is fantastic for cooking a big batch at once.
- Two Mixing Bowls: One for the dry ingredients, one for the wet. This is non-negotiable for proper mixing.
- A Whisk: For getting the dry ingredients perfectly combined and airy.
- A Rubber Spatula: For the final, gentle fold. Put the whisk away for this part!
- A Thin, Wide Spatula: For executing a clean, confident flip.
- A Ladle or a ¼-cup Measuring Cup: For pouring perfectly even, round pancakes.
- Measuring Cups and Spoons.
Step-by-Step Instructions: The Path to Pancake Nirvana
Ready to create a masterpiece? Follow these steps with the focus of a zen master.
H3: Part 1: The Prep
- The Dry Team: In a large bowl, whisk together the flour, sugar, baking powder, baking soda, and salt. Whisk for a solid 30 seconds. This is your insurance against biting into a salty pocket of unincorporated baking soda.
- The Wet Team: In a separate medium bowl, whisk together the buttermilk and eggs until just combined. Then, slowly whisk in the melted butter and vanilla extract.
H3: Part 2: The Combination (This is Where the Magic Happens)
- The Gentle Union: Pour the entire wet mixture into the bowl of dry ingredients. Now, put down your whisk and pick up a rubber spatula. Gently fold the ingredients together until they are just combined.
- LUMPS ARE YOUR FRIEND! I will say this again because it is the most important pancake commandment. Your batter should be thick, lumpy, and look slightly undermixed. If you mix it until it’s perfectly smooth, you will create tough, chewy, sad pancakes. Resist the urge to overmix!
- LET THE BATTER REST! This is the secret step that most people skip. Let the lumpy batter sit undisturbed on the counter for 10-15 minutes. This allows the gluten to relax and the leavening agents to get to work, which is the secret to an incredibly tender and fluffy pancake.
H3: Part 3: The Art of the Cook
- Heat the Pan: Place your skillet or griddle over medium heat. To test if it’s ready, flick a few drops of water on it. If they sizzle and dance before evaporating, you’re good to go.
- Grease Lightly: Lightly grease the pan with a little butter or oil. Wipe out the excess with a paper towel. You want an almost-dry surface.
- Pour and Watch: Use a ladle or ¼-cup measure to pour the batter onto the hot griddle. Now, don’t touch it. Watch for the signs. You’ll see bubbles start to form and pop on the surface, and the edges will begin to look matte and set. This is your signal. It usually takes 2-3 minutes.
- The Perfect Flip: Slide your spatula completely under the pancake and flip it with a confident flick of the wrist. Cook the second side for another 1-2 minutes, until golden brown.
- Serve Immediately: Transfer your perfect, golden, fluffy pancakes to a plate and serve immediately with butter, syrup, and all the glory you deserve.
Calories & Nutritional Info
This is a classic comfort food breakfast. Let’s not get too caught up in the numbers.
- Calories per pancake (makes about 12-14): Approximately 150-180 kcal (this is before you add toppings, which is where things get wild).
- Carbohydrates: About 20g.
- Protein: Around 5g.
- Note: These pancakes are a source of carbohydrates for energy and protein from the eggs and milk. They are also a primary source of weekend happiness.
Common Mistakes to Avoid (Pancake Crimes and Misdemeanors)
- The Overmixing Massacre: You whisked the batter until it was as smooth as silk. Congratulations, you just developed all the gluten and have created a batch of delicious rubber frisbees. Lumpy batter is the secret to tender, fluffy pancakes.
- The Pan Is a Temperamental Beast: Your pan was either screaming hot (burnt outside, raw inside) or lukewarm (pale, greasy, and sad). Medium heat is the sweet spot. Take the time to test it properly before you pour that first pancake.
- The Impatient Cook: You skipped the resting step because you were hungry. Your pancakes are probably fine, but they could have been perfect. Letting the batter rest makes them noticeably more tender and fluffy. It’s worth the wait.
- The Dreaded Spatula Smash: You flipped your pancake and then, for some unknown reason, you squished it flat with the back of your spatula. Why would you do that?! You just pressed out all the beautiful air pockets that make it fluffy. Never, ever press on your pancakes.
Variations & Customizations (Choose Your Own Adventure)

This classic recipe is a perfect jumping-off point.
- Classic Chocolate Chip: After the batter has rested, gently fold in 1 cup of your favorite chocolate chips. Pour and cook as usual. A timeless classic for a reason.
- Bountiful Blueberry: After you pour the batter onto the griddle, dot the top of each pancake with fresh or frozen blueberries. This prevents the berries from bleeding into the batter and sinking to the bottom.
- Wholesome Banana Walnut: Reduce the sugar to one tablespoon. Add one ripe, mashed banana to the wet ingredients. After the batter has rested, gently fold in ½ cup of chopped, toasted walnuts. It’s a heartier, more rustic version.
FAQ Section: Your Perfect Pancake Predicaments, Solved
- Why is buttermilk so important in pancake recipes? Buttermilk is acidic. This acid serves two purposes: it reacts with the baking soda for a powerful leavening boost (extra fluff!), and it helps to break down the gluten in the flour, resulting in a more tender pancake.
- How do I know exactly when to flip a pancake? Don’t rely on a timer; rely on your eyes. Look for bubbles to form and pop all over the surface, not just the edges. The edges of the pancake should also start to look dry and matte, not wet and shiny.
- Help! Why are my pancakes always tough or flat? The number one culprit, 99% of the time, is overmixing the batter. The second most likely culprit is that your baking powder or baking soda is old and has lost its power.
- Can I use a pre-made pancake mix with these techniques? Yes! The techniques of using buttermilk instead of water, adding melted butter, not overmixing, and letting the batter rest will improve almost any box mix.
- How do you keep the pancakes warm while you cook the whole batch? Preheat your oven to its lowest setting (around 200°F or 95°C). Place a wire rack on a baking sheet and put the finished pancakes on the rack in a single layer to keep them warm and crispy in the oven while you cook the rest.
- Can I freeze leftover pancakes? Absolutely! They are perfect for meal prep. Let them cool completely, then stack them with squares of parchment paper in between. Store them in a freezer-safe bag. To reheat, just pop them in the toaster, toaster oven, or microwave.
- Why is my first pancake always a weird test-pancake? Ah, the “sacrificial pancake”! This is a universal law. The first one is usually a bit off because your pan is still adjusting its temperature and absorbing that first bit of oil. Don’t worry, it’s not you, it’s the pan.
Final Thoughts
And there you have it. You are now armed with the knowledge and the technique to banish sad, flat pancakes from your life forever. You have unlocked the secrets to a truly perfect breakfast. You are a weekend morning hero. A brunch champion. A master of the griddle.
Now go forth. Drown that beautiful, perfect stack in an irresponsible amount of real maple syrup and a glorious pat of butter. You have more than earned it. And good luck ever wanting to use a box mix again.