The Only Onigiri Recipe You’ll Ever Need (Probably)
So, you want to learn how to make onigiri? Welcome to the club! You’ve seen them in anime, scrolled past them on your feed, and maybe even grabbed a sad, pre-packaged one from the store. Let me tell you, homemade onigiri is a game-changer. It’s like discovering your favorite band before they were cool.
Forget everything you think you know about rice. We’re about to turn a humble grain into a portable, delicious, and ridiculously satisfying snack that’ll make you wonder why you ever settled for a boring sandwich. Ready to become a rice-ball-making legend? Of course, you are.
Why This Recipe Is a Game-Changer
Look, I get it. Making onigiri sounds intimidating. All that shaping and stuffing… isn’t that what restaurants are for? Wrong. This recipe is your ticket to becoming the friend who casually whips up perfect onigiri for picnics, impressing everyone with your culinary prowess.
It’s easier than you think, surprisingly quick, and the flavor combinations are endless. Plus, there’s something deeply satisfying about molding a warm ball of rice with your own two hands. It’s basically edible therapy. Trust me, once you go homemade, you’ll never go back.
Ingredients

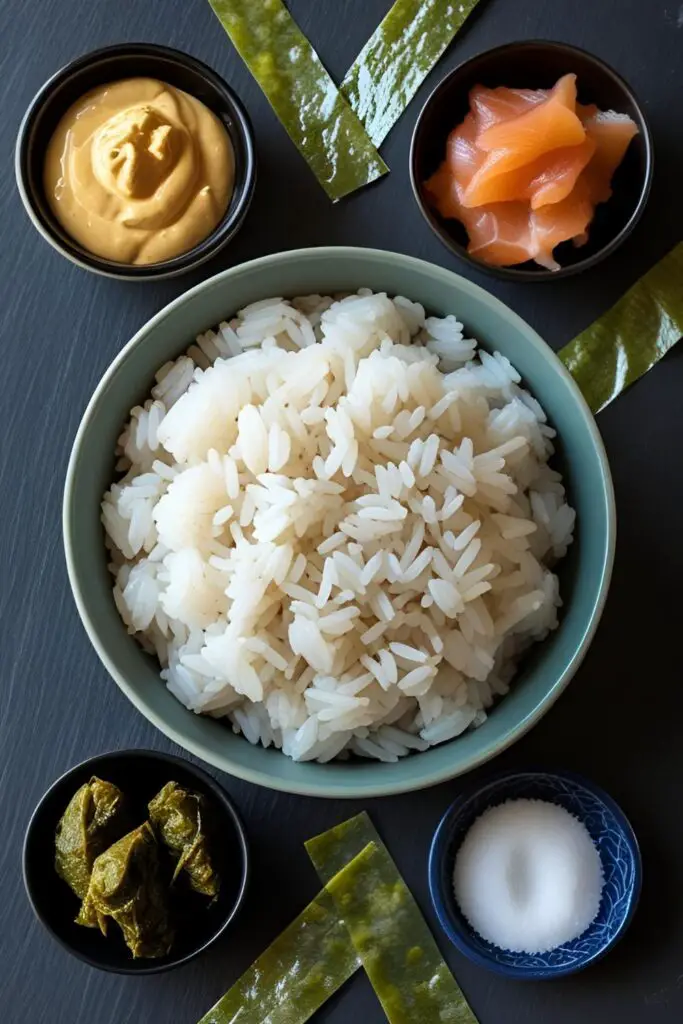
- 2 cups Japanese short-grain rice (sushi rice) – Don’t even think about using basmati or jasmine. It won’t work.
- 2 ½ cups water
- 1 tsp salt, plus more for your hands
- Nori (dried seaweed), cut into strips
- Your choice of fillings:
- Canned tuna mixed with Japanese mayo
- Salted salmon, cooked and flaked
- Umeboshi (pickled plum)
- Seasoned kombu
Tools & Kitchen Gadgets
- Rice cooker (or a pot with a tight-fitting lid)
- Rice paddle
- A small bowl of water
- Onigiri mold (optional, but a lifesaver for beginners)
- Cutting board
- Sharp knife
Step-by-Step Instructions
- Wash That Rice! No, seriously. Rinse the rice in a fine-mesh sieve under cold water until the water runs clear. This removes excess starch and is the key to fluffy, non-mushy rice. Don’t skip this, or your onigiri will be a sticky mess.
- Cook the Rice. If you have a rice cooker, now’s its time to shine. If not, combine the rinsed rice and water in a pot, bring to a boil, then reduce the heat to low, cover, and simmer for 15-20 minutes, or until the water is absorbed. Once done, let it steam, covered, for another 10 minutes.
- Season and Cool. Transfer the cooked rice to a large bowl and gently fold in the salt with a rice paddle. Let it cool slightly—you want it warm, not scorching hot.
- Wet Your Hands (or Mold). This is the most important trick in the book. Dip your hands in the bowl of water and sprinkle them with salt. This prevents the rice from sticking to you and seasons the outside of the onigiri. If you’re using a mold, wet it too.
- Shape and Fill. Grab a handful of rice (about ½ cup) and gently flatten it in your palm. If you’re adding a filling, make a small indent in the center and add about a teaspoon of your chosen filling.
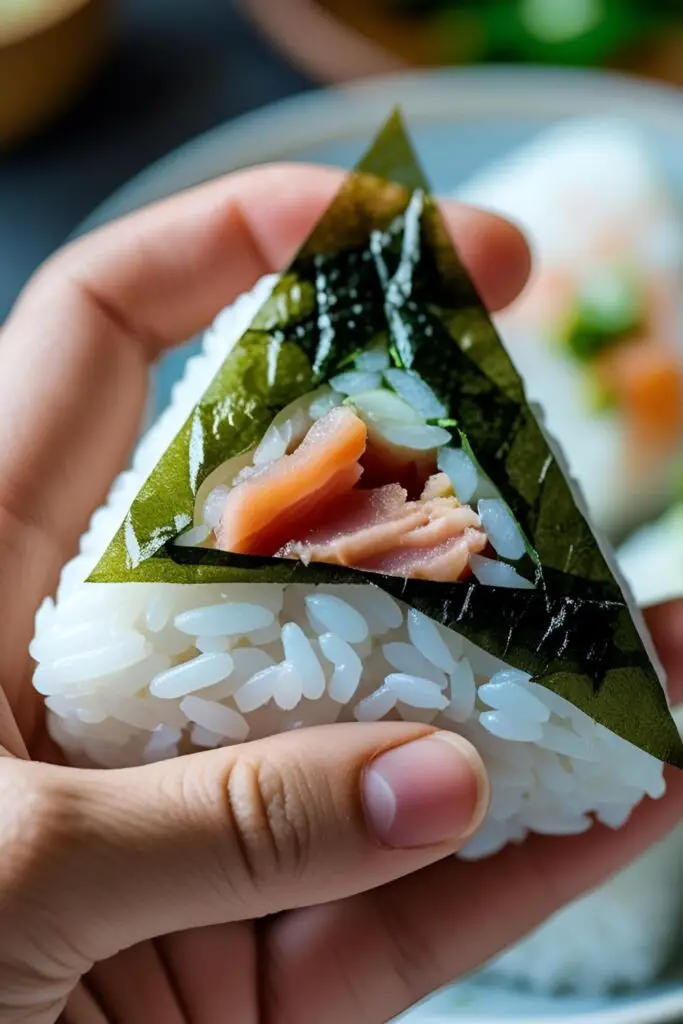
- Form the Triangle. Bring the edges of the rice up and around the filling. Gently cup your hands and start shaping it into a triangle, rotating as you go. Don’t squeeze too hard, or you’ll crush the rice grains. You’re aiming for firm but gentle.
- Wrap it Up. Take a strip of nori and wrap it around the bottom of the onigiri. The moisture from the rice will help it stick.
- Serve or Store. Enjoy immediately, or wrap in plastic wrap to save for later.
Calories & Nutritional Info
- Calories: Approximately 150-200 kcal per onigiri (without filling).
- Carbs: The main event here, providing a great source of energy.
- Low in Fat: A naturally low-fat snack.
- Customizable: The nutritional value will change depending on your filling. Tuna mayo will add protein and fat, while umeboshi is a low-calorie option.
Common Mistakes to Avoid
- Using the Wrong Rice: I said it before, and I’ll say it again. Use Japanese short-grain rice. Long-grain rice will not stick together, and you’ll be left with a pile of sadness.
- Forgetting to Wet Your Hands: If you don’t, you’ll have rice stuck to your hands for days. It’s not a good look.
- Pressing Too Hard: You’re not trying to create a rice diamond. Gentle pressure is all you need to get the shape right without turning your onigiri into a dense brick.
- Overfilling: A little filling goes a long way. Too much, and your onigiri will explode. It’s a tragic sight.
Variations & Customizations
- Spicy Tuna Onigiri: Mix your canned tuna with Japanese mayo and a squirt of sriracha for a spicy kick.
- Vegetarian Delight: Sautéed shiitake mushrooms seasoned with soy sauce make a fantastic, savory filling.
- Keto-Friendly? Not Really, But… Okay, onigiri is all about the rice, so a true keto version is a stretch. But you could try a similar concept with cauliflower rice, though the texture will be very different. IMO, just enjoy the real thing.
FAQ Section
1. Is onigiri the same as sushi? Nope! Sushi rice is seasoned with vinegar, while onigiri rice is usually just salted. They’re two different, but equally delicious, things.
2. Can I use leftover rice to make onigiri? You can, but it’s not ideal. Freshly cooked rice is warmer and stickier, making it much easier to shape.
3. How long does onigiri last? It’s best eaten the same day, but it will last for a day or two in the fridge. The rice will harden, so let it come to room temperature before eating.
4. Why is my onigiri falling apart? You either used the wrong kind of rice, or you didn’t press it firmly enough. It’s a delicate balance.
5. Can I freeze onigiri? Yes, you can! Wrap each onigiri tightly in plastic wrap before freezing. To eat, let it thaw or microwave it briefly.
6. What are the most popular onigiri fillings? Classic fillings include salted salmon, tuna mayo, pickled plum (umeboshi), and seasoned kelp (kombu).
7. Do I have to make it a triangle? Of course not! While the triangle is iconic, you can also make them into balls or logs. Have fun with it!
Final Thoughts
You did it! You’re officially an onigiri-making pro. Now go forth and spread the joy of homemade rice balls. Share them with friends, pack them for lunch, or just hoard them all for yourself (no judgment here). You’ve earned it.

