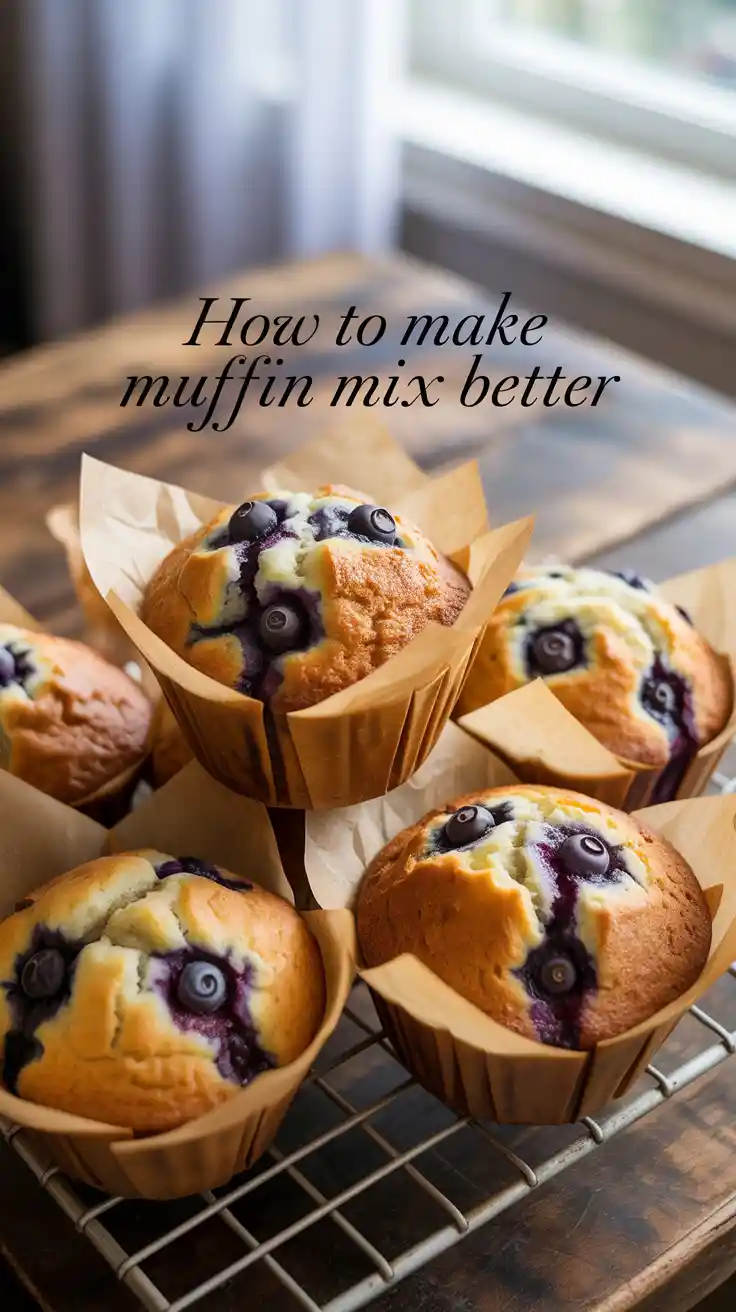
How to Make Muffin Mix Better (And Fool Everyone It’s Homemade)
How to Make Muffin Mix Better (And Fool Everyone Into Thinking It’s Homemade)
We’ve all been there. It’s a Sunday morning, you’re craving something warm and comforting, but the thought of measuring out flour and sugar feels like a Herculean task. You reach for that trusty box of muffin mix—your reliable, convenient friend. But as you stir in the required water and oil, a little voice in your head whispers, “This could be… more.”
That little voice is right. It’s screaming for richness, for flavor, for a texture that doesn’t feel quite so… boxed. Well, today, we listen to that voice. Today, I’m going to show you how to make muffin mix better. So much better, in fact, that you’ll be fending off compliments and politely denying accusations that you secretly moonlight as a pastry chef.
This isn’t about snobbery; it’s about strategy. We’re taking a shortcut and turning it into the scenic route. Let’s elevate that humble box into something truly spectacular.
Why This “Recipe” Is Pure Genius
This is the ultimate low-effort, high-reward baking project. You get the speed and convenience of a box mix without sacrificing the quality and flavor of a truly delicious, homemade-tasting muffin. It’s the best of both worlds, a culinary win-win.
With a few simple swaps and additions, you can transform a standard, slightly bland muffin into a moist, tender, and deeply flavorful masterpiece. We’re talking about achieving that coveted bakery-style texture and taste with about five extra minutes of effort.
Best of all? No one will ever know your secret. You can bring these to a bake sale, a potluck, or a family brunch and graciously accept all the praise. It’s your little secret, a testament to your cleverness in the kitchen.
Ingredients: The Upgrade Arsenal

Think of your box of muffin mix as a blank canvas. We’re the artists, and these are our paints. We’ll start with a standard box of muffin mix (like a simple blueberry or chocolate chip) and its typical requirements, then we’ll dive into the upgrades.
The Base:
- One 12-18 oz box of your favorite muffin mix

The Upgrades & Swaps (Choose your own adventure!):
- INSTEAD OF WATER, USE: Milk, buttermilk, sour cream, or plain yogurt. This is the #1 trick for a richer, more tender muffin.
- INSTEAD OF VEGETABLE OIL, USE: An equal amount of melted unsalted butter. This is a non-negotiable for flavor.
- BOOST THE EGGS: The box usually calls for 1 or 2 eggs. Add one extra egg yolk to what the box requires for unbelievable richness and a softer crumb.
- FLAVOR ENHANCERS (The Secret Weapons):
- 1-2 teaspoons of pure vanilla extract.
- ½ teaspoon of cinnamon or a pinch of nutmeg.
- The zest of one lemon or orange.
- EXTRA GOODIES (Optional but Recommended):
- ½ to 1 cup of extra berries, chocolate chips, or chopped nuts.
- Coarse sugar (like turbinado or demerara) for sprinkling on top.
Tools & Kitchen Gadgets Used
No need for a professional kitchen here. Just the basics will do.
- A Standard Muffin Tin: And of course, muffin liners (or you can make your own!).
- Two Mixing Bowls: One for your upgraded wet ingredients, one for the dry mix.
- A Whisk: For bringing the wet ingredients together.
- A Rubber Spatula: The key tool for gently folding your batter.
- Cookie Scoop: An ice cream or cookie scoop is the secret to perfectly uniform, even-sized muffins.
- Wire Cooling Rack: To let your masterpieces cool without getting soggy bottoms.
Step-by-Step Instructions: The Upgraded Method
Throw those box instructions out the window (well, mostly). We’re on a new path now.
H3: Part 1: The Prep & The Perfect Mix
- Get Ready: Preheat your oven according to the box directions (usually around 375°F or 190°C). Line your muffin tin with liners.
- Upgrade Your Wet Ingredients: In a medium bowl, whisk together your chosen liquid (let’s say buttermilk), your melted butter, the required eggs plus the extra egg yolk, and a teaspoon of vanilla extract. Whisk it all until it’s smooth and combined.
- Prep the Dry: Empty the entire contents of the muffin mix packet into a large mixing bowl. If it came with a can of berries, drain them and set them aside.
- The Gentle Fold: Pour your glorious, upgraded wet ingredients into the bowl with the dry mix. Now, put down the whisk and pick up your rubber spatula. Gently fold the ingredients together until they are just combined. Seriously, stop the second you no longer see big streaks of dry flour.
H3: Part 2: The Final Touches & Baking
- The Cardinal Rule of Muffin Making: Your batter should be lumpy! Lumps are your friend. They are the sign of a tender, fluffy muffin-to-be. Overmixing develops gluten and leads to tough, rubbery hockey pucks.
- Fold in the Extras: Now is the time to gently fold in the drained canned berries (if using) or any extra goodies like fresh blueberries or chocolate chips. Use as few strokes as possible.
- The Bakery Finish: Use a cookie scoop to divide the batter evenly among the muffin liners. They should be about ⅔ to ¾ full. For that professional, crunchy top, sprinkle each muffin with a generous pinch of coarse sugar.
- Bake to Perfection: Bake for the time recommended on the box, but start checking a few minutes early. The added fat and moisture from the upgrades can sometimes slightly alter the baking time. They’re done when a toothpick inserted into the center comes out clean or with a few moist crumbs attached.
- Cool Down: Let the muffins cool in the tin for 5 minutes before moving them to a wire rack to cool completely. This is also when your kitchen will smell like heaven. You’re welcome.
Calories & Nutritional Info

Let’s be real. We just added butter, buttermilk, and an extra egg yolk to a box of muffin mix. This is not health food. But for science, here’s a rough idea:
- Calories per muffin: Expect an increase of 40-80 calories per muffin compared to the box directions, landing you in the 200-300 kcal range depending on the mix and your specific upgrades.
- Fat & Flavor: The fat content will be higher, thanks to the butter and extra yolk. But fat equals flavor and a tender texture, so it’s a worthy trade-off.
- Note: This is an indulgence. It’s designed to be a treat that tastes infinitely better than the standard version. Enjoy it!
Common Mistakes to Avoid (Don’t Sabotage Your Upgrade!)
You’re so close to perfection. Don’t fall at the final hurdle.
- The Overmixing Massacre: I cannot say this enough. If you mix your batter until it’s smooth, you have failed. You will have tough, dense muffins. Embrace the lumps. Fold until just moistened. That is all.
- Getting Too Wild with Add-Ins: Upgrading is fun, but don’t add all the things. If you swap water for yogurt, add an extra yolk, and also throw in a cup of mashed banana, your batter will be too wet and your muffins will be dense and gummy. Pick a few key upgrades and stick to them.
- Forgetting the Topping: A naked muffin is a missed opportunity. That simple sprinkle of coarse sugar before baking creates a delightful crunchy lid that provides a textural contrast to the soft muffin inside. It takes 10 seconds and makes a huge difference.
Variations & Customizations: “Doctoring” Formulas
Ready to play? Here are some specific combinations to try.
- Ultimate Bakery Blueberry Muffins:
- Base: 1 box of blueberry muffin mix.
- Upgrades: Use buttermilk instead of water, melted butter instead of oil, add an extra egg yolk, 1 tsp vanilla extract, and the zest of one lemon. Gently fold in an extra ½ cup of fresh or frozen blueberries. Top with coarse sugar mixed with a little extra lemon zest.
- Death by Chocolate Muffins:
- Base: 1 box of double chocolate or chocolate chip muffin mix.
- Upgrades: Use whole milk or even cooled coffee instead of water, melted butter, an extra egg yolk, and 1 tsp of vanilla or ½ tsp of instant espresso powder to deepen the chocolate flavor. Fold in 1 cup of mixed semi-sweet and dark chocolate chunks.
- Cozy Apple Cinnamon Streusel Muffins:
- Base: 1 box of plain, yellow, or cinnamon swirl muffin mix.
- Upgrades: Use sour cream or plain yogurt instead of water, melted butter, an extra egg yolk, and 1 tsp vanilla. Fold in 1 cup of finely diced apple (tossed in a little cinnamon).
- Streusel Topping: In a small bowl, mix ⅓ cup flour, ¼ cup brown sugar, ½ tsp cinnamon, and 3 tbsp of cold, cubed butter with your fingers until crumbly. Sprinkle generously on top before baking.
FAQ: Your Burning Muffin Mix Questions
- How do I make my box muffins more moist? The best ways are to swap the water for a dairy product like buttermilk, sour cream, or yogurt, and to swap the oil for melted butter. The extra fat and acidity work wonders.
- Can I add fresh fruit to any muffin mix? Yes! For juicy fruits like berries or chopped peaches, toss them in a tablespoon of flour from the mix before folding them in. This helps prevent them from sinking to the bottom.
- How do I get those big, domed “bakery-style” muffin tops? Two tricks: First, let your batter rest for 15-20 minutes after mixing. Second, fill your muffin liners almost to the very top. Finally, start your oven at a higher temperature (like 425°F/220°C) for the first 5-7 minutes, then reduce it to the box temperature without opening the door. This initial blast of high heat causes the muffins to rise rapidly.
- What does adding sour cream or yogurt do to a muffin mix? It adds moisture, fat, and acidity. The acid reacts with the leavening agents in the mix to create a very tender, soft crumb, while the fat adds richness and moisture.
- Can I make these upgrades with a gluten-free muffin mix? Absolutely! All of these swaps and additions work beautifully with a good quality gluten-free muffin mix to improve its flavor and texture.
- Help! I don’t have buttermilk. What can I do? Easy DIY buttermilk: For every 1 cup of milk, stir in 1 tablespoon of lemon juice or white vinegar. Let it sit for 5-10 minutes. It will curdle slightly and be ready to use.
- Can I add a streusel topping? Please do! A simple crumb topping makes any muffin feel ten times fancier. Just mix flour, brown sugar, cinnamon, and cold butter.
Final Thoughts
And there you have it. You’ve successfully hacked the system. You now hold the keys to transforming a humble, unassuming box of muffin mix into a dozen glorious, praise-worthy muffins that taste like they came from a little corner bakery run by angels.
So go forth, you clever, resourceful, semi-homemade genius. Raid your pantry, upgrade that mix, and fill your kitchen with the smell of victory. Your taste buds—and anyone lucky enough to share with you—will thank you.