How to Make Mozzarella Cheese in 30 Minutes (Yes, Really!)
How to Make Mozzarella Cheese in 30 Minutes (Yes, Really!)
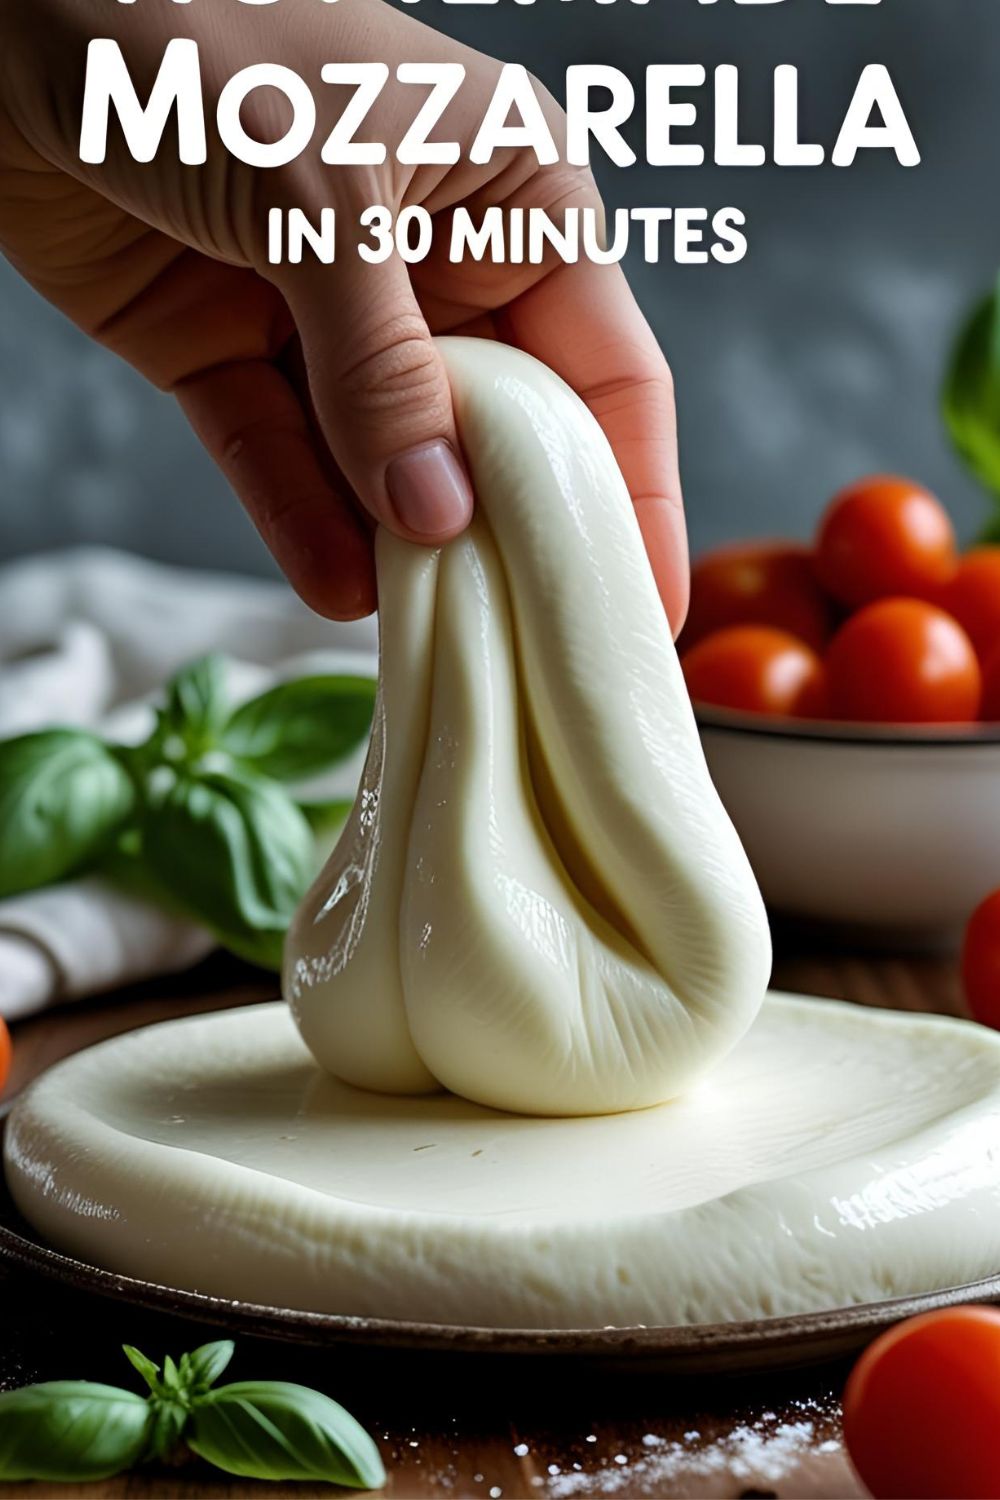
Admit it. You’ve been scrolling through social media, and you’ve seen the video. Someone takes a wobbly blob of white stuff, stretches it like taffy, and magically forms it into a perfect, glistening ball of fresh mozzarella cheese. You probably thought to yourself, “Well, that’s some next-level kitchen wizardry. I could never.” It seems like a complicated, ancient art form best left to Italian nonnas with generations of secrets, right?
What if I told you that in about 30 minutes, you could be performing that exact same magical cheese stretch in your very own kitchen? What if I told you that you are just a few simple ingredients away from the best, freshest mozzarella you’ve ever tasted? Today, we’re learning how to make mozzarella cheese, and it’s so much easier, faster, and more fun than you ever imagined.
This isn’t just a recipe; it’s a science experiment you can eat. Let’s get ready to play with our food and create some magic.
Why This Recipe is Awesome
If “you get to feel like a literal magician” isn’t enough of a selling point, here are a few more reasons why you need to try this.
- It’s Actual, Real-Life Magic: I’m not kidding. You are going to take a simple jug of milk and, with a little science and some stretching, turn it into a ball of delicious, warm, melty cheese. It is the coolest, most satisfying, and most impressive kitchen project you will ever do. Your friends and family will think you’re a genius.
- The Flavor is Unbeatable: There is nothing, and I mean nothing, on this earth like a ball of fresh, warm, still-slightly-salty homemade mozzarella. It’s milky, it’s tender, and it has a texture that the rubbery, pre-packaged stuff from the grocery store can only dream of.
- It’s Insanely Fast: This is not a month-long cheese aging project that takes over your basement. This is a 30-minute miracle. You can literally decide you want fresh mozzarella for your pizza and have it made and ready before your pizza dough has even finished its first rise.
Ingredients

Cheesemaking is a science, so the ingredients are specific and very important. Read this section carefully before you start!
- 1 gallon (about 4 liters) of Whole Milk: This is the most important part. You MUST use milk that is NOT ultra-pasteurized (UHT). Standard pasteurized or even fresh, raw milk is perfect. UHT milk is heated to such a high temperature that its protein structure is changed, and it simply will not form a proper curd. Check the label carefully!
- 1 ½ teaspoons Citric Acid: This is what helps to acidify the milk and start the curdling process. You can often find this at shops that sell baking supplies or look for it online.
- ¼ teaspoon Liquid Rennet: This is the enzyme that coagulates the milk, turning it from a liquid to a solid. Do not use junket rennet. You need real cheesemaking rennet. The liquid form is much easier to measure than tablets, and vegetarian rennet is widely available online if you prefer.
- 1 cup cool, non-chlorinated water, divided
- 1-2 teaspoons non-iodized salt, like kosher or sea salt
Tools & kitchen gadgets used
You don’t need a full-blown creamery, but a few specific tools are non-negotiable for success.
- A Large, Non-Reactive Pot (like stainless steel or an enameled Dutch oven. Do not use aluminum or cast iron.)
- An Instant-Read Thermometer: This is not a suggestion. It is a requirement. Cheesemaking is all about hitting precise temperatures.
- A Long Knife (long enough to reach the bottom of your pot)
- A Slotted Spoon
- A Microwave-Safe Bowl
- Food-Safe Gloves (optional, but highly recommended for stretching the hot curd without burning your hands)
- Measuring Spoons
Step-by-step instructions
Read through all the steps, get your station ready, and prepare for some delicious alchemy.

Step 1: Prepare Your Potions In a small bowl, dissolve the 1 ½ teaspoons of citric acid in ½ cup of cool water. In a separate small bowl, dilute the ¼ teaspoon of liquid rennet in the other ½ cup of cool water. Set them both aside.
Step 2: Acidify and Heat the Milk Pour your gallon of milk into your large, cold pot. Stir in the citric acid solution. Now, place the pot on the stove over medium heat. This is where your thermometer is your best friend. Stirring gently now and then to prevent scorching, heat the milk until it reaches exactly 90°F (32°C).
Step 3: Add the Rennet Immediately remove the pot from the heat. Pour in your diluted rennet solution. Stir gently and continuously with an up-and-down motion for exactly 30 seconds, then stop the motion of the milk with your spoon.
Step 4: The Magic Curdle Cover the pot with a lid and walk away for 5 to 10 minutes. Do not touch it. Do not peek. Do not jiggle it. During this time, the rennet is doing its magic, and the milk will set into a solid mass that looks like a giant, wobbly block of panna cotta.
Step 5: Cut the Curds Once the curd is set (it should pull away cleanly from the side of the pot), take your long knife and cut the curd. First, cut straight down in parallel lines about 1 inch apart. Then, turn the pot 90 degrees and cut again, creating a 1-inch checkerboard pattern.
Step 6: Cook the Curds Place the pot back on the stove over medium-low heat. Stirring very, very gently, heat the curds until the temperature of the liquid whey reaches 105°F (41°C). The curds will clump together and separate more from the greenish-yellow whey. Remove from the heat and let sit for 5 more minutes.
Step 7: Drain the Curds Using your slotted spoon, carefully scoop the curds out of the whey and place them into your microwave-safe bowl. Gently press on the curds to squeeze out a bit more whey.
Step 8: The Microwave Stretch (The Fun Part!) Place the bowl of curds in the microwave and heat on HIGH for 1 minute. Remove the bowl (it will be hot!) and drain off any whey that has been released. At this point, the curd will be starting to look melty.

Step 9: Fold and Stretch! This is where gloves come in handy! Sprinkle the salt over the curd. Using a spoon or your gloved hands, begin to stretch and fold the hot curd back on itself, like you’re kneading taffy. It will be lumpy and weird at first. This is normal.
Step 10: One More Zap Pop the curd back in the microwave for another 30 seconds. Drain any more whey. Now, get back to stretching! This time, the curd should become smooth, shiny, and beautifully elastic. Stretch it and fold it until it has the texture of perfect mozzarella.
Step 11: Shape and Chill Once it’s smooth and stretchy, shape your mozzarella into one large ball or several smaller ones. Immediately place the ball(s) into a bowl of ice water for about 15 minutes to cool down and firm up. Your masterpiece is complete.
Calories & Nutritional Info

This is for the glorious cheese you just created.
- Serving Size: 1 ounce (28g)
- Estimated Calories: Around 70-85 kcal.
- Rich in: Protein, calcium, and the immense satisfaction of having made your own cheese.
Common Mistakes to Avoid
Cheesemaking is a science. Avoid these lab accidents for a perfect result.
- USING THE WRONG KIND OF MILK: I will shout this from the rooftops. If you use ultra-pasteurized (UHT) milk, your curds will not set properly. It has been heated too high, and the proteins are damaged. You will end up with a sad, milky, ricotta-like soup and a broken heart. You MUST use regular pasteurized or raw whole milk.
- Ignoring Your Thermometer: Cheesemaking is all about hitting precise temperatures to activate enzymes and culture bacteria. The temperatures listed in this recipe are not suggestions. You must use an instant-read thermometer to be accurate.
- Over-stirring After Adding the Rennet: Rennet creates a delicate web of proteins. If you keep stirring after your 30 seconds are up, you will break apart that fragile network as it’s trying to form, resulting in weak, soupy curds. Stir for 30 seconds and then STOP.
- Giving Up on the Stretch Too Soon: Your first attempt to stretch the curd after the first microwave zap might be a lumpy, shaggy mess. That’s okay! It needs to get hot enough to become elastic. Don’t give up; just pop it back in the microwave for another 15-30 seconds. The heat is what makes it stretchy.
Variations & Customizations
Once you’re a mozzarella master, you can start experimenting.
- Herb-Infused Mozzarella (A Local Twist): During the final stretching phase, knead in some finely chopped fresh mint (pudina) and cilantro (dhonia). The fresh, bright herbs are an incredible contrast to the rich, milky cheese.
- Smoked Mozzarella: After you’ve formed and cooled your mozzarella ball, you can use a handheld smoking gun or a traditional smoker to infuse it with a light, smoky flavor that is incredible when melted on pizza.
- Spicy Mozzarella: During the final stretching phase, knead in a pinch of red chili flakes for a little bit of heat. This is amazing in grilled cheese sandwiches or chopped into a salad.
FAQ Section
All your cheesy questions, answered.
1. Why didn’t my milk form a solid curd? The most likely culprit is that you used ultra-pasteurized (UHT) milk. The second most likely reason is that your rennet was old and had lost its potency.

2. Why isn’t my mozzarella stretching? It’s almost certainly not hot enough. The curd needs to reach an internal temperature of about 135°F (57°C) to become elastic. Pop it back in the microwave for another 15-30 seconds and try again.
3. Where do I buy citric acid and rennet? These can be the trickiest ingredients to find. Check larger supermarkets in the baking or specialty sections. Otherwise, they are easily available from online retailers that specialize in baking and cheesemaking supplies and ship across Bangladesh.
4. What can I do with all the leftover whey? Don’t throw it out! Whey is packed with protein. You can use it in place of water when making the dough for roti or paratha, add it to smoothies for a protein boost, or even feed it to your garden plants—they love it.
5. Can I make mozzarella without a microwave? Yes, the traditional method is to heat the drained curds in a pot of hot water (or the whey itself) heated to about 175°F (80°C). You then scoop the hot curds out and stretch them as directed.
6. How do I store my homemade mozzarella? Fresh mozzarella is best eaten within a day or two. Store it in the refrigerator, submerged in a light brine (1 teaspoon of salt per cup of cool water) or in the leftover whey.
7. What kind of salt is best for cheesemaking? It’s best to use a non-iodized salt, like kosher salt or sea salt. The iodine in regular table salt can sometimes interfere with the cheesemaking process.
Final Thoughts
And just like that, with a little heat and a little science, you have become a cheesemaker. You’ve transformed a simple jug of milk into a ball of fresh, warm, stretchy, delicious perfection. You have unlocked a new level of kitchen badassery.
Now go, make the best pizza or caprese salad of your life. Put it in a sandwich with fresh tomatoes and basil. Or just stand over the sink and eat it with your hands while it’s still warm. You’ve more than earned it.