How to Make Kolaches with Biscuit Dough (and Fool Everyone)
Okay, let’s have a real talk. You woke up craving a warm, soft, pillowy pastry filled with something delicious. But then reality hits. You remember that traditional kolaches involve yeast, proofing, rising, and a level of patience you simply don’t possess before your first cup of coffee. I see you. I am you. This is precisely why I’m about to show you how to make kolaches with biscuit dough, a shortcut so brilliant, so outrageously easy, that you’ll wonder why you ever bothered with yeast in the first place.
I can already hear the collective gasp of every Czech grandmother, and to them I say: I honor your tradition, but sometimes a person just needs a pastry in under 30 minutes. Is that so wrong? This isn’t about authenticity; it’s about delicious, buttery, shortcut-fueled genius. Prepare to enter the no-yeast zone.
Why This Recipe Is Your New Best Friend
Still on the fence about committing this act of beautiful pastry sacrilege? Let me convince you.
First, this recipe is ridiculously fast. From the pop of the biscuit can to you pulling a tray of golden-brown beauties out of the oven, we’re talking about 25 minutes, tops. You can decide you want kolaches and be eating them before a traditional dough has even finished its first rise. That’s what I call progress.
Second, it’s practically foolproof. Canned biscuit dough is engineered for success. It wants to be fluffy. It wants to be golden. You don’t have to worry about killing your yeast or punching down dough. Your only job is to not burn them. You can do that, right?

Finally, the customization is endless. These biscuit-kolaches are the perfect blank canvas for whatever your heart desires. Sweet, savory, a mix of both on the same tray—go wild! They’re the choose-your-own-adventure of breakfast pastries.
Ingredients: The Easiest Shopping List Ever
This is less of a “shopping list” and more of a “raid your fridge” situation. It’s glorious.
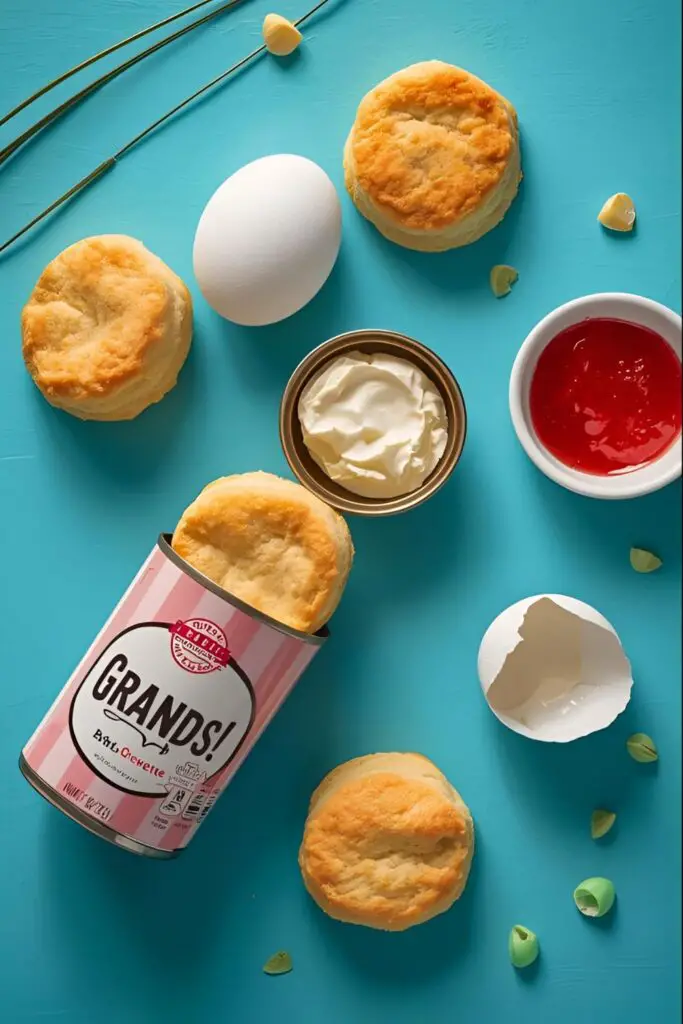
- 1 can (16.3 oz) refrigerated biscuit dough: The big, “Grands!” style biscuits are your best bet. You want a decent-sized canvas for your fillings.
- 1 large egg, beaten (for an egg wash): This is for getting that shiny, professional-bakery look. You can also just use melted butter.
- Your Fillings of Choice! Here are some ideas:
- For Sweet Kolaches: Fruit pie filling (canned or homemade), cream cheese filling (see below), jam, preserves, or even a dollop of Nutella.
- For Savory Kolaches: Small cooked breakfast sausage links or patties, shredded cheese, chopped jalapeños, scrambled eggs.
- For Cream Cheese Filling (Optional but Recommended):
- 4 oz cream cheese, softened
- 2 tbsp granulated sugar
- 1/2 tsp vanilla extract
- 1 tbsp milk or cream
Tools & Kitchen Gadgets Used
No need for a bunch of fancy equipment. You probably have all this stuff already.
- Baking Sheets: At least one large one, but two makes it easier.
- Parchment Paper or Silicone Baking Mat: For easy cleanup and to prevent sticking. A true lifesaver.
- Small Mixing Bowls: For your fillings and the egg wash.
- Rolling Pin (Optional): You can also just use your hands or the bottom of a glass.
- Measuring Spoons: For making the cream cheese filling.
- Pastry Brush: For applying that glorious egg wash or melted butter.
- Spatula: For transferring your hot, delicious creations.
Step-by-Step Instructions: The Path to Pastry Glory
Ready for the easiest baking project of your life? Let’s roll.
Step 1: Prep Your Station
Preheat your oven to 375°F (190°C). Line a large baking sheet with parchment paper. If you’re making the cream cheese filling, now’s the time to mix the softened cream cheese, sugar, vanilla, and milk in a small bowl until it’s smooth. This is also a good time to pop that can of biscuits and try not to jump when it does.
Step 2: Flatten Those Biscuits
Separate the biscuits and place them on your prepared baking sheet, giving them a couple of inches of space. Now for the fun part. Using your fingers, the palm of your hand, or a rolling pin, flatten each biscuit into a circle about 3-4 inches in diameter. Don’t make them paper-thin, just a bit wider and flatter than they came out of the can.
Step 3: Create the Well

This is the key step! Using your thumb or the back of a spoon, press a deep indentation into the center of each flattened biscuit. Don’t press all the way through, but create a definite “well” for the filling. Make sure the edges stay puffy and raised. This little nest will cradle your delicious fillings and keep them from escaping.
Step 4: Fill ‘Em Up!
Now, the moment of truth. Spoon about 1 to 1.5 tablespoons of your desired filling into the well of each biscuit. Resist the temptation to overfill! I know you want to, but trust me, an overfilled kolache becomes a volcanic mess in the oven. A little goes a long way.
Step 5: Get That Golden Glow
Gently brush the raised edges of the dough with your beaten egg wash or some melted butter. This step is what gives them that beautiful, shiny, golden-brown finish that screams “I’m a professional baker.” Let’s not tell them our secret, okay?
Step 6: Bake to Perfection
Slide that beautiful tray into the preheated oven. Bake for 12-15 minutes, or until the edges are a deep golden brown and the filling is bubbly. Keep an eye on them—ovens vary, and the line between “golden” and “uh oh” is a fine one.
Once they’re done, let them cool on the baking sheet for a few minutes before moving them to a wire rack to cool completely… or, you know, eat them while they’re still molten-hot. I won’t judge.
Calories & Nutritional Info

Disclaimer: This is a wild estimate because your fillings will change everything. But let’s give it a shot.
- Serving Size: 1 kolache
- Estimated Calories per Serving (with fruit filling): Approximately 200-250 calories.
- A Note on Nutrition: These are a delightful breakfast treat, not a health food. They are rich in carbs and, depending on the filling, sugar or fat. Enjoy them in moderation, or don’t. Your life, your rules. IMO, happiness is a nutrient.
Common Mistakes to Avoid (Please Learn From My Failures)

I’ve made the mistakes so you don’t have to. You’re welcome.
- The Overfill Catastrophe: I know I said it before, but it bears repeating. Do not overfill your kolaches. A tablespoon is plenty. If you stuff it too full, the filling will bubble over and weld itself to your baking sheet, creating a sticky, sad mess.
- Forgetting the Indentation: If you just plop the filling on a flat biscuit, it has nowhere to go. It will slide right off as the biscuit puffs up. You’ll end up with a plain biscuit next to a sad, baked puddle of jam. Press that well in firmly.
- Using the Wrong Biscuits: Those small, flaky-layer biscuits are great for other things, but not this. They tend to separate and won’t hold the filling properly. Stick with the larger, “Southern Homestyle” or “Grands!” type biscuits.
- Skipping the Egg Wash or Butter: Can you make them without it? Sure. But they’ll look pale and anemic. For that pro-level golden-brown finish, a quick brush of egg or butter is a must.
Variations & Customizations
Here’s where you can really get creative. The biscuit is your oyster… or something like that.
- Savory Breakfast Bombs: Before baking, fill the wells with a little pre-cooked crumbled sausage, a sprinkle of cheddar cheese, and some chopped chives. It’s like a complete breakfast in one convenient, handheld package.
- Pizza Kolaches: A spoonful of marinara sauce, a pinch of shredded mozzarella, and a mini pepperoni in the center. Brush the edges with melted butter mixed with garlic powder and Italian seasoning. The kids will go nuts for these.
- Lemon Blueberry Bliss: Fill the well with cream cheese filling, then top with a few fresh blueberries and a little lemon zest before baking. After they come out of the oven, drizzle with a simple glaze made from powdered sugar and lemon juice.
FAQ: Answering Your Kolache Quandaries
So… are these real kolaches?
Let’s be blunt: no. A traditional Czech kolach is made with a sweet, yeasted dough that is a true labor of love. This is a brilliant, delicious, and speedy imposter. Think of it as the kolache’s fun, less-work-obsessed cousin.
Can I use my own homemade biscuit dough?
Absolutely! If you have a favorite recipe for sturdy, non-flaky biscuits, go for it. The process will be exactly the same.
Can I make these ahead of time?
You can assemble them ahead of time and keep them covered in the fridge for a few hours before baking, but they are definitely best served warm and fresh from the oven. The dough will get a bit tough if it sits too long.
How do I store leftovers?
Store any leftover kolaches in an airtight container in the refrigerator for up to 3 days. You can reheat them in the microwave for about 15-20 seconds or in a toaster oven for a few minutes to bring them back to life.
My filling leaked everywhere! What did I do wrong?
You probably either overfilled it or didn’t make your well deep enough with high enough sides. It’s a delicate balance! Next time, try a little less filling and make sure you’ve created a solid little doughy wall around it.
What are the absolute best fillings to use?
This is highly subjective, but the classics are classic for a reason. Canned poppy seed filling, apricot preserves, and the cream cheese filling are all top-tier choices. For savory, you can’t go wrong with sausage and cheddar. TBH, the best filling is whatever you have in your fridge.
Can I use crescent roll dough for this?
You could, but it won’t be quite the same. Crescent dough is flakier and less dense, so it will create a lighter, more croissant-like pastry. It’s also delicious, just a different vibe!
Final Thoughts
There you have it. You’re now armed with a recipe that delivers maximum pastry satisfaction with minimum effort. You’ve learned how to bend the rules of baking to your will, creating something utterly delicious that will make any morning better.
So go forth and bake! Impress your family, delight your friends, or just treat yourself. And the next time you see a can of biscuits, I hope you see not just biscuits, but a world of pillowy, pastry potential. You’ll never look at them the same way again.