How to Make Kimbap: Your Ultimate Guide to Korean Seaweed Rice Rolls
Have you ever scrolled through food pics online and seen those beautiful, colorful seaweed rice rolls and thought, “Wow, I could never make that”? Well, I’m here to tell you that you’re wrong. Today, we’re demystifying the art of Korean rice rolls. This is your ultimate guide on how to make kimbap, and I promise, by the end of this, you’ll be a rolling machine. And no, for the last time, it’s not just “Korean sushi”!
Why This Recipe is Your New Favorite Thing
So, why should you clear your schedule to make kimbap? First off, it’s a complete, satisfying meal packed into a perfect, portable roll. We’re talking seasoned rice, savory proteins, and a rainbow of fresh, crunchy vegetables. What’s not to love? It’s the ultimate picnic food, the champion of lunch boxes, and a fun “make your own” dinner party idea.
Second, it’s a work of art that you can eat. Every slice reveals a beautiful mosaic of colorful fillings. You’ll look like a culinary artist, even if your rolling skills start off a little… abstract. The best part? It’s infinitely customizable. Once you learn the basic technique, you can throw pretty much anything you want in there. Leftover chicken? In it goes. That weird block of tofu in your fridge? Yep, that too.
Ingredients (The Kimbap Crew)
Making kimbap is all about the prep. Get your ingredients ready, and the rolling part is a breeze. This is a classic combination, but feel free to go wild.
For the All-Important Rice:
- 2 cups uncooked short-grain white rice (like sushi rice). This is non-negotiable!
- 2 ½ cups water
- 2 tablespoons sesame oil
- 1 teaspoon salt
For the Classic Fillings:
- 4-5 sheets of roasted seaweed (gim/nori)
- 2 large eggs, beaten
- 1 large carrot, julienned
- 5 ounces spinach, washed
- 4-5 strips of yellow pickled radish (danmuji), available at Korean or Asian markets
- 4-5 strips of seasoned burdock root (gobo), also at Asian markets (optional but adds great texture)
- Protein of your choice:
- Bulgogi Beef: ½ lb thinly sliced beef, marinated and cooked.
- Imitation Crab Sticks: 4-5 sticks, left whole or shredded.
- Canned Tuna: 1 can, drained and mixed with a little mayo.
- Sesame oil and salt for seasoning the veggies.
Key Substitutions:
- Rice: In a desperate pinch, you could use medium-grain rice, but never use long-grain rice like Basmati or Jasmine. It just won’t stick together.
- Veggies: Don’t have pickled radish? Use cucumber sticks. Can’t find burdock root? Leave it out. Use avocado, bell peppers, or whatever crunchy veggies you love.
- Protein: Ham, Spam (a true classic!), or fried tofu are all fantastic substitutes.
Tools & Kitchen Gadgets Used:
These tools will make you a kimbap-rolling pro.
- A Bamboo Rolling Mat (Gimbal): This is your most important tool. It helps you get a tight, even roll.
- A Very Sharp Knife: A dull knife will squish your beautiful roll into a sad, misshapen log.
- Rice Cooker: For perfectly cooked rice every time, without the guesswork.
- Large Mixing Bowl: For seasoning the rice. A wooden one is traditional, but any bowl will do.
- Rice Paddle: For fluffing and mixing the rice without crushing the grains.
- Skillet: For cooking your egg and other fillings.
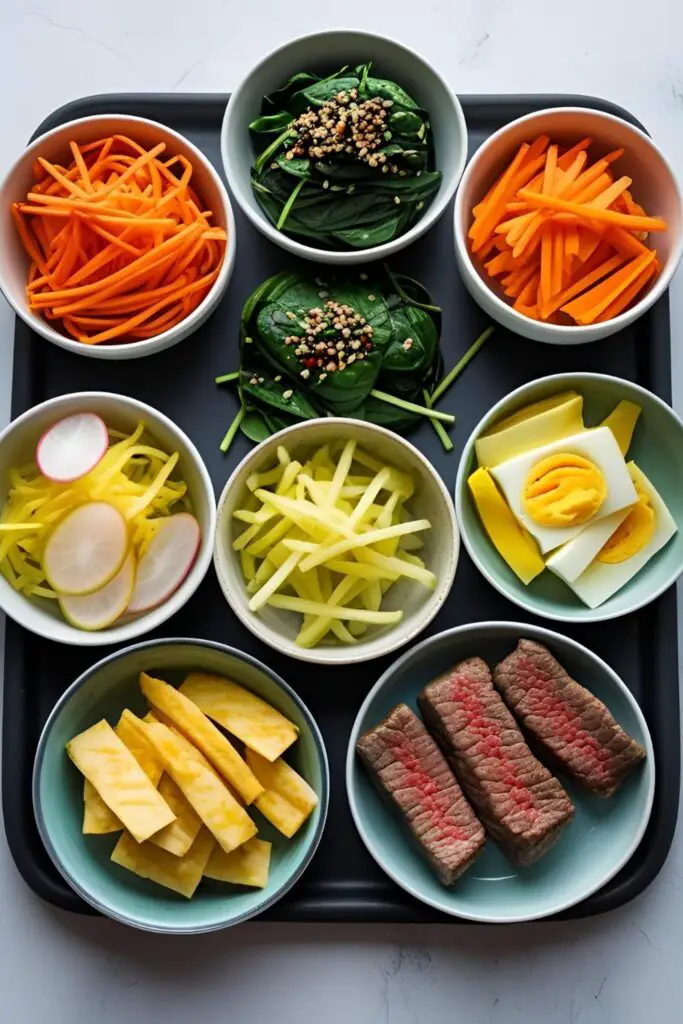
- Small Bowls: For organizing all your prepped fillings (your mise en place, if you’re feeling fancy).
- Pastry Brush: For brushing the finished rolls with sesame oil.
Step-by-Step Instructions (Let’s Get Rolling!)
Don’t be intimidated. We’re going to break this down. Deep breaths. You can do this.
Part 1: The Great Prep-A-Thon
- Make the Rice: Cook your short-grain rice in a rice cooker or on the stovetop. As soon as it’s done, transfer it to a large bowl. While it’s still hot, drizzle with 2 tablespoons of sesame oil and 1 teaspoon of salt. Gently mix with a rice paddle, using a cutting motion to separate the grains. Let it cool down until it’s no longer steaming but still warm.
- Carrots: Sauté your julienned carrots in a skillet with a pinch of salt for 2-3 minutes until they’re slightly tender but still have a bite. Set aside.
- Spinach: Blanch the spinach in boiling water for about 30 seconds. Immediately drain it and rinse with cold water to stop the cooking. Squeeze out as much water as humanly possible. Seriously, wring it out. Then, toss it with a little sesame oil and salt. Set aside.
- Egg: Pour the beaten eggs into a lightly oiled skillet over medium-low heat to create a thin, flat omelet. Cook for a few minutes per side. Let it cool, then slice it into long, thin strips. Set aside.
- Protein: Cook your chosen protein (like bulgogi) and set it aside. If you’re using crab sticks or tuna, just have them ready to go.
- Create Your Assembly Line: Arrange all your beautiful, colorful fillings in separate bowls or on a large plate. You should have your seasoned rice, seaweed sheets, and all your fillings ready to go. This is your kimbap command center.
Part 2: The Art of the Roll
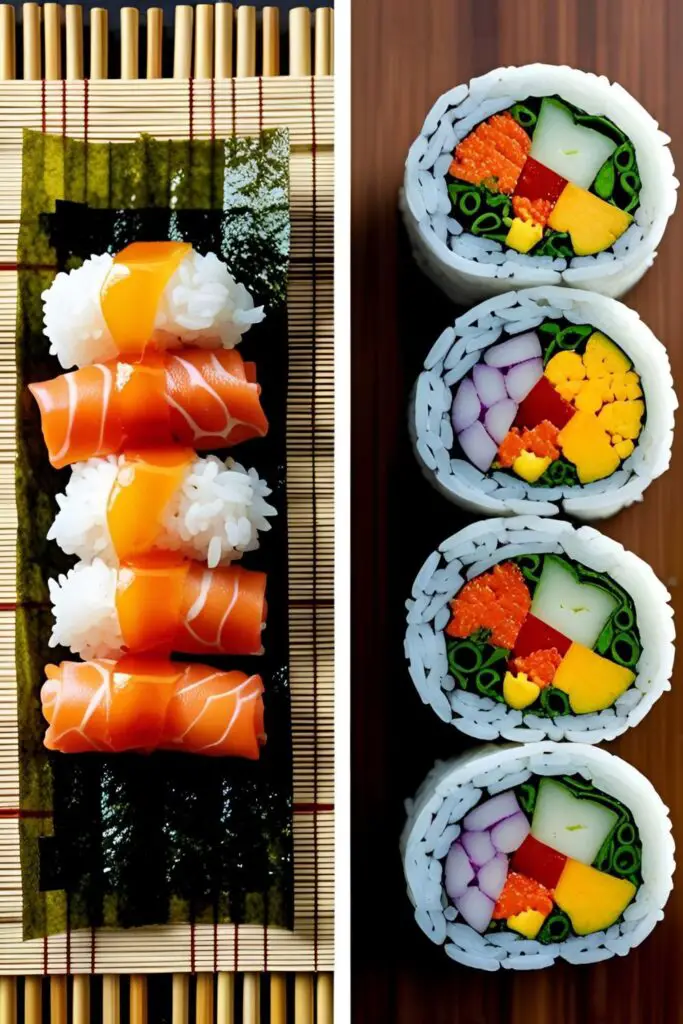
- Set Up Your Mat: Place your bamboo rolling mat on a clean, flat surface. Place one sheet of seaweed, shiny side down, on the mat with the longer side facing you.
- Spread the Rice: Wet your hands with a little water or sesame oil to prevent sticking. Grab a handful of rice (about ¾ to 1 cup) and spread it evenly over the seaweed, leaving about a 1-inch border at the top edge away from you. This empty space is crucial for sealing the roll!
- Lay the Fillings: About a third of the way up from the bottom of the rice, lay your fillings in neat, horizontal lines. Don’t overstuff it! I know it’s tempting, but a modest amount of each filling is best.
- The Tuck and Roll: Now for the main event. Start from the edge closest to you. Lift the edge of the bamboo mat with your thumbs, using your other fingers to hold the fillings in place. Roll it up and over the fillings, tucking it in tightly to create a firm core.
- Keep Rolling: Continue rolling the kimbap away from you, applying gentle, even pressure with the mat as you go. You want a tight, compact log.
- Seal the Deal: When you get to the empty seaweed border at the top, dab a little bit of water or use a few grains of rice to help it seal shut.
Part 3: The Finishing Touches
- Get Glossy: Brush the outside of your finished roll with a little bit of sesame oil. This gives it a beautiful shine and a nutty aroma.
- Slice It Up: Using your very sharp, slightly oiled or wet knife, slice the roll into ½- to ¾-inch thick pieces. Wipe the knife clean between cuts for the cleanest slices.
- Admire Your Work: Arrange your beautiful kimbap slices on a plate and admire your handiwork. You did it! Now, repeat with the remaining ingredients.
Calories & Nutritional Info (It’s Basically a Salad, Right?)
The nutritional info for kimbap can vary wildly depending on what you stuff inside. Here’s a rough estimate for one classic roll (about 8-10 pieces).
- Estimated Calories: 350-450 per roll
- Carbohydrates: Mostly from the rice.
- Protein: Varies based on your filling (beef, egg, tuna, etc.).
- Fat: Mainly from the sesame oil and any protein fillings.
- Vitamins & Minerals: You’re getting a good dose from all those veggies!
Common Mistakes to Avoid (Save Yourself from Kimbap Catastrophe)
- Using the Wrong Rice: I’m serious about this. Long-grain rice will lead to a crumbly, sad roll that falls apart. You need the stickiness of short-grain rice.
- Overfilling the Roll: It’s tempting to load it up, but this is the #1 cause of exploding kimbap. Be modest with your fillings. Less is more until you get the hang of it.
- Not Rolling Tightly Enough: A loose roll will fall apart when you slice it. Use that bamboo mat to apply gentle but firm pressure as you roll.
- Using a Dull Knife: A dull knife will squish your roll instead of slicing it cleanly. A sharp, wet knife is your best friend.
- Spreading Rice to the Very Edge: You need that 1-inch border of bare seaweed at the top to seal your roll. Don’t forget it!
Variations & Customizations (The “Anything Goes” Roll)
Kimbap is a canvas for your culinary creativity.
- Spicy Tuna Kimbap: A crowd favorite! Mix a can of drained tuna with mayonnaise, a squirt of sriracha, and a little sesame oil. Add this along with some crunchy cucumber and creamy avocado.
- Fully Loaded Veggie Kimbap (Vegan-Friendly): Ditch the egg and meat and load up on veggies! Use pan-fried firm tofu (marinated in soy sauce), avocado slices, bell pepper strips, cucumber, and extra carrots and spinach.
- Breakfast Kimbap: Why not? Fill it with scrambled eggs, cooked bacon or sausage, and maybe some American cheese slices. It sounds weird, but IMO, it’s weirdly delicious.
FAQ Section (Your Kimbap Questions, Answered)
Let’s clear up some common kimbap queries.
1. What is the difference between kimbap and sushi? Sushi rice is seasoned with vinegar and sugar, and it often features raw fish. Kimbap rice is seasoned with sesame oil and salt, and the fillings are almost always cooked or preserved (pickled, roasted, etc.).
2. Why is my kimbap roll falling apart? It’s likely one of three things: you used the wrong kind of rice, you overfilled it, or you didn’t roll it tightly enough.
3. Do you eat kimbap with soy sauce? Unlike sushi, kimbap is seasoned so well on its own that it’s typically eaten without any dipping sauce.
4. Can I make kimbap ahead of time? Kimbap is best enjoyed the day it’s made, as the rice can harden in the fridge. However, you can make it a few hours ahead and keep it at room temperature, well-wrapped. If you must refrigerate it, let it sit out for 20-30 minutes to take the chill off before eating.
5. How do I keep the rice from sticking to my hands? Keep a small bowl of water or sesame oil nearby and dip your fingers in it before handling the rice. It’s a game-changer!
6. My seaweed sheet tore while I was rolling. What do I do? Don’t panic! You can try to patch it with a small piece of another seaweed sheet, using a bit of water as glue. Or, just finish the roll as best you can and call that one the “chef’s treat.”
7. Where can I find yellow pickled radish (danmuji)? You can find it in the refrigerated section of most Korean or large Asian grocery stores. It’s a key ingredient for that classic kimbap crunch and flavor!
Final Thoughts (You’re a Rolling Pro Now!)
Congratulations! You are now a certified kimbap-making machine. You’ve conquered the rice, prepped the fillings, and mastered the art of the roll. No longer will you have to gaze longingly at pictures of perfect rice rolls; you can make them yourself!
So go on, host a kimbap-making party, pack the perfect picnic, or just enjoy a delicious and satisfying meal. You’ve officially unlocked a new level of kitchen prowess. And you’ll probably never look at a sad, pre-made grocery store roll the same way again. 😉


