How to Make Jimmy John’s Bread (The Freaky Fast Copycat Recipe)
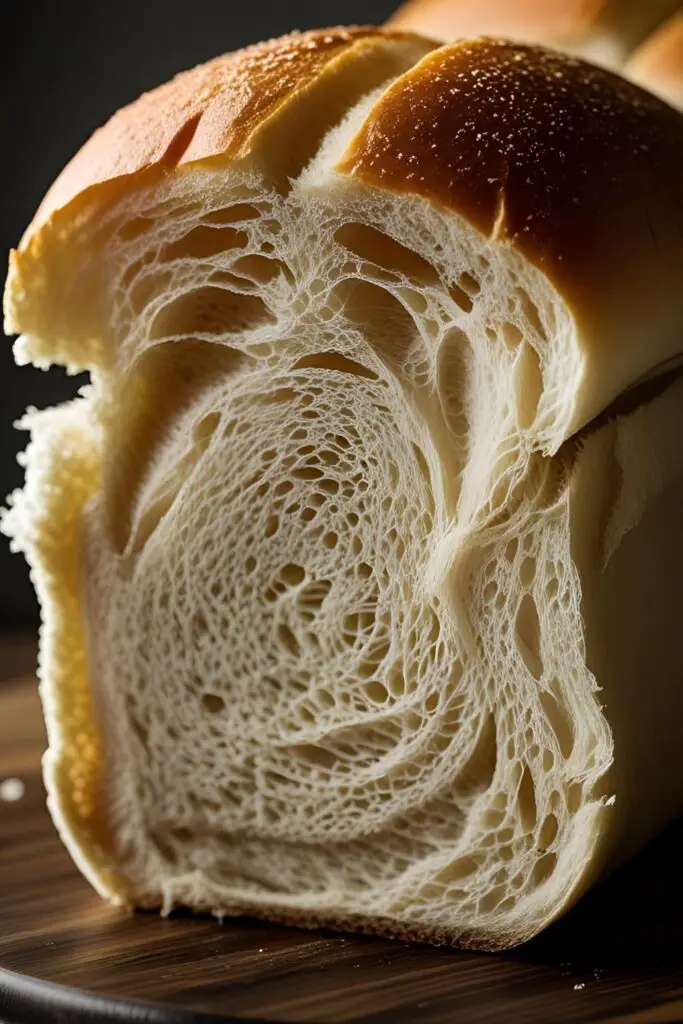
Let’s be real for a second. When you crave a Jimmy John’s sandwich, what are you really craving? The turkey? The Vito? The controversial sprouts? No. You’re craving the bread. It’s the unsung hero, the perfect vessel that’s soft and squishy on the inside but has that distinct, ever-so-slight chew on the outside. Well, what if I told you that you no longer have to pay delivery fees to get your fix? Today, you’re going to learn how to make Jimmy John’s bread at home, and your sandwich game will never be the same again.
Why This Recipe Is a Legitimate Game-Changer
So, why should you, a busy person with important things to do, venture into the world of bread-making for this specific recipe? Because this isn’t just any bread; it’s the key to unlocking sandwich nirvana. This copycat recipe nails that signature texture—soft, slightly chewy, and sturdy enough to hold all your fillings without turning into a soggy mess.
Beyond the perfect texture, there’s the sheer satisfaction of pulling a loaf of this iconic bread out of your own oven. The smell alone is worth the (minimal) effort. Plus, once you master this, you can have that freaky fresh bread any time you want, for any sandwich you can dream up. It’s like having a Jimmy John’s in your kitchen, but without the employee staring at you while you decide between pickles or no pickles.
Ingredients: Your Path to Sandwich Perfection
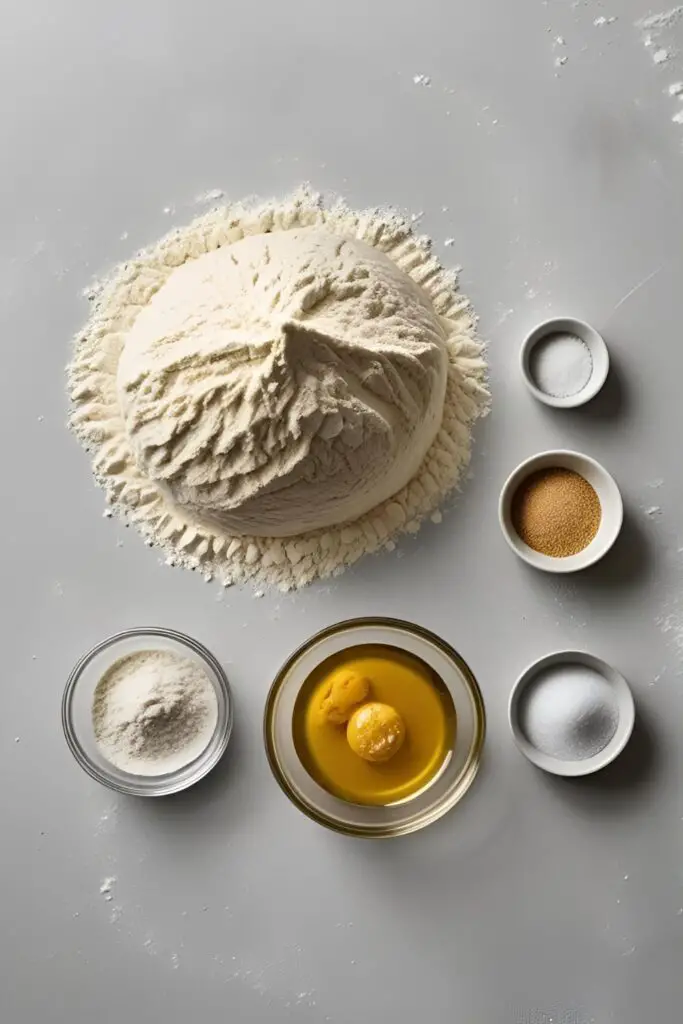
The beauty of this bread is its simplicity. No weird, fancy ingredients required.
- 1 ½ cups warm water (about 110-115°F or 43-46°C—like a nice, warm bath for the yeast)
- 2 teaspoons active dry yeast
- 2 tablespoons granulated sugar
- 1 ½ teaspoons salt
- 4 cups bread flour, plus more for dusting
- 2 tablespoons vegetable oil or other neutral oil
Key Substitutions:
- Yeast: You can use instant yeast instead of active dry. If you do, you can skip the “blooming” step and just mix it in with your dry ingredients.
- Bread Flour: Bread flour has a higher protein content, which gives the bread its signature chew. You can use all-purpose flour in a pinch, but the texture won’t be quite the same.
- Sugar: A little honey or maple syrup can work as a substitute if needed.
Tools & Kitchen Gadgets Used: Your Baking Arsenal
While you can make this by hand, a stand mixer will make your life significantly easier.
- Stand Mixer with a dough hook attachment (highly recommended)
- Large mixing bowl (if kneading by hand)
- Measuring cups and spoons
- Baking sheet
- Parchment paper
- Plastic wrap or a clean kitchen towel
Step-by-Step Instructions: Let’s Get This Bread

Ready to bake? Let’s break this down into easy, manageable steps. Don’t be scared of the yeast; it just wants to be your friend.
- Wake Up the Yeast: In the bowl of your stand mixer (or a large bowl), combine the warm water, sugar, and yeast. Give it a gentle stir and then let it sit for 5-10 minutes. You’re looking for it to get foamy or “bubbly” on top. This is called blooming, and it’s how you know your yeast is alive and ready to party. If it doesn’t foam, your yeast is dead. RIP. Start over with fresh yeast.
- Mix the Dough: Once your yeast is bubbly, add the salt, oil, and about 3 ½ cups of the bread flour to the bowl. Fit your mixer with the dough hook and mix on low speed until a shaggy dough forms.
- Knead It Good: Increase the mixer speed to medium-low and let it knead the dough for 8-10 minutes. The dough should become smooth, elastic, and pull away from the sides of the bowl. If it’s still super sticky after a few minutes, add the remaining ½ cup of flour, one tablespoon at a time.
- No Mixer? Turn the shaggy dough out onto a lightly floured surface and knead by hand for 10-15 minutes until it’s smooth and elastic. It’s a great workout.
- The First Rise: Form the dough into a ball. Lightly grease a large bowl with oil, place the dough inside, and turn it over once to coat. Cover the bowl with plastic wrap or a damp kitchen towel and place it in a warm, draft-free spot for 1 to 1.5 hours, or until it has doubled in size.
- Shape Your Loaves: Gently punch down the risen dough to release the air. Transfer it to a lightly floured surface and divide it into four equal pieces. Shape each piece into a log about 8 inches long, just like their famous sub rolls.
- The Second Rise: Place the shaped loaves on a baking sheet lined with parchment paper, leaving a few inches between them. Cover them loosely with plastic wrap and let them rise again for another 30-45 minutes, or until they look puffy.
- Time to Bake: About 15 minutes before the second rise is done, preheat your oven to 400°F (200°C).
- Bake to Golden Perfection: Uncover the loaves and bake for 15-20 minutes, or until they are a beautiful light golden brown. The internal temperature should be around 190-200°F (88-93°C).
- Cool It Down: Transfer the baked loaves to a wire rack to cool completely before slicing. This is the hardest part. The smell will be intoxicating, but slicing into hot bread can ruin its texture. Be strong.
Calories & Nutritional Info (It’s Bread, Let’s Be Real)
Here’s a rough idea of what you’re looking at.
- Serving Size: One 8-inch loaf
- Estimated Calories: Around 450-500 per loaf
- Protein: Approximately 14g
- Fat: Around 5g
- Carbohydrates: Roughly 85g
Nutritional Note: It’s carbs. Glorious, delicious carbs. Perfect for fueling your day or building an epic sandwich.
Common Mistakes to Avoid: A Guide to Bread Bliss
- Killing Your Yeast: If your water is too hot (over 120°F), it will kill the yeast, and your bread won’t rise. If it’s too cold, the yeast won’t activate. The 110-115°F “warm bath” temperature is the sweet spot.
- Under-Kneading: If you don’t knead the dough enough, the gluten won’t develop properly, and you’ll end up with a dense, sad loaf of bread. Don’t skimp on the kneading time!
- Over-Proofing: If you let your dough rise for too long, especially on the second rise, the loaves can collapse in the oven. Keep an eye on it; you want it to look puffy, not like it’s about to explode.
- Improper Shaping: A loosely shaped loaf can lead to an uneven bake and a weird final shape. Tuck the ends under and create a nice, tight log for the best results.
Variations & Customizations: Make It Your Own
Once you’ve mastered the classic, why not play around?
- Whole Wheat Version: Replace 1 to 1.5 cups of the bread flour with whole wheat flour for a heartier, nuttier loaf. You may need to add an extra tablespoon or two of water.
- Herb and Cheese Bread: During the last few minutes of kneading, add 1 cup of shredded sharp cheddar cheese and 2 tablespoons of your favorite dried herbs (like an Italian blend or rosemary).
- “Day-Old” Bread Croutons: Don’t let any of this precious bread go to waste! Cube up any leftovers, toss with olive oil and seasonings, and bake at 375°F until golden and crispy for the best croutons of your life.
FAQ Section: All Your Freaky Fast Bread Questions, Answered
- What kind of bread does Jimmy John’s actually use? They bake their own version of a French-style sub roll in-house every day. It’s known for being made with simple ingredients and no preservatives.
- Why is their bread so good? It’s all about the texture! It’s soft enough not to tear up the roof of your mouth but sturdy enough to hold the fillings. It’s baked fresh daily, which makes a huge difference.
- Do I really need a stand mixer? You don’t need one, but it makes the process much easier. Kneading by hand is totally doable; just be prepared for a good 15-minute arm workout.
- How do I know when my dough has doubled in size? A good test is the “poke test.” Gently poke the dough with a floured finger. If the indentation springs back slowly and only partially, it’s ready. If it springs back immediately, it needs more time. If it collapses, it’s over-proofed.
- How do I store this homemade bread? Store it in a bread box or a paper bag at room temperature for up to 3 days. Avoid storing it in a plastic bag in the fridge, as that can make the crust soft and stale.
- Can I freeze this bread? Yes! Let the loaves cool completely, then wrap them tightly in plastic wrap and then foil. They can be frozen for up to 3 months. Thaw at room temperature.
- My bread came out really dense. What happened? This is usually a sign of one of three things: your yeast was dead, you didn’t knead the dough enough, or you didn’t let it rise long enough.
Final Thoughts
You’ve done it! You have unlocked one of the greatest sandwich secrets of our time. You are no longer beholden to delivery times or business hours. The power to create a perfect sub is now in your hands. So go forth, bake this glorious bread, and build the sandwich of your dreams. You might just find yourself saying goodbye to that “Unwich” for good.