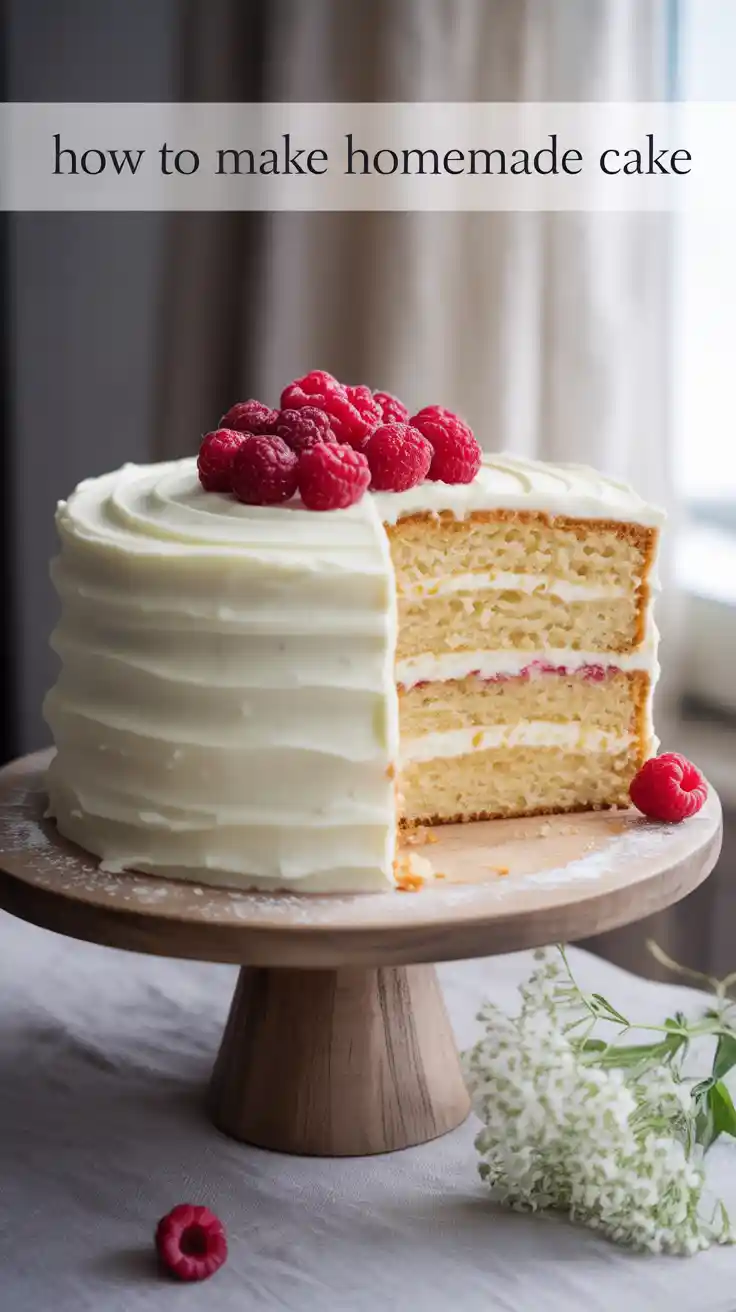
How to Make Homemade Cake From Scratch (The Only Recipe You’ll Ever Need)
How to Make Homemade Cake From Scratch (Without Having a Meltdown)
Let’s be honest, the box cake mix aisle at the grocery store whispers sweet, convenient nothings to all of us. “I’m so easy,” it coos. “No need to measure flour,” it tempts. But deep down, you know. You know there’s a better way, a more glorious path to cake nirvana. What if I told you that learning how to make homemade cake is not only simple but will also make you feel like a certified domestic superstar?
Today, we are officially ghosting the box mix. We’re breaking up with its slightly chemical aftertaste and weirdly uniform crumb. We’re embarking on a journey to create a cake from scratch that is moist, fluffy, rich with vanilla, and tastes like a sweet, buttery dream.
This isn’t just a recipe; it’s a rite of passage. Are you ready to unlock your final baking form?
Why This Recipe is Awesome (And Will Make You a Legend)
Think of this recipe as the “little black dress” of cakes. It’s a timeless, foolproof vanilla cake that is perfect for any and every occasion—birthdays, anniversaries, Wednesdays, celebrating that you finally folded all the laundry. It’s the perfect canvas for any frosting, filling, or decoration your heart desires.
The flavor and texture are on another level. We’re talking a tender, moist crumb that practically melts in your mouth, infused with the rich, warm flavor of real butter and pure vanilla. It’s light without being flimsy, and sweet without being cloying. One bite and you’ll understand why from-scratch is always worth it.
And the bragging rights? Oh, they are immense. The quiet satisfaction you’ll feel when someone asks, “Wow, which bakery did you get this from?” and you get to casually reply, “Oh, this old thing? I just whipped it up myself.” That, my friend, is a feeling worth every second of effort.
Ingredients You’ll Need

The magic of a truly spectacular homemade cake lies in using simple, quality ingredients that are all playing for the same team. And by that, I mean they’re all at the same temperature.

For the Perfect Vanilla Cake:
- 2 ½ cups (300g) all-purpose flour
- 2 ½ teaspoons baking powder
- ½ teaspoon salt
- 1 cup (226g) unsalted butter, softened to room temperature (this is non-negotiable!)
- 1 ¾ cups (350g) granulated sugar
- 4 large eggs, at room temperature
- 1 cup (240ml) whole milk, at room temperature
- 2 teaspoons pure vanilla extract
For the Easiest Dreamy Buttercream:
- 1 cup (226g) unsalted butter, softened
- 3-4 cups (360-480g) powdered sugar, sifted
- ¼ cup (60ml) whole milk or heavy cream
- 1 ½ teaspoons pure vanilla extract
- A tiny pinch of salt
Tools & Kitchen Gadgets Used
Having the right tools is like having a secret weapon. It makes the whole process smoother and more fun.
- Stand Mixer or a reliable Hand Mixer: This is your best friend for creaming the butter and sugar into fluffy submission.
- Two 9-inch Round Cake Pans: The classic choice for a beautiful layer cake.
- Parchment Paper: Your guarantee against the horror of a cake stuck in its pan.
- Wire Cooling Racks: Absolutely essential for preventing soggy cake bottoms.
- Offset Spatula: The key to getting those smooth, swoopy, professional-looking frosting swirls.
- Rubber Spatula: For scraping the bowl clean. We leave no batter behind in this kitchen.
- Digital Kitchen Scale: Highly recommended for perfect, consistent results every single time. Baking is a science, after all.
- Measuring Cups and Spoons: The trusty sidekicks if you haven’t yet ascended to the glory of a kitchen scale.
Step-by-Step Instructions: Your Path to Cake Glory
Don’t let the steps intimidate you. We’ll take this one stage at a time. You’ve got this.
H3: Part 1: Assembling the World’s Best Cake Batter
- Prepare for Liftoff: First, preheat your oven to 350°F (175°C). Grease your two 9-inch cake pans with butter or baking spray, then dust them with flour, tapping out any excess. For ultimate peace of mind, trace the pan bottoms on parchment paper, cut out the circles, and lay them in the bottom.
- The Dry Team: In a medium bowl, whisk together the flour, baking powder, and salt. This ensures your cake rises evenly instead of looking like a lopsided science experiment.
- The Most Important Step: In the large bowl of your stand mixer (or using a hand mixer), beat the softened butter and granulated sugar together on medium-high speed. Do this for a solid 3-5 minutes. You want the mixture to transform into a pale, light, and almost ethereal fluff. This is where you whip in the air that makes your cake tender.
- The Egg-cellent Addition: Add the room temperature eggs one at a time, making sure each one is fully incorporated before adding the next. Scrape down the sides of the bowl often. After the last egg is in, beat in the vanilla extract.
- The Alternate Reality: Now, turn your mixer to its lowest speed. You’re going to add the dry ingredients in three parts, alternating with the milk in two parts. It goes like this: Dry, Milk, Dry, Milk, Dry. Stop mixing as soon as the last streak of flour disappears. I mean it. Overmixing is the number one enemy of a tender cake.
- Bake to Perfection: Divide your glorious batter evenly between the two prepared pans. Bake for 30-35 minutes. You’ll know it’s done when a wooden skewer or toothpick inserted into the center comes out clean.
- The Agonizing Wait: Let the cakes cool in their pans on a wire rack for about 10 minutes. Then, carefully run a knife around the edges and invert the cakes onto the racks to cool completely. And yes, that means completely.
H3: Part 2: The Easiest, Dreamiest Buttercream
- Whip That Butter: While the cakes cool, make your frosting. In your clean mixer bowl, beat the softened butter on medium-high speed for about 3 minutes until it’s super creamy and pale.
- The Sweet Surrender: With the mixer running on low, gradually add the sifted powdered sugar, about one cup at a time. This prevents a sugar explosion that will coat you and your kitchen in a fine white dust.
- The Final Transformation: Once the sugar is mostly mixed in, add the vanilla extract and a pinch of salt. Pour in the milk or cream and turn the mixer up to medium-high. Let it whip for another 3 full minutes until the frosting is unbelievably light, fluffy, and a dream to spread.
H3: Part 3: The Grand Assembly
- Level Up (Optional): If your cake layers baked with a dome on top (which is normal!), you can use a long serrated knife to gently slice it off, creating a perfectly flat surface for stacking. The baker gets to eat the scraps. This is the law.
- Frost It: Place one cake layer on your serving plate or cake stand. Scoop a heaping cup of frosting on top and spread it evenly. Place the second cake layer on top, bottom-side up, for an extra flat top surface.
- Cover It Up: Use your offset spatula to apply a thin “crumb coat” of frosting all over the cake to trap any loose crumbs. Pop it in the fridge for 20 minutes to firm up. Then, cover the whole cake with the rest of your beautiful frosting. Make it smooth, make it swirly—it’s your masterpiece!
Calories & Nutritional Info

Let’s be very clear with each other. This is cake. It’s made of butter and sugar and happiness. Its nutritional value is measured in joy. But if you absolutely must know:
- Calories per slice (1/12th of cake): Approximately 500-600 kcal
- Fat: A glorious, flavor-carrying amount.
- Carbohydrates: Enough to fuel your victory dance.
- Note: This is a classic homemade cake, a treat meant for celebration and indulgence. Savor every single bite with zero guilt. TBH, life is too short for bad cake.
Common Mistakes to Avoid (Read This Before You Touch a Whisk!)
I have made these mistakes so you don’t have to. Heed my warnings.
- The Cold Shoulder: You used butter and eggs straight from the fridge, didn’t you? Your ingredients won’t emulsify properly, and you’ll end up with a dense, heavy cake. Room temperature ingredients are not a suggestion; they are a command.
- The Overzealous Mixer: You mixed that batter until it was perfectly smooth and lump-free, like you were trying to punish it. Wrong! Once the flour goes in, you mix until just combined. Overmixing develops gluten and results in a tough, rubbery cake.
- The Impatient Peeker: You kept opening the oven door to check on your cake’s progress. Every time you do that, the temperature plummets, which can cause your beautiful cake to sink in the middle. Use the oven light and trust the timer.
- The Warm Cake Catastrophe: You tried to frost a cake that was still warm. Did you enjoy watching your beautiful buttercream slide off in a sad, melty puddle? No? Then you must wait until your cake is 100% completely cool to the touch.
Variations & Customizations
Once you master this classic, you can start playing. This recipe is a fantastic base.
- Ultimate Chocolate Lover’s Cake: Reduce the flour to 2 cups and add ¾ cup of high-quality unsweetened cocoa powder to the dry ingredients. Make a chocolate buttercream by adding ½ cup of cocoa powder to the frosting.
- Zesty Lemon Sunshine Cake: Add the zest of two lemons to the butter and sugar when creaming. Replace the milk with lemon-flavored buttermilk for an extra tangy kick. Make a lemon buttercream by adding lemon zest and a little fresh juice to the frosting.
- Classic Funfetti Party Cake: Make the vanilla cake as directed, but gently fold in ¾ cup of rainbow jimmies (the little rod-shaped sprinkles) at the very end of mixing the batter. It’s an instant party!
FAQ: Your Burning Cake Questions, Answered
- Can I bake this cake in a different size pan? Yes! For a 9×13 inch sheet cake, the baking time will be about the same, 30-35 minutes. For cupcakes, fill liners about ⅔ full and bake for 18-22 minutes.
- Why did my cake sink in the middle? This is the great cake mystery! The usual culprits are opening the oven door too early, underbaking, or your baking powder being old and expired.
- How do I store a homemade cake? In a cake carrier or covered loosely with plastic wrap at room temperature is fine for 2-3 days. The frosting actually helps seal in the moisture.
- Can I make this cake ahead of time? Absolutely. You can bake the cake layers, let them cool completely, wrap them tightly in plastic wrap, and freeze them for up to a month. The buttercream can also be made ahead and stored in the fridge; just re-whip it before using.
- My frosting is too sweet! How can I fix it? A tiny pinch of salt can work wonders to cut through sweetness. You can also add a little more butter or a splash of cream to balance it out.
- What does “room temperature” actually mean for ingredients? It means your butter, eggs, and milk should sit out on the counter for about 1-2 hours before you start. The butter should be soft enough that your finger leaves an indent, but not so soft that it’s greasy or melty.
- Why sift the powdered sugar for the frosting? Powdered sugar loves to form little lumps. Sifting it ensures your final buttercream is silky smooth and not gritty. It’s an annoying but necessary step.
Final Thoughts
And there you have it. You have officially graduated from the University of Box Mixes with high honors. You now possess the knowledge and power to create a truly spectacular homemade cake whenever the mood strikes.
Go forth, you magnificent baker. Create this cake, share it with people you love (or don’t, I won’t judge), and take all the credit. You’ll never look at that store-bought aisle the same way again.